crwdns2915892:0crwdne2915892:0
This repair guide was authored by the iFixit staff and hasn’t been endorsed by Google. Learn more about our repair guides here.
Use this guide to replace the battery in your Google Pixel 7 Pro.
Note: this guide was made using the GE2AE model, which features a 5G mmWave antenna. If you have a non-mmWave model, you can still use this guide—just ignore the mmWave antenna steps.
For your safety, discharge the battery below 25% before disassembling your phone. This reduces the risk of fire if the battery is accidentally damaged during the repair. If your battery is swollen, take appropriate precautions.
Caution: The Pixel 7 Pro contains class 1 lasers. Disassembly could result in exposure to invisible infrared laser emissions.
Retaining water resistance after the repair will depend on how well you reapply the adhesive, but your device will lose its IP (Ingress Protection) rating.
You'll need replacement adhesive in order to complete this repair.
crwdns2942213:0crwdne2942213:0
crwdns2936621:0crwdne2936621:0
-
-
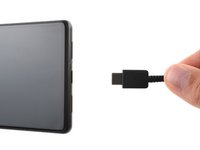
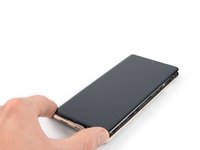
Fully power off your phone and unplug any cables.
-
-
-
Screen seam: This seam separates the screen from the rest of the phone. Do not pry at this seam.
-
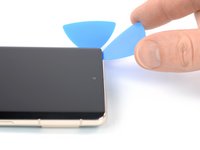
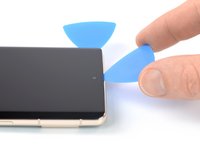
Bezel seam: This is where the plastic bezel designed to protect the screen meets the frame. It's held in place by plastic clips. This is where you should pry.
-
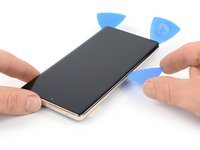
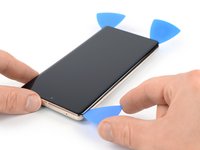
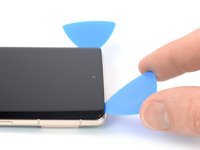
During the removal procedure, make sure to insert your opening picks in the right position to avoid separating the screen from its safety frame.
-
There are several plastic clips around the whole screen. If your opening pick gets blocked during the screen removal procedure, you've inserted your pick too deep underneath the screen.
About the paragraph:
During the removal procedure, make sure to insert your opening picks in the right position to avoid separating the screen from its safety frame.
It was not clear to me what the safety frame was until I opened the phone; I was careful but while opening the phone I slid a pick between the screen and the frame, and they became separated in one corner, I wonder if this resulted to my screen being damaged after the repair.
An image that shows what the security frame is would be helpful.It is VERY difficult to get an angle into the frame and under the plastic bezel. Since this repair is for a screen, you don't have to worry about damaging it further because you will. I've done dozens of these repairs and have gotten ONE removed without further damage. Just an FYI. I also use 91% alcohol around the edges off the frame as well as heat (I have a hot plate set at 80*c that I lay it on after adding alcohol around the edges, place on hot plate for about 10 minutes, add more alcohol around the edges and then place on hot plate for another 5 minutes).
Thank you so much for the info about the degrees, amount of time, and when to apply alcohol! I really needed this info!!! Hallelujah!!
So what do we do if we DO separate the frame? Is there a way back from this?
-
-
crwdns2935267:0crwdne2935267:0Clampy - Anti-Clamp$24.95
-
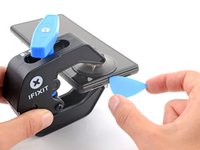
Pull the blue handle backwards to unlock the Anti-Clamp's arms.
-
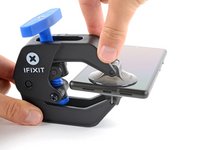
Slide the arms over either the left or right edge of your phone.
-
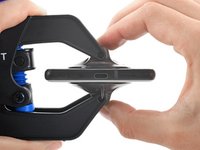
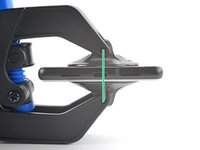
Position the suction cups near the bottom edge of the phone—one on the front, and one on the back.
-
Squeeze the cups together to apply suction.
The pixel 7 pro kit does not come with the clamp and may have to be purchased separately
was für n müll tolle anleitung wenn im reparaturset nicht alles enthalten ist und man jeden mist extra kaufen muss
-
-
-
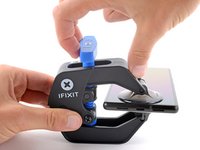
Pull the blue handle forward to lock the arms.
-
Turn the handle clockwise 360 degrees or until the cups start to stretch.
-
Make sure the suction cups remain aligned with each other. If they begin to slip out of alignment, loosen the suction cups slightly and realign the arms.
-
-
-
Heat an iOpener and thread it through the arms of the Anti-Clamp.
-
Fold the iOpener so it lays on the bottom edge of the phone.
-
Wait one minute to give the adhesive a chance to release and present an opening gap.
-
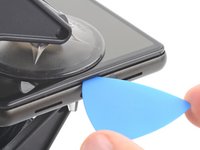
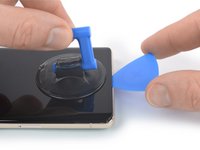
Insert an opening pick under the screen frame when the Anti-Clamp creates a large enough gap.
-
Skip the next two steps.
-
-
-
Apply a heated iOpener to the screen to loosen the adhesive underneath. Apply the iOpener for at least 3 minutes.
Don't forget to remove your screen protector if you haven't already.
-
-
-
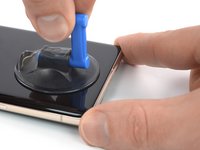
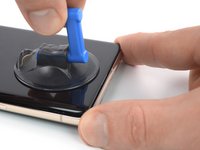
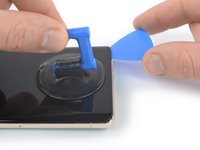
Once the screen is warm to the touch, apply a suction handle to the bottom edge of the screen.
-
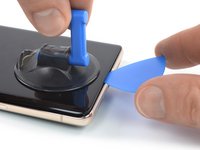
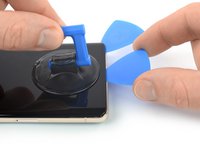
Lift the screen including its safety frame with the suction handle to create a small gap between the screen and the phone assembly.
-
Insert an opening pick into the gap.
The crack on my screen is along the bottom, on a diagonal. I cannot get the suction cup to lift off the edge. I've tried more heat using a hair dryer, using tape, but nothing seems to work! The phone is only a few months old, could that be the issue? I'm really frustrated after trying multiple times throughout the day today.
I’m having the same issue unfortunately. I’ve superglued the suction cup and have it under weight. Going to wait 24 hours to see if it helps. Without a proper seal, there’s no way it’s going to lift. I made sure to leave about a half inch gap from the bottom of the phone to try and use the warming pad one more time
There are white line after one month only!!!
There are warranty or anything else
-
-
-
The screen cable is a little less than halfway up the left edge of the phone. Be very careful here to avoid tearing the cable.
-
There are many spring contacts around the perimeter of the phone. Be very careful in these areas to avoid bending the contacts.
I noticed some bending in the contact, particularly in the upper half right side. I believe I managed to straighten it out, but now it feels a bit loose. Despite this, I went ahead and fixed the screen over it, and everything seems to be functioning properly. However, I'm somewhat concerned about the implications of this. Should I be concerned about anything?
Same here, the upper half right side. while in the prosses of straightening it out i managed to break it! so now i want to know if my screen will work before i continue and put in, i'm afraid i'll just waste my new screen?
What happen if one spring contact broke ? Like the top right one ?
-
-
-
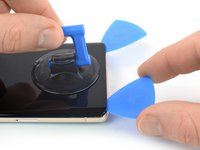
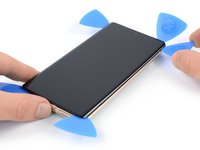
Slide the opening pick to the bottom right corner of the screen to slice its adhesive.
-
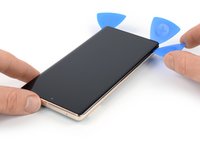
Leave the opening pick in place to prevent the adhesive from resealing.
-
-
-
Insert a second opening pick at the bottom edge and slide it to the bottom left corner of the screen to slice the adhesive.
-
Leave the opening pick in place to prevent the adhesive from resealing.
-
-
-
-
Insert a third opening pick underneath the bottom left corner of the screen.
-
Slide the opening pick along the left edge of the screen to slice the adhesive and to release the plastic clips.
-
Leave the opening pick in the top left corner to prevent the adhesive from resealing.
-
-
-
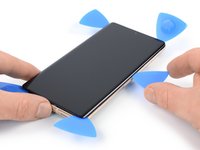
Insert a fourth opening pick at the top left corner of the screen.
-
Slide the opening pick along the top edge of the phone to slice the adhesive.
-
Leave the opening pick in the top right corner to prevent the adhesive from resealing.
-
-
-
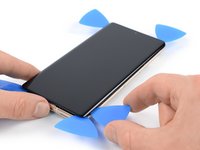
Insert a fifth opening pick and slide it along the right edge of the phone to slice the remaining adhesive and release the right plastic clips.
-
-
-
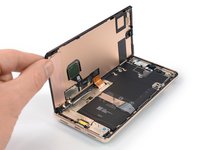
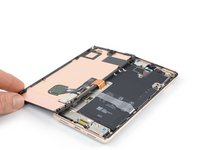
Lift the right edge of the screen up and towards the left side of the device, like opening a book.
-
Rest the screen upside down and parallel to the frame.
-
-
crwdns2935267:0crwdne2935267:0Tweezers$4.99
-
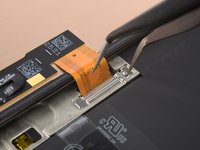
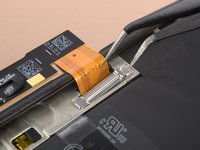
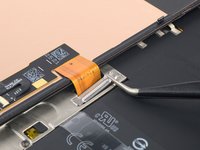
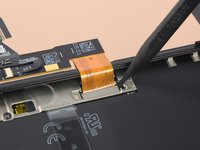
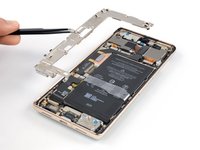
Insert one arm of a pair of tweezers into the opening at the upper end of the display cable bracket.
-
Push the bracket inwards and pry up to release it.
This picture is a bit misleading and I ended up bending my bracket as a result. The picture shows the tweezers inserted in the bend of the bracket. If you insert it where the END of the bracket is, you'll have a much more natural way to remove it without much force! (this is just a little to the right of where it shows in the pictures...
Arrows showing how to move the bracket would be helpful. "Push the bracket inwards" is ambiguous.
-
-
-
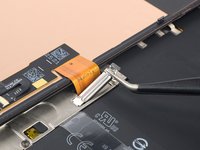
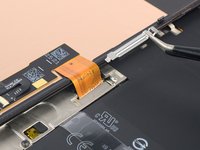
Use a pair of tweezers to remove the display cable bracket by pulling it from underneath the midframe and in direction of the camera.
-
-
-
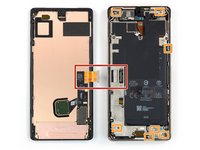
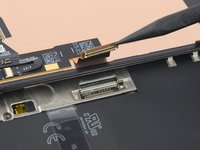
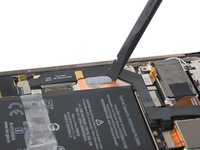
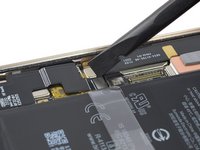
Use a spudger to disconnect the display flex cable by prying the connector straight up from its socket.
-
-
-
When handling your screen, grip it by its edges.
-
When placing the screen on your work area, make sure nothing is touching the bottom of the screen. Consider placing it on a soft, lint-free cloth.
-
-
-
Separate the screen from the phone assembly.
-
Check that all screws are tightened and there are no loose parts.
-
Reconnect the screen and test your phone to make sure it works. Power it back down and continue reassembly.
-
Apply new adhesive where it's necessary after cleaning the relevant areas with isopropyl alcohol (>90%).
-
Follow this guide if you're using custom-cut adhesives for your device.
-
Follow this guide in case you're using a pre-cut adhesive card.
-
-
crwdns2935267:0crwdne2935267:0Tweezers$4.99
-
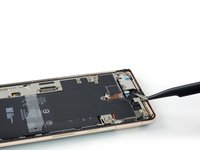
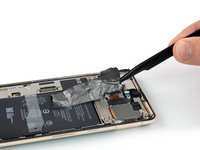
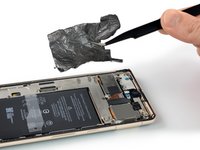
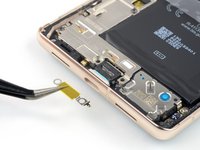
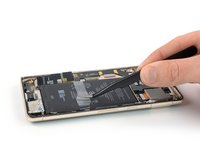
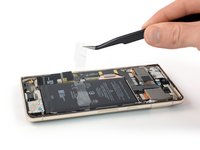
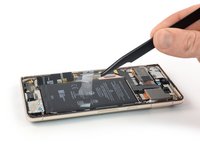
Use a pair of tweezers to carefully peel the graphite foil off the battery and midframe.
-
-
-
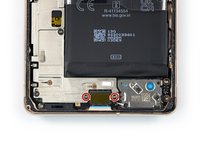
Use a Torx T3 screwdriver to remove the two 5.1 mm-long screws securing the charging port bracket.
-
-
-
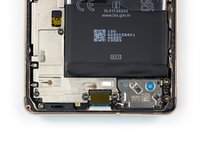
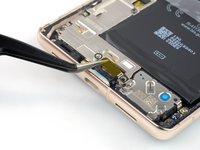
Use a pair of tweezers to remove the charging port bracket.
-
-
-
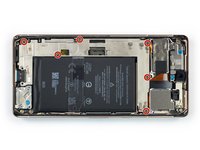
Use a Torx T3 screwdriver to remove the six 5.1 mm-long screws securing the midframe.
-
-
-
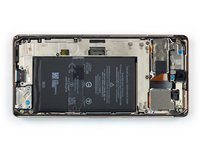
Use a pair of tweezers to remove the midframe.
-
-
-
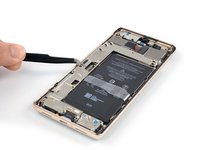
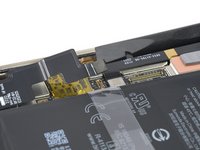
Use a spudger to disconnect the battery cable by prying the connector straight up from its socket.
-
-
-
Apply a heated iOpener to the back of the device to loosen the adhesive underneath. Apply the iOpener for at least 3 minutes.
-
-
crwdns2935267:0crwdne2935267:0Tweezers$4.99
-
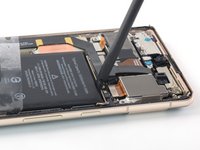
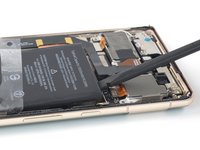
Use tweezers, or your fingers, to peel the plastic pull tabs away from the battery.
-
-
-
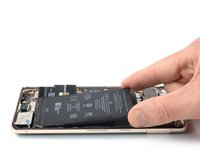
Grip the pull tabs, and slide it up until you can feel it contact adhesive underneath.
-
Lift straight up to pull the battery away from its adhesive.
-
If available, have a friend help hold the phone down while you lift.
-
-
-
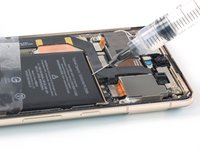
Apply a few drops of high concentration (90% or higher) isopropyl alcohol into the gap at the top edge of the battery.
-
Wait about one minute for the alcohol solution to weaken the adhesive.
-
Use the flat end of a spudger or an opening pick to gently lift the top edge of the battery until you can grab it with your fingers.
-
-
-
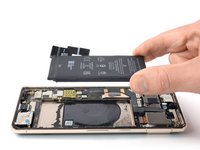
Tilt the battery out of the device to separate the rest of the adhesive.
-
Remove the battery.
-
Apply pre-cut adhesive adhesive or double-sided tape to the battery well at the places where the old adhesive was located, not directly onto the battery.
-
Temporarily reconnect the battery to the motherboard to help align it correctly. Disconnect the battery after it's seated.
-
Make sure that the battery sits in the center of the battery well and there's an even gap around the battery.
-
Press the new battery firmly into place.
-
Compare your new replacement part to the original part—you may need to transfer remaining components or remove adhesive backings from the new part before you install it.
To reassemble your device, follow these instructions in reverse order.
For optimal performance, calibrate your newly installed battery after completing this guide.
To run a diagnostics test with the built-in Pixel Diagnostic tool, click here.
Take your e-waste to an R2 or e-Stewards certified recycler.
Repair didn’t go as planned? Try some basic troubleshooting, or ask our Google Pixel 7 Pro answers community for help.
crwdns2935221:0crwdne2935221:0
crwdns2935229:014crwdne2935229:0
crwdns2947412:09crwdne2947412:0
Wie muss man nur sowas bescheuertes konstruieren?
@manfredelsing are you referring to the device or the guide?
@manfredelsing meinst du das Gerät oder den Leitfaden?
what happens if you peel off a couple of small bits off the black graphite that's over the wireless charging coil, underneath the battery? will it still work? will installing the battery over that run the risk of overheating/damaging the wireless charging coil or the nfc antenna?
I have the same question as Priyank. I damaged it when I stuck something underneath the battery to pry it up.
I followed the Ifixit directions to taking out the battery and replaced the battery with the one that Ifixit sent me.everything went back in right but after two minutes of fighting to connect the Display back into it's connection the Display would not turn back on. I can hear the cell phone turning on but I get nothing on my screen. I've taken ithe Display off the phone four times and put it back on and I still get nothing on the screen. I don't have another Google Pixcell 7 Pro cell phone to test the Display or the connection. What can I do next?
Same issue for me. I plugged in the new Battery what iFixit sent me. Phone wont turn on, neither shows anything on the Display. With the Old Battery it turn´s on and shows diffrent things on the Screen, so the Screen is not the issue. With the new Battery it remains completly dead, even plugged in.
I lost 2 of the screws, where can i get new ones?
I damaged the silvery foil underneath the black graphite one in the upper left corner... now I can forget it. Can't I?
DEFINITELY add the portion about pulling the black (NOT blue) selfie camera protector off. Totally missed that till after, luckily I was going through the comments after the fact. Was able to do a quick, emergency partial pull of the screen and get some tweezers in there to get the selfie cam cleared. Not sure what it's going to do to the integrity of the seal, but needed to try.
























































I am not able to power off. Broken screen does not respond. I have the battery fully discharged but would like to know before beginning my repair if I can plug in the charger to try the screen after replacement to verify all is functioning before reassembly.
Mary - crwdns2934203:0crwdne2934203:0
Step 2 is VERY VERY IMPORTANT!!!!!!
I had to remove the adhesive and take out the plastic from the old screen, which was still on the phone and had to reapply it. It was a nightmare.
Please DON'T TAKE IT EASY
Kevin Döring - crwdns2934203:0crwdne2934203:0
I thought i was careful enough, but got between the display and its frame.
So, the display is broken now..!!
The main problem was the battery, which became thicker and caused a big space on the right hand side of the phone.
Now i have to replace the (expensive) display.
You really have to be very careful !!
Benjamin Janzen - crwdns2934203:0crwdne2934203:0
..oh, by the way. I just got my new Display. I cannot understand why they do not put the selfadhesive screen sticker within.
I did not need another repair kit, so i only ordered the part. And now i am wondering why they will not put the sticker within, i mean at that price.
Benjamin Janzen -