crwdns2915892:0crwdne2915892:0
This repair guide was authored by the iFixit staff and hasn’t been endorsed by Google. Learn more about our repair guides here.
Use this guide to replace the fingerprint reader in your Google Pixel 6.
If you replace the fingerprint reader in the Pixel 6 or switch it between two different displays, you need to recalibrate it to maintain its functionality.
Warning: The replacement of the fingerprint reader in the Google Pixel 6 is not complicated, but the screen can get damaged very easily during the removal procedure.
Caution: The Pixel 6 contains class 1 lasers. Disassembly could result in exposure to invisible infrared laser emissions.
Retaining water resistance after the repair will depend on how well you reapply the adhesive, but your device will lose its IP (Ingress Protection) rating.
You’ll need replacement adhesive to reattach components when reassembling the device.
Note: Replacement fingerprint sensors are not available for sale on iFixit or from Google.
crwdns2942213:0crwdne2942213:0
-
-
Fully power off your phone and unplug any cables.
-
-
crwdns2935267:0crwdne2935267:0Clampy - Anti-Clamp$24.95
-
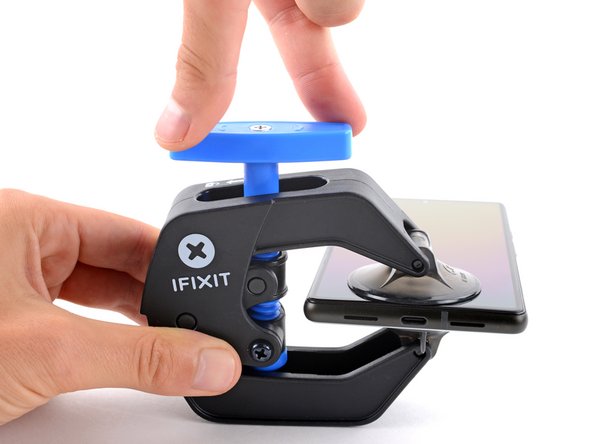
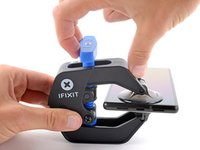
Pull the blue handle backwards to unlock the Anti-Clamp's arms.
-
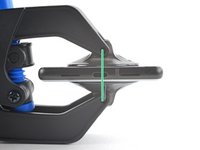
Slide the arms over either the left or right edge of your phone.
-
Position the suction cups near the bottom edge of the phone—one on the front, and one on the back.
-
Squeeze the cups together to apply suction.
-
-
-
Pull the blue handle forward to lock the arms.
-
Turn the handle clockwise 360 degrees or until the cups start to stretch.
-
Make sure the suction cups remain aligned with each other. If they begin to slip out of alignment, loosen the suction cups slightly and realign the arms.
-
-
-
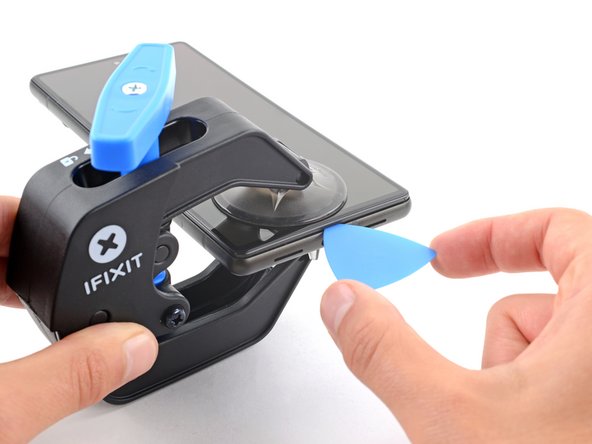
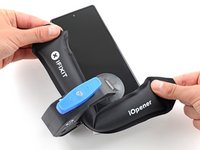
Heat an iOpener and thread it through the arms of the Anti-Clamp.
-
Fold the iOpener so it lays on the bottom edge of the phone.
-
Wait one minute to give the adhesive a chance to release and present an opening gap.
-
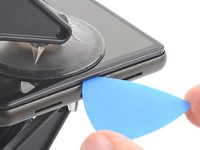
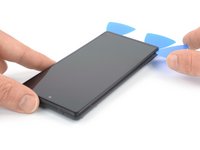
Insert an opening pick under the screen frame when the Anti-Clamp creates a large enough gap.
-
Skip the next two steps.
-
-
-
Apply a heated iOpener to the screen to loosen the adhesive underneath. Apply the iOpener for at least three minutes.
what area of the phone do i apply it to?
middle, edges, diagonal?
Only on the edges.
-
-
-
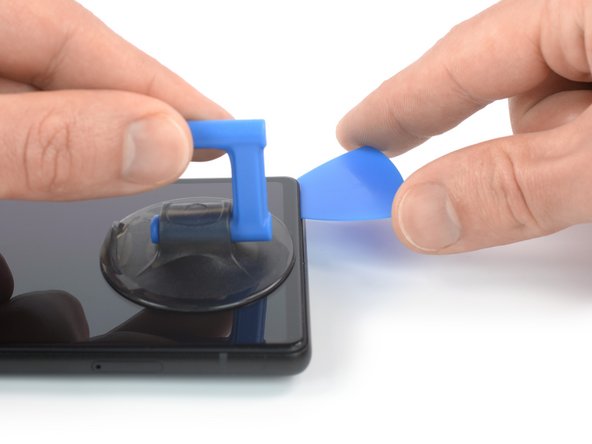
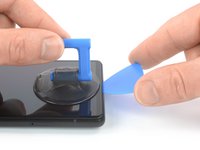
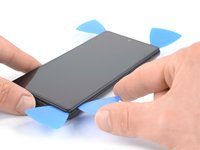
Once the screen is warm to the touch, apply a suction handle to the bottom edge of the screen.
-
Lift the screen, including its safety frame, with the suction handle to create a small gap between the screen and the phone assembly.
-
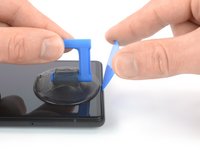
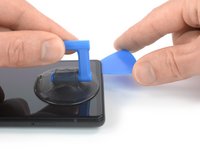
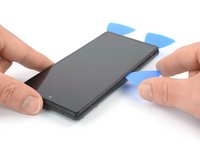
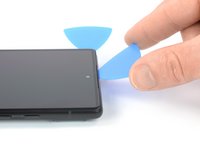
Insert an opening pick into the gap between the screen frame and the phone assembly.
-
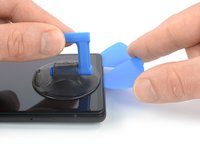
Slide the opening pick to the bottom right corner of the screen to slice its adhesive.
-
Leave the opening pick in place to prevent the adhesive from resealing.
-
-
-
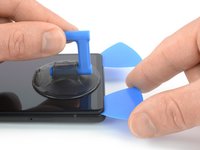
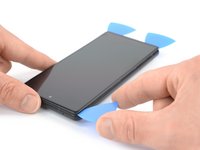
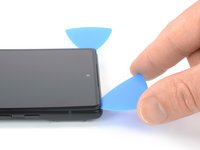
Insert a second opening pick at the bottom edge and slide it to the bottom left corner of the screen to slice the adhesive.
-
Leave the opening pick in place to prevent the adhesive from resealing.
-
-
-
-
The screen of the Google Pixel 6 is not only held in place by adhesive but also small plastic clips. If your opening pick gets blocked during the screen removal procedure, it means you inserted your pick too deep underneath the screen. Only insert the tip of the opening pick (3-4 mm) when slicing the display adhesive.
-
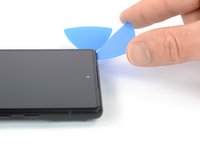
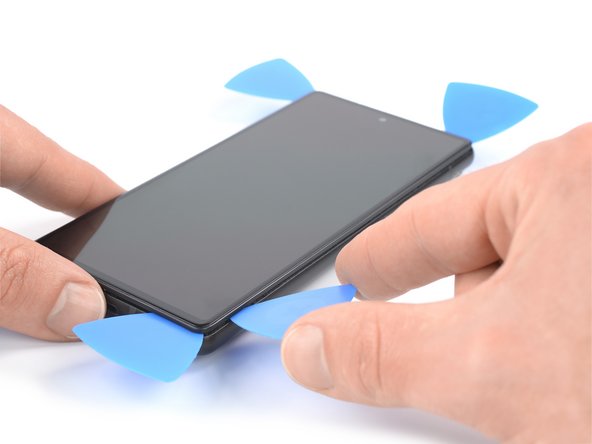
Insert a third opening pick underneath the bottom left corner of the screen.
-
Slide the opening pick along the left edge of the screen to slice the adhesive.
-
Leave the opening pick in the top left corner to prevent the adhesive from resealing.
-
-
-
Insert a fourth opening pick at the top left corner of the screen.
-
Slide the opening pick along the top edge of the phone to slice the adhesive.
-
Leave the opening pick in the top right corner to prevent the adhesive from resealing.
-
-
-
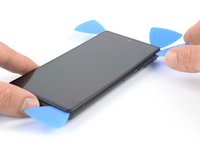
Insert a fifth opening pick and slide it along the right edge of the phone to slice the remaining adhesive.
-
-
-
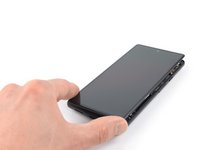
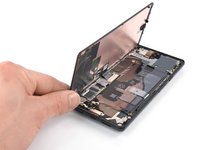
Carefully open the right side of the screen to the left side of the phone assembly like you would open a book.
-
-
crwdns2935267:0crwdne2935267:0Tweezers$4.99
-
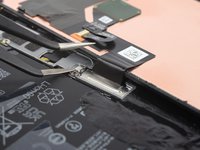
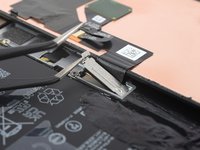
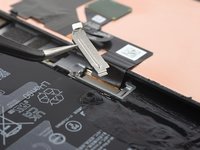
Use a pair of tweezers to carefully unhinge and remove the metal bracket sitting on top of the display cable connector.
Don't be afraid to bend that clip. I had to bend mine to around 90 degrees.
Thank you very much for the information
Don't forget to put the bracket back on during reassembly!
I only realised I had forgotten to reattach it when I was putting the tools away and saw the bracket on the desk... both halves are already glued together so far too late for me. Let's hope it doesn't come loose or I'll be meticulously scraping off all that glue again lol
The absolute same thing happened to me...! I just saw it laying around on the table after cleaning up... Did you experience any issues so far? Not keen on opening it up again eager haha.
Milkiman -
Any chance someone has an update on how bad it is to just go on and use the phone without that bracket?
Leilin -
My bracket was a little bit stuck. I bent the tab on the left side to 90 degrees, as Jack mentioned. Then I folded the bracket with my finger to the right side and then upwards. When reinstalling, you can bend the bent tab back to its original position.
I couldn't get the bracket back installed. Just wouldn't click back in place no matter what I tried. Hopefully screen cable doesn't pop out anytime soon 😂
-
-
-
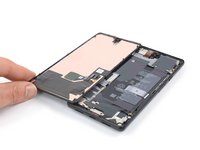
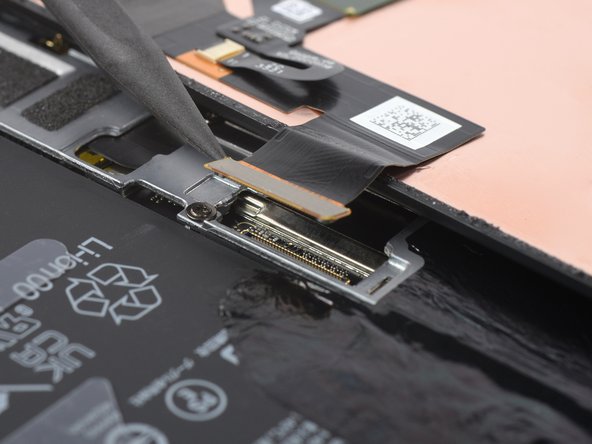
Use a spudger to disconnect the display flex cable by prying the connector straight up from its socket.
-
-
-
When handling your screen, grip it by its edges.
-
When placing the screen on your work area, make sure nothing is touching the bottom of the screen. Consider placing it on a soft, lint-free cloth.
-
-
-
Remove the screen.
-
If you replaced the screen, check the front-facing camera hole on the screen and remove any remaining protective liners in it.
-
This is a good point to test your phone before sealing it up. Temporarily connect your screen, power on your phone, and make sure it works as expected. Before continuing with reassembly, power off your phone and disconnect the screen.
-
Follow this guide if you're using custom-cut adhesives for your device.
-
Follow this guide if you're using a pre-cut adhesive card.
-
If you're installing a new screen, follow this guide to calibrate the fingerprint sensor.
Has the issue with the fingerprint not working after screen replacement been sorted?
I bought the repair kit that included the adhesive & fingerprint module. If that's what you bought as well, you will have to use the google repair tool. https://pixelrepair.withgoogle.com/udfps. I had to manually download the google usb drivers & install them on Windows 11 because the phone wasn't being detected by the pixel repair tool.
Hello, fingerprint does'nt work now.... any tips ? thank !
I had the screen on my 6A replaced at a U-BreakiFix got home fingerprint reader does not work. It says enrollment not complete. Go to your repair facility. I guess they must have some magic that makes it work again due to security issues
Great directions, would be helpful to have a section on Google Pixel 6 Display Adhesive - Genuine
This guide is clear and easy to follow. The other one where you actually replace the screen and put the new adhesive is much less easy to follow, and takes much more time to complete because you have to remove all traces of the old adhesive. I used GooGone and a 2mm flat head screwdriver as a scraping tool and it worked well.
The fingerprint reader was not working after the upgrade, but I got it to work by visiting https://pixelrepair.withgoogle.com/udfps and since I'm using Ubuntu, I had to run those two commands:
sudo usermod -aG plugdev $LOGNAMEsudo apt-get install android-sdk-platform-tools-commonAnd then reboot my computer before my phone could be connected. I rebooted my phone manually after the upgrade and all was working normally. In fact, the new fingerprint sensor works better than the one I got before. The new one is actually usable.
My Pixel 6 is like new! (except perhaps for the water resistance)
Great tips! I wish I had thought of Goo Gone. By far the longest part of the procedure was cleaning out the old adhesive, and using alcohol swabs (including a few spares on hand) was slow and not very effective.
After Chrome on ubuntu was unhappy with recognizing my phone I had to resort to using a Mac, but I would prefer your solution.
Alternate solution, without installing anything:
Determine the USB bus and device ID of your phone.
lsusbAssuming, the bus ID is '004', and the device ID is '001', temporary allow access to this USB device for all users.
chmod 0777 /dev/bus/usb/004/001Thomas -
Easy enough and excellent guide! Thank you!
The guide was very helpful, but could be improved somewhat. I made the mistake of removing the screen without the bracket & didn't realize until I had attached the adhesive & tried to put the new screen on. So I had to remove the adhesive & the bracket before the new screen would fit, since it has it's own bracket. Another tip would be to include the instructions for getting the fingerprint module to work. Including https://pixelrepair.withgoogle.com/udfps & downloading & installing the google usb driver.
I agree that the guide was good. To be more clear, after the screen is completly installed you have go here https://pixelrepair.withgoogle.com/udfps to fix your fingerprint sensor, but my phone was not recognized by the utility when you plug it in Fast Boot Mode. This requires the usb drivers to be installed on the computer. Go here to download the usb https://developer.android.com/studio/run... Once you have the drivers you will have to go to device manager and you will see your Pixel 6 with a exclamation point on it. Right click on the Pixel 6 and select update drivers. Now browse to the folder that you extracted your drivers to that you just downloaded. This will fix the pixel 6 to be recognized by the utility. Now run the utiltity, and just make sure you reboot your phone when the utiltiy is done and it should be fixed.
Just finished a screen replacement on my pixel 6. Everything was pretty straight forward and the instructions and guide was really clear. Scraping all the old tape/glue and making sure I get every last piece out of the phone was the most time consuming part, but totally doable in the end. Using something like goo gone or lighter fluid helps greatly in dissolving the tape residue and the include plastic scraper tool helped scraping every single last piece of goop off the phone.
Had a little scare with the fingerprint scanner not working even after following the guide and calibrating the fingerprint scanner through google's website. I did it on a win11 computer at first, but thought I would use another computer with win10 to see if that made any difference. Fortunately that worked and my phone is back to 100% working again.
Thank you very much, worked as expected! Had also to recalibrate fingerprint censor AND then reboot the phone manually.
For Ubuntu, you have to add some udev rules or use some other trick to make Chrome/Chromium access your USB devices.
Never explains how to snap the bracket of the new phone screen onto the device. Incomplete.
-
-
crwdns2935267:0crwdne2935267:0Tweezers$4.99
-
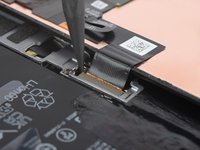
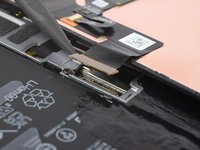
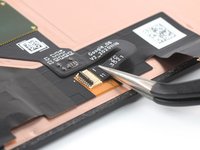
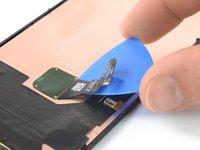
Use one arm of a pair of tweezers to carefully open the ZIF connector at the rear side of the screen.
-
-
-
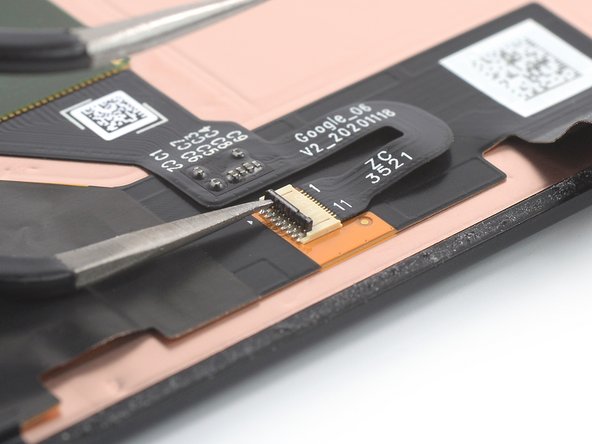
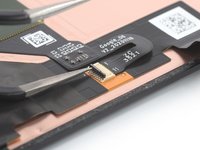
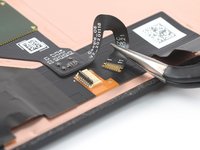
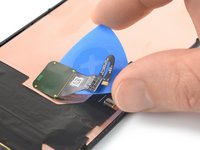
Use a pair of tweezers to disconnect the fingerprint reader by pulling its cable out of the ZIF connector.
-
-
-
Apply a heated iOpener to the screen where the fingerprint reader is located to loosen the adhesive underneath. Apply the iOpener for at least 3 minutes.
-
-
-
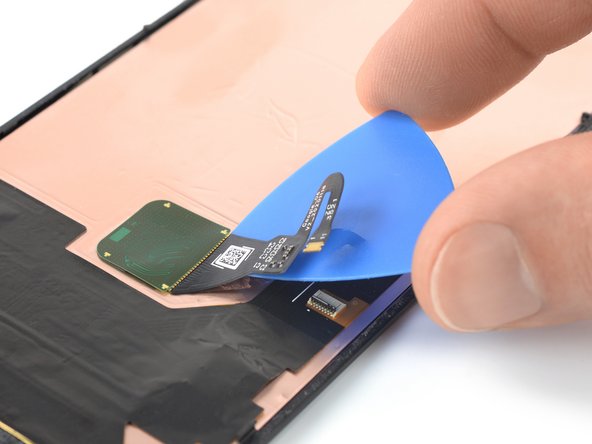
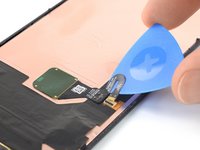
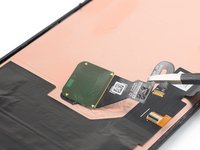
Carefully slide an opening pick underneath the fingerprint reader cable to slice its adhesive.
-
Use your opening pick to separate the fingerprint reader from the screen.
-
-
-
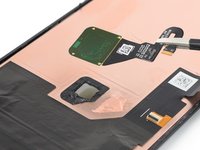
Use a pair of tweezers or your fingers to carefully remove the fingerprint reader.
-


If possible, turn on your device and test your repair before installing new adhesive and resealing.
To reassemble your device, follow these instructions in reverse order. During reassembly apply new adhesive where necessary after cleaning the relevant areas with isopropyl alcohol (>90%).
To run a diagnostics test with the built-in Pixel Diagnostic tool, click here.
Take your e-waste to an R2 or e-Stewards certified recycler.
Repair didn’t go as planned? Try some basic troubleshooting, or ask our Answers community for help.
crwdns2935221:0crwdne2935221:0
crwdns2935229:011crwdne2935229:0


crwdns2947412:05crwdne2947412:0
Will you ever sell a fingerprint replacement part?
Great guide! Using very little alcohol after heating the display can help loosen up the adhesive holding the fingerprint scanner.
I am looking at this gide right now because I would like to know how to calibrate my fingerprint after I swap one of your screen on my phone
This is incomplete. It STOPS 1/2 THROUGH!!!!!
This guide stops at removal of the original part. NO WHERE DOES IT GET TO REASSEMBLY or CALIBRATION!!!
Reassembly is literally all the steps but backwards and the calibration program is listed at the top of the article.
If I cannot use my screen, how do I power it off?
Craig Joseph Van Vliet - crwdns2934203:0crwdne2934203:0
I was thinking the same. Could let the battery run down.
Jack Adrian Zappa - crwdns2934203:0crwdne2934203:0
You can turn the Smartphone off via the boot menue. Push the on/off-button plus the volume up button at the same time. Once the smartphones goes off to restart, hold the volume down button. The smartphone will boot and you can select between recovery mode and other options. You will find the option turn off, which you can select then with the buttons on the side.
Jonas R. - crwdns2934203:0crwdne2934203:0
This is only helpful if you can read your screen. I have a black screen and over 60% battery. It will take days to drain the battery. I need to power it off.
William Maine -