
iPad Air 3 Screen Replacement

crwdns2944107:0crwdnd2944107:0Robert Boydcrwdnd2944107:0crwdnd2944107:0crwdnd2944107:02crwdnd2944107:0crwdne2944107:0
crwdns2944111:0Dzi 30, 2025crwdne2944111:0
crwdns2915892:0crwdne2915892:0
crwdns2942287:0crwdne2942287:0Follow this guide to remove or replace the screen in an iPad Air 3 for both Wi-Fi and cellular models.
The home button's Touch ID sensor is paired to the logic board. In order to retain Touch ID functionality, you'll need to transfer the original home button to the new front panel assembly.
Some photos in this guide are from a different model and may contain slight visual discrepancies, but they won't affect the guide procedure.
crwdns2942213:0crwdne2942213:0
crwdns2943213:0crwdne2943213:0


crwdns2943215:0crwdne2943215:0
- Isopropyl Alcoholcrwdns2942747:0crwdne2942747:0crwdns2943225:0crwdne2943225:0crwdns2931591:0Amazoncrwdne2931591:0


crwdns2944105:0crwdne2944105:0

-
-
You may need to reapply heat repeatedly throughout this process to prevent the adhesive from cooling and hardening.
-
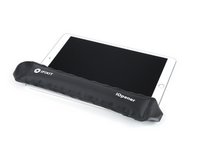
Prepare an iOpener and place it on the bottom edge of the iPad's screen for about two minutes.
-
-
crwdns2935267:0crwdne2935267:0Clampy - Anti-Clamp$24.95
-
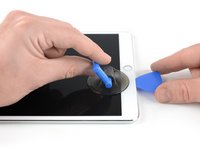
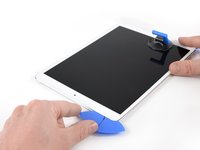
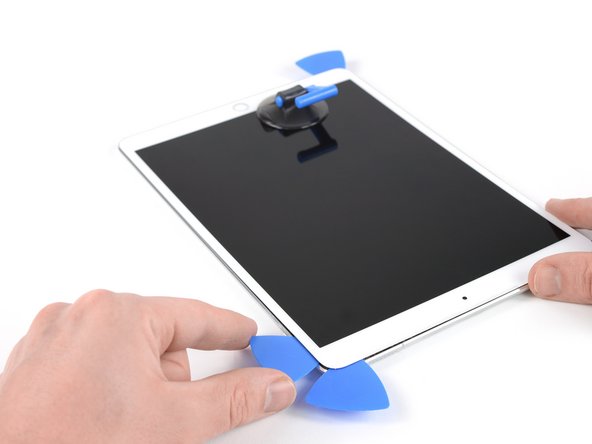
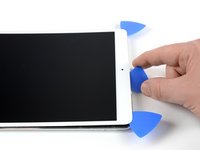
Place a suction cup next to the iPad's home button and press down to create a seal.
-
Firmly pull up on the suction cup to create a small gap between the front panel and the rear case.
-
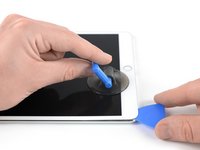
Once you've opened a sufficient gap, insert an opening pick into the gap.
-
-
-
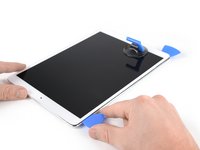
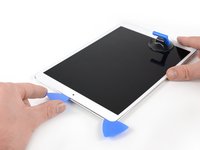
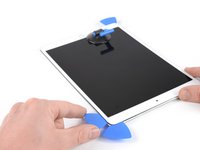
Slice through the adhesive under the screen by sliding the pick along the edge of the display, towards the bottom left corner.
-
Leave the pick in place temporarily to prevent the adhesive from re-sealing.
-
-
-
Apply heat to the left edge of the iPad for about two minutes, or until it's slightly too hot to touch comfortably.
-
If necessary, re-heat your iOpener for a few seconds or until it's a bit too hot to touch. Be careful not to overheat the iOpener, or it may burst.
-
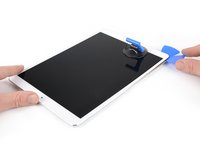
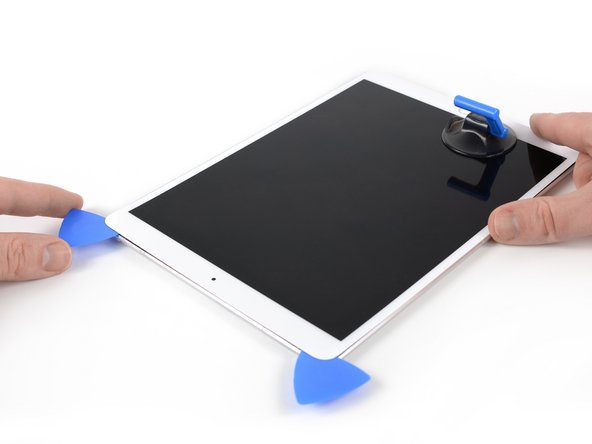
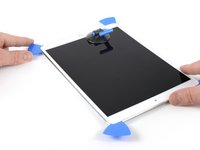
Insert a second opening pick at the bottom left corner of the iPad.
-
Slide the second opening pick along the left side of the display to separate the adhesive underneath.
-
Leave the opening pick inserted near the top left corner of the iPad to prevent the adhesive from re-sealing.
-
-
-
Apply heat to the top edge of the iPad for about two minutes, or until it's slightly too hot to touch comfortably.
-
-
-
Insert a third opening pick at the top left corner of the iPad.
-
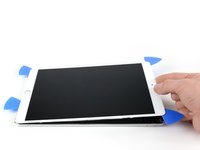
Use the opening pick to cut the adhesive under the top edge of the iPad by sliding it to the top right corner.
-
-
-
Apply heat to the final, right edge of the iPad for about two minutes, or until it's slightly too hot to touch comfortably.
-
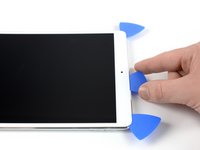
Insert a fourth opening pick at the top right corner of the iPad.
-
Slide the opening pick down to the bottom right corner to cut the adhesive.
-
Slide the opening pick around the bottom right corner—pausing to apply more heat if needed—and cut the remaining adhesive on the bottom edge, but stop before you reach the home button.
-
-
-
Insert a fifth opening pick at the top of the iPad near (but not directly on) the front-facing camera.
-
Gently twist the pick to separate the display assembly from the iPad.
-
If needed, apply more heat and/or cut any remaining adhesive that prevents the display from separating.
-
-
-
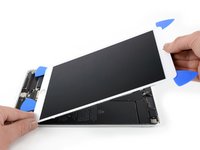
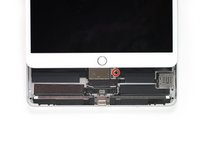
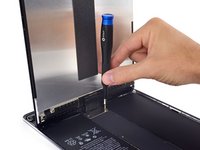
Lift the display assembly from its top edge and carefully slide it up (towards the front-facing camera and headphone jack), until the screw that secures the battery power connector is revealed at the bottom.
-
-
crwdns2935267:0crwdne2935267:0Magnetic Project Mat$19.95
-
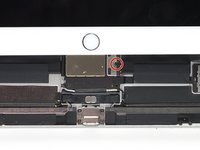
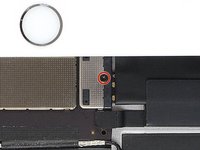
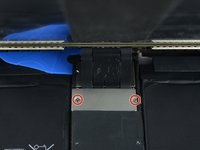
Remove the 1.9 mm Phillips screw that secures the battery power connector.
-
-
-
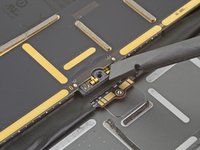
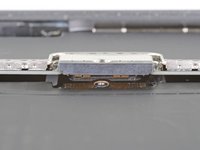
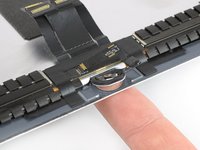
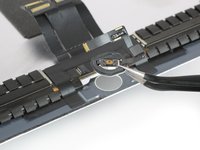
To disconnect the battery, slide one prong of a battery blocker or the tip of an opening pick under the battery power connector to ensure the power circuit is interrupted.
-
Leave the battery blocker in place as you work.
I found it very hard to fit something under the battery power connector. I did not have a battery blocker, so I tried a playing card. I was not able to slide it between the springs. The section of the battery power connector, above the cantilever springs, did not seem to want to give at all, like in the picture above. If other people had success, I would love to hear how.
I didn’t have success either, but i kept myself grounded, and avoided battery contact as much as possible.
I used a playing card cut to shape. I had to make a couple, to try a few times.. It does go in eventually. Not deep, but enough to break connection. You can test by trying to switch on iPad.
It took some time but I was able to get it under the back part and slide it forward.
You must disconnect the battery before plugging the new screen. I think i didn't break the circuit in first attempt and shorted the screen, the result was half of the screen didn't work. I used a playing card. Second attempt was successful with new screen.
I believe I have a good solution to this problem. I was dissatisfied with the thickness of the battery blocker, or even a thin guitar pick, for that matter; both required force and I feared bending the springs or leaving the connection intact.
What worked for me was cutting a small strip of non-conductive, static-proof film (the kind that RAM and other sensitive components come in). There was every reason to trust in its non-conductivity but just to be sure, I used a VOM to test; its resistance was out of the VOMs range, meaning that its conductivity was nil. I used a spudger to gently lift the logic board off of the battery contacts and slid the non-conductive strip in between; went without a hitch.
When reassembling, I laid the strip on the battery contacts, laid the logic board on top, installed it, connected the display panel and gently drew the slip out and installed the battery screw. Worked like a charm.
These are some extremely misleading set of instructions and picture. Much better if you have the battery discharged, so don't need to worry about blocking the connector. But DO NOT force anything in the through the socket and certainly do not try to bend up the soldered cover, as it appears to be happening in the picture. You will break the connector, most likely resulting in ipad shutting down every 3 minutes from the notorious "thermal sensor missing" panic system crash.
I like the method used in this video to block the battery. Seems superior to the instructions here.
I skipped this part entirely and now its not turning on after i screw on the screw, did I break the connector?
-
-
-
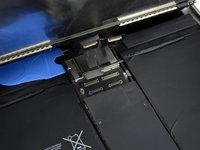
Slowly lift the display from its top edge, being careful not to strain the attached ribbon cables.
-
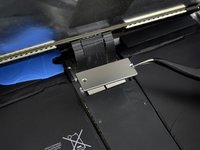
Remove the two 1.3 mm Phillips screws securing the display connector cover bracket.
-
Remove the display connector cover bracket.
-
-
-
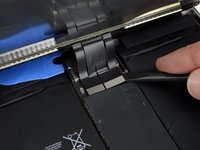
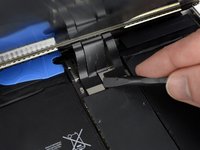
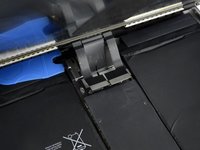
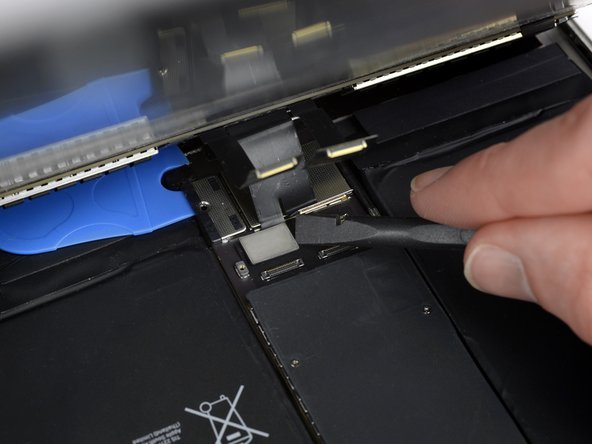
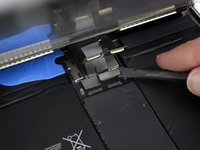
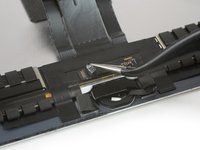
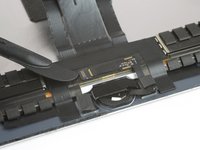
Use a spudger to disconnect the two visible display flex connectors by gently prying them straight up from their sockets.
-
-
-
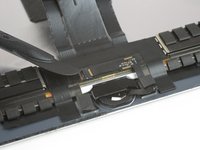
Use your spudger to gently pry them up and disconnect them.
-
-
-
Use your iOpener or hair dryer for about a minute to heat the home button area in order to soften the adhesive securing the home button components.
-
-
crwdns2935267:0crwdne2935267:0Tweezers$4.99
-
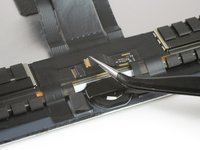
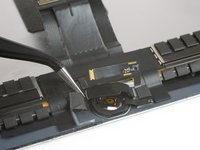
Use a pair of tweezers to peel off any tape covering the ZIF connector above the home button.
-
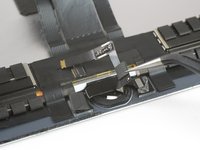
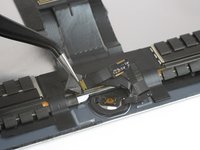
Use the tip of a spudger, an opening tool, or your fingernail to flip up the small, hinged locking flap on the home button cable ZIF connector.
-
-
-
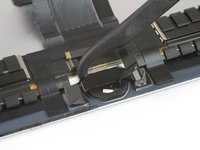
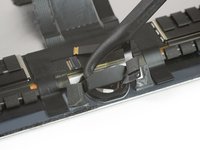
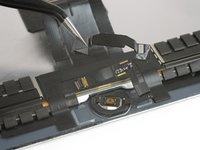
Use a pair of tweezers to pull the home button flex cable straight out of the ZIF connector.
-
Gently peel the flex cable off the home button cover and fold it a little bit upwards.
-
-
crwdns2935267:0crwdne2935267:0Halberd Spudger$2.99
-
Gently pry off the home button bracket by inserting the hook of a halberd spudger or the flat edge of a regular spudger under the bracket and gently pry it towards the bottom edge of the iPad.
-
-
crwdns2935267:0crwdne2935267:0E6000 Adhesive Glue$2.99
-
Lift the home button bracket starting from the left side.
-
Carefully pull it upwards toward the display, making sure not to damage the home button cable.
-
Scrape off as much of the old adhesive residue as you can, then clean it with acetone or high-concentration (90% or greater) isopropyl alcohol.
-
Secure the bracket with a high bond glue, superglue, or high-strength double-sided tape. Make sure the bracket is aligned correctly before allowing your adhesive to cure, or the home button will not click when pressed.
-
-
-
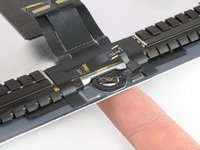
Use the tip of your finger to press the home button and gently push it through from the front side of the display.
-
Remove the home button.
-
-
-
Only the screen remains.
-


Compare your new replacement part to the original part—you may need to transfer remaining components or remove adhesive backings from the new part before you install it.
To reassemble your device, follow these instructions in reverse order.
Take your e-waste to an R2 or e-Stewards certified recycler.
Repair didn’t go as planned? Try some basic troubleshooting, or ask our iPad Air 3 Answers community for help.
crwdns2935221:0crwdne2935221:0
crwdns2935229:023crwdne2935229:0
crwdns2947821:0crwdne2947821:0
crwdns2947823:0crwdne2947823:0


crwdns2947412:02crwdne2947412:0
I used this guide to remove and replace a cracked screen from iPad Air 3 successfully. My comments are in the sections above , i summarise here (1) i used a proper suction tile puller (small one from DIY store used to hold bathroom tiles) to lift the screen off after heating around the edge using a heat gun. (2) You must disconnect the battery before plugging the new screen. I think i didn't break the circuit in first attempt and shorted the screen, the result was half of the screen didn't work. I used playing card. (3) The adhesive that came with the new screen is not that great or maybe i'm doing something wrong with it. The first time i used it, i heat gunned the edge (adhesive on), and parts of the screen still wouldn't stick. So i used a second set, and tried not to touch the adhesive, i used tweezers alot. It was a bit better second time, but, the case we have wraps over screen, holds it on.
I used the guide as well and the replacement went well except the home button. The touch-id sensor is working, but until I have new glue, I need to use Assistive touch. Guess I need to glue the home button a bit more.