crwdns2915892:0crwdne2915892:0
This repair guide was authored by the iFixit staff and hasn’t been endorsed by Google. Learn more about our repair guides here.
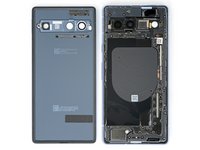
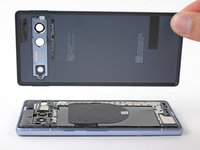
Follow this guide to remove or replace the rear cover on your Google Pixel 7a.
If your battery is swollen, take appropriate precautions.
You'll need replacement rear cover adhesive in order to complete this repair.
Note: Any repair can compromise the water resistance of your phone. Retaining water resistance after the repair will depend on how well you reapply the adhesive.
crwdns2942213:0crwdne2942213:0
-
-
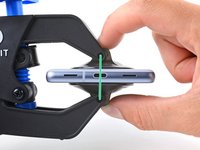
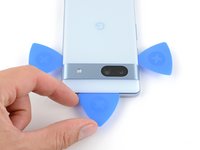
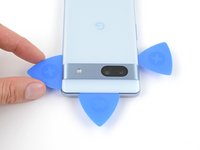
Unplug any cables from your phone and fully power it down.
-
-
-
Apply a heated iOpener to the bottom edge of the rear cover for three minutes.
If you have an IR Thermometer or Thermal Camera, you're going for 85C/185F. Even with mini heat guns, this comes up fast; just a few seconds of heat.
-
-
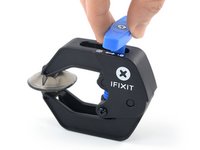
crwdns2935267:0crwdne2935267:0Clampy - Anti-Clamp$24.95
-
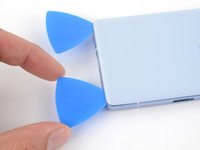
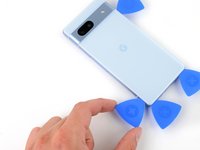
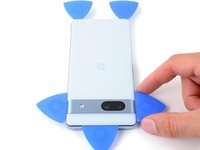
Pull the blue handle backward to unlock the Anti-Clamp's arms.
-
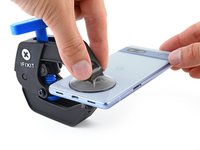
Slide the arms over the bottom edge of the phone, with one suction cup on the rear cover and one on the screen.
-
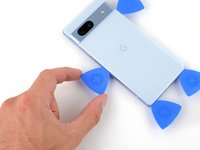
Squeeze the cups together to create suction.
-
-
-
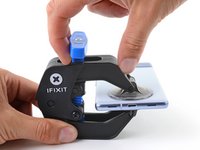
Pull the blue handle forward to lock the arms.
-
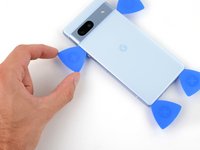
Turn the handle clockwise one full turn (360 degrees), or until the suction cups begin to stretch.
-
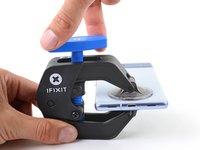
As the cups stretch, make sure they stay aligned with each other. If they keep slipping, remove the Anti-Clamp and apply tape for the cups to stick to.
-
-
-
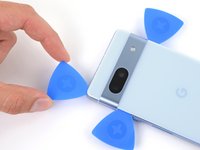
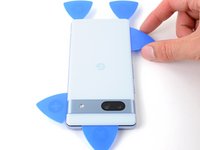
Place an object under your phone so it rests level while between the Anti-Clamp's arms.
-
Wait one minute, or until the adhesive separates, for a gap to form along the bottom edge of the phone.
-
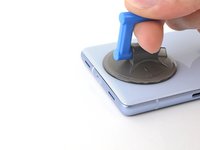
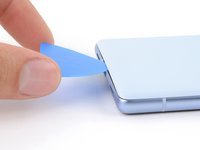
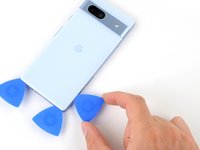
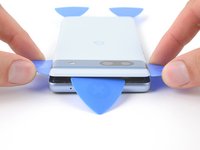
Insert an opening pick into the gap between the rear cover and the frame.
-
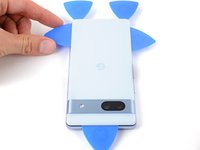
Remove the suction cups from the phone using their pull-tabs and set the Anti-Clamp aside.
-
-
-
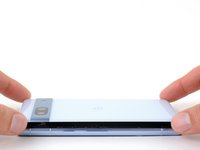
Apply a suction handle to the center of the bottom edge of the rear cover.
-
Pull up on the suction handle with a strong, steady force until a gap forms between the rear cover and frame.
-
Insert the tip of an opening pick into the gap.
-
Remove the suction handle.
-
-
-
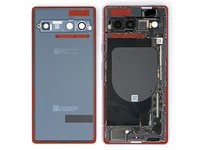
The rear cover is secured with adhesive around the perimeter of the frame and near the cameras. Use this picture as a reference while you slice the adhesive.
There is also a plastic bezel attached to the rear cover which you DO NOT want to remove. It's a very similar (temperature wise) adhesive that connects that bezel to the cover, as connects the bezel & cover to the frame, but since only the frame side adhesive is provided in the kit, you want to try not removing that bezel from the rear cover.
If you did remove the rear cover bezel, while removing the rear cover, grab some T7000 glue, which has a precision application needle tip. Follow the instructions on how to apply the iFixit adhesive which you'll reach at and perimeter pieces at the end of this guide, but hold off on removing the blue tape pieces facing the cover. Make sure you know how to orient the bezel (there is a little notch ridge that goes over the USB-C power port. Clean up the bezel of adhesive, but don't remove the cover liner, which seems to stay in place even with the heat and prying that accidentally broke the bezel adhesives. Install rear cover, with loose bezel, to check you have it right.
Remove, apply a bead of T7000 around the rear cover and then lay the bezel into that bead, carefully checking orientation. Pull your blue strips, install the cover with freshly glued bezel, and press the assembly overnight (using some clean cloths and a few books works - I used soft auto polishing microfibers and a kit of hydraulic caps). -
-
-
-
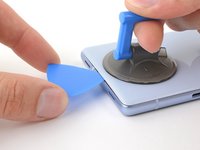
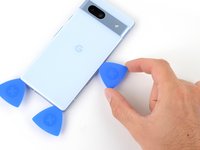
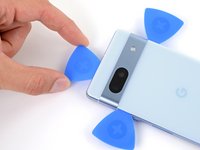
Angle the opening pick upward so the tip faces away from the frame.
-
Slide your pick to the bottom left corner of the rear cover.
-
Leave this pick in place to prevent the adhesive from resealing.
-
-
-
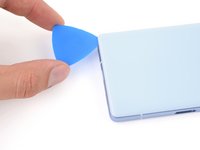
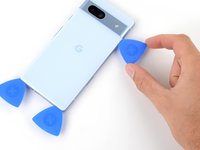
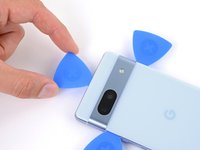
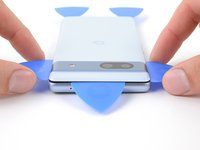
Insert a second opening pick in the bottom left corner.
-
Slide the new pick to the bottom right corner of the rear cover to separate the bottom edge adhesive.
-
Leave this pick in place to prevent the adhesive from resealing.
-
-
-
Apply a heated iOpener to the right edge of the rear cover for two minutes.
-
-
-
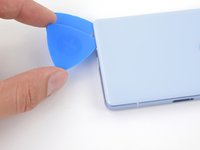
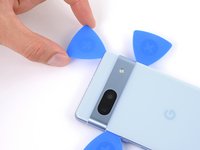
Insert a third opening pick in the bottom right corner of the rear cover.
-
Slide your pick up the right edge of the rear cover to separate its adhesive. Stop when you reach the camera bar.
-
Leave this pick in place to prevent the adhesive from resealing.
-
-
-
Apply a heated iOpener to the left edge of the rear cover for two minutes.
-
-
-
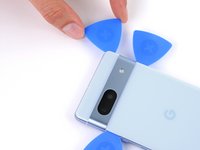
Insert a fourth opening pick in the bottom left corner of the rear cover.
-
Slide your pick up the left edge of the rear cover to separate the adhesive. Stop when you reach the camera bar.
-
Leave this pick in place to prevent the adhesive from resealing.
-
-
-
Apply a heated iOpener to the top edge of the rear cover for two minutes.
-
-
-
Insert a fifth opening pick in the top left corner of the rear cover between 8 mm and 10 mm (0.3–0.4 in) deep, or just over halfway between the tip of the pick and the iFixit logo.
-
Slide your pick halfway across the top edge to separate the antenna bracket adhesive. Stop at the halfway point along the top edge.
This is the trickiest part, because the camera bar wants to keep the back cover from lifting. It's like a break in the leverage, of the lower part of the case. Go easy.
-
-
-
Pull your opening pick out to a depth of 3 mm.
-
Slide your pick to the top right corner to slice the rest of the top edge adhesive.
-
-
-
Roll the top edge pick so its flat edge is under the rear cover.
-
Roll the picks on each side of the camera bar so their flat edges are under the camera bar.
-
-
-
Use the opening picks under the camera bar to pry the top edge of the rear cover from the frame.
-
Pry back and forth until the camera bar loosens.
-
-
-
Slide the opening picks from the camera bar down the long edges of the rear cover to separate any adhesive that may have resealed.
-
-
-
Remove the rear cover.
-
Now is a good time to test your phone before sealing it up. Power it on and check that it works. Power it back down before you continue reassembly.
-
Follow this guide to apply new adhesive and install your rear cover.
This reassembly link, "Follow This Guide" is really important. It's a shame they did it this way, but make a note of it for when you come back through.
-


To reassemble your device, follow this guide.
To run a diagnostics test with the built-in Pixel Diagnostic tool, click here.
Repair didn’t go as planned? Try some basic troubleshooting, or ask our Answers community for help.
To reassemble your device, follow this guide.
To run a diagnostics test with the built-in Pixel Diagnostic tool, click here.
Repair didn’t go as planned? Try some basic troubleshooting, or ask our Answers community for help.
crwdns2935221:0crwdne2935221:0
crwdns2935229:07crwdne2935229:0

crwdns2915084:0crwdne2915084:0

Guide Team crwdns2935289:0Guide Teamcrwdne2935289:0
Staff
crwdns2931471:09crwdne2931471:0
crwdns2935297:012,489crwdne2935297:0
crwdns2947410:01crwdne2947410:0
Hi, im Deckel ist ein Schaumstoff um das Kamera-Glas. Das Bild im Schritt 7 ist nicht aktuell, denn auch hier ist ein Klebestreifen angebracht.
Wenn man den Aufkleber abzieht, dann löst sich nicht der Aufkleber sondern der Schaumstoff vom Deckel. Merkt man das nicht, ist die Klebeaktion umsonst, hier bitte genau darauf schauen, dass sich nicht der Schaustoff ablöst.
If you purchased the iFixit kit, now is a good time to ensure you have all the parts: If you go to the kit page, and expand Kit Contents, you'll see the full list. The full list contains links to details on adhesive sets. These links are also in this guide document, in the upper right, in a scrollable window.⏎
⏎
Newer batteries seem to come with the 1IP Torx Plus bit taped in the tray of the battery part tray (Repair Part box). It is not in the Tools, found in the Repair Tools box (if you purchased the Fix Kit).⏎
⏎
Familiarize yourself with all the parts, including the six adhesive items. Ensure none of the components fell behind the parts tray and are left in the parts box (they are tiny adhesive tabs). The adhesive is VERY sticky. Don't remove the backing until you are ready to use, and then be prepared to lay the piece in place once ANY contact is made. Removal, even an edge, to better align an adhesive part is often not possible(!). The adhesive will stretch and bunch up.⏎
⏎
As noted at the beginning of the guide, proper installation of the adhesive is required to maintain water resistance, but also to transfer heat correctly.
Chris Romer - crwdns2934203:0crwdne2934203:0