crwdns2915892:0crwdne2915892:0
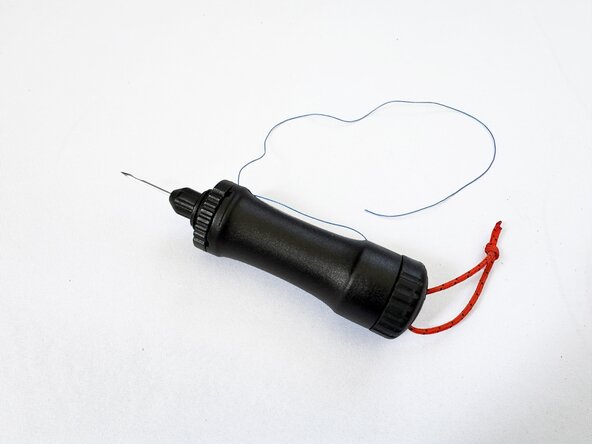
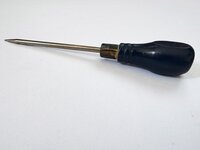
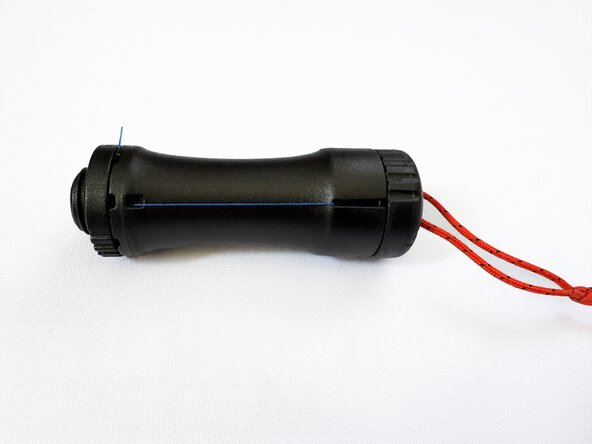
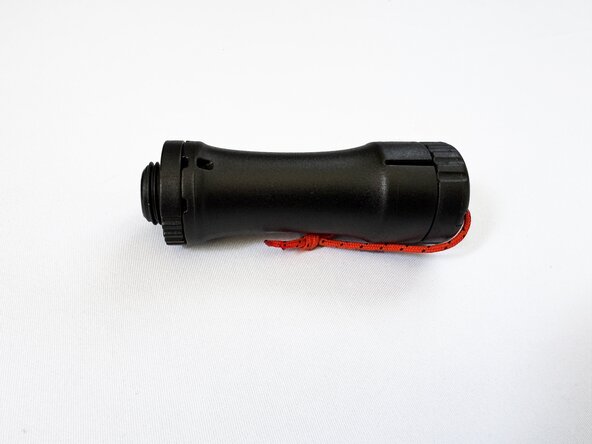
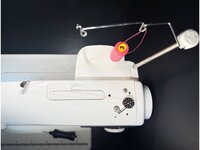
The iconic Patagonia® Expedition Sewing Awl was re-released in Fall 2025 with some modern updates. This guide demonstrates how to use the updated Expedition Sewing Awl (ESA)—a small handheld tool used for sewn repairs.
Steps 1 - 10: Overview and ESA setup
Steps 11 - 20: Repairing using the ESA
Although the ESA is a hand sewing tool, the bobbin and needles are machine sewing elements. Please review these articles for more information:
Related Articles
DIY repairs are a fun and effective way to extend the life of gear at home and won't void the Patagonia warranty—they're actually encouraged!
Patagonia items can also be taken in to a local retail store for repair evaluation or sent in to Patagonia through their mail-in repair service.
Let's get fixing!
crwdns2942213:0crwdne2942213:0
-
-
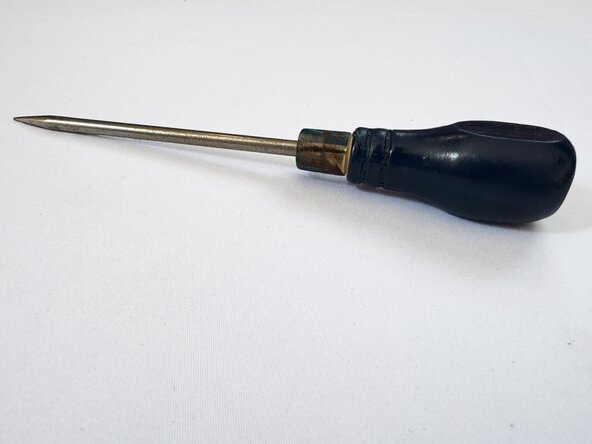
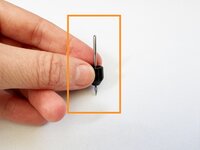
Standard awls are used in sewing to punch holes in thick materials to make stitching easier.
-
The Expedition Sewing Awl (ESA) is unique because it punches holes and sews simultaneously, and can be adapted to work on a multitude of materials!
-
The ESA creates a lockstitch where the upper thread and lower thread "lock" together.
-
-
-
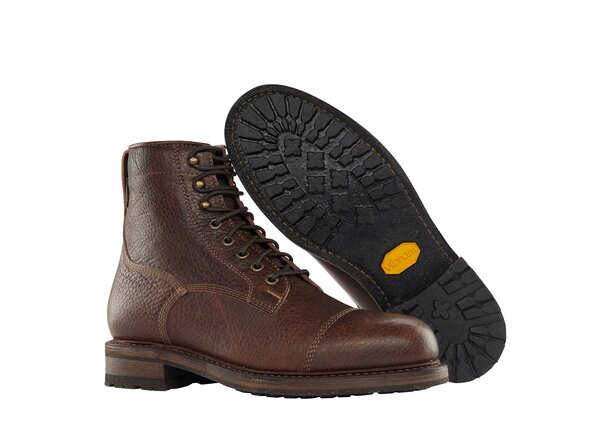
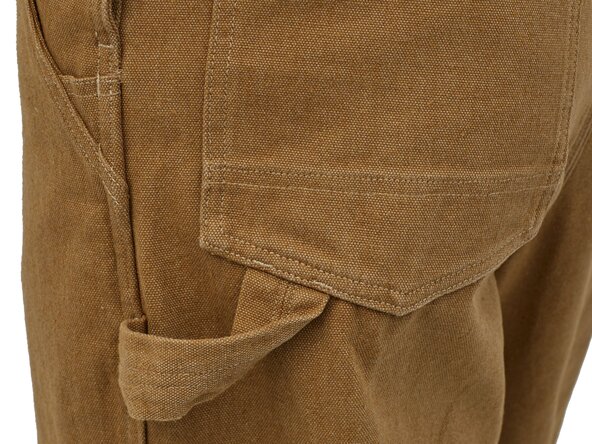
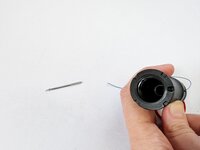
The ESA comes equipped with two heavy-duty needles, best suited for repairs on thick materials like packs, luggage, tents, boots, nylon webbing, vinyl, denim, hemp, and leather.
-
Adding smaller needle sizes to your kit will allow you to also sew on thinner or stretchier fabrics like shirting, blankets, and sleeping bags.
-
-
-
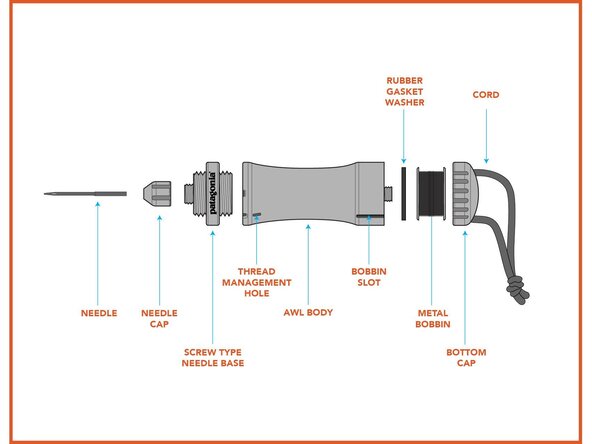
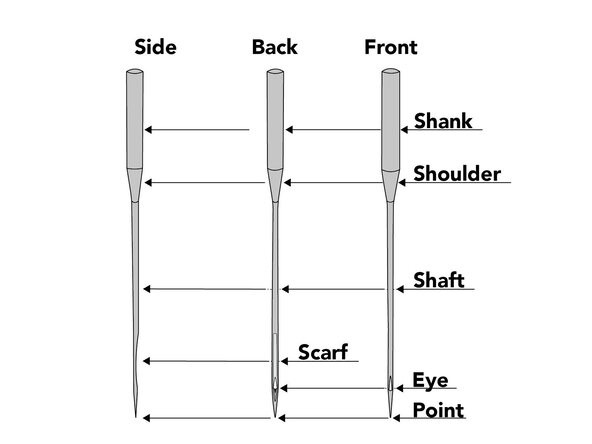
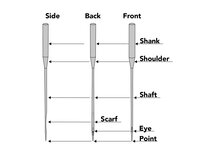
Needle: The ESA uses a machine sewing needle. Unlike hand sewing needles, the eye of a machine needle is on the pointed end.
-
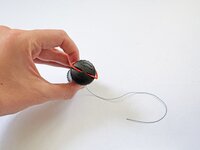
Thread: This tool is best suited for equipment-weight thread. The included thread is Tex 70 Nylon which is heavy-duty.
-
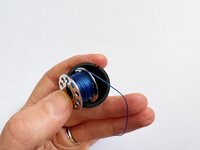
Bobbin: Included within the ESA is a metal bobbin (A-Style / Class 15) that holds the thread. Other types of bobbins aren't compatible.
-
-
-
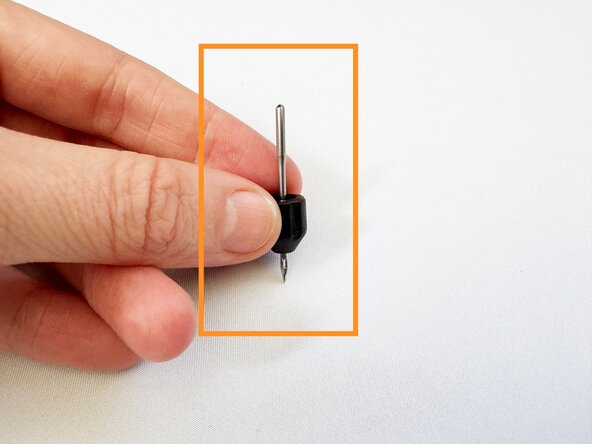
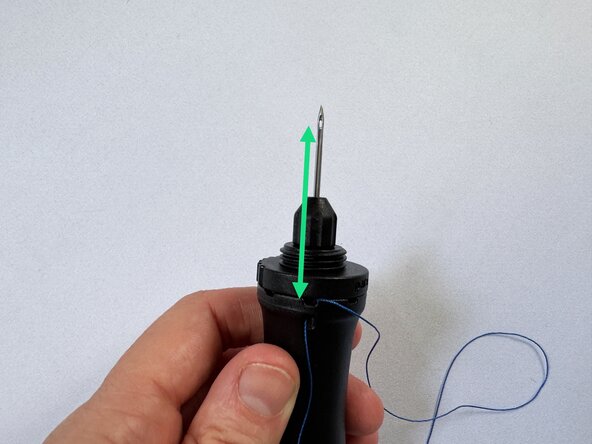
The ESA has a hollow body to store extra needles and contain the active needle when not in use:
-
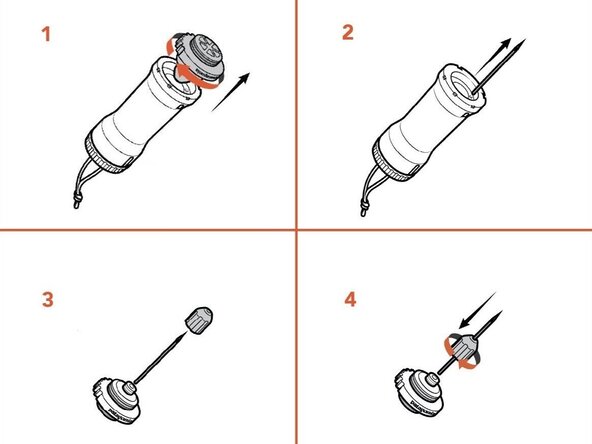
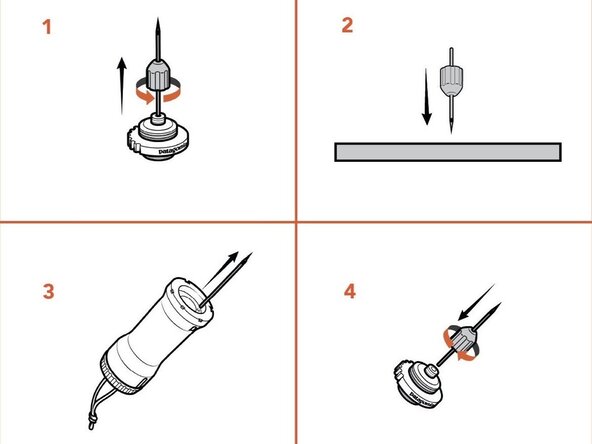
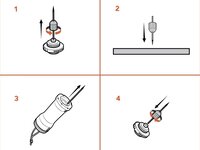
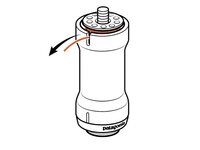
Unscrew the needle base.
-
Flip the needle base so the needle points into the awl body.
-
Screw the needle base back onto the body.
-
If a thread tail remains, wind it fully back into the bobbin slot or wrap it between the body and needle base.
-
-
-
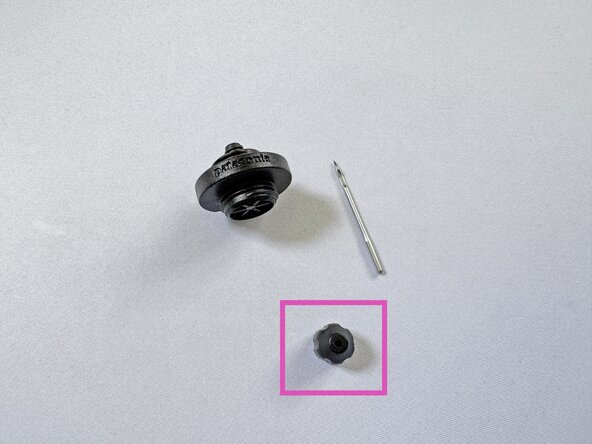
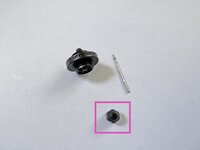
Unscrew the needle base from the ESA.
-
Flip over the needle base and twist off the needle cap.
-
Remove one of the included needles from inside the body.
-
Hold the needle upright on a work surface and carefully place the needle cap over the needle.
-
Push the needle cap down onto the needle shank until the needle is snug in the needle cap.
-
Screw the needle cap with the needle onto the needle base.
-
-
-
Unscrew the needle cap from the needle base of the ESA and pull the needle out through the bottom of the needle cap.
-
If the needle isn't loose after removing the cap, hold only the needle cap and press the point of the needle down on a soft surface to push it through the cap.
-
Remove a new needle from inside the awl body.
-
Insert the new needle from the back of the needle cap. Press the shank of the needle in until tight. Screw the needle cap with the needle onto the needle base.
-
-
-
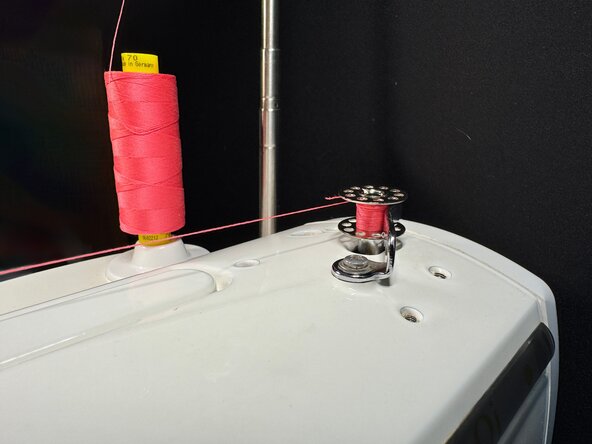
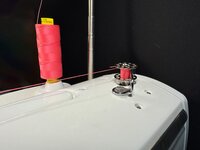
The ESA comes with 40 meters of Tex 70 nylon thread pre-loaded on the metal bobbin. You can reload the thread using a sewing machine or a bobbin winder.
-
-
-
-
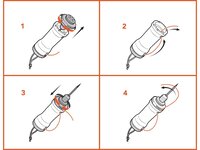
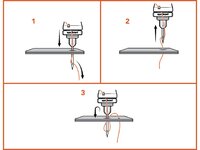
Unscrew the bottom cap from the awl body.
-
Place the bobbin into the awl body in the space under the bottom cap so it'll spin clockwise when the thread is pulled.
-
Thread the tail of the thread through the bobbin slot.
-
Screw the bottom cap onto the awl body.
-
Check that the bobbin is placed correctly by slowly pulling on the thread. If the bottom cap unscrews, flip the bobbin over.
-
-
-
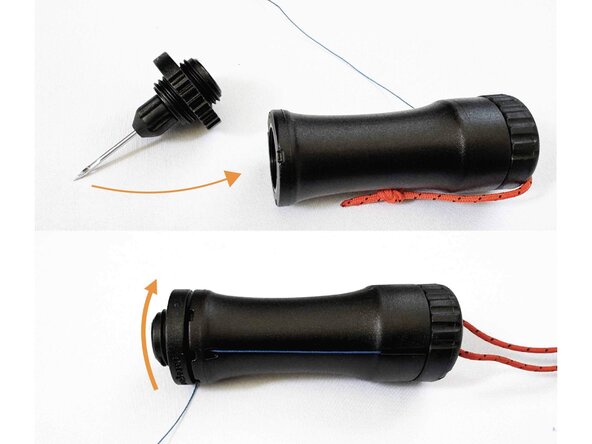
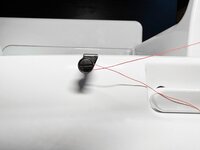
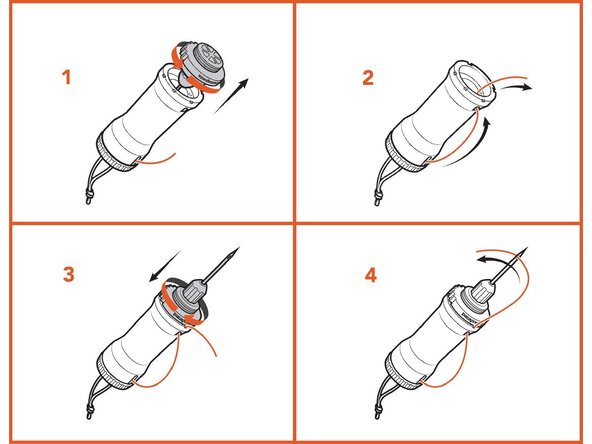
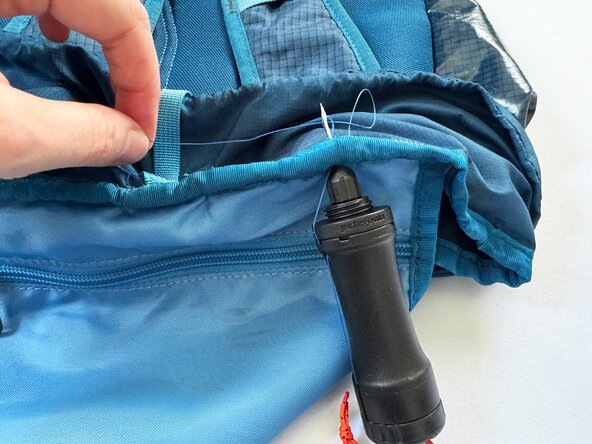
With the needle base removed, insert the thread emerging from the bobbin slot into the thread management hole.
-
Pull the thread into the awl body, then thread it out through the slot above the thread management hole.
-
Screw the needle base onto the awl body.
-
For best results, the needle shaft should face towards the thread management hole. (The indentation in the needle should face away from the thread management hole.)
-
Insert the thread through the flat side of the needle so it comes out on the indented side.
-
Pull the thread through and leave a tail equal to the length of the damage plus 2 inches (~50 mm) for tying off.
-
See the next step for a video of this process.
-
-
-
This video demonstrates how to thread the ESA as described in the previous step.
-
-
-
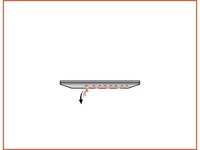
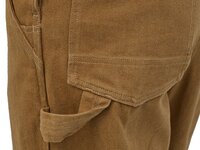
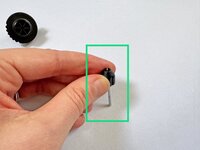
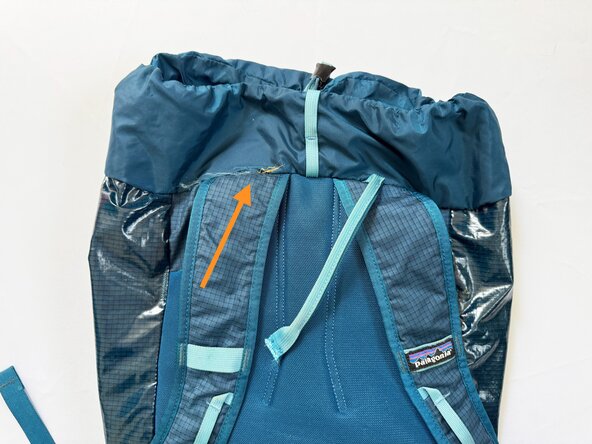
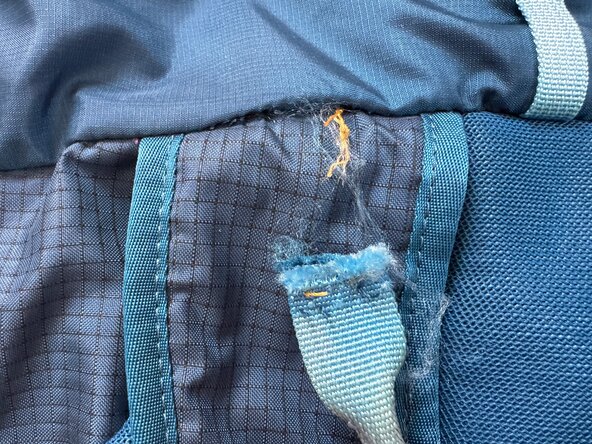
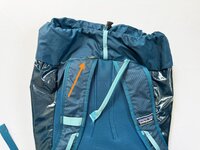
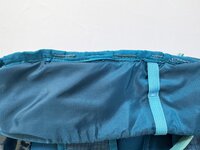
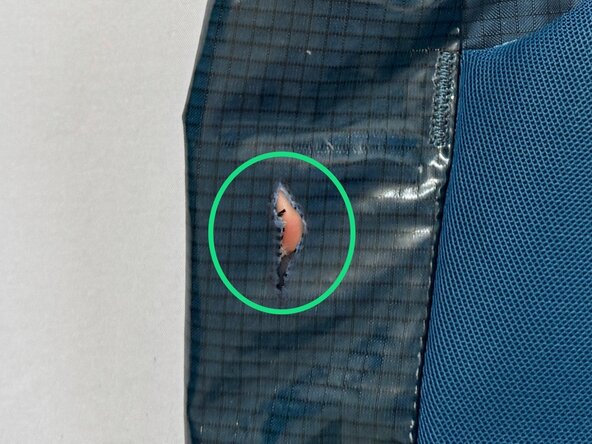
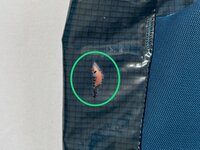
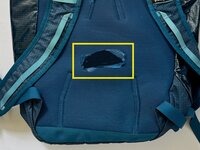
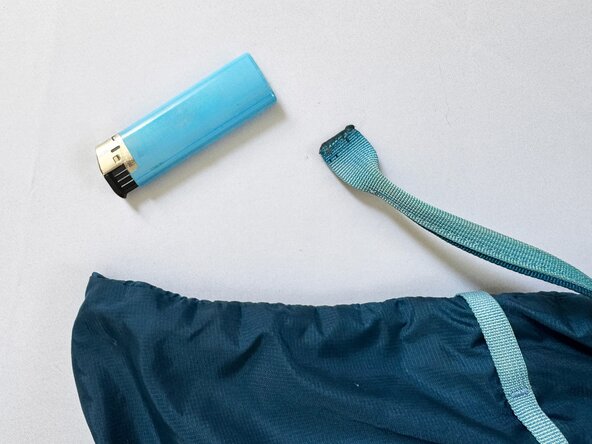
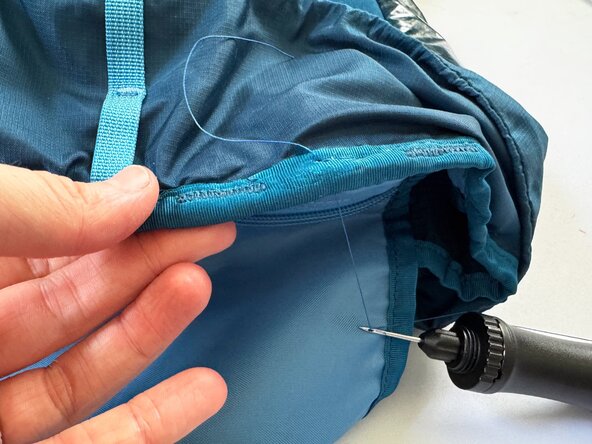
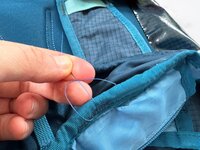
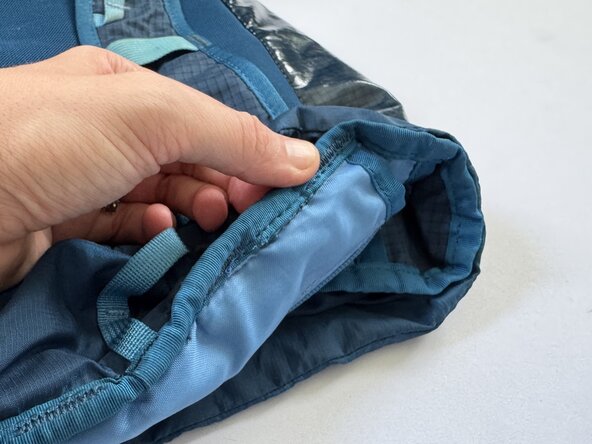
Locate the damage.
-
Determine whether a seam has opened or if there's also damage to the fabric.
-
Flip the item inside out to gain better access to the damaged area.
-
-
-
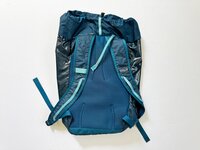
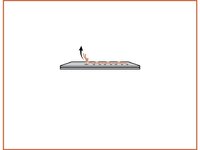
Split Seam: This tutorial covers how to repair a short, straight popped seam with no fabric loss using the Expedition Sewing Awl.
-
Tear Without Fabric Loss: Determine if the edges of the tear can be brought together for the tear to be re-stitched. See also: Whip Stitch on a Tear.
-
Tear With Fabric Loss: If there's significant fabric loss, you'll need to make a patch to cover the hole.
-
Before proceeding, test that the needle can pierce all layers of the material cleanly and easily.
-
-
-
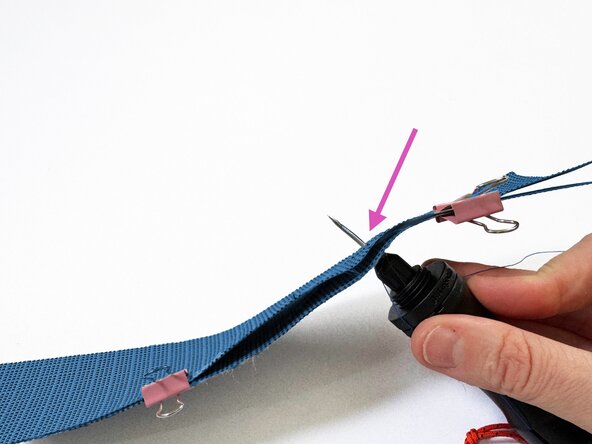
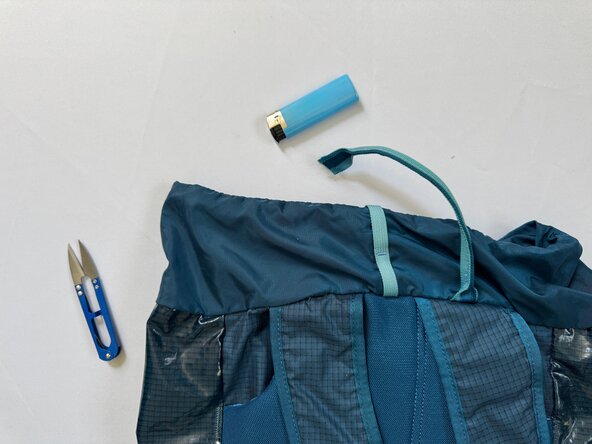
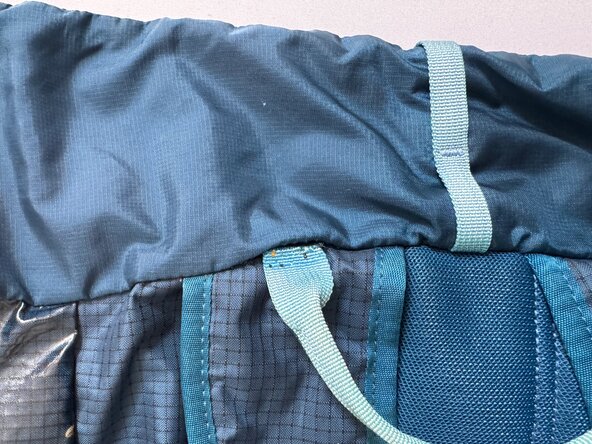
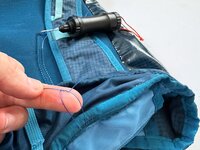
Tuck any loose fabric or webbing back into place.
-
If the fabric or webbing has frayed, carefully singe the edge with a lighter to prevent further fraying.
-
Use binder clips to secure the area in place.
-
-
-
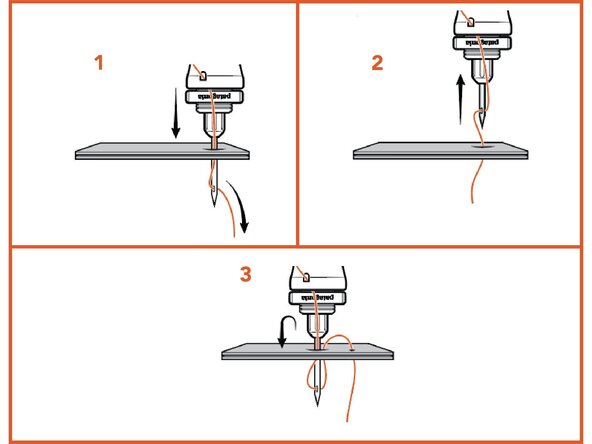
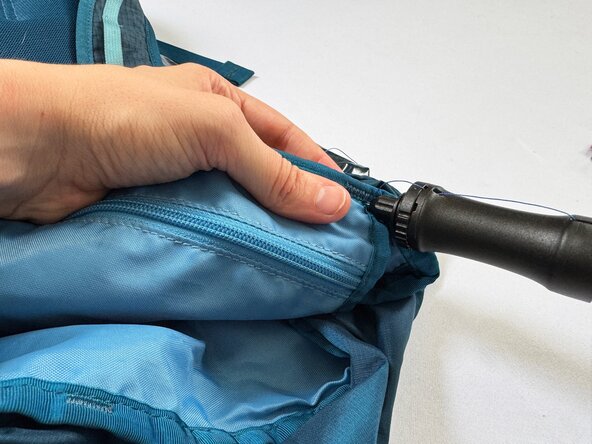
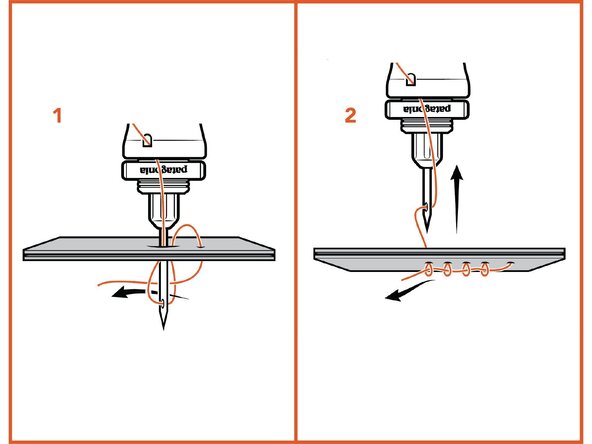
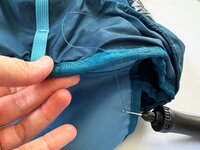
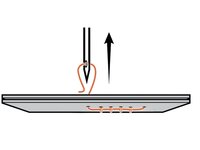
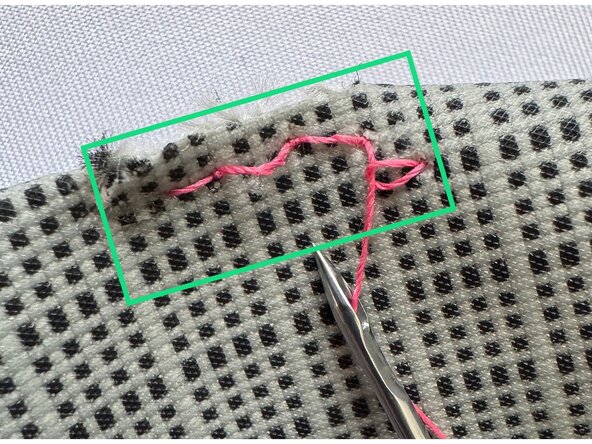
Beginning from the less visible side of the item, push the needle fully through all layers.
-
With the the needle still inserted, pull the thread tail through to the front side.
-
Pull the needle out, leaving the thread tail through the fabric.
-
Reinsert the needle into the fabric about 1/4 inch (~6 mm) or less from the first hole. Leave the needle inserted.
-
-
-
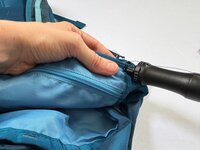
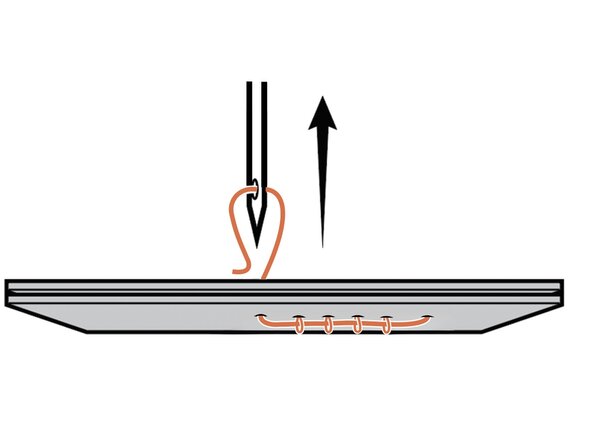
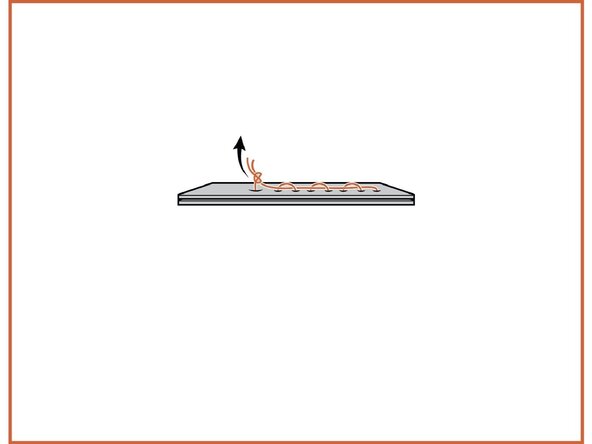
Pass the thread tail through the loop created by the inserted needle.
-
Pull the excess thread until it's taut and the fabric is flat.
-
Pull the needle back out. Keep the tail taut and ensure it doesn't move with the needle to the back side of the fabric.
-
Repeat this process along the entire stitch line.
-
-
-
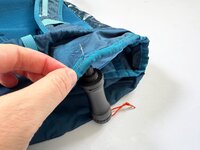
Control the thread tension (how easily the thread emerges from the ESA) by tightening or loosening the bottom cap.
-
Alternatively, hold the ESA like a pencil with the thread under your thumb to control the tension.
-
-
-
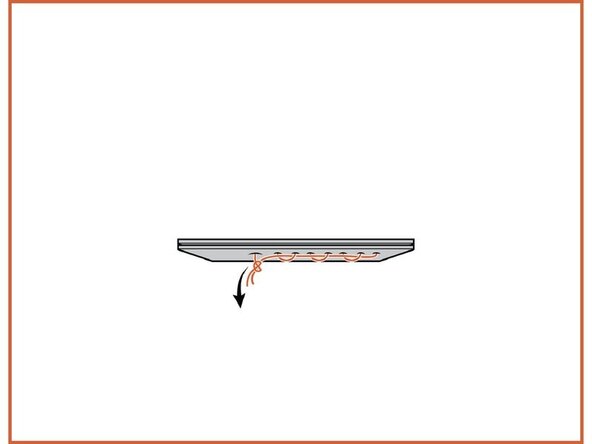
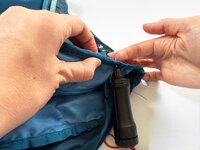
Start with a standard stitch. Insert the needle at the end of the stitch line and make a lockstitch by threading the tail through the needle thread loop.
-
Pull the needle back out and bring the thread tail along with it, creating a loop on the back side.
-
Pull this loop until the remaining thread tail is on the back side of the fabric.
-
-
-
Cut the thread coming from the awl, leaving about 2 inches (~50 mm) of tail for tying off.
-
Tie the two thread ends together with a square knot, keeping it as flush to the fabric as possible.
-
Trim off the excess thread from the knot.
-
-
-
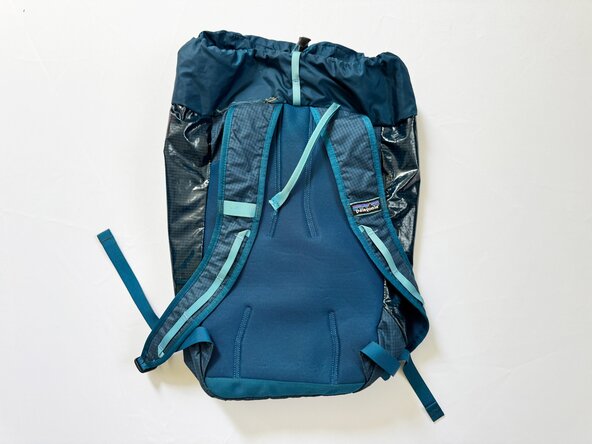
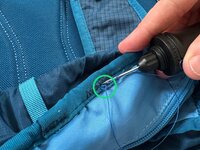
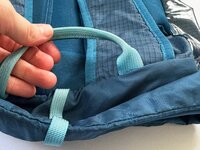
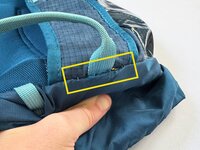
Gently pull on the repaired seam to check that the stitches are sturdy and secure.
-
In the pictured repair, tug on the haul handle that was sewn into the seam to ensure it can hold weight. The stitches should hold firmly and the handle should remain securely attached.
-
-
-
Stitch not aligned: If your stitching doesn’t align with the original line but feels secure, you can create another stitch line in the correct place. There’s no need to remove the first set of stitches.
-
Tough to puncture: If the material is thick and difficult to pierce with the needle, try using a twisting motion as you insert the needle. This can help it pass more easily though all layers.
-
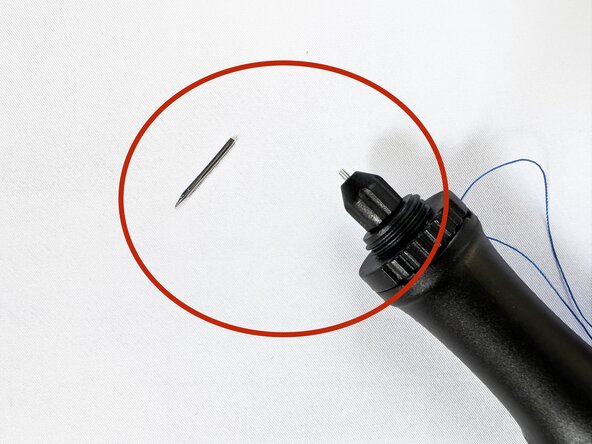
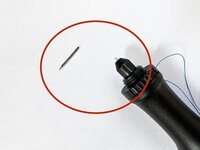
Broken needle: If the needle breaks, stop immediately and remove all broken pieces from the fabric and the awl. This can happen due to (1) the material being too thick for the needle size, (2) the material being too thick for the device, or (3) a dull needle.
-
Uneven thread tension: If stitches are loose or uneven, gently pull both thread tails after each stitch to even them out. Consistent tension is key—adjust as you go rather than at the end of the stitch line.
-