Return to the Patagonia Care & Repair homepage.
Equipment
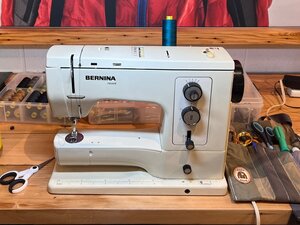
Sewing Machine
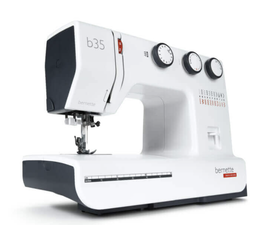
A basic straight-stitch sewing machine is all you need for most repair jobs. Look for a machine with these essential features:
- Adjustable stitch length - to alter stitch size based on fabric and repair type
- Adjustable upper thread tension - to control the tightness or looseness of stitches
- Reverse stitch - for back-tacking to secure the beginning and end of seams
- Zigzag stitch (optional but handy!) - useful for darning, stretch fabrics, or edge finishing
While high-end or computerized machines offer extra features, they’re not necessary for most repair work.
No machine? No problem! Many repairs can be done by hand with a needle and thread.
Sewing Machine Feet (Presser Feet)
A presser foot holds your fabric in place while the machine stitches. Most machines have a removable screw-in or snap-on foot system, allowing you to switch feet depending on the stitch, material, or project type.
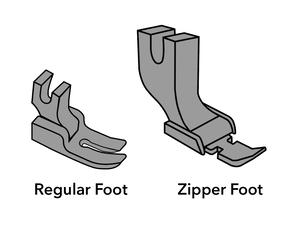
Essential Presser Feet for Repairs
- Regular foot (also called all-purpose, universal, or zigzag) - the go-to for most stitching tasks
- Zipper foot - lets you sew close to the zipper teeth (some machines have separate left and right zipper feet)
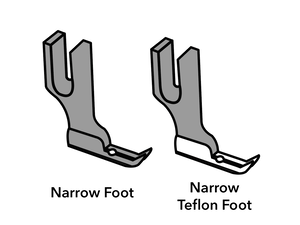
Nice-to-Have Feet for Repairs
- Narrow foot - offers better visibility and maneuverability in tight spaces (not compatible with most zigzag capable machines)
- A Teflon (non-stick) foot - reduces friction as it moves across the fabric and is great for preventing bunching and improving stitch quality on tricky surfaces
Note: These images show industrial presser feet. Home machine feet may look different and often attach via a snap-on mechanism.
Bobbins and Casings
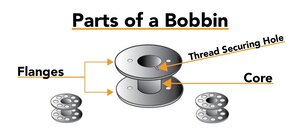
A bobbin is a small spool, usually made of plastic or metal, that holds the lower thread in a sewing machine. It works together with the top thread to form each stitch.
Bobbins come in different sizes and styles, and it’s important to use the correct type for your specific machine to ensure smooth stitching and proper tension.
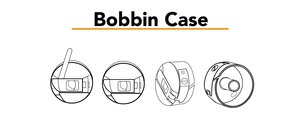
There are three common bobbin setups:
- Drop-in bobbin - The bobbin is placed directly into a compartment beneath the needle plate. This style is common in many modern home machines and is easy to load and monitor.
- Front-loading bobbin with a bobbin case - The bobbin is first inserted into a removable bobbin case, which is then loaded into the front of the machine. This setup is more common in older or industrial machines and allows for more precise tension adjustments.
- Side-loading bobbin with a bobbin case - The bobbin is first inserted into a removable bobbin case, which is then loaded into the left side of the machine. This setup is more common in industrial machines and allows for more precise tension adjustments.
See tutorial on How to Wind a Bobbin.
Always wind thread onto the bobbin evenly and under tension, and check that it’s inserted in the correct direction!
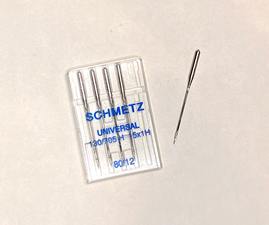
Needles
Choosing the right needle for your project depends on two main factors:
- The type of sewing machine you're using
- The material you're sewing
Heavier fabrics (like denim or canvas) require thicker needles, while thinner fabrics (like silk or cotton shirting) need finer needles.
Needle sizes are listed in a dual-number format, such as 90/14.
- The first number is the European size.
- The second number is the American size.
- The larger the number, the thicker the needle.
Home sewing machine needles have a flat side on the shank, which helps ensure the needle is inserted in the correct orientation. Industrial sewing machine needles have a fully cylindrical (round) shank.
Many brands use color codes to indicate needle type and size. However, these codes vary by manufacturer, so it’s best to refer to the brand’s specific chart.
Anatomy of a Machine Needle
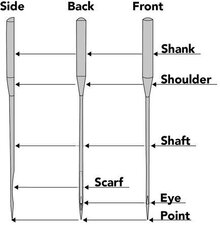
Point: Machine sewing needles have either a sharp point or a ballpoint.
- Sharp points are better for piercing through wovens.
- Ballpoints (which are dull to the touch) are better for knits because they can push aside individual loops to move through the fabric.
Eye: Unlike a hand sewing needle, a machine needle's eye is located just above the point. Choose a needle with an eye that's large enough for your thread to pass through easily.
Scarf: The scarf is the grooved indentation between the eye and shaft. It allows the hook to catch the thread to form a stitch.
The scarf should face opposite the threading direction.
- If your machine threads front to back, the scarf faces back.
- If it threads left to right, the scarf faces right.
Shaft: The shaft is the long body of the needle. Choose the shaft width and length that's right for the project and the machine.
- Width - Thicker shafts create larger holes and are better for heavy-duty and thick fabric sewing.
- Length - Different machines (e.g., straight stitch vs. overlock) may require different shaft lengths.
Shoulder: The shoulder is the tapered area between the shaft and the shank. This area is usually color-coded to indicate the needle type.
Shank: The thickest part of the needle that fits into the machine.
- Home machines use needles with a flat side on the shank.
- Industrial machines typically use round shank needles.
Machine Thread
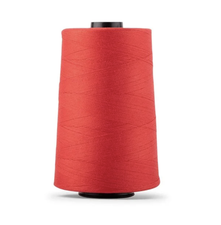
Sewing machine thread is strong, smooth, and designed to withstand the high speed and tension of machine stitching. It’s typically polyester-based, making it durable and versatile for a wide range of repair tasks.
At Patagonia, all products are constructed with polyester core thread with an exterior wrap of polyester, nylon, or cotton—a combination chosen for its high strength and long-term durability.
Thread Tips
- If you can’t find an exact color match, choose a thread that’s slightly darker, it will blend in better than a lighter shade.
- You don't need to match your thread fiber to your fabric. For example, you can use polyester thread on cotton fabric.
Cutting, Clipping & Opening
Fabric Scissors
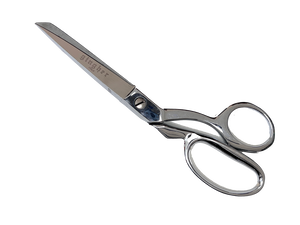
Fabric scissors are designed to cut fabric with a clean edge to reduce fraying. Your fabric scissors should be very sharp and used only to cut fabric, cutting items like paper and tape will dull them quickly. And it can be very frustrating to cut fabric with dull scissors!
Thread Snips
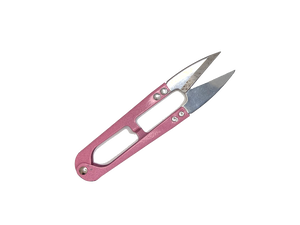
Thread snips are small and ideal for quickly snipping away loose threads close to the fabric.
Seam Ripper
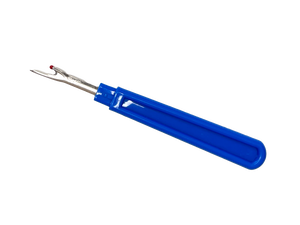
The seam ripper is used to remove stitches and take out stitch lines. It's necessary any time you are doing a repair or an alteration and need to open the seams of a garment. Or any time you make a mistake!
Flush Cutters / End Nippers
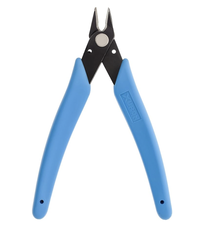
Optional
Flush cutters are a handy tool for sewing repairs where standard scissors or snips fall short. They have a flat cutting edge that allows for precise, close-up clipping without damaging surrounding material.
- Zipper repairs - ideal for removing zipper teeth, coils, or top stops
- Delicate trims - when you need to cut close to fabric or hardware
- Plastic or metal components - cutting through zip ties, boning, or wire-based closures
Measuring
Ruler
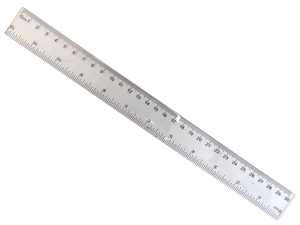
A ruler is necessary for making accurate measurements and drawing straight lines. A straight or L-shaped ruler is used to measure, draw and create a fabric patch. A see-through ruler can be extra handy for visibility when making marks.
Soft Measuring Tape
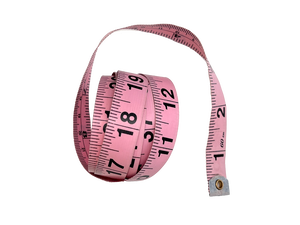
A soft measuring tape differs from a ruler because it can measure curved and irregular surfaces. It's essential for any 3-dimensional or curved measuring. And because it's made of fabric, you can even pin through it!
Securing
Straight Pins
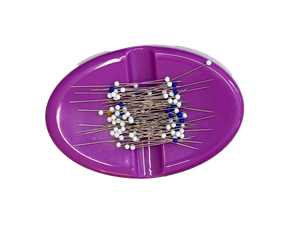
Straight pins are used to hold pieces of fabric together before and during sewing. Because they are made of metal, they can be stored on a magnet or magnetic tray!
Don't use pins on:
- Waterproof or laminated fabrics
- Technical apparel
These materials can be permanently damaged and lose functionality with pinholes.
Binder Clips
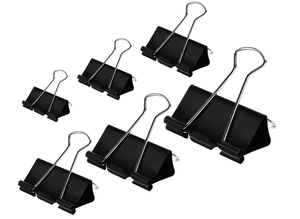
When working with materials that shouldn't be punctured, binder clips are a great alternative to pins. They can hold fabric, parts, and patches in place while repairing.
Needle Nose Pliers

Optional
Needle nose or tweezer nose pliers are versatile tools that can assist in a variety of repair tasks, including:
- Removing threads after seam ripping
- Installing zipper top stops
- Reaching into small spaces
- Holding small components in place while sewing
Their narrow, pointed tips allow for precision in tight spaces, making them a helpful addition to your repair toolkit.
Marking
Tailor's Chalk
Tailor's chalk is chalk specifically made for marking fabric. It can be used to mark stitch lines and patch placements, and is easily brushed or steamed away.
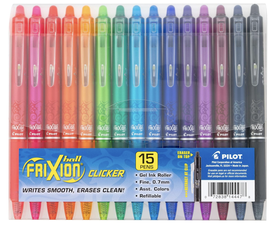
Heat-Erasable Pen
Optional
A heat-erasable pen is an alternative to tailor's chalk for marking fabric. It comes in a pen form which can be easier to maneuver than the tailor's chalk and disappears with heat from an iron.
There is also a water-soluble version of this pen that uses steam or water to wash away.
Tip: A great brand of heat-erasable pen is Pilot FriXion.
Masking Tape

Optional
Masking tape is great for marking areas that need to be repaired or for temporarily applying patches. The adhesive is usually light enough to not leave behind a residue on the fabric.
Ironing
Irons
An iron uses heat and steam to remove wrinkles and press out folds in fabric. Proper pressing is an essential step in repair work—it helps ensure clean, accurate stitching and a professional finish. You should iron any fabric you are using for a patch before cutting it and steam or iron the area of the garment that needs repair so it's smooth and easier to work with.
Home Iron
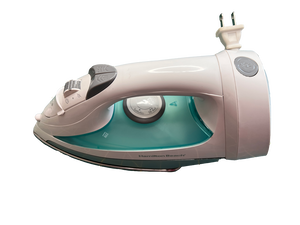
A standard home iron is likely all you need for most repair tasks. It typically features adjustable heat settings for different fabric types and a small water reservoir to create steam. However, home irons are relatively lightweight, which may make it harder to press out deep wrinkles or work with heavy fabrics efficiently.
Gravity Feed Iron
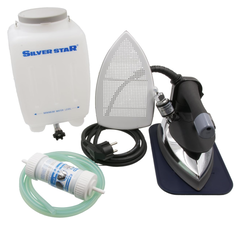
Common in professional and industrial sewing shops, a gravity feed iron uses a large water reservoir suspended above the iron to provide consistent steam and heat. It's heavier, providing better pressing power and can be left on for long periods of time.
Hobby Iron

For tight spaces or small, detailed areas, a hobby iron is extremely useful. Its smaller head allows you to press seams, corners, and hard-to-reach spots with greater control.
Temperatures
Double-check any guidelines that come with your fabric, but as a general rule, ironing temperatures are as follows:
| Level | Temperature | Fabrics |
|---|---|---|
| Low | Under 250 °F | Used for lycra, spandex, nylon, and acrylic |
| Medium | 250 °F - 350 °F | Used for polyester, wool, and silk |
| High | Over 350 °F | Used for linen, cotton, viscose/rayon, and denim |
Ironing Board or Ironing Pad
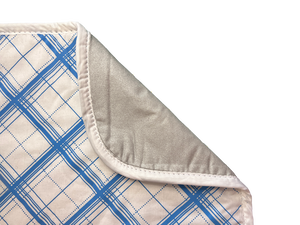
An ironing board or ironing pad is a heat resistant surface on which you can use your iron.
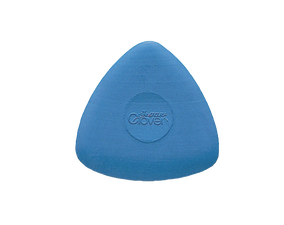
Tailor's Ham
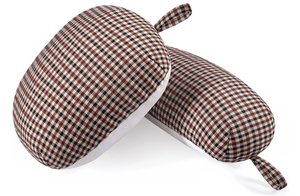
Optional
While a flat ironing surface is essential, a tailor's ham is incredibly useful for pressing curved or shaped areas of a garment. It helps maintain the natural contours of the fabric while pressing. Use it for sleeves, collars, princess seams, darts, and curved hems.
Pattern Weights
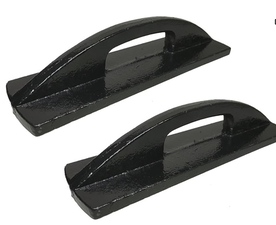
Optional
Pattern weights serve multiple purposes in repair work:
- Hold fabric in place while aligning patterns for cutting or pinning
- Act as a cold press after ironing to help set folds, seam allowances, or seam tape repairs
Lighting
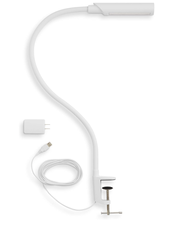
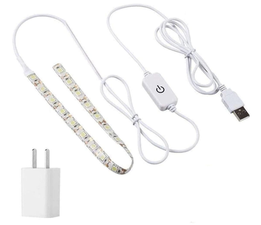
Good lighting is essential for both the quality and ease of repair work. If your overhead lighting isn't sufficient, adding work lights can make a big difference, especially when working with dark fabrics or fine details.
LED strip lights can also be mounted under the throat of the sewing machine to reduce shadows and improve visibility while stitching.
Materials
Patch Fabric
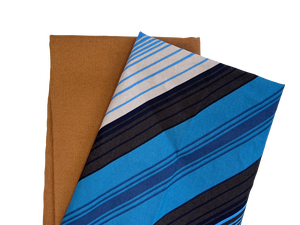
You'll need a variety of types of fabric to make patches for your repairs. To choose the ideal patch fabric for performance and aesthetics, take the following aspects into consideration and match them to the garment:
- Weave Structure - Whether the fabric is woven or knit.
- Fiber Content - The fiber that the fabric is made of (cotton, nylon, etc). This will likely be written somewhere on the garment tag.
- Weight - How thick and rigid the fabric feels.
- Stretch - Whether the fabric stretches horizontally, vertically, or both.
- Color - Matching color is up to personal discretion but often a slightly darker fabric will look less obvious than a slightly lighter fabric.
- Preference - A preference for a contrasting patch for a more visible repair.
See Step 2 of Make a Fabric Patch for an example on how to choose fabric for your project.
Zippers
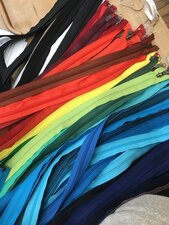
Zippers come in a wide range of styles, sizes, and colors. When replacing a zipper, aim to:
- Match the original zipper size and function exactly
- If an exact match isn't available:
- Prioritize style and size
- Then choose the closest color match
General Rules
- It’s okay to size up for a better color match, but never size down—a smaller zipper may not function properly.
- As with patching and thread matching, when in doubt, choose the darker color, as it tends to blend in like a shadow rather than stand out like a highlight.
For more in-depth details on repairing zippers check out the Patagonia Zippers wiki.
Trims
Trims (also called notions) are functional or decorative elements like elastic, webbing, or snaps. Keep a small variety on hand to match or reinforce existing garment features.
Hard Trims
Buckles
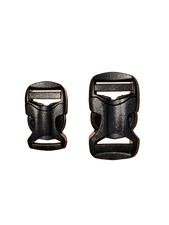
Having a variety of buckles in your kit ensures you're prepared for different repair needs, especially if you are repairing a lot of bags or packs.
- Width is the most important factor—match it to the webbing for proper function.
- Due to variation in post and socket shapes, test replacements with any undamaged parts.
- In many cases, it’s easiest to replace both sides of the buckle for a secure fit.
Snaps

Snaps vary by size, shape, and manufacturer. For best results:
- Test the replacement part with any remaining original components prior to repair.
- If unsure, replace both the stud and socket sides.
- A proper snap will produce an audible click when engaged.
Cord Locks
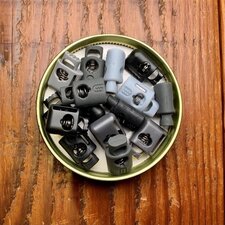
Cord locks are used to secure drawcords on hoods, hems, and bags. Keep a few in different sizes and shapes to match various applications.
Soft Trims
Elastic
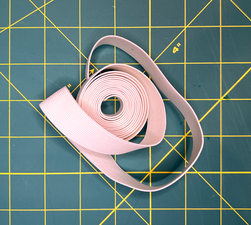
Elastic is used in waistbands, cuffs, and other areas requiring stretch. Keep a variety of:
- Widths (e.g., ¼ inch, ½ inch, 1 inch)
- Types (knit, braided, woven)
- Stretch strengths to match different garment needs
Drawcord
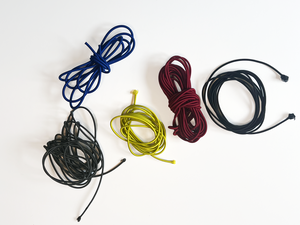
Drawcords are commonly used in hoods, waistbands, hems, and bags. They come in two main types:
- Static drawcords - non-stretch, used for structure and secure cinching
- Elastic drawcords - provide flexibility and comfort, often used in activewear or outerwear
Keep a variety of:
- Widths (e.g., 3 mm, 5 mm, 8 mm)
- Colors to match or contrast with garments
- Materials (cotton, nylon, polyester, elastic blends)
Hook-and-Loop Fastener
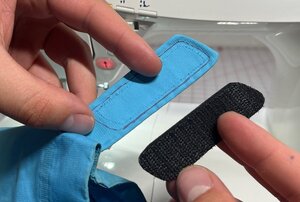
Hook-and-loop fastener (commonly known as Velcro) is a versatile closure system used on many garments and bags. Keep a variety of widths and colors in your kit!

crwdns2935287:0crwdne2935287:0

Guide Team crwdns2935289:0Guide Teamcrwdne2935289:0
Staff
crwdns2931471:010crwdne2931471:0
crwdns2935297:018.409crwdne2935297:0
crwdns2944067:00crwdne2944067:0