
Apple Watch Series 4 Screen Replacement

crwdns2944107:0crwdnd2944107:0Dominik Schnabelrauchcrwdnd2944107:0crwdnd2944107:0crwdnd2944107:05crwdnd2944107:0crwdne2944107:0
crwdns2944111:0Ndz 26, 2025crwdne2944111:0
crwdns2915892:0crwdne2915892:0
crwdns2942287:0crwdne2942287:0Use this guide to replace a broken, cracked, or defective display on your Apple Watch Series 4.
Make sure to update your Apple Watch to watchOS 5 or later (and the paired iPhone to iOS 12 or later) to avoid pairing issues after a display replacement.
Replacing the display can cause issues with Apple Pay. If possible, to reduce the likelihood of problems, delete all your Apple Pay account info before the replacement, and then re-enter it with the new display installed.
This guide shows the procedure on the standard, GPS-only version of the watch, but the cellular/LTE version is similar.
crwdns2942213:0crwdne2942213:0
crwdns2943213:0crwdne2943213:0


crwdns2943215:0crwdne2943215:0


crwdns2944105:0crwdne2944105:0

-
-
Before starting repairs, take your watch off the charger and power it down.
-
If your touchscreen is broken and prevents powering off the watch, use this alternate method to power it down.
-
-
-
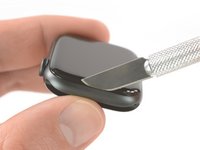
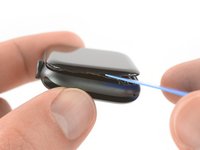
Because the gap between the screen and watch body is so thin, a sharp blade is needed to separate the two. Read the following warnings carefully before proceeding.
-
-
-
Prepare an iOpener (or use a hair dryer or heat gun) and heat the face of the watch to loosen the display adhesive.
-
Leave the iOpener on the watch for at least two minutes to fully heat the screen and soften the adhesive holding it to the case.
-
-
-
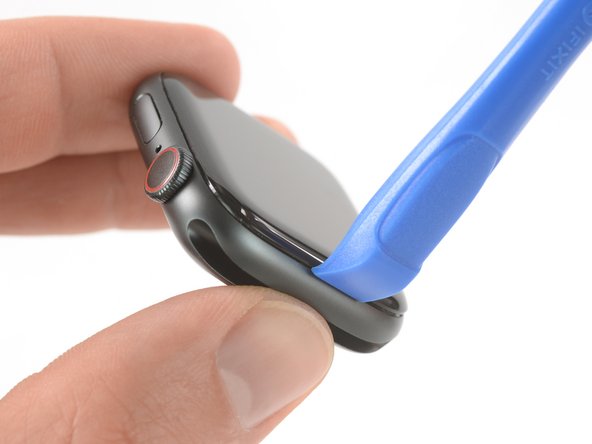
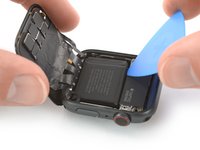
Place the edge of a curved blade into the thin gap between the display and the outer case. Start at the short side of the display, closest to the digital crown.
-
Press firmly straight down into the gap.
-
Once inserted, tilt the blade to pry the display open slightly.
-
-
-
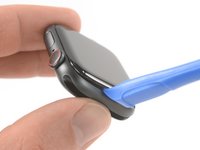
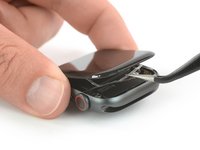
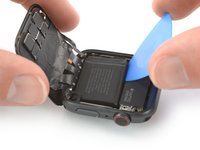
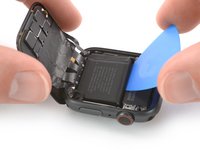
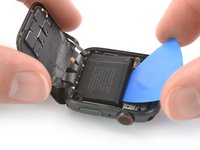
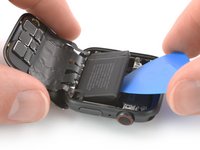
Once you've opened a small gap with the curved blade, remove the blade and insert the thinner edge of an opening tool into the gap.
-
Push the opening tool into the gap, using your thumb as a pivot to lift the display open a bit farther.
-
-
-
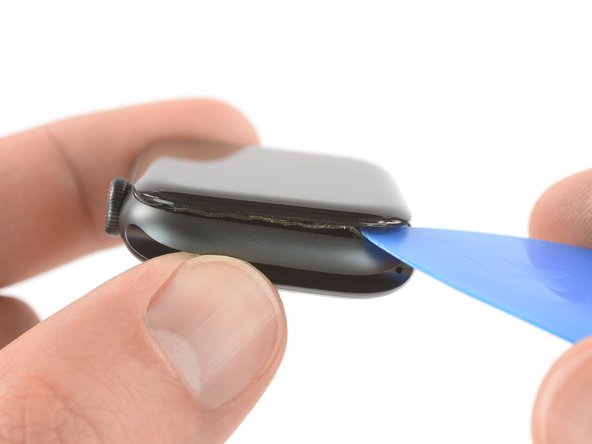
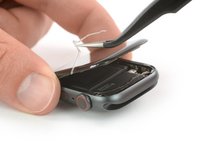
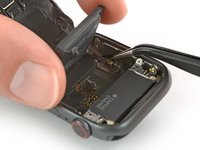
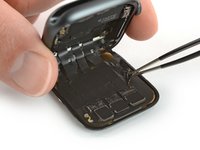
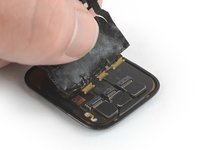
It's likely that the Force Touch sensor will stick to the display frame instead to the watch's body. In this case, insert an opening pick under the display and carefully separate the Force Touch gasket from the display.
-
Slide the pick around the display to separate the adhesive between the Force Touch gasket and the display.
This impossible for me. I just left the force touch gasket attached to the display side. I was able to bend the display back with the gasket still in place.
See first the instructions for replacing the force touch gasket to familiarize yourself with parts that need separating. These instructions will seem unclear if you don't know what the force touch gasket looks like.
Be very careful with this step. I accidentally tore the Force Touch gasket, and while trying to replace it, then tore the display flex cable, thereby ruining the watch.
-
-
crwdns2935267:0crwdne2935267:0Tweezers$4.99
-
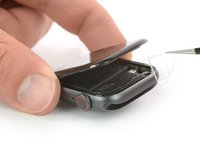
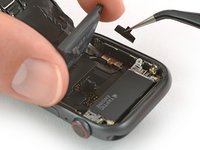
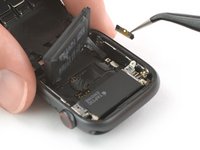
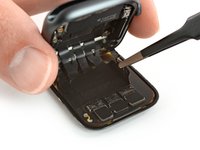
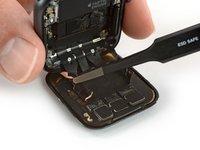
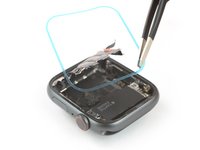
Open the display at max. to an 45° angle, and use tweezers to peel off the adhesive between the display and the Force Touch gasket.
-
Thread the adhesive around and behind the display cables to get it off completely. Since the adhesive needs to be replaced anyway, you can cut it if that makes removal easier for you.
-
-
-
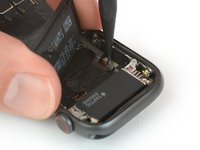
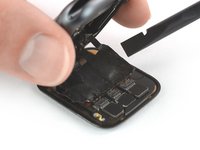
Carefully fold the screen to the back until you get enough space to pry out the battery.
-
Insert an opening pick between the battery and the Taptic Engine.
-
-
-
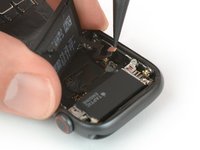
Slide the opening pick along the edge of the battery to loosen the adhesive.
-
Use constant, steady pressure to slowly pry the battery up, separating it from the adhesive securing it to the system board.
-
-
crwdns2935267:0crwdne2935267:0Tweezers$4.99
-
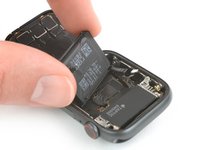
Carefully lift the battery and bring it in a 75° angle.
-
Use a pair of tweezers to peel the black sticker off the metal plate which covers the battery connector.
-
-
-
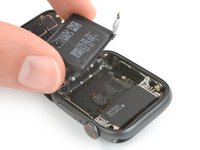
Remove the Y000 screw (1.2 mm length).
-
-
-
Use a pair of tweezers to remove the metal plate which covers the battery connector.
-
-
-
Use the pointed end of a spudger to pry up and disconnect the battery flex cable.
-
-
crwdns2935267:0crwdne2935267:0Tesa 61395 Tape$5.99
-
Remove the battery.
-
-
-
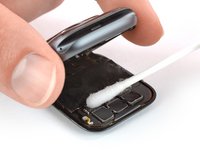
Apply a little bit of high isopropyl alcohol (>99%) to a Q-tip and apply it to the black adhesive foil. Let it penetrate the adhesive for about two minutes.
-
Alternatively you can place an a heated iOpener on top of the screen to loosen the adhesive. Apply the iOpener at least for two minutes.
-
-
crwdns2935267:0crwdne2935267:0Tweezers$4.99
-
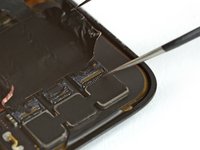
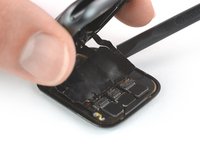
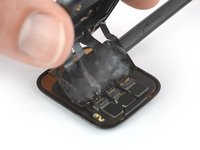
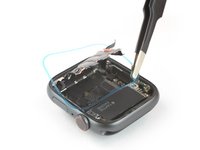
Use a pair of tweezers to carefully peel off the tape covering the three display cable connectors.
-
-
-
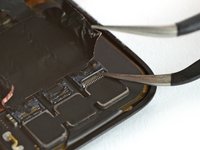
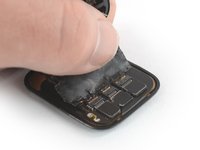
Use one arm of a pair of tweezers to carfully open the three ZIF connectors on the rear side of the screen.
-
-
-
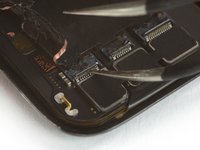
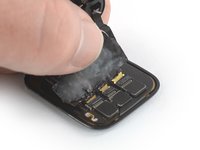
Use a pair of blunt nose tweezers to peel up the sides of the black foil which adheres the cable to the rear side of the screen.
-
-
-
Lift the body of the watch up and carefully slide a spudger underneath the display flex cable to loosen remaining adhesive.
-
-
-
Carefully pull the display flex cables out of their ZIF connectors.
-
Separate the watch assembly and the screen.
-
-
crwdns2935267:0crwdne2935267:0Adhesive Cleanup Kit (Set of 12)$7.99
-
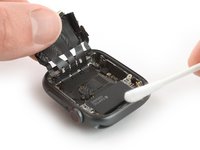
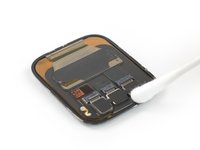
Apply a little bit of high isopropyl alcohol (>99%) to a Q-tip or use a cleaning pad to gently remove the leftover adhesive on top of the Force Touch gasket.
-
-
crwdns2935267:0crwdne2935267:0Tweezers$4.99
-
Use a pair of tweezers to carefully remove the replacement adhesive with the blue protective film from the backing paper.
-
-
-
Hold the replacement adhesive diagonally to thread it over the display cable.
-
Position the replacement adhesive on top of the Force Touch gasket.
-
-
-
Use the pointed end of a spudger to make final position adjustments and press the adhesive into place.
-


To reassemble your Apple Watch Series 4 follow these instructions in reverse order to reattach the screen and the battery.
Take your e-waste to an R2 or e-Stewards certified recycler.
Repair didn’t go as planned? Check out our Answers community for troubleshooting help.
To reassemble your Apple Watch Series 4 follow these instructions in reverse order to reattach the screen and the battery.
Take your e-waste to an R2 or e-Stewards certified recycler.
Repair didn’t go as planned? Check out our Answers community for troubleshooting help.
crwdns2935221:0crwdne2935221:0
crwdns2935229:035crwdne2935229:0
crwdns2947821:0crwdne2947821:0
crwdns2947823:0crwdne2947823:0


crwdns2947412:017crwdne2947412:0
Do not buy does not come with all the pieces needed to make the screen repair all the connections are not possible
Can you tell me what the black adhesive tape with flex ends that covers the flex ribbons is used for and can it be replaced ?
That is for shielding and grounding purposes. If you get a spare you can of course replace it. But be careful not to damage the display cables.
Sheila, this you can purchase on Aliexpress. i tried to get it elsewhere, seems noone else stocks it. cost approx $10. i found it here: https://www.aliexpress.com/item/10050019...
I have replaced an original screen from another apple watch and everything seems to have gone well. But when I try to pair with the iphone it doesn't succeed. Is it because I didn't put the NFC chip from the original apple watch? What can be?.
It is an apple watch series 4 44 mm + cellular.
Thank you very much.
I would like to change the screen of my smart watch series 4. Could you tell me all the tools I need? Will the battery I have stop working? Thank you.
Do you have to replace the black flex ribbons when preparing the apple watch or can you leave them out?
Very difficult repair, indeed. Be very careful about the side wires, they can be very easily be cut when opening the screen. I just hope having a contact supper to supper will be enough… Response in some hours.
This tutorial could be completed with an advice about how to bring the screen wires back to their connectors. That was the most difficult part for me. I was afraid to cut or destroy them.
Concerning the parts, I found the adhesive ring very thick compare to the adhesive I had to remove. What I had as parts did not correspond to what was shown in the repair tutorial. The watch is getting pressed now so I can’t judge if the adhesive is ok or too thick.
It was also very difficult to separate to only get the ring.
Anyway, thanks for this tutorial. Without it, impossible to repair the first time.
Sorry for replying after such a long time: I have cut the smaller side wires (both, I'm very proud of myself ;) ), did you have any problems using the watch with such wires cut? It seems very difficult to find replacement parts for such components.
Replaced screen and testing before closing everything back up. Screen comes on, but it doesn’t respond to touch. Is this due to a cable not connecting properly, or is this a bad screen? Comes on and looks great, but not touch responsive. -dw
Hi Andrew, yes, there might be a cable not sitting correctly in its connector. Those tiny cables are hard to handle and need to be inserted all the way in their connectors. Hopefully that solves the issue.
Quick question: the two wire cables at the sides of the black foil (Step 18) are of any use? I have broken mine (both) while opening the watch, and I am wondering if I have to throw everything in the garbage (I was replacing the battery) or I can still use the watch after battery replacement (I have to order the battery yet)
Pareil les 3 connecteurs impeccable mais un des deux stickers aux extrémités s'est cassé ... Est-ce pour cela que ma montre ne s'allume pas ?
Bonjour, j'ai respecté toutes les étapes une par une ... Et rien ne se passe dans ma montre ... Montre non utilisée pendant plus d'un an du coup j'ai choisi de changer la batterie ... Rien de plus ... La montre "chauffe" donc la charge semble fonctionner mais l'écran est noir et aucun éclair ou autre a l'écran ^^
Are there any news on Apple Pay function after replacing the screen? As I can remember at some time there was a disclaimer at this guide that there is currently no easy fix to get NFC and Apple Pay working after replacement. I thought if only changing the screen it's 100% not working but now it sounds like it could succeed or not. Is that right?
We haven’t tested it recently. So all we can say is in the introduction:
"Replacing the display can cause issues with Apple Pay. If possible, to reduce the likelihood of problems, delete all your Apple Pay account info before the replacement, and then re-enter it with the new display installed."
Oh boy I'm not exited for this repair... Hopefully it goes well...