crwdns2915892:0crwdne2915892:0
Use this guide to correctly apply replacement battery adhesive strips in many late-model iPhones. Any time you remove the battery, these strips must be replaced. The strips are easily damaged if not applied correctly, so you may want to have a spare set of strips on hand if following this guide for the first time.
The larger iPhone "Plus" models use three strips instead of two, but the procedure is the same.
Before you begin, you should have removed the battery by following a guide like the ones linked below. Note: iPhone 5 and earlier models do not use any adhesive strips.
- iPhone 6 Battery Replacement
- iPhone 6 Plus Battery Replacement
- iPhone 6s Battery Replacement
- iPhone 6s Plus Battery Replacement
- iPhone 7 Battery Replacement
- iPhone 7 Plus Battery Replacement
To replace the battery adhesive strips in a different model iPhone, use one of the following guides:
crwdns2942213:0crwdne2942213:0
crwdns2936621:0crwdne2936621:0
-
-
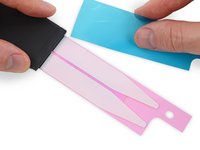
If your new battery came with adhesive strips already stuck on, skip to Step 7.
-
Otherwise: If present, remove the small plastic film(s) covering the flat ends of the adhesive strips.
 crwdns2952109:0crwdne2952109:0
-
-
-
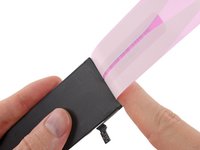
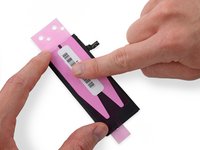
With the battery facing up (battery connector on the right), carefully align the exposed portion of the adhesive strips along the lower edge of the front of the battery, and press them gently into place.
-
-
-
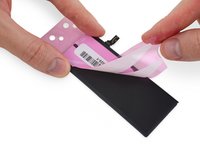
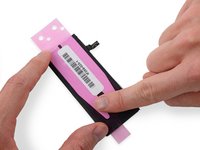
Place the battery face down on a flat surface.
-
Starting at the pointed end of the adhesive strips, peel off the large blue film covering the strips.
-
If this happens to you and you got your strips from iFixit, contact us here and we'll send you a replacement on the double.
-
In the meantime, you can temporarily reassemble your iPhone with a bit of double-sided tape to hold the battery.
-
-
-
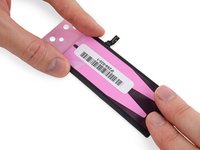
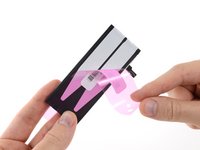
Using your fingertip, gently roll the adhesive strips over the bottom edge of the battery, toward the back.
-
-
-
-
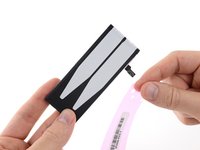
Lay the strips down flat and let them stick to the back of the battery.
-
-
-
Use your fingers or a cloth to press the strips firmly into place all along the back of the battery.
-
-
-
Carefully peel away the remaining piece of film, fully exposing the adhesive strips.
-
-
-
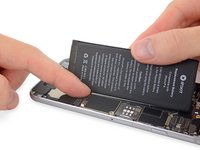
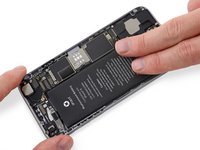
Without sticking the battery down, lower its connector into the iPhone and align it to its socket on the logic board.
-
Connect the battery.
-
-
-
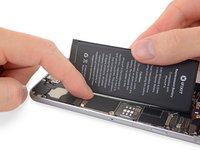
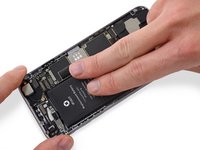
Carefully position the battery and set it into the iPhone.
-
-
-
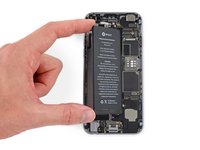
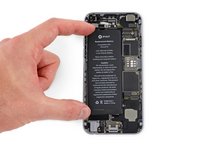
When the battery is correctly positioned, lay it down in the iPhone and press it firmly into place, allowing the adhesive strips to stick to the rear case.
-
-
-
Be sure to disconnect the battery again before reassembling your iPhone.
-


To reassemble your iPhone, return to the guide you used to remove the battery and follow the steps in reverse order.
Remember to take your old battery to an R2 or e-Stewards certified recycler.
crwdns2935221:0crwdne2935221:0
crwdns2935229:01625crwdne2935229:0


crwdns2947412:068crwdne2947412:0
I had to read these directions thoroughly three times before proceeding as I didn't want to screw it up on the adhesive. Went slow and it worked just fine
patrick knaggs - crwdns2934203:0crwdne2934203:0 crwdns2950251:0crwdne2950251:0
I would say jus watch out as you go from step 4 to step 5 - the white adhesive can become slightly detached from the backing as you push it onto the edge of the battery and then around to the back side. Extreme care here! Very good guide and equipment. Galaxy class!
Steve Cottrell - crwdns2934203:0crwdne2934203:0 crwdns2950251:0crwdne2950251:0
All was good, aside from the adhesive bunched up when I removed the blue backing and it started to separate from the pink backing. I had to just gingerly make sure it was all straight and kept steady like a heart surgeon until I had it smoothed down as best as possible. It all went well, but I was worried I'd end up with a big stuck ball of white adhesive in the middle of the battery plate, making it all uneven and stupid looking.
DiscoDan74 - crwdns2934203:0crwdne2934203:0 crwdns2950251:0crwdne2950251:0
What happens if I use a different adhesive than this one?
gleeglee217 - crwdns2934203:0crwdne2934203:0 crwdns2950251:0crwdne2950251:0
The iPhone adhesive strips we sell (and the original Apple ones) are special since they have very strong adhesion, but they can be removed easily by pulling on the tabs on the lower edge of the battery. People have had success with our 3M double-sided sticky tape (aka sticker tape), but standard plastic double-sided tape may not have enough strength to hold the battery in place. If you want the strongest adhesive possible, you should use iPhone adhesive strips mentioned above, but if your phone isn't subject to lots of movement, you could get by with some sticker tape.
Evan Noronha - crwdns2934203:0crwdne2934203:0 crwdns2950251:0crwdne2950251:0