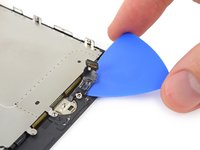
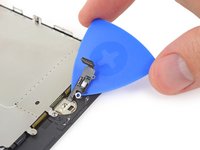
crwdns2933423:0crwdne2933423:0

iPhone 7 Screen Replacement

crwdns2942213:0crwdne2942213:0

crwdns2936621:0crwdne2936621:0

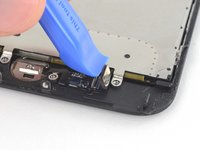
  1. iPhone 7 Screen Replacement, Pentalobe Screws: crwdns2935265:01crwdnd2935265:01crwdnd2935265:01crwdne2935265:0
    • Before you begin, discharge your iPhone battery below 25%. A charged lithium-ion battery can catch fire and/or explode if accidentally punctured.

    • Power off your iPhone before beginning disassembly.

    • Remove the two 3.4 mm pentalobe screws on the bottom edge of the iPhone.

    • Opening the iPhone's display will compromise its waterproof seals. Have replacement seals ready before you proceed past this step, or take care to avoid liquid exposure if you reassemble your iPhone without replacing the seals.

    Can anyone confirm 7/7P's pentalobe screws have a ring of seal near the screw head?

    Cooper Chase - crwdns2934203:0crwdne2934203:0

    Confirmed, the screws have a black ring seal around the head.

    rcheing - crwdns2934203:0crwdne2934203:0

    From personal experience, I highly recommend before doing this procedure or any other, that you do a backup of your phone (preferably local) in case your procedure goes south.

    ballina5ny - crwdns2934203:0crwdne2934203:0

    I purchased the repair tools with the replacement battery from iFixit. The tools include a screw driver and three heads none were labeled 3.4 mm. I think the one that fit the pentalobe screws was labeled Y000. The guide should identify the screw driver head supplied by the kit not 3.4mm.

    Mark Lieberman - crwdns2934203:0crwdne2934203:0

    in the iphone 7 replacement battery kit from iFixit, the screwdriver that fits the 3.4 mm pentalobe screws is labeled P2 (and not Y000)

    Jan-Tijn Oppermann -

    3.4 mm is the height of the screw and is not related to the screw driver code.

    Ahmad Vaziri -

    the screwdriver PH000 does not work i wasted two screws and now they dont have the 4 cross mark they are now a circle, i buyed it all from Paraguay and it doesnt work, had to assembly back the parts because i got stuck like i mention with some screws, well im just going to send to a professional to install, thanks

    Martin Frutos, Nuñez - crwdns2934203:0crwdne2934203:0

    The bottom screws are Pentalobe, not Phillips.

    Bram Driesen -

    Before starting, I would recommend backing up your Iphone’s data just in case.

    Jon Moylan - crwdns2934203:0crwdne2934203:0

    If you managed to make it to this section, just send the phone into apple for 50 + 6 dollars shipping. The ribbon cables on the screen are designed to break. I can literally twist on the rest of the cable and it won’t fall apart but there is a diagonal section where it snaps. This is the fault of apple and the fault of ifixit for misrepresenting the fragility of the cables.

    Ryan Huebert - crwdns2934203:0crwdne2934203:0

    Had to reheat it a few times for a minute each with a hairdryer to get the seal to break after pulling and rocking the suction

    Cynthia Lamb - crwdns2934203:0crwdne2934203:0

    I’m technically challenged. Is there a premier national service who can professionally install a replacement battery got my 7 +?

    Richard - crwdns2934203:0crwdne2934203:0

    Do the screws come out in total?

    YVES THEUGELS - crwdns2934203:0crwdne2934203:0

    They may come out or may not. If you loosen as much as you can and they don't come out you should still be able to pry open the bottom. Once you get the screen off you can then push the screws out from the inside.

    Anthony Falabella -

    Is it the P2 you should use for the bottom??

    YVES THEUGELS - crwdns2934203:0crwdne2934203:0

    I heated the bottom of the phone with a hairdryer and then used a syringe to put a couple of drops of acetone directly into the bottom two screw holes. I GENTLY pulled on the screen with the suction cup and used the pry tool to GENTLY separate the screen. The sealant is applied around the entire display so be very careful pulling it off so you don’t break the fragile display cables.

    Anthony Scaminaci - crwdns2934203:0crwdne2934203:0

    At first it was very difficult to open, per instructions. I used a heat/ice pack and nuked it for 1 minute. The pry tool wasn’t working so I carefully used my pocket knife to wedge the cover open. The rest of the procedure went well until I cracked the glass while trying to get the top right corner to pop off. Other than that mistake, all went well. Tip: before setting the new battery, attach the battery connector first and leave enough room for the taptic engine, or better yet, place the taptic engine before adhering the replacement battery. This way you’ll have a small gap between the two, whereas mine barely fit. Good job on hosting the video, Gwendyl.

    Klaus Preiss - crwdns2934203:0crwdne2934203:0

    I love the fact that the screw bit and shaft are magnetic! I almost lost a screw and found it attached to the magnet.

    I used a heat/ice pack and nuked it for 1 minute. At first the display cover was very difficult to open with the pry tool, per instructions. The pry tool wasn’t working so I carefully used the blade of my pocket knife to wedge the cover open. The rest of the procedure went well until I cracked the glass while trying to get the top right corner to pop off. Other than that mistake, all went well. Tip: before setting the new battery, attach the battery connector first and leave enough room for the taptic engine, or better yet, see the taptic engine in place before adhering the replacement battery. This way you’ll have a small gap between the two, whereas mine barely fit because I placed it almost too low.

    Good job on hosting the video, Gwendyl.

    Klaus Preiss - crwdns2934203:0crwdne2934203:0

    I replaced the lightning connector assembly and reassembled. The old one did not 'click' into the cable and had corrosion inside, it needed the cable to be placed in a specific way to charge. The new part - does not recognize that a charger is plugged in at all.

    I backtracked the assembly - took it apart, put it back again - and find that every thing on the part works - the mic, speakers, taptic engine.

    The original problem with the cable still persists. Any ideas?

    H K - crwdns2934203:0crwdne2934203:0

  2. iPhone 7 Screen Replacement, Mark your opening picks: crwdns2935265:02crwdnd2935265:01crwdnd2935265:03crwdne2935265:0 iPhone 7 Screen Replacement, Mark your opening picks: crwdns2935265:02crwdnd2935265:02crwdnd2935265:03crwdne2935265:0 iPhone 7 Screen Replacement, Mark your opening picks: crwdns2935265:02crwdnd2935265:03crwdnd2935265:03crwdne2935265:0
    • If inserted too far, an opening pick can damage your device. Follow this step to mark your pick and prevent damage.

    • Measure 3 mm from the tip and mark the opening pick with a permanent marker.

    • You can also mark the other corners of the pick with different measurements.

    • Alternatively, tape a coin to a pick 3 mm from the tip.

    Got to step 2 and realized the fix kit doesn't include an opening pick! Looks like a guitar pick, and I have those lying around. Is that expected? Looks like the pick is used in many steps below. There's a little blue crowbar that isn't mentioned in the instructions. Perhaps that replaces the opening pick?

    Sloan Looney - crwdns2934203:0crwdne2934203:0

    Hi! I can't see which guide you were using when writing this comment. Can you reply here with which guide and fix kit you used?

    Clay Eickemeyer -

    I see you posted this in Meta. I hope it's resolved soon! In the meantime, a guitar pick may work well enough for your repair.

    Clay Eickemeyer -

    what fix kit?

    Meow Purr -

    My fix kit didn't include an opening pick either

    WILLIAM HARRIS - crwdns2934203:0crwdne2934203:0

    Make sure you check inside the black boxes after emptying them. My pick was stuck inside one of the boxes.

    AndyF - crwdns2934203:0crwdne2934203:0

    My AliExpress refurbished screen came with a pick that has a coin-like circle that pops out, so no modification was necessary

    Gijs Leegwater - crwdns2934203:0crwdne2934203:0

  3. iPhone 7 Screen Replacement, Anti-Clamp instructions: crwdns2935265:03crwdnd2935265:01crwdnd2935265:03crwdne2935265:0 iPhone 7 Screen Replacement, Anti-Clamp instructions: crwdns2935265:03crwdnd2935265:02crwdnd2935265:03crwdne2935265:0 iPhone 7 Screen Replacement, Anti-Clamp instructions: crwdns2935265:03crwdnd2935265:03crwdnd2935265:03crwdne2935265:0
    crwdns2935267:0crwdne2935267:0
    Anti-Clamp
    $24.95
    crwdns2942207:0crwdne2942207:0
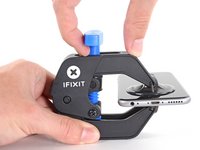
    • The next three steps demonstrate the Anti-Clamp, a tool we designed to make the opening procedure easier. If you aren't using the Anti-Clamp, skip down three steps for an alternate method.

    • For complete instructions on how to use the Anti-Clamp, check out this guide.

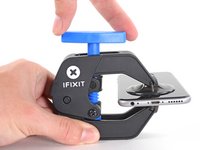
    • Pull the blue handle backwards to unlock the Anti-Clamp's arms.

    • Slide the arms over either the left or right edge of your iPhone.

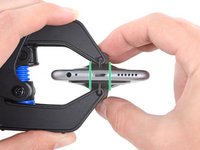
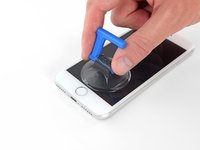
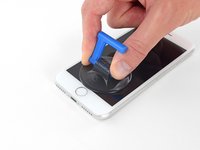
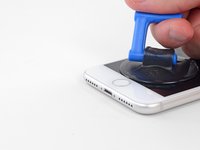
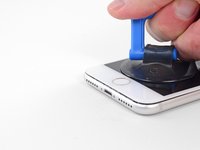
    • Position the suction cups near the bottom edge of the iPhone just above the home button—one on the front, and one on the back.

    • Squeeze the cups together to apply suction to the desired area.

    • If you find that the surface of your iPhone is too slippery for the Anti-Clamp to hold onto, you can use tape to create a grippier surface.

  4. iPhone 7 Screen Replacement: crwdns2935265:04crwdnd2935265:01crwdnd2935265:03crwdne2935265:0 iPhone 7 Screen Replacement: crwdns2935265:04crwdnd2935265:02crwdnd2935265:03crwdne2935265:0 iPhone 7 Screen Replacement: crwdns2935265:04crwdnd2935265:03crwdnd2935265:03crwdne2935265:0
    • Pull the blue handle forwards to lock the arms.

    • Turn the handle clockwise 360 degrees or until the cups start to stretch.

    • Make sure the suction cups remain aligned with each other. If they begin to slip out of alignment, loosen the suction cups slightly and realign the arms.

  5. iPhone 7 Screen Replacement: crwdns2935265:05crwdnd2935265:01crwdnd2935265:02crwdne2935265:0 iPhone 7 Screen Replacement: crwdns2935265:05crwdnd2935265:02crwdnd2935265:02crwdne2935265:0
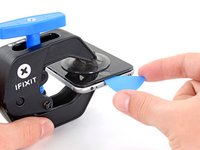
    • Heat an iOpener and thread it through the arms of the Anti-Clamp.

    • You can also use a hair dryer, heat gun, or hot plate—but extreme heat can damage the display and/or internal battery, so proceed with care.

    • Fold the iOpener so it lays on the bottom edge of the iPhone.

    • Wait one minute to give the adhesive a chance to release and present an opening gap.

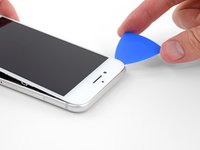
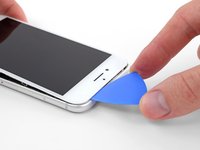
    • Insert an opening pick into the gap.

    • If the Anti-Clamp doesn't create a sufficient gap, apply more heat to the area and rotate the handle a quarter turn.

    • Don't crank more than a quarter turn at a time, and wait one minute between turns. Let the Anti-Clamp and time do the work for you.

    • Skip the next three steps.

  6. iPhone 7 Screen Replacement, Heat the display: crwdns2935265:06crwdnd2935265:01crwdnd2935265:01crwdne2935265:0
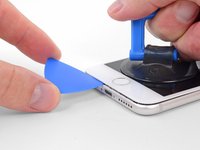
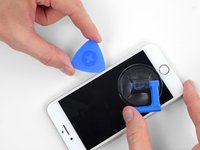
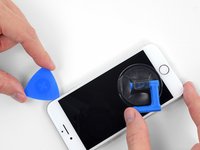
    • The next three steps show how to separate the screen using a suction cup.

    • Heating the lower edge of the iPhone will help soften the adhesive securing the display, making it easier to open.

    • Use a hairdryer or prepare an iOpener and apply it to the lower edge of the phone for about 90 seconds in order to soften up the adhesive underneath.

    No hair dryer so GENTLY heated over stove burner

    John Toth - crwdns2934203:0crwdne2934203:0

    Hello,

    What temperature is suitable for removing the front display ? I bought i-Fixit ProTech which is not include the heating "roller" . Thanks for help

    Jiří Sítko - crwdns2934203:0crwdne2934203:0

    Ich habe eine heiße Wärmflasche verwendet. Das hat gut funktioniert :-)

    Moritz Hartges - crwdns2934203:0crwdne2934203:0

    I laid my phone face-down on my 3D printer’s heated bed, and set the temperature to 60 C. After a few minutes, it was ready to loosen.

    Nate B - crwdns2934203:0crwdne2934203:0

    If you don’t have an “iOpener” or heat gun, try using an electric heating pad. I have a small $11 pad I got at CVS for my knee. On medium heat it worked fine for removal and with the “pennies” for setting the new seal.

    Pete P - crwdns2934203:0crwdne2934203:0

    I used a heated tea kettle and a tea towel, it worked!

    Adam Yavner - crwdns2934203:0crwdne2934203:0

    I put on the furnace vent for 10 minutes to get it warm to the touch but not hot.

    terrelldoc - crwdns2934203:0crwdne2934203:0

    I attached it to the after burner of my rocket ship and that worked.

    Matt Brown - crwdns2934203:0crwdne2934203:0

    I'm holding mine just above an erupting volcano but I'm still waiting to see if it has worked. How long does it need?

    Paul Aron - crwdns2934203:0crwdne2934203:0

    I used a water-filled ziploc bag, heated it in microwave. fast, cheap, worked.

    John Barker - crwdns2934203:0crwdne2934203:0

    Hairdryer works fine for this step. No issues.

    tripmusic - crwdns2934203:0crwdne2934203:0

    The most effective way to heat up the glue is to leave the phone in full sun - if it's available. In fact I would always wait for a sunny day to repair any glued together Apple device. The heat will be very even and the phone was probably designed to survive anything the sun can throw at it - although it can get very warm. (I'm in the UK) If you leave the phone turned on it will give a warning if it goes near the temperature limit.

    John - crwdns2934203:0crwdne2934203:0

    I'm sorry but I tried both the hair dryer (for 3 minutes!) and the eye opener (also 3 minutes) and no luck. Not even a hint of loosening the adhesive holding down the display!! Do I send this kit back for a refund or what??!!

    John Noble - crwdns2934203:0crwdne2934203:0

    No luck, guys. 3 minutes of hair drying and 3 minutes heating up the iopener. What next?

    John Noble - crwdns2934203:0crwdne2934203:0

    Okay, a half hour later i finally got the screen loose, but not after super heating it for at leat 10 minutes with a hair drying and burning my hand trying to pry it open. Also, watch out for the power button because it inadvertently keeps switching the phone back on while you wrestle with it. More later . . .

    John Noble - crwdns2934203:0crwdne2934203:0

    . . . and now I need to buy a new phone!!! the cable broke as I was trying to unscrew one of the top screws, so thanks! I FIXed IT but Good!!!!

    John Noble - crwdns2934203:0crwdne2934203:0

    Nate B's advice was key. I couldn't get the temperature of the display hot enough to break the seal with a hair dryer. A heat gun set to low speed and 550F (287C) got the display up to just over 130F, close to the 60C Nate mentioned.

    Matt C - crwdns2934203:0crwdne2934203:0

  7. iPhone 7 Screen Replacement, Separate the display: crwdns2935265:07crwdnd2935265:01crwdnd2935265:02crwdne2935265:0 iPhone 7 Screen Replacement, Separate the display: crwdns2935265:07crwdnd2935265:02crwdnd2935265:02crwdne2935265:0
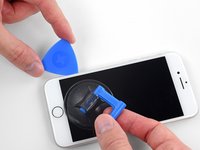
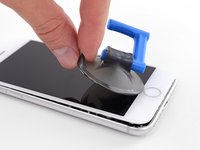
    • Apply a suction cup to the lower half of the front panel, just above the home button.

    • Be sure the suction cup does not overlap with the home button, as this will prevent a seal from forming between the suction cup and front glass.

    Even with using high heat from a blow dryer, I had to put the suction cup over the home button or the bottom edge wouldn’t lift at all. That waterproof adhesive is incredibly strong.

    Aaron Soderholm - crwdns2934203:0crwdne2934203:0

    As others have said, this part really stinks, but it’ll work if you keep trying. Agree with multiple rounds of hair dryer on high (did about 60-90s each time), and with having to out the suction cup over the home button. You don’t need a big gap to pry it open - it’ll be slight …

    Johnny Emrica - crwdns2934203:0crwdne2934203:0

    Patience is the key here. Expletives and patience. Like previous comments say, putting the suction cup over the home button (I used packing tape to maintain the seal) will allow you to apply force to the proper location to separate the screen. Good luck!

    J Rawlinson - crwdns2934203:0crwdne2934203:0

    Get a suction cup pliers. It’ll make this part fun

    Bradley Steiner - crwdns2934203:0crwdne2934203:0

    iSclack EVO opened the iPhone easily even without heating with no fear of accidentally over-opening it like with a simple suction cup.

    Matti Haveri - crwdns2934203:0crwdne2934203:0

  8. iPhone 7 Screen Replacement: crwdns2935265:08crwdnd2935265:01crwdnd2935265:03crwdne2935265:0 iPhone 7 Screen Replacement: crwdns2935265:08crwdnd2935265:02crwdnd2935265:03crwdne2935265:0 iPhone 7 Screen Replacement: crwdns2935265:08crwdnd2935265:03crwdnd2935265:03crwdne2935265:0
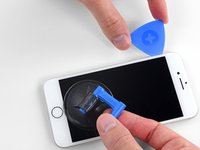
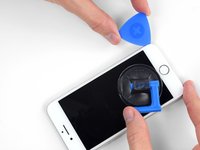
    • Pull up on the suction cup with firm, constant pressure to create a slight gap between the screen and the frame.

    • Insert an opening pick into the gap.

    • The watertight adhesive holding the screen in place is very strong; creating this initial gap takes a significant amount of force. If you're having a hard time opening a gap, apply more heat, and gently rock the screen up and down to weaken the adhesive until you create enough of a gap to insert your tool.

    The screen on my phone was so broken, a suction cup did not work, so I softened the adhesive with a blow dryer and used a Jimmy to carefully pry open the phone from the bottom just enough to slip a pick in.

    charguy - crwdns2934203:0crwdne2934203:0

    Just completed a smashed screen replacement, this is probably the most time consuming part. Used packing tape to cover the screen to help create a suction surface (had to replace it a couple times because it pulls away after a purple good pulls ) Used consistent heat for about 5 minutes, then stuck a pick in the tiniest opening… and pry pry pry!

    Brian Gill - crwdns2934203:0crwdne2934203:0

    I failed at this step. No amount of heating, pulling, and rocking opened up enough of a gap to slip in even a knife let alone the blue plastic tool. That's with a phone that has an undamaged screen - just trying to replace the battery. Apple won this round :(

    Michael Sherman - crwdns2934203:0crwdne2934203:0

    Be really careful here. I placed a sucker to the front and rear to help lever off the screen. However, the whole thing came away much easier than I anticipated and I ripped the front part completely away from the rear, tearing all three connector cables. New iPhone required.

    Chris Wood - crwdns2934203:0crwdne2934203:0

    Note that the opening pick they show here does not appear to come with the kit, which is a bummer! The plunger, the mini blue crowbar thing, these are too thick. I ended up using a really thin guitar pick.

    Johnny Emrica - crwdns2934203:0crwdne2934203:0

    Following careful methods can mostly preserve the seal and reusable. Won’t be as water tight but probably still pretty good.

    Bottom edge is pull up with suction + separating tool. Use small precision scissor to cut any tape that gets overly stretched upon initial opening.

    - For the 2 long edges, use an exacto knife to separate the seal from the screen. This keeps the tape on the chassis. Go slow along the long sides. Becareful to avoid scratching the paint on underside of the screen’s edge.

    - Top corners have a thick sealed tape. Best to just use separating tool to twist it open.

    In summary, top and bottom edge use separating tool. Side long edges can use exacto knife to gradually gently separate the seal from underside of the screen’s edge.

    Howard - crwdns2934203:0crwdne2934203:0

    4 picks and an exacto knife, plus 45 minutes later, I finally got it to open! Thanks tor the tip!

    Cat - crwdns2934203:0crwdne2934203:0

    Intact screen, check. Tool kit, check. Hair dryer hot enough to make the phone too hot to touch, check. Following all instructions, check. Screen still in place and refusing to come off, check.

    I heated, reheated, pulled and pulled. I simply could not get it off. Worked at it for an hour and a half, and I’m not a small guy. Yes it is hard to hold, but could get a grip. Just could not get it to budge. Off to the iPhone repair shop tomorrow. Anybody want to buy a repair kit and replacement battery?

    Jim Meyers - crwdns2934203:0crwdne2934203:0

    After struggling for 30m, I looked up some alternate methods and found this helpful:

    https://www.youtube.com/watch?v=25zAK5mG...

    - I used a utility knife and pried up right under the home button

    - the angle matters! I was trying to go too far down before going in. The top surface of the phone is rather thin, so you go in after barely getting under the chassis lip

    - tilt utility knife left to right once you’ve got it under to work it in

    - leave the utility knife in, and now add that pick

    Jared Wilk - crwdns2934203:0crwdne2934203:0

    Pro-tip: don't be an idiot like me. Instead, remove the screen protector you have on the phone before applying the suction cups. Derp.

    hunter.geofizz - crwdns2934203:0crwdne2934203:0

    I struggled with a hair dryer at first and a singular suction cup. However, I tried putting packing tape on the spot where I put the suction job (even though my screen isn't cracked) and I was able to do it first try with ease. Definitely recommend packing tape.

    Alessio Toniolo - crwdns2934203:0crwdne2934203:0

    After successful screen replacement, returning to give my thanks here. Excellent tips from you all - if you’re using force, you’re doing it wrong. Heat, very very gentle exact-o knife barely down then fully under the screen below the home button … perfect. Slow and patient around the upper corners, and don’t forget to heat there as well! Thank you all!

    dantegd - crwdns2934203:0crwdne2934203:0

    The problems with this step are (1) not having three hands and (2) managing to hold the phone in a way that doesn't put reverse pressure somewhere else on the screen. Exacto knife was the best tip. It's a little dangerous. On a misstep you may scratch the screen or jab yourself, but it's what got me in.

    thewrytstf - crwdns2934203:0crwdne2934203:0

    sorry, could not lift off the display any nano-meter even after applying enough force I think and heating it up. need to visit a store.

    Andi Tony - crwdns2934203:0crwdne2934203:0

    I used a razor blade and plenty of heat, and it somehow worked like a charm at the cost of me cutting myself. Definitely be careful when doing this, I used the razor blade on the left side of the iphone then wedged in a small screwdriver and then used the pick to cut the rest of the material away.

    Sharaf Kazi - crwdns2934203:0crwdne2934203:0

  9. iPhone 7 Screen Replacement: crwdns2935265:09crwdnd2935265:01crwdnd2935265:03crwdne2935265:0 iPhone 7 Screen Replacement: crwdns2935265:09crwdnd2935265:02crwdnd2935265:03crwdne2935265:0 iPhone 7 Screen Replacement: crwdns2935265:09crwdnd2935265:03crwdnd2935265:03crwdne2935265:0
    • Slide the opening pick up the left edge of the phone starting at the lower edge and moving towards the volume control buttons and silent switch, breaking up the adhesive holding the display in place.

    • Stop near the top left corner of the display.

    • Do not try to pry the top edge of the display away from the rear case, as it is held in place by plastic clips that may break.

    My Plektrum worked ok, but the edges broke off a bit towards the end

    griffin.weber - crwdns2934203:0crwdne2934203:0

  10. iPhone 7 Screen Replacement, Screen information: crwdns2935265:010crwdnd2935265:01crwdnd2935265:01crwdne2935265:0
    • There are delicate cables along the right edge of your iPhone. Don't insert your pick here, as you may damage the cables.

    I was trying to replace my battery, and accidentally cut one of the cords on my screen. I marked my pick, so i don't know how it happened.

    Gib Jeffries - crwdns2934203:0crwdne2934203:0

  11. iPhone 7 Screen Replacement: crwdns2935265:011crwdnd2935265:01crwdnd2935265:03crwdne2935265:0 iPhone 7 Screen Replacement: crwdns2935265:011crwdnd2935265:02crwdnd2935265:03crwdne2935265:0 iPhone 7 Screen Replacement: crwdns2935265:011crwdnd2935265:03crwdnd2935265:03crwdne2935265:0
    • Re-insert your tool at the lower right corner of the iPhone, and slide it around the corner and up the right side of the phone to separate the adhesive.

    • Don't insert your pick more than 3 mm, as you may damage the display cables.

    No pick in the kit you sent me.

    Ted Cooper - crwdns2934203:0crwdne2934203:0

  12. iPhone 7 Screen Replacement: crwdns2935265:012crwdnd2935265:01crwdnd2935265:02crwdne2935265:0 iPhone 7 Screen Replacement: crwdns2935265:012crwdnd2935265:02crwdnd2935265:02crwdne2935265:0
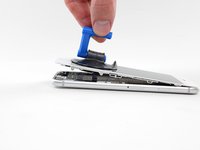
    • Gently pull up on the suction cup to lift up the bottom edge of the display.

    • Do not raise the display more than 15º or you'll risk straining or tearing the ribbon cables connecting the display.

    • Pull on the small nub on the suction cup to remove it from the front panel.

  13. iPhone 7 Screen Replacement: crwdns2935265:013crwdnd2935265:01crwdnd2935265:03crwdne2935265:0 iPhone 7 Screen Replacement: crwdns2935265:013crwdnd2935265:02crwdnd2935265:03crwdne2935265:0 iPhone 7 Screen Replacement: crwdns2935265:013crwdnd2935265:03crwdnd2935265:03crwdne2935265:0
    • Slide an opening pick underneath the display around the top left corner and along the top edge of the phone to loosen the last of the adhesive.

    I did end up using just a smidge of IFIXIT adhesive remover along the edge before opening and that seemed to really help

    Karen Flowers - crwdns2934203:0crwdne2934203:0

    I have been using the pointed tweezers to pull the adhesive strands apart and out as the display comes off.

    Adam Yavner - crwdns2934203:0crwdne2934203:0

    This bit was awkward as to get a good grip I kept inadvertently switching the %#*@ phone on!

    wendyhoward - crwdns2934203:0crwdne2934203:0

  14. iPhone 7 Screen Replacement: crwdns2935265:014crwdnd2935265:01crwdnd2935265:02crwdne2935265:0 iPhone 7 Screen Replacement: crwdns2935265:014crwdnd2935265:02crwdnd2935265:02crwdne2935265:0
    • Slide the display assembly slightly down (away from the top edge of the phone) to disengage the clips holding it to the rear case.

  15. iPhone 7 Screen Replacement: crwdns2935265:015crwdnd2935265:01crwdnd2935265:03crwdne2935265:0 iPhone 7 Screen Replacement: crwdns2935265:015crwdnd2935265:02crwdnd2935265:03crwdne2935265:0 iPhone 7 Screen Replacement: crwdns2935265:015crwdnd2935265:03crwdnd2935265:03crwdne2935265:0
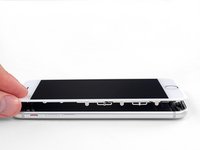
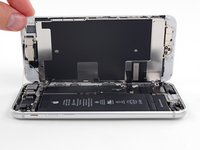
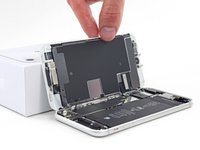
    • Open the iPhone by swinging the display up from the left side, like the back cover of a book.

    • Don't try to fully separate the display yet, as several fragile ribbon cables still connect it to the iPhone's logic board.

    • Lean the display against something to keep it propped up while you're working on the phone.

    Nach RECHTS klappen - nicht nach links!

    Manfred Wachtel - crwdns2934203:0crwdne2934203:0

    Als ich das Flachbandkabel auf der rechten Seite sah, hab ich mich auch gefragt, ob die das mit nach Links klappen ernst meinen, und das „Buch“ lieber auf japanische Art nach rechts aufgeklappt. Das sollte dringend in der Anleitung korrigiert werden!

    Sebastian Plickert - crwdns2934203:0crwdne2934203:0

    “Up from the left” means lift up the left side.

    Which is the same as folding to the right.

    “Like the back cover of a book” explains it even more clearly.

    Maybe it gets lost in translation?

    Nick Shtangey -

    Fold to THE RIGHT - not to the left!

    Jim Glenys - crwdns2934203:0crwdne2934203:0

    When I saw the ribbon cable on the right side, I also wondered if they were serious about folding it to the left, and the "book" would rather be opened to the right in the Japanese way.This should be corrected urgently in the manual!

    Jim Glenys - crwdns2934203:0crwdne2934203:0

    Hi Jim, the display opens from the left side, toward the right side. It should look like the back cover of a book. Hope this helps. Good luck with the repair!

    Adam O'Camb -

    DO NOT LAY THE TWO HALVES FLAT!!! There is a reason why the third photo shows the screen half leaning against a box! This really needs to be a warning in addition to the one about not separating the display.

    Mangled Jargon - crwdns2934203:0crwdne2934203:0

  16. iPhone 7 Screen Replacement, Battery Disconnection: crwdns2935265:016crwdnd2935265:01crwdnd2935265:01crwdne2935265:0
    crwdns2935267:0crwdne2935267:0
    Tri-point Y000 Screwdriver
    $5.99
    crwdns2942207:0crwdne2942207:0

    Ahhh shoot! accidentally ordered tri-wing vs tri-point (must have just looked for y000).. It seems they only did this to annoy repair folks because not everything is tri-point on the phone...

    Steve - crwdns2934203:0crwdne2934203:0

    These screws just spin for me. They don't back out, but the heads aren't stripped either. I've tried applying backpressure to help lift the screws, but no luck

    Jeff Hurst - crwdns2934203:0crwdne2934203:0

    The Y000 took out one of the screws but not the other 3. I even tried the PH000 as suggested but nothing.

    dbright - crwdns2934203:0crwdne2934203:0

    What driver do I need to remove these screws i’m stuck

    Nasser Nader - crwdns2934203:0crwdne2934203:0

    i cant use, the Y000 it isnt working.

    joscarlos91 - crwdns2934203:0crwdne2934203:0

    What if I stripped a screw what do I do??

    Jacob Ramos - crwdns2934203:0crwdne2934203:0

    Yep, only the 2.4mm came out, other 3 won’t budge, and worried I’ve stripped the heads. Anyone got any ideas?

    Stephen Babbage - crwdns2934203:0crwdne2934203:0

    It’s the screwdriver bit that is the problem. I had the same issue with 2 Y000 bits not grabbing the screw properly. I fixed it by using a small 3 sided file to slightly grind the groves in the Y000 bit just a bit deeper. Then the bit worked like a charm on these screws.

    Jim Staples - crwdns2934203:0crwdne2934203:0

    Use Y000 on all 4. U have to be very sensitive on the 1.2mm screws. Put the bit in the screw, put the left pointing finger on top of the screwdriver and turn the driver carefully to the right until you feel a “bump”, thats the trick :-), then you are able to screw the screw out.

    Magne Eivindson - crwdns2934203:0crwdne2934203:0

    For me the key here was a LOT of downward pressure to ensure the Y000 bit caught in the screw. Not sure i can describe how much exactly, but is was significant. Otherwise the bit would not catch.

    Erik Fredriksen - crwdns2934203:0crwdne2934203:0

    What do I do if I Stripped one of them?

    Adam Corral - crwdns2934203:0crwdne2934203:0

    Can’t get them removed what to do ?

    cowling_luke - crwdns2934203:0crwdne2934203:0

    Managed to get the central one out. The upper one won't move, the lower one I've popped out with some force. This allows you to rotate the cover enough to unplug the various bits. Not ideal, but works. I've tried applying a lot of pressure, using the tighten/ loosen method, but the heads have just got mashed… no wonder Samsung are now No1, sigh…

    jimpoolio - crwdns2934203:0crwdne2934203:0

    You need to be careful when just rotating the cover as you can accidentally slice through the two black antennas! You only need to nip them…As you can tell I have done this in the past :/

    Kyle Webb -

    The first, longer screw came out fine, but the other three wouldn’t budge, regardless of more/less pressure or a slight angle or anything. I finally filed down the tip of the Y000 bit ever so slightly, and then it worked. Hope this helps someone.

    Harmony - crwdns2934203:0crwdne2934203:0

    Filing down the bit worked for me. The tip about putting an index finger on the end of the screwdriver handles and then turning gently until it clicks into place was very helpful! Using these 2 tips I didn't need much downward pressure. Screws are out in a few turns.

    Chris Bennett - crwdns2934203:0crwdne2934203:0

    If you can’t get the bit to grip the screw properly, you can use a little bit of the water-proof sealing between the bit and the screw. That worked for me. Hope this helps anyone.

    jvalaamo - crwdns2934203:0crwdne2934203:0

    Mine came out easily. I placed the screws in the area where the bit goes in my kit so I can keep track.

    Gina Torres - crwdns2934203:0crwdne2934203:0

    I used a bunch of medicine cups to track my screws. You need like 12 if you want them all in cups. I ran out. There are so many different sizes that literally vary by 1mm. The tolerances on these things are tight.

    Ray Bieze - crwdns2934203:0crwdne2934203:0

    I use a 28 day pill box and keep every screw separate and reburn to exact slot because they all vary in length, width and can really damage u phone if too long and nt secure if to small.  use a magnetised screwdriver,  or make the cheap freebees magnetic for a short period by rubbing it up an a magnet. lol

    scallyteacher - crwdns2934203:0crwdne2934203:0

    Absolutely ridiculous had to go get a different one just stupid

    mark golling - crwdns2934203:0crwdne2934203:0

    I couldn’t get the lowest one out and just turned the metal bracket out of the way and replaced battery.

    qwerty77x - crwdns2934203:0crwdne2934203:0

    Was able to get the outer bracket screws out using fine needle nose pliers 90 degrees straight down for the outer ones by pressing down a little and using medium gripping force. Had to take these out first before i could use tweezers on the middle one, for which I had to use tweezers to hold the screw, then rotating the bracket (not the screw) counter clockwise a few mm many times over to slowly unscrew it 1/32th of a turn at a time, repeat. (this loosened middle screw). Think ‘rotating bracket 3minutes/degrees counterclockwise at a time while holding screw in place.) You are gonna need really small/fine pliers and tweezers for this because the heads are countersunk into the bracket.

    Galen Wollenberg - crwdns2934203:0crwdne2934203:0

    The top screw in the step was much longer than 1.2mm. It has the same head as the 1.2mm, but different than the 2.4mm. It’s good to keep track of where they came from.

    All are so small that I thought I’d lost one, when it was still sitting in the phone.

    Mark - crwdns2934203:0crwdne2934203:0

    To help tell if the screw is turning, put a small dot from a marker on the head of the screws.  This helped me to know I wasn't just stripping the head.

    Darren Thibodaux - crwdns2934203:0crwdne2934203:0

    try heating the iPhone with a hairdryer or a bag of rice or about 60 degrees in an oven for 3 minutes . It has worked for me. If the screws don’t come out while hot the will come out as the iPhone cools.

    David Howard - crwdns2934203:0crwdne2934203:0

    A small tapered triangle file using moderate pressure did the trick for me.

    Jack - crwdns2934203:0crwdne2934203:0

  17. iPhone 7 Screen Replacement: crwdns2935265:017crwdnd2935265:01crwdnd2935265:01crwdne2935265:0
    • Remove the lower connector bracket.

    my battery cable connector was stuck to the bottom of this metal bracket plate so be careful when you lift it off

    Josh Martin - crwdns2934203:0crwdne2934203:0

    This may have been intentionally done by Apple to make sure the battery gets disconnected before any other connector is disconnected. So always make sure to disconnect the battery before disconnecting and reconnecting the connectors for the display.

    Oscar Moreno - crwdns2934203:0crwdne2934203:0

    So…I forgot to put this bracket back on when reassembling. Now I’ve adhered the display to the case and don’t have another adhesive strip…so I’m wondering: what purpose does this bracket serve? The phone is powering on and seems to work okay.

    Am I going to run into trouble with this bracket missing?

    Ian Fritz - crwdns2934203:0crwdne2934203:0

    Well, that didn’t last long. The phone shuts down without warning. So I guess that plate is important…

    Ian Fritz -

    I also forgot to put the battery shield in, and adhered the display. I’m tempted to leave it like that. However, your negative experience is a good data point telling me to not be cheap.

    Ordered a new adhesive , under $2 shipped from eBay.

    Yishai Sered -

    Thanks, Josh Martin! Mine was stuck too, so I lifted carefully.

    Cynthia Lamb - crwdns2934203:0crwdne2934203:0

  18. iPhone 7 Screen Replacement: crwdns2935265:018crwdnd2935265:01crwdnd2935265:03crwdne2935265:0 iPhone 7 Screen Replacement: crwdns2935265:018crwdnd2935265:02crwdnd2935265:03crwdne2935265:0 iPhone 7 Screen Replacement: crwdns2935265:018crwdnd2935265:03crwdnd2935265:03crwdne2935265:0
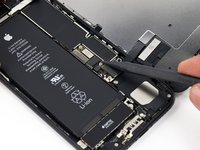
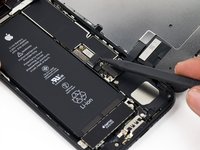
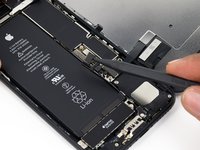
    • Use the point of a spudger to lift the battery connector out of its socket on the logic board.

    • Bend the connector cable up slightly to prevent it from making contact with the socket and providing power to the phone.

    Was kann passieren wenn man diesses Kabel vergessen hat zu entfernen `?

    Julian Eltrich - crwdns2934203:0crwdne2934203:0

    Reconnecting the battery poorly can cause the iPhone to appear to be properly powered and functional, but then suffer a reboot loop.

    I had difficulty after a screen replacement, and the Console app on my Mac showed that the ‘thermalmonitord’ process was throwing lots of errors from not getting any sensor readings from the battery. It would never charge past 1% and just kept rebooting.

    The contacts on this conector looked fine so even though I had reseated this connector several times already, I reconnected it very firmly using my thumb and a spudger to really press all the corners and middle and really gave it a good massage and then finally it showed the normal dead battery screen and started properly charging and eventually booted back up to normal functionality.

    It seems the battery has to be able to transmit data to the phone to say it’s not overheating or iOS will not allow any current into the battery to recharge it, and the kernel will panic from the null readings and just reboot over and over again.

    jason - crwdns2934203:0crwdne2934203:0

    In my case, the battery connector was attached to the bracket. We just left it connected bracket when we pryed it up.

    Dave Miller - crwdns2934203:0crwdne2934203:0

    Reconnecting the battery connector was a bit difficult in my case. The cable that comes out of the battery was a tiny bit too long, or that I placed the battery a bit too high (i.e., too close to the top of the phone). It took me several frustrating minutes of fiddling with the connector for it to sit right into the socket. I was not sure if that was connected correctly but, alas, the phone came back to life when it was turned back on.

    Tomoharu Eguchi - crwdns2934203:0crwdne2934203:0

    VERY IMPORTANT NOTE: Please READ the reply here by jason.

    It is very easy to knock off or nudge the little pins near the battery socket, see https://guide-images.cdn.ifixit.com/igi/... and https://guide-images.cdn.ifixit.com/igi/....

    Those pins are the data lines to extract battery info: temperature, charge, etc. If you accidentally nudge/knock off them the phone could appear to work normally, even for a few days. But then you will start getting wrong battery reads and then after that it may suffer a reboot loop. If you enter settings > privacy > analytics & improvements and you scroll down you will find panic errors from thermalmonitord that there are missing sensors (TG0B or TGXXX) and you will have to micro solder them. DO NOT NUDGE THEM and double check the socket connector when reconnecting the battery.

    PJM - crwdns2934203:0crwdne2934203:0

    After successful screen replacement, returning to give my thanks here. Excellent tips from you all! Careful removing the lower bracket - mine was stuck to this battery connector, which came up with the bracket. Luckily no cable or connector damage. Be careful. Thank you all!

    dantegd - crwdns2934203:0crwdne2934203:0

    after installing new ifixit battery kit, note the foam on the new battery is thicker than old apple one, managed to remove the old foam and swap to new battery connector, sheild plate now level

    Neil Mills - crwdns2934203:0crwdne2934203:0

  19. iPhone 7 Screen Replacement, Display Assembly: crwdns2935265:019crwdnd2935265:01crwdnd2935265:03crwdne2935265:0 iPhone 7 Screen Replacement, Display Assembly: crwdns2935265:019crwdnd2935265:02crwdnd2935265:03crwdne2935265:0 iPhone 7 Screen Replacement, Display Assembly: crwdns2935265:019crwdnd2935265:03crwdnd2935265:03crwdne2935265:0
    • Make sure the battery is disconnected before you disconnect or reconnect the cables in this step.

    • Use a spudger or a fingernail to disconnect the two lower display connectors by prying them straight up from their sockets on the logic board.

    • To reconnect these cables, press down on one end until it clicks into place, then repeat on the opposite end. Do not press down on the middle. If the connector is even slightly misaligned, the connector can bend, causing permanent damage.

    • If you have a blank screen, white lines on the display, or partial or complete lack of touch response after reassembling your phone, try disconnecting and carefully reconnecting both of these cables and make sure they are fully seated.

    To be honest you don’t really need to disconnect the display cables in step 15 or 16 to get the battery out. Just keep the suction cup on the screen to keep it propped up and to give the cables some slack. The only reason to take these cables off is that it’s a pain to apply the replacement display adhesive with those cables in the way. If you’re not re-waterproofing your phone just leave these attached.

    iPhone Display Adhesive Replacement

    minimalist - crwdns2934203:0crwdne2934203:0

    MAKE SURE you hold the top screen when dislodging the cable connections. I let the screen lie flat down and ended up tearing one of the cable connections, now my touch ID does not work at all! I’m going to have to order a whole new screen.

    Arjun Nagarajan - crwdns2934203:0crwdne2934203:0

    Don’t miss that SECOND CONNECTOR like I did. It will break very easily if not disconnected :(

    garrett peek - crwdns2934203:0crwdne2934203:0

    An earlier comment said to re-apply the suction cup to the right side of the display so that it acts as a stand when the phone is partially opened. That’s a great idea, and helps a lot for this step and the next.

    Mark - crwdns2934203:0crwdne2934203:0

    Hey – I broke one of these flex cables and I cant find them to purchase anywhere. Can somebody help me? It’s the LCD connector first and what is the second flex cable for? Thanks!

    Chan Ty - crwdns2934203:0crwdne2934203:0

    I broke the second (smaller) display connector flex cable.

    1) Is it replaceable or repairable?

    2) Where can I get the replacement?

    Ben Blom - crwdns2934203:0crwdne2934203:0

    Same happened to me. What solution did you find? Could you replace a part to make it work? Thank you!

    Viktoria -

    I replaced the screen and have ended up with a blank screen. Touch control seem to work (touch button works and I can shut down the phone by pressing power button for some seconds and then swipe left to right in the upper part of the screen). But the screen is blank. I’ve tried to disconnect and connect the two connectors in step 16 but with the same result (blank screen). What do I need to do?

    Thanks for advice!

    Bjorn - crwdns2934203:0crwdne2934203:0

    this point is the most important in the whole manual.

    Please pay attention not to strain the flex cables or they will end up breaking

    Jose Joaquín Sanz Iniesta - crwdns2934203:0crwdne2934203:0

    I should have been more careful - the second cable tore off.

    My own fault after having done this replacement about four times previously without any issues, I clearly got cocky and didn’t pay enough attention.

    Be VERY CAREFUL and remember to unplug those cables. Don’t skip steps.

    I’ve now had to order a replacement screen.

    Stuart - crwdns2934203:0crwdne2934203:0

    Echo minimalist’s comment here. Prop the display up and skip to step 19 to save time and remove risk.

    .A. - crwdns2934203:0crwdne2934203:0

    If you replace the screen and there is no display apply io propyl alcohol 99.9 & purse to both connectors on the screen and on the iPhone with a clean toothbrush and let them dry for 45 minutes and then fit the screen and reassemble the iPhone..

    It works for me . when I get a new screen I do t5his before fitting it.

    David Howard - crwdns2934203:0crwdne2934203:0

    I tried to save time by not removing the screen during battery replacement as some comment here, HOWEVER, I ended up having to use a little force to remove the battery and in the process broke the second, lower smaller cable, resulting in loss of home button function and needing to get a new screen. Next time I will follow these steps and completely remove the screen during a battery replacement

    chrislacey - crwdns2934203:0crwdne2934203:0

    I removed the screen and cable still got ripped during reassembling :(

    Viktoria -

    There is a critical fact missing from the steps here, for reassembly: That bottom (underlying) cable is longer than it should be. Loads of people are reporting that the Home button is dead after this repair, but the cables aren't torn. I'm pretty sure this is why. Here is a picture of the problem.

    When reassembling the phone, you must poke this cable back into the body of the phone while you bring the halves together, or you will crush, crimp, and destroy the cable.

    Gavin Stokes - crwdns2934203:0crwdne2934203:0

    I’m only reading your very useful comment now, after the exact thing happened to me and my cable got ripped during reassembling phone. Would you be able helping me naming this part, so I can look for a new one? Thank you very much!

    Viktoria -

    thanks gavin. ifixit should have included this piece of info.

    soupamanx -

    Can somebody help me with the name of the part that these cables belong to? The bottom one got ripped during my battery replacement, I need a new one but unsure what to look for.

    Viktoria - crwdns2934203:0crwdne2934203:0

  20. iPhone 7 Screen Replacement: crwdns2935265:020crwdnd2935265:01crwdnd2935265:03crwdne2935265:0 iPhone 7 Screen Replacement: crwdns2935265:020crwdnd2935265:02crwdnd2935265:03crwdne2935265:0 iPhone 7 Screen Replacement: crwdns2935265:020crwdnd2935265:03crwdnd2935265:03crwdne2935265:0
    • Remove the two 1.3 mm Phillips #000 screws securing the bracket over the front panel sensor assembly connector.

    • Some phones could be Y000. Apple started using Y000 for these at some point in the middle of the product's lifecycle.

    Has anyone had trouble getting these two screws off? I’ve been working on these for about 10 minutes and the LEFT screw wont spin. It seems like the little PH000 screwdriver bit won’t even grip it. (The one of the right comes off, no problem)

    It looks like I’ll have to pick this project up again with a screwdriver that will actually take off this piece.

    Makana Sylva - crwdns2934203:0crwdne2934203:0

    If you’re having trouble removing these screws;

    the screw on the right goes into a standoff screw that is screwed into the frame.The left one goes into the logicboard.

    If your phone is used most likely it has been repaired in the past and the person that repaired it put the screws in way too tight.

    If your phone is brand new And you know 100% it is then the problem is your screwdriver.Stop before you strip it completely and buy a better screwdriver (EBAY).

    If you already stripped the screw head take the phone to a shop before you break it.

    there are ways to get them out but truthfully it’s extremely dangerous and sometimes your better off quitting while you are ahead.

    Vegeta Barrett -

    The right screw kept spinning, tried different levels of force but didn’t work. I left the screw on and bent the shield to get to the cable.

    s h - crwdns2934203:0crwdne2934203:0

    I used a #1 flat head tip to loosen.

    Peter Pearson - crwdns2934203:0crwdne2934203:0

    I couldn’t get the two screws out either—used the correct screw tip and everything. Stripped the screw. Will now attempt to just keep the cable attached…..

    Therese Peffer - crwdns2934203:0crwdne2934203:0

    Use the PH000 and apply a little more force before spinning, should come right out!

    Sierra Scolaro - crwdns2934203:0crwdne2934203:0

    ^To anyone having trouble, this is the correct answer. Put the phone on a firm surface, align your driver carefully, press down hard, and twist. As long as your driver is approximately the right size, it’ll come out.

    Jeff Suovanen -

    the two screw i have are stripped and i have n way of getting either screws off whats my next bet

    Alexis Marie Colon - crwdns2934203:0crwdne2934203:0

    The PH000 bit is to large. I can’t get the screws out either which really sucks…now I have to put everything back together, find another bit that will work and try this again another day. Not impressed with IFIXIT’s attention to detail so far :-(

    Ryan Welborn - crwdns2934203:0crwdne2934203:0

    Using iFixit’s driver kit, I prefer a PH00 for this, which is larger than the PH000. If you think the PH000 is too big, something is wrong.

    Jeff Suovanen -

    I think part of the issue with the iFixit PH000 is that it is slightly too pointy. The PH00 fits better because the splines engage the slots of the screw before the point bottoms out. The PH000 tip bottoms out in the screw’s center point and the splines don’t engage as well. I have other PH000 tips that are more blunt nose and they work better than the iFixit bit.

    rcarswell - crwdns2934203:0crwdne2934203:0

    Use the J00 bit. Worked perfectly

    efazio588 - crwdns2934203:0crwdne2934203:0

    PH000 screwdriver didn’t work for any of these screws, or the barometric vent, or the taptic engine. It was too big. I had to use a different screwdriver from another kit I had.

    minimalist - crwdns2934203:0crwdne2934203:0

    I’d do this step before removing the ribbon cables by the battery connector. That way you can disconnect all of them at the same time.

    Ray Bieze - crwdns2934203:0crwdne2934203:0

    i used the little +-shape 30 mm screwdriver (not the Y…but the + shape).

    mason - crwdns2934203:0crwdne2934203:0

    the cable tore. is that it i need a new phone?

    patricia loving - crwdns2934203:0crwdne2934203:0

    You don’t need a new phone, but your selfie camera and phone speaker will not work. You can get replacements for that about $10.

    jack jones - crwdns2934203:0crwdne2934203:0

    Reconnecting this cable and coverplate took a good 20 minutes. O_O

    Nicole Crome - crwdns2934203:0crwdne2934203:0

    What can I do to remove the screw (I stripped it)

    Alex Vu - crwdns2934203:0crwdne2934203:0

    I also had issues to loosen up the screws, in two parts the right side up and the left side down, i think the PH000 is to pointy or something or its too hard for the srews of the iphone, i cannot take it off and know im regreting i bought i order all the way from Paraguay in south america and know so angry it doesnt work

    Martin Frutos, Nuñez - crwdns2934203:0crwdne2934203:0

    I skipped this step. Just be really careful not to pull on the screen.

    Takumi Arai - crwdns2934203:0crwdne2934203:0

    The guide says they changed these to the Y000 “at some point in the t middle of the product’s lifecycle”…

    That can’t be true, I have a *day one*, preordered iPhone 7, and mine had, unmistakably, Y000 screws!

    and also, I’m just faithfully following the guide here, but can anyone clarify *why* is is necessary to entirely remove the display AND the Taptic Engine at all? The battery seems accessible just fine… oh well

    PS- I’m doing this on an older backup iPhone 7. My iPhone 12 Pro just went berserk and stopped working completely a little over a year after I got it day one of its release… since the iPhone X I’ve only had easily breakable, overly sensitive phones. I’ve had every numbered iPhone except for the 8 (I got the X released at the same date) and the 11, and man, are these newer iPhones post X fragile!

    Cam F - crwdns2934203:0crwdne2934203:0

    This worked for me! As mentioned use PH000 and apply pressure and then unscrew the screws. They are tiny, adhere to a piece of tape so you don't lose them.

    Rosie J - crwdns2934203:0crwdne2934203:0

  21. iPhone 7 Screen Replacement: crwdns2935265:021crwdnd2935265:01crwdnd2935265:02crwdne2935265:0 iPhone 7 Screen Replacement: crwdns2935265:021crwdnd2935265:02crwdnd2935265:02crwdne2935265:0
    • Disconnect the front panel sensor assembly connector from its socket on the logic board.

    • This press connector should also be reconnected one end at a time to minimize the risk of bending.

    Das ist sehr mutig, das Kabel dort so zu strapazieren.

    Mich würde das Display daneben stellen und mit irgendetwas stützen, dass es nicht umkippen kann um Beschädigungen an dem Kabel zu vermeiden. Das reißt sehr schnell ein.

    Detlef Menninger - crwdns2934203:0crwdne2934203:0

    Is this the connector for the earpiece, as well? I did the screen replacement and everything worked, except now I can’t use my earpiece… I’m afraid I didn’t fully connect this particular portion.

    Victor Bui - crwdns2934203:0crwdne2934203:0

    @victorbui714 Correct, this is also the connector for the earpiece speaker. Check the flex cable carefully and make sure it wasn’t pinched or torn. Make sure the connector socket is clean (give it a blast with some compressed air if needed) and try reseating it. If that doesn’t help, you may want to remove the earpiece speaker and inspect the four springs on the back, and check that they’re intact and making good contact with the four circular pads on the flex cable. Give the pads a wipe with some IPA and try not to leave any skin oils on them. If none of that works, try replacing the entire flex cable/sensor assembly. Good luck!

    Jeff Suovanen -

    This is the only connector that is quite easily possible to put back in the wrong way. If you do so, the phone will just get into a continuous loop where it shows the boot screen, goes blank and then shows the boot screen again and again. If this happens, do not despair-just put it back in the right way.

    Roy Mathew - crwdns2934203:0crwdne2934203:0

    After putting together, I had a continuous loop boot up (as noted above). I saw articles where this (front panel sensor connection) was the reason. I disconnected this connection and the boot up loop stopped. I tried reconnecting several times but had the same problem (boot up loop). However, it turns out that I needed to apply extra pressure when installing until a heard a (faint) second click when pressing down. Note - before I was using the spudger to press the connection together, which didn’t do the job. I ended up using my finger to press harder to get it to click in. Solved that issue.

    Ed Scannell - crwdns2934203:0crwdne2934203:0

    The ribbon cable on this step is torn. Is this something that can be replaced? Is this only to the earpiece?

    John Daily - crwdns2934203:0crwdne2934203:0

    The ribbon cable on this step is torn. Is this something that can be replaced? Is this only to the earpiece?

    Sarah Valencia - crwdns2934203:0crwdne2934203:0

  22. iPhone 7 Screen Replacement: crwdns2935265:022crwdnd2935265:01crwdnd2935265:01crwdne2935265:0

    When removing the screen, be aware of the two tiny square black rubber grommets on the Penelope screw brackets that secure the screen. They can fall off very easily and be lost without even knowing it (it happened to me, but was lucky enough to find them).

    Guy Cooley - crwdns2934203:0crwdne2934203:0

    Sorry, I’m so unclear about when to replace the Adhesive tape. Should I put the iPhone 7 Display Assembly Adhesive at this step, or after I’ve replaced the battery?

    Victor Bui - crwdns2934203:0crwdne2934203:0

    @victorbui714 Battery first, then adhesive during reassembly, as it says in the instructions. ;)

    Jeff Suovanen -

    This is the 3rd screen iv put in my phone and everyone them bust at the top by the camera every time iv bought one of these screen idk if it’s the manufactures fault or what?

    trent bost - crwdns2934203:0crwdne2934203:0

    @trentb28922 Ouch! That’s not normal. Is your phone’s frame bent? Are you having to use a lot of force when you install the display?

    Jeff Suovanen -

    If the instructions are followed step by step, then adding the adhesive comes before changing the battery.

    If I had to do it all over again, I'd skip adding the adhesive, because you have to disconnect the battery, plus the two lower display connecters and the front panel sensor assembly connector. It was a nightmare trying to marry the components back together without disturbing the wire prongs, and I don't even want to talk about reinserting the tiny screws that kept twirling around on the tip of the screwdriver as well. It wasn't worth the time or aggravation!!

    If you decide to skip this step, just avoid using your iPhone near water.

    Rosie J - crwdns2934203:0crwdne2934203:0

  23. iPhone 7 Screen Replacement, Home/Touch ID Sensor: crwdns2935265:023crwdnd2935265:01crwdnd2935265:01crwdne2935265:0
    • Remove the four Y000 screws securing the bracket over the home/Touch ID sensor:

    • One 1.1 mm screw

    • Three 1.3 mm screws

    • During reassembly, be careful not to overtighten these screws, or your home button may not work.

    Why is the screw over top of the home button so difficult to get out… has anyone else experienced this..? This is twice now I've struggled to get that screw

    Brandon - crwdns2934203:0crwdne2934203:0

    The screw to the left holding the heatshield is never mentioned in this guide

    Beerbo - crwdns2934203:0crwdne2934203:0

    No reason to touch that screw unless you’re removing the shield—in which case, this step instructs you to remove it.

    Jeff Suovanen -

    The link that was mentioned takes you to the heat shield for iphone 7 plus. There’s a slight difference in the two models.

    Jason Glenn -

    To clarify: the regular/smaller iPhone 7 has no screw on the far left there. The 7 Plus does, but there’s no need to touch it unless you’re removing the large metal shield covering the back of the display. The procedure in the guide is correct.

    Jeff Suovanen -

    So I stripped the screw furthest to the left, how can i possibly remove it now? Can I just buy a new LCD shield and home bracket button and screw and will that work just fine on the new screen replacement? this stripped screw of mine is not coming out

    Bryan Ferrer - crwdns2934203:0crwdne2934203:0

    That should work, as long as you can still get the home button/sensor out without damage. For removing a stripped screw this size, I’d probably try supergluing it to the driver—or else just drill the top of the screw off and then remove the bracket, leaving the screw shaft embedded in the old display. Good luck!

    Jeff Suovanen -

    I used the same driver for all of these screws. Had to apply a lot of pressure before trying to unscrew it and it was fine.

    jessica harlow - crwdns2934203:0crwdne2934203:0

    This is wrong, the size you need is Y00 for the 1.1mm screws and Y000 for the 1.3mm one.

    Robert Clark - crwdns2934203:0crwdne2934203:0

    The heads on those screws are identical. I’ve never had any trouble using a Y000 for all of them. Use whatever works for you I guess.

    Jeff Suovanen -

    I’ve managed to strip the screw on the right hand side - not the far right, just right of the home button. Any ideas on how to get it out without glue (I don’t have any)

    Christie Ellen - crwdns2934203:0crwdne2934203:0

    My screwdriver is too big to get out the screws

    Coolinee Kerman - crwdns2934203:0crwdne2934203:0

    My eyesight isn’t what it used to be. That said, the replacement screen that arrived already had screws in the two outside positions. It took me a minute to figure this out when I was trying to install the home button. I couldn’t figure out why the screws weren’t going in. I thought the holes were filled or something… Nope. screws. Took them out and used them.. all good.

    Critter - crwdns2934203:0crwdne2934203:0

    My 7 had quite a bit of loctite holding these bad boys on. I stripped the one to the right of the home button and after using many “sentence enhancers” I was able to remove it using good tweezers and quite a bit of hand strength. I think that heating up the screws here is not an option because the cables lie underneath the plate and would probably get damaged from the amount of heat needed to loosen the loctite. Be patient here, and maybe have spare Y000 drivers because you may damage your driver getting these screws out.

    P Park - crwdns2934203:0crwdne2934203:0

    If your having trouble. I recommend you guys to buy the Y00o driver at amazon. It look golden. It works very will .

    Jonathan curz - crwdns2934203:0crwdne2934203:0

    Read instead of: “Remove the four Y000 screws”. “Remove the four Philips 00 screws”. Thats the case what occurs to me.

    Henk - crwdns2934203:0crwdne2934203:0

    Hi all, I’m really hoping someone will be able to give me a hand here, so the 1.1mm screw on top of the home button is stripped, and absolutely refuses to get out. I have tried the superglue technique mentioned and am worried it may have even glued the screw to the bracket. The only solution I can think of is to bend the home button bracket on either side of the middle screw, and use the bracket itself to remove the screw from the home button. I have ordered a new home button bracket either way, does anybody have any other ideas? Should I even attempt what I am proposing?

    Thanks in Advance.

    llamalulu42 - crwdns2934203:0crwdne2934203:0

    This worked for me take a Stanley blade and saw a grove across the screw with the edge ofcourse then heat the home button with hair dryer for a couple of minutes take the blade and press it into the groove you scored and turn it

    Paul -

    Does the ground strap go over or under bracket?

    Marcos Polos - crwdns2934203:0crwdne2934203:0

    over the bracket

    David Proudman -

    my home button does not work anymore! do you know why?

    josé - crwdns2934203:0crwdne2934203:0

    I magically used an X-acto knife tip to lift the edges of the home button screw to loosen it, and then turned it slightly with the X-acto blade tip in the screw slot to get it started, then the 000 screwdriver could finish it.

    Jim Pflasterer - crwdns2934203:0crwdne2934203:0

    I can’t stress how important it is to not overtighten the one on the button. I undertightened the center one at first in fear, and then tightened it more when I realized the button was loose. It ended up ruining the home button :(

    Brendon Parker - crwdns2934203:0crwdne2934203:0

    I was completely unable to get the screw directly over the homebutton off. I definitely stripped it some. Here’s some tips!

    1. If you are trying to unscrew and it skips instead of locking in—STOP. Apply more pressure, and then try again. Keep doing this until it comes out. If you continue turning without doing anything, you’ll strip the head of the screw and end up in a way worse situation.

    2. If your screw is stripped, first try putting a rubber band between the screwdriver and the screw to fill the gap. Duct tape has worked for many people as well.

    3. If you can’t get the screw directly above the home button off of the home button, I found this video that shows how to remove the home button without unscrewing the screw!! Bend the protective plate up 90° on both sides of the home button so the bent plate now fits through the home button hole. Then you can continue to

    the next steps and remove the home button with the plate still attached to it.

    https://www.youtube.com/watch?v=DTCQA-jn...

    silas - crwdns2934203:0crwdne2934203:0

    Don’t know if I did something wrong, but the home button no longer works. I’ll see if I can get someone to repair it.

    David Proudman - crwdns2934203:0crwdne2934203:0

    Found a software workaround, go to General > Accessibility > Assistive Touch. Now you don’t need the home button to work to use the phone

    David Proudman -

    I enabled assistive touch before making a go on this part. Screws are very small, easy to strip, and difficult to find if they go flying when you;re just trying to seat them properly.

    jack jones - crwdns2934203:0crwdne2934203:0

    VERY SMART!! I would not have thought of doing that. Depending on what my local repair guy charges I may be doing this myself, but in all honestly if the home button does not work on the new screen I'm getting another phone

    FallenAnjel -

    I’ve never been so stressed at trying to assemble something, O_O I should really get some glasses. I just reassembled all the screws, tried to not screw too tight, but how does one know? Maybe they could include “only twist 3 times, or 2…and maybe provide an ocular. Those screws are very very very tiny, and yes - be careful, because if you attach the right screw first, the left one can be catapulted if not secured and just “set” waiting to screw in. Thankful for the magnetism, but also had to find myself holding the screw in place while securing or else it would just attach to the screwdriver and come out. I'm TOTALLY looking forward to turning this ON after all assembled based on all the disheartened comments…..oy. Here. We. Go.

    Nicole Crome - crwdns2934203:0crwdne2934203:0

    There’s a small square rubber piece that has a screw hole in it. does anyone know if it goes over the home button? I missed it when I took it apart, but then , there it is on my table.

    MajorCouillon - crwdns2934203:0crwdne2934203:0

    It slips over one of the posts that the pentalobe screws in step 1 go through. Like a mitten over a hand. It’s incredibly hard to see where the slit is in that tiny rubber piece though.

    Jared Cook -

    What do you do if you overtighten the screws? I assume that is why my home button won't click

    Andrew Targett - crwdns2934203:0crwdne2934203:0

    How can you tell if you’ve over-tightened the screws or if the home button isn’t working for some other reason (other physical damage, shorted out, etc.)?

    Jared Cook - crwdns2934203:0crwdne2934203:0

    Die Schraube auf dem Home-Button ist wohl von Apple gewollt schwer zu entfernen. Man sollte sie daher zuerst herausdrehen; denn, ist die Unterlage unterm iPhone nicht hart genug und man drückt jetzt mit Kraft über den Schraubendreher auf die Schraube, wird der Home-Button hinausgedrückt, dabei verbiegt sich die Halterung und besonders schlimm, das eine untere Flachbandkabel reißt ab und der Home-Button ist unbrauchbar.

    Hartmut Kruse - crwdns2934203:0crwdne2934203:0

    So from those that do many repairs what do you think is the percentage of repairs in which the home button doesn't work after moving it to a new screen? 10%? 30%? 70%?

    FallenAnjel - crwdns2934203:0crwdne2934203:0

  24. iPhone 7 Screen Replacement: crwdns2935265:024crwdnd2935265:01crwdnd2935265:01crwdne2935265:0
    • Remove the bracket that secures the home/Touch ID sensor.

  25. iPhone 7 Screen Replacement: crwdns2935265:025crwdnd2935265:01crwdnd2935265:03crwdne2935265:0 iPhone 7 Screen Replacement: crwdns2935265:025crwdnd2935265:02crwdnd2935265:03crwdne2935265:0 iPhone 7 Screen Replacement: crwdns2935265:025crwdnd2935265:03crwdnd2935265:03crwdne2935265:0

    Well, I just damaged the home button connector in step 31. It is completely off the cable. What now? Can I buy this home button?

    LadyTech - crwdns2934203:0crwdne2934203:0

    I think you can not do it because your phone is not identify for new cable.

    Ali Alsaed - crwdns2934203:0crwdne2934203:0

    Best thing to do here is to NOT pry up on the connector, but to insert the pry tool on the left side until the connector is dislodged.

    Oscar Moreno - crwdns2934203:0crwdne2934203:0

    Good tip. Worked perfectly. Thx.

    Klaus M -

    That worked perfectly, thank you!

    Emily Kretschmer -

    use one pry tool to hold down, another to pull up.

    Christa - crwdns2934203:0crwdne2934203:0

    Anyone having difficulty reconnecting the two ? I’ve been trying for ages with no luck.

    Patrick McKenna - crwdns2934203:0crwdne2934203:0

    Same problem here - can reconnect them once the new LCD is being installed. Not sure what the trick is.

    edcraigslistaccount -

    Yes I had to fiddle with it for about 20mins to get it to finally click in place, just don’t apply too much pressure it doesn’t take much, if the alignment of the connector is right you should feel it snap into place. connect the cables together before you screw it in place, also raise the assembly up off the small locator pin until after you get the connectors together. Hope this helps

    Callum Cross -

    my Homebutton don´t work after I reconnect all, I checked all flex cables but it still dont work. what can I do?

    Dr. Dieter - crwdns2934203:0crwdne2934203:0

    so, i’m working on an iPhone 7. I was very careful not to break anything, I even bought an iOpener heat pack and applied it, and everything went off without a hitch, but when I tested the button, It does not work, would it help to reconnect it or something?

    Thanks a lot!

    Peter Keller - crwdns2934203:0crwdne2934203:0

    iPhone 7 home “buttons” can be really fussy. You’ll find some good troubleshooting tips here and here. Hope this helps!

    Jeff Suovanen -

    Broke my cable. The picture is not clear but you have to separate the thin silver end of cable from what looks like a black piece of rubber. I pulled up on it from under the black rubber like the picture shows and broke mine.

    bart.hutchings - crwdns2934203:0crwdne2934203:0

    This helped me SO much. Watch it before removing home button. Around 4:56ish

    https://youtu.be/An9kUJshRjA

    Gina Torres - crwdns2934203:0crwdne2934203:0

    Thank you so much!

    Jakob Kloppenborg -

    That’s a very good view. Thank you!

    johanbogg -

    Yup, this video helped me know what people were talking about. It worked and I didn’t rip or break anything…so far XD

    Christopher Villavicencio -

    Well, I just damaged the home button connector in step 21. It is completely off the cable. What now? Can I buy this connector ?

    dima shynin - crwdns2934203:0crwdne2934203:0

    I’m having a really hard time reconnecting the two together. Any advice?

    Ben Carter - crwdns2934203:0crwdne2934203:0

    I used the tweezers in step 21 to separate this connector. I squeezed the tweezers shut then put the flat edge of the points between the connector and slowly released the tweezers. The connector separated really easy.

    sschaffer - crwdns2934203:0crwdne2934203:0

    This tip worked a treat. Thanks!

    Admin4CBowra -

    any tips on reconnecting the connector. I assume it needs to be snuggly fit back in. I can’t seem to connect the two agin. Is it supposed to ‘snap’ together or should I use an adhesive?

    rwalz - crwdns2934203:0crwdne2934203:0

    Figured it out. I just needed to make sure I aligned them better when feeding the home button backthrough

    rwalz -

    勢い余ってケーブルを

    ブッちぎってしまいました(>_<)

    MARU - crwdns2934203:0crwdne2934203:0

    Hi, After fixing Iphone 7 Plus screen, my touch sensor is not working, What is the alternative .. Please help me . Thanks

    kalyan c - crwdns2934203:0crwdne2934203:0

    I found it quite difficult to reconnect the home button cable connector. After putting everything back together, my iPhone said there was an error with the TouchID. I disassembled the phone again, pried off the home button connector and found that I had not lined it up properly with the mated part. I had to push the connector upwards (toward the top of the phone) in order for it to seat properly. It almost felt unnatural to push the connector so far up to make it seat properly. I tested the phone again before reassembling and everything worked fine. If you break the cable on this home button piece, you can only buy a generic home button (about $8 here on Amazon) that will allow you to use the button for navigation but it will not work for TouchID (you will have to use your phone permanently unlocked or use a numeric code to unlock). The original home button is specifically mapped to your phone and cannot be replaced.

    awillimd - crwdns2934203:0crwdne2934203:0

    Yeah, I couldn't snap it back together either and after giving up a few times, probably the third time I came back to it, about the 10th time trying to line it up, the cable just totally snapped off....

    nlr_fairygirl - crwdns2934203:0crwdne2934203:0

  26. iPhone 7 Screen Replacement: crwdns2935265:026crwdnd2935265:01crwdnd2935265:02crwdne2935265:0 iPhone 7 Screen Replacement: crwdns2935265:026crwdnd2935265:02crwdnd2935265:02crwdne2935265:0
    • Carefully pry up the underlying connector and move it out of the way of the home/Touch ID cable.

    • It's very easy to damage your iPhone during this step. Work slowly and take care where you pry with your tool. If you damage the Touch ID hardware, it can only be replaced by Apple.

    • If the connector doesn't pry up easily, use a hair dryer or iOpener to heat and soften the adhesive securing the connector, and then try again.

    • Don't try to detach the connector completely—simply flip it up slightly so that the underlying home/Touch ID sensor cable can be removed.

    Make sure that you fold this cable out when fitting your replacement before you fasten the shield back down. I didn’t but managed to loosen 2 screws on the shield to get the cable out.

    chris_sawyer - crwdns2934203:0crwdne2934203:0

    If you have isopropyl alcohol on hand. You can use it to help weaken the adhesive temporarily when lifting up the adhered home button.

    Ben - crwdns2934203:0crwdne2934203:0

    Just one tiny drop of isopropyl alcohol or it will reach the lcd screen.

    Stefano Restuccia -

    Heat is absolutely vital during this step. Care should be taken and you should work very slowly. A new playing card will be useful in separating the ribbon from the device, using heat periodically to soften the adhesive as you go along. The ribbon cable changes size between the connector and the button, creating a weak area that can begin to rip if stressed. Use a card flat against the frame to slowly separate the cable from the frame.

    Benji - crwdns2934203:0crwdne2934203:0

    The isopropyl alcohol did the trick for me; all it takes is for you to dip the prying tool in a bit of the alcohol and the rest is magic. I did not have to apply heat and I was able to remove the home button from the original screen to transfer it to the new screen without any issue! Be careful, go slow, don't force things, and when it doubt view and review the video and instructions!

    Lemuel Gonzalez - crwdns2934203:0crwdne2934203:0

    Alcohol or Ifixit adhesive remover is the trick. I used the tweezers to dip in the remover and just a smidgen is all you need, start on the connecter side and work towards the button. - On reassembly, I kept the screen protector on and just peeled it up enough to slide the button in, then used it to hold the button in place while I finished up.

    William Riggles - crwdns2934203:0crwdne2934203:0

  27. iPhone 7 Screen Replacement: crwdns2935265:027crwdnd2935265:01crwdnd2935265:01crwdne2935265:0
    • Heating the area around the home/Touch ID sensor will help soften the adhesive holding its delicate cable in place, making it easier to remove safely.

    • Flip the display assembly over. Use a hairdryer or prepare an iOpener and apply it to the lower edge of the display for about 90 seconds in order to soften up the adhesive underneath.

    If you don’t have that heating tool, a hair straightener n a T-shirt worked just fine for me

    www.tertlegerl - crwdns2934203:0crwdne2934203:0

    A hair dryer works well too. 2mins is all you need

    Mr Tegs - crwdns2934203:0crwdne2934203:0

    I did with a heat gun instead. I found the i opener not helpful.

    David Gordon - crwdns2934203:0crwdne2934203:0

    I need just 1 min with my hair drier, then the screen starts to pop and crackle

    Andrew Sims - crwdns2934203:0crwdne2934203:0

  28. iPhone 7 Screen Replacement: crwdns2935265:028crwdnd2935265:01crwdnd2935265:03crwdne2935265:0 iPhone 7 Screen Replacement: crwdns2935265:028crwdnd2935265:02crwdnd2935265:03crwdne2935265:0 iPhone 7 Screen Replacement: crwdns2935265:028crwdnd2935265:03crwdnd2935265:03crwdne2935265:0
    • Use an opening pick to gently separate the adhesive holding the home/Touch ID sensor cable to the back side of the display panel.

    It cannot be stressed enough that this is the one part of this repair that you can’t screw up. Anything else you’ll deal with during this repair can be easily replaced (The screen, and the sensor/microphone/camera assembly). Tearing this cable means an expensive trip to the apple store. or a very unhappy customer if you’re doing this for someone. Heat is your friend. I don’t even use a spudger or a guitar pick for this one, I use a new playing card to pull this up. Even with the card, you have to be careful. The edge of the playing card can nick the cable if you’re not careful to get it under the ribbon cable. If the adhesive isn’t soft enough for the card to get it up, apply more heat. Again, you can’t screw this step up. It’s all or nothing.

    Spartan99 - crwdns2934203:0crwdne2934203:0

    Thanks for the tip! worked great!

    Isaac Ham -

    Do you know what I need to do if I damage the cable?

    Hey hermano -

    Yes playing card is what I used too, worked very well. Just heat it up(I used a 3D printer bed for 30 seconds at 80°). Just go slow from right to left.

    cheap parts -

    Well, no visible damage but the home button won’t work. I contacted a local Apple Authorized Service Center to check options. Since I had personally replaced the screen assembly, they wouldn’t even look at it per Apple policy. They said they would jeopardize their Apple Authorization if they even looked at it. Seems like more of the “Right to Repair” problem to me. Frustrated, but at least I have the accesibility home button working.

    bandman - crwdns2934203:0crwdne2934203:0

    Make sure the home button screws aren’t overtightened; that often causes issues. If there’s any damage to the button cable, a repair shop with a skilled microsolderer can patch a new cable on and restore functionality. iPhone 7 home button not working after screen replacement? Worst case scenario, you can also buy a screen repair from Apple, and they’ll include a new home button. I am not a lawyer, but the response you’re describing from the AASP sounds way out of bounds. Good luck!

    Jeff Suovanen -

    I don’t know why this step does not include a major warning about it being by far the most challanging step. I started before reading the comments and most likely screwed my home button with it,

    I don’t know if it is a broken cable or if it was too much heat later…but I scratched the cable on the first try with the plectrum. It took lots of heat to soften the adhesive and then it worked WAY better for me to start removing the connector from the near side of the home button. And not, as shown, on the far side.

    Wish I had known that before - the homebutton ist not working anymore now (and it’s not the screws).

    Robert -

    Just keep in mind that this is a very delicate step that requires a lot of patience. the part is attached to the body of the phone so firmly and there is no gap to put the opening pick under. So the way I did it was applying a good amount of heat onto the part and not from behind. I did it constantly for 5 minutes, a few minutes at a time, then I pulled the connected up slightly (a little too much pressure on the pull and you will break the wire). Pull it constantly and If the heat has been enough to melt the adhesive, it should come off easily and slowly.

    ashkan eslami fard - crwdns2934203:0crwdne2934203:0

    Hi, a little thing to help : i heatened up and then insert a cutter blade to start. Work better

    Crasset Renaud - crwdns2934203:0crwdne2934203:0

    Okay the home button is connected, as touch id works, but I can’t get any motion out of it. I backed off the screws, but that didn’t help. What else can I try?

    kathwick2 - crwdns2934203:0crwdne2934203:0

    The home button on an iPhone 7 Plus doesn’t move at all. Anything you feel during normal operation is a small vibration from the Taptic Engine that tricks your brain into thinking the button is moving.

    markpetereit -

    Salve, vorrei un vostro aiuto, ho un problema con il tasto home (il tasto è originale preso dal vecchio display rotto) una volta sostituito il Touch ID funziona perfettamente (l’iPhone si sblocca e legge l’impronta digitale) il tasto invece no (il click per intenderci) cosa può essere? Grazie!

    bernabbo - crwdns2934203:0crwdne2934203:0

    I had to use the iOpener tool twice before the adhesive was soft enough to remove the cable with the pick.

    sschaffer - crwdns2934203:0crwdne2934203:0

    How do I get the home button out? I got the ribbon up.. just not sure how the button comes out

    Ash - crwdns2934203:0crwdne2934203:0

    Hi, i replaced the screen and home button, the home button was a bit difficult. When i turn on the Phone, touch id works fine but not home button function. Any idea ?

    Jim - crwdns2934203:0crwdne2934203:0

    More precisely, i was wondering if the home button could not work while touch idea does…

    Jim -

    Wow…I did a lot of praying during this step.

    tomnape - crwdns2934203:0crwdne2934203:0

    This was a very difficult step… I found using heat wasn't removing the adhesive for my home button. Found a video online that recommended using a playing card and a tiny bit of rubbing alcohol on the corner and slowly sliding it under. I was able to finally remove my home button using this tip.

    ryan pouliot - crwdns2934203:0crwdne2934203:0

    Heat via hairdryer applied for a solid 3 minutes worked for me.

    natjpollard - crwdns2934203:0crwdne2934203:0

    Thank the stars that I looked at these comments. I managed to do this and transferred the home button successfully. The pick is not good enough to do this job. The suggestion to use a new playing card helped. I also found that if you use a single edged razor to ply apart the bezel from the screen then when you apply heat with the heat gun the bezel will melt and bend a bit out of shape allowing you to use the playing card to lift the home button strip away from the bezel. The adhesive on the old home button strip was enough to stick it to the new screen bezel without having to buy new adhesive.

    David Gordon - crwdns2934203:0crwdne2934203:0

    Thanks for the tip on the new playing card and rubbing some isopropyl alcohol on the corner of the card! I also peeled back the metal plate on the broken screen to get that bracket out of the way for better access to the cable. After applying heat and slowly and steadily working up the cable with the card, the home button popped out in proper working order.

    Nick Nave - crwdns2934203:0crwdne2934203:0

    Given that the old screen was already broken. I cut away the part of the screen where the button is, this gave easy access to the side of the ribbon cable which made it simple to gently pry it up and separate it from the plastic case.

    Charles Hope-Lang - crwdns2934203:0crwdne2934203:0

    After successful screen replacement, returning to give my thanks here. Excellent tips from you all - if you’re using force, you’re doing it wrong. All tips about direct heat, new playing card, bending back the metal bracket on the broken screen, screen protector to hold the replaced home button in place … perfect. Slow and patient, heat and almost no pressurel! Thank you all!

    dantegd - crwdns2934203:0crwdne2934203:0

  29. iPhone 7 Screen Replacement: crwdns2935265:029crwdnd2935265:01crwdnd2935265:01crwdne2935265:0
    • Remove the home/Touch ID sensor assembly by lifting it through the front side of the display.

    • To reinstall, first feed the cable through the hole in the front of the display.

    • Your replacement part may come with an extra Y000 screw already installed right of the Home Button. Remove the unnecessary screw so that you can reinstall the home button bracket.

    • Follow this guide to install replacement display adhesive on your screen.

    True to this picture, the home button can only be removed (and put back in place) through the front of the LCD assembly.

    Talon - crwdns2934203:0crwdne2934203:0

    OHMYGOD! Thank. you for this! After ruining *three* displays while inserting the home button from the back, I finally saw this comment…

    In my defense I had no internet access through some of these replacements… but really, I’m sorry to say, this merits a MAJOR warning on the guide.

    Cam F -

    Very good comment Talon. That was the first thing I was looking for here. There should be a bullet point in step 24 - Carefully remove home button from front of display being careful not to damage cable.

    Tracey - crwdns2934203:0crwdne2934203:0

    Had an issue when putting the screen back on, the side where the cables attach would not sit flush. At first I thought the cables were pushing the screen up. Turned out to be the battery cable shield was just a fraction too far down toward home button. After loosening screws, nudging it up slightly and screwing back in, the screen sat flush as it should. In case anyone else has same issue.

    jbarry - crwdns2934203:0crwdne2934203:0

    Is there anything special about reassembling the "home" button ?

    I tried several times with several buttons but none works.

    Lambiel - crwdns2934203:0crwdne2934203:0

    must use original button

    Christa -

    My phone is no more turning on after I replace the screen, no reaction if I press home button or power button

    cheryl.iseli - crwdns2934203:0crwdne2934203:0

    Why doesn’t this tutorial also cover the earpiece assembly?

    James - crwdns2934203:0crwdne2934203:0

    This guide is missing the camera transfer and the stupid little black sticker on the earpiece assembly that causes the earpiece not to work if that sticker is not transferred. This guide is wholly incomplete

    Mason Schild - crwdns2934203:0crwdne2934203:0

    This guide is meant for the ifixit parts, not other third-party screens.

    Ben Carter -

    Since I bought the replacement screen from iFixit and it has NO camera and speaker part anymore, the replacement of those parts should also be in this guide.
    And, the replacement of those parts (camera, speaker, true light sensor, and aprox. sensor) is the most difficult!

    Hannes -

    James and @computermason—You’ll want to look up the correct guide for your repair, especially if you’re not using one of the kits for which this guide is designed. The guide for transferring all the smaller components is here.

    Jeff Suovanen - crwdns2934203:0crwdne2934203:0

    No home button functionality? I just watched a video on YouTube from two years ago saying that the iPhone 7 and 7+ have to be taken to an Apple repair center for the home button to work. Is this still the case? If so why didn’t you tell me this before I ordered this! Please confirm before I start warning everyone not to purchase from you!

    Gregory Haycock - crwdns2934203:0crwdne2934203:0

    @ghaycock If you’re replacing a screen, the home button will work fine as long as you carefully remove it from the old screen and transfer it to the new one, exactly as explained in the guide. The button itself can’t be replaced without help from Apple (which is why iFixit doesn’t sell home buttons for this model).

    Jeff Suovanen -

    @jeffsuovanen If you’re replacing a screen, the home button will work fine as long as you carefully remove it from the old screen and transfer it to the new one, exactly as explained in the guide. The button itself can’t be replaced without help from Apple (which is why iFixit doesn’t sell home buttons for this model).

    Jeff Suovanen - 06/11/2019

    Jeff Suoven-I bought a new home button from Ifixit for this phone (along with a digitizer assembly) and it doesn’t work.

    Jeff Steffens -

    One thing I don’t see mentioned is the replacement of the rubber gaskets that are on the pentalobe holes. The replacement screen did not come with these on it. I was able to remove them from the OEM screen, but there was no easy way to get them to adhere to the new screen. If they move just a little, you might not be able to properly thread the pentalobe screws. Worst case is that they fall into the body of the phone during this last step of re-assembly. At that point, you’ve already started to have the screen stuck to the adhesive, so you would need to redo the entire adhesive gasket.

    You can see the gaskets in this picture: https://d3nevzfk7ii3be.cloudfront.net/ig...

    Here they are near the new screen: https://drive.google.com/open?id=14FwpSB...

    Andre LeBlanc - crwdns2934203:0crwdne2934203:0

    Thank you! I was wondering what those things did, and even lost one but later was lucky enough to find it.

    Ben Carter -

    I saw one mention about those small gaskets in a guide and now I cannot find it. I was able to slip them off the old screen and onto the new one. I would think this is an important step to help seal those holes for the waterproofing. They should edit these screen replacement guides to include this step. Thanks for mentioning it in this guide.

    sschaffer -

    If your home button doesn’t work after transferring to the new screen you might have a faulty screen. I spent a lot of time chasing all the suggestions here, but eventually resolved the issue by installing a replacement screen.

    nigel - crwdns2934203:0crwdne2934203:0

    WARNING: When you reassemble the phone, the little screws… You have to be VERY careful to not put any pressure on them until they’re really well seated, otherwise you will flick the screws into another dimension… they’re so small they literally just vanish out of existence lol. I ended up losing two of the smallest screws, one per bracket, and everything seems fine so far.

    The glue/seal is also nearly impossible to get right. Just mash it down into the general area that it belongs if it gets stretched/twisted and can’t go in perfectly. Some glue is better than no glue, just assume that any repaired iPhone isn’t water resistant at all.

    Nicholas Tenney - crwdns2934203:0crwdne2934203:0

    The biggest issue I'm having now Is replacing the gasket that goes around the home button. The original one got stretched out and the new on is too thick to seat correctly into the hole without being exposed and potentially coming off of the home button after a while.

    Eric R Deshields - crwdns2934203:0crwdne2934203:0

    I ordered a replacement screen from ifixit, but contrary to the description it arrived without the ancillary parts attached. So I had to transfer the front camera & sensor assembly, and the lcd shield. In case anyone else needs to do this, be sure when transferring the lcd shield that the screen cable sits properly underneath it (ie as far up towards the top of the screen as possible) or else the rectangular block on the cable will foul the loudspeaker.

    If this happens, the bottom right corner of the screen will stand very slightly proud of the case, and you will end up with a pressure spot on the screen.

    See Pressure spot on iPhone after screen replacement..

    Neil Wilson - crwdns2934203:0crwdne2934203:0

    Well I transferred all the parts properly, but the front camera wasn’t working. Reseating it fixed the camera but then when I closed the screen it cracked. I backed out to the old screen which is held together by tape, but miraculously everything including the camera and Touch ID is fine. Better luck next time.

    jack jones - crwdns2934203:0crwdne2934203:0

    I did not realize that the much cheaper 3rd party replacement I purchased also required the further steps of removing and replacing front facing camera and speaker. I was pretty bummed initially as it looked intense…however i totally pushed through using another ifixit guide and saved $50. My only advice to a first timer would be get a $15 heat gun or the bean bag microwave thing, the hardest part is getting it open.

    Cramps Delight - crwdns2934203:0crwdne2934203:0

    The cable is more than fragile and immediately broke right off my phone! Mine is no good anymore, but I wanted to warn everyone else just one more time…BE SO SUPER GENTLE and PATIENT…and even then, I’m not totally convinced that it is possible!! I was doing so well, right up to the point when I got to the one part that only Apple can fix and that will totally ruin your repair!!! SHAT!!!

    Good Luck all!!!

    jenn ross - crwdns2934203:0crwdne2934203:0

    I don't understand whether I need to glue the ribbon back down on the new screen. I have not been sent any adhesive for it. The guide mentions replacing adhesive for the screen, but do you mean the home button ribbon itself? If so, what should I use?

    charlie B - crwdns2934203:0crwdne2934203:0

    I can’t get the home button to stay in place when reataching it to the phone. Anyone know what I’m doing wrong?

    johanbogg - crwdns2934203:0crwdne2934203:0

    The ribbon in steps 16 and 17, when reconnecting and sealing the phone, is really something to be careful with. I feel like I smooshed it in, and while the phone works after the replacement, I feel like the right side of the phone, near the power button, isn’t quite set in 100 properly. I wish I would have taken better note of how it looked prior to removing the broken screen. Hopefully, it will settle in better once the adhesive sets. At this point, however, the fact that I got through the process with what I would call 99% success is a win for me. Just be careful of the aforementioned ribbon when setting the new screen on.

    Mike K - crwdns2934203:0crwdne2934203:0

    So I put the home button onto my new screen and the touch ID works however, when you press down on the button to return home for example, it doesn’t work. Any ideas what might be causing this? I made sure not to tighten the screws too much when reinstalling.

    Hayden - crwdns2934203:0crwdne2934203:0

    The home bottom sensor cable does not plugin into the new screen, if put it back to old screen it plugin nicely and directly , but on the new screen it does not stay, it does not plug in the new screen, what to do?

    mohamed elzaiady - crwdns2934203:0crwdne2934203:0

    The comments suggest the home button is well stuck down.

    Does the home button need adhesive to stick it back onto the new screen? If so, what do you use/where do you get it?

    Thanks

    Andrew Murtha - crwdns2934203:0crwdne2934203:0

    Very disappointed. Front camera and home button not working. And overheating too. I would like a refund Ifixit.

    Xavi Rojas - crwdns2934203:0crwdne2934203:0

    Esta incompleto, falta el desmontaje de los elementos de la parte superior de la pantalla

    Alfredo Alvarez - crwdns2934203:0crwdne2934203:0

    Did this back in 2021 after using i fix it tutorial on replacing battery i accidentally cracked screen when trying to pry it up with suction device and using spudger which felt wasn’t best tool for the job.

    Maybe i didn’t heat up device enough to loosen adhesive enough, who knows it was the first time doing this.

    Screen alone much easier than a battery replacement, especially second time around after cracking screen had more awareness of job.

    They make good tutorials here always like fixing thins myself then paying more to have someone else do it.

    DJSan - crwdns2934203:0crwdne2934203:0

crwdns2915888:0crwdne2915888:0

To reassemble your device, follow these instructions in reverse order. Don't forget to reapply the display adhesive before reinstalling the display.

Take your e-waste to an R2 or e-Stewards certified recycler.

Repair didn’t go as planned? Try some basic troubleshooting, or ask our iPhone 7 Answers community for troubleshooting help.

crwdns2935229:0916crwdne2935229:0

Evan Noronha

crwdns2935283:002/05/15crwdne2935283:0

223,223 crwdns2915208:0crwdne2915208:0

crwdns2935297:0168crwdne2935297:0

crwdns2944067:0109crwdne2944067:0

When putting the screen back on will the device loose it's water-resistant properties?

Joseph - crwdns2934203:0crwdne2934203:0

Wondering this too.

Draydan -

It will for sure lose it's water-resistant properties. So, please replace the water-resistant adhesive before assembly.

Jojo -

Yes, but you can buy a new replacement seal for a few bucks. However, it is extremely thin and very sticky so its almost impossible to do it right the first time (imagine placing a needle thin sized rubber band covered in glue around the tiny ledge you phone screen sits on). I would suggest you buy two because it is likely you’ll need a second shot at it…because if any part gets misplaced and sticks to the wrong spot, it will not come off, and that “sticky rubber band” turns into this horrible stringy tar/chewing gum ring that is impossible to manipulate…fair warning… it will most likely be pretty water resistant even if you don’t add a new seal to it… its not a waterproof phone in the first place :)

jaicdc -

Yes it will lose the water-resistant abilities. It is very hard to seal it back to it's original state.

Alec - crwdns2934203:0crwdne2934203:0

Is there any supplier that sells the original adhesive for the edge of the phone so we can make it better? Or do we have to just wing it with some cut double sided tape etc?

Grant Ormsby - crwdns2934203:0crwdne2934203:0

The short answer is yes, there are suppliers who carry the adhesive. It can be difficult to obtain and may be tempting to go for a replacement from eBay or somewhere similar, but I advise to steer clear of unverified vendors. If you can get one from iFixit, I strongly recommend that you use them - especially if you're only purchasing one for a DIY project. If iFixit doesn't have them, you can get these from Union Repair as one option. http://www.unionrepair.com/replacement-f...

Joshua -

We do offer the replacement adhesive if you need it—I wouldn't recommend trying to wing it. By the way, the phone will work fine without replacing the adhesive (it just won't be as waterproof), so if you don't have the adhesive on hand, it's perfectly okay to finish your repair and close up your iPhone, and then replace the adhesive at a later date.

Jeff Suovanen -

The adhesive is sold here but its sold out, you can find it on eBay tho

Hernandez5827 - crwdns2934203:0crwdne2934203:0

I am curious about the home button transfer? transfer from old cracked to new screen and finger print will work? also I have read online forums using 3rd party screens for gens i6/i6s/i7 and doing an iOS update will brick and or make the finger print scanner unusable? Can anyone confirm?

Thanks.

hawaii4vr - crwdns2934203:0crwdne2934203:0

The issue with the Home Button not functioning and "bricking" the device was not from 3rd party displays. It was from shops not transferring the Home Button to the new assembly. During restore or update the device would deliver Error 53. Apple has since modified iOS to not do this, so it is no longer the concern that it was. As long as there is not anything wrong with your Home Button, it will be fully functional on your device after the new display is installed.

Joshua -

Keep in mind that while you are safe using third party screens, using a non-original home button will result in losing TouchID functionality.

Evan Noronha -

That home button cable is a bit tricky. I came at it from the top side of the home button with the pointy end of my spudger, and managed to pull up all of the adhesive. otherwise, this was a pretty straight forward swap.
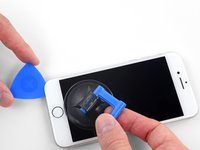
Bradley Breedlove - crwdns2934203:0crwdne2934203:0

Anybody having issues with the replacemnt screen flex putting pressure on back of the lcd when its put back together? I don't know if its a defect because its my first time!

Astralzombie - crwdns2934203:0crwdne2934203:0

Thats quite easy. Thats the ‘block’ on the bottom left of the screen. Make sure it aligns nicely.

Beerbo -

This guide feels incomplete without the disassembly of the smaller parts on the display assembly.

Sverre Siggerud - crwdns2934203:0crwdne2934203:0

I agree since these guides are intended for newer repair techs or DIY people that should have been added in

Don -

I agree with @Sverre Siggerud

gra_allax -

I agree it's missing a large portion of the work

Gaspard Leon -

tbh this is one of the worst guides on here. It goes about 30% of the way into the whole job. No instructions an removing backplate/shield, camera assembly or home button which are by far the trickier parts of this job. 4/10 could do much better!

gra_allax - crwdns2934203:0crwdne2934203:0

There are other guides that gives the directions on removing the other parts ..you just have to find the guide for each part ...the guide for removing shield plate pretty much covers it all

Jaye -

exactly! was in the middle of the job when realised the the guide was incomplete, had to guess by myself

victor maia -

I’m sorry to hear that! From what it sounds, your replacement part is actually the LCD and digitizer, not the complete screen, which is listed in the parts section. The screen part comes with everything pre-installed for easy replacement, while the LCD and digitizer comes with nothing installed and requires much more disassembly.

Arthur Shi -

I replaced the screen of iPhone 7 , after using couple of hours its opening & closing apps by itself .i restore it still didn't work if I restart it will work couple of hours then start again same issue .

Malik Adam - crwdns2934203:0crwdne2934203:0

Tip for anyone who is moving the home button to a replacement screen. The cable is stuck on the screen pretty good with adhesive, I found that an easy way to get it off is to use a very very small flathead screwdriver (I used the smallest one in the iFixit tool kit) and carefully pry the cable off starting where the little plastic pin pokes through the hole in the cable. Came right off and the adhesive was still stuck to the cable. Just don't puncture the cable.

Evan Smith - crwdns2934203:0crwdne2934203:0

STEP 9: WARNING IS STUPID.

WHO CARES if you break the plastic clips? You're replacing the screen which has NEW plastic clips.

STEP 14. DO NOT lay it down like an open book. The cables are likely to tear if you do this because they are very short and snug. I recommend placing a heavy object behind the screen to keep it propped up/open like a laptop screen.

STEP 15. CLEARLY IT IS NOT laying down like an open book. In fact not until step 19 does it look like it's laying flat like an open book.

To the above comments. Send it to Apple if you want the WATERPROOFING to stay intact. Of course you'll likely get a refurbished phone in return. Here's a novel idea. Don't get your phone (or any other electronics for that matter) wet.

paul bunions - crwdns2934203:0crwdne2934203:0

Thanks for the info. I was just thinking about Step 14 and if the cables would be long (or strong) enough. You answered my question ;-)

Clems -

You're right that broken clips might not matter if you're just replacing the screen—however, the warning in step 9 is necessary because this step (opening the phone) is a prerequisite for all iPhone repairs (not just the screen). I agree with you about the cables being too short in some cases to lay the display flat, and I've deleted the note about laying it down like an open book. Thanks for your comments!

Jeff Suovanen -

http://www.unionrepair.com/replacement-f...

@joshua, thanks for the link, that i much cheaper then in the Netherlands.

Btw how is the quality of the lcd screens for example?

Ron Schuts - crwdns2934203:0crwdne2934203:0

To whom ever posted this tutorial,

I think you explained well.Some people always have some type of negative feedback. There are other tutorials for removing the shield and etc. Just do a little research people. Also if warnings are put in place you best believe someone made that mistake. If you all have a problem with his tutorial you all go out your way and make one. Keep up the good work!

Kaila Freeman - crwdns2934203:0crwdne2934203:0

When I took off the home button, a small black square rubber piece fell out. while prying off the cable.

Can anyone tell me where this is supposed to go when I put the home button back on.

Joe in PA - crwdns2934203:0crwdne2934203:0

That is the button seal. Goes between the front screen and the button.

122654 -

You guys need to provide some instruction on the removal of the home button, its changed since the older phones.

Andrew spoelstra - crwdns2934203:0crwdne2934203:0

I work in a phone repair shop. We have had an on/ off problem for the 7/7+. Sometimes if you unplug the camera from the board and attach it to the new screen then back to the board it will boot loop. So we've taken the precaution to not unplug it. Do you know if this is a software or hardware problem? If so, which part of the software/hardware should we be more careful about when repairing?

The only way to stop the boot loop is to unplug the FF camera which puts the customer out of a selfie camera and makes the repair redundant.

Thanks

Marsha Brady - crwdns2934203:0crwdne2934203:0

I am experiencing this right now. I am currently trying to restore the phone for like the dozenth time when I came across this. As soon as it’s done this time I’m going to try unclipping the front camera assembly. Have you tried getting the phone out of the boot loop and then clipping the earpiece assembly in while it’s on the home screen? I know we aren’t supposed to be playing with the innards while its on, but desperate times…

Tom Kavarnic -

Sometimes--- there is a pressure point underneath the LCD on the right side of the screen when closing the iPhone 7 (where the bracket covers the cables under the LCD, not the proxy connector). It's been hit and miss. Some repairs can be done and there is no pressure point, then for others, it seems the chip is sitting on top of the metal bracket and causes a pressure point when closed. Has anyone else had this issue? What have you done to make sure it's not an issue 100% of the time?

aqnguyen87 - crwdns2934203:0crwdne2934203:0

The pressure point is because the chip is moved a little bit upwards to the phone when changing to a new screen. Try to relocate the chip 0,5mm-1mm further down on the screen and this will fix the pressure point occurring when closing the screen to the phone!

Erling Andre Saethervik - crwdns2934203:0crwdne2934203:0

please help

i have replaced the screen with another working screen and i opened the screen very slowly as i should without touching the right side cables of the screen than i removed the bracket from the bottom of the lcd connectors and removed the battery connector first than the lcd connectors and than removed the top connector by the camera…the problem is im having a black screen i reconnected the old screen and now same issues…what did i do wrong and how to fix this black screen…what could have i done…if i removed the battery connectors first….

sam - crwdns2934203:0crwdne2934203:0

Pk so i replaced and the screen and now working fine..but fromt camera does notvwant to work even after i changed thefkex cable…no bent no issues…what is the issue…i did reset still no front camera i did reboot power+volume down still same issue what did i miss??

sam - crwdns2934203:0crwdne2934203:0

What is the function of the 1.1 mm screw located in the plate securing the touch I/D sensor in position, the screw is located directly in the centre of the touch I/D sensor.

costadelsol

Neil Rodgers - crwdns2934203:0crwdne2934203:0

It holds the touchid sensor in place. Duh :p

Beerbo -

How To fix black screen when I touch home button screen will not light up and phone tells me to enter password

jordansm80 - crwdns2934203:0crwdne2934203:0

You really should have included the camera as well,

gocaps25 - crwdns2934203:0crwdne2934203:0

I am having issues with the home button swap.

I have replaced a damage screen from another damaged iPhone.

One iPhone had hardware issues that made the phone basically useless (no service, ever, could not restore firmware from iTunes) this device had a perfect screen.

The other iPhone had a shattered screen.

So I am replacing the shattered screen with the screen from the other iPhone, and swapped the home buttons.

The phone with the now new (uncracked) screen doesn't recognize the home button at all. Nor does it tell me that I have the wrong home button when I purposely connect the wrong home button.

I took the same home button and put it with the other iPhone and the iPhone rejects it (point is, it detects the home button). The other iPhone doesn't even detect it.

cadearmstrong - crwdns2934203:0crwdne2934203:0

Everything went well and smooth on installing screen, but when I started testing my iPhone it seems it has some sort of interference when using the front and rear recording camera. All my recordings come out with a pretty loud static and clicking noise on the recording . Is it possible that the screen is interfering with my Front and rear camera mic camera? Can someone help me out please?

lmatiasjr - crwdns2934203:0crwdne2934203:0

Worked really well, make sure that you really heat up the home button adhesive, if you lose 1 or 2 screws per bracket, it’ll still be ok BTW

Coolinee Kerman - crwdns2934203:0crwdne2934203:0

Bought a replacement kit that not only left out the splunger, but gave my three unmarked screwdrivers. (all I needed was the pentalum ) stripped the screws, not even super glue could get them out. Utter failure .

MajorCouillon - crwdns2934203:0crwdne2934203:0

Wanted to reply to my own text.My failed attempt had nothing to do with these in-depth directions , it had to do with my failure to purchase tools from the correct company.this sight has helped me repair my ps3 and offered countless other insights. I was just in one of those moods I’m sure most of us can relate to. Oh, and , excuse me while I do this….. AAAPPPPLLE!! Grrr

MajorCouillon -

Does automatic brightness work for you after replacing the screen with the iFixit part? Mine was working properly with the original screen, but auto-brightness doesn’t seem to work with the iFixit replacement.

AlexVaq - crwdns2934203:0crwdne2934203:0

Hey i tryed to fix my iphone 7 which had screen brokedown with a collision i think it can b a issue of some loose connection or someting boke out the phone is not responding to anything no display so vibration i tried to change it for too long i din’t even heat up what can b the issue will ut work agian plz reply im a student and cant aford to buy new phone or waste money on old one i alredy got its screen replaced but its noe working yet plz… help me out with a professional advice it will be gratefully

Thank you

jashandeep.0052@yahoo.com

Jashandeep - crwdns2934203:0crwdne2934203:0

Salve ,

mi spiegate perché quando sostituisco il gruppo display e lo vado a rimontare mi rimane sollevato sulla parte dei flat?

è come se non entrasse, eppure sembra tutto ok e ben posizionato.

Grazie anticipatamente della risposta e complimenti per la guida.

Riccardo Mazzoni - crwdns2934203:0crwdne2934203:0

Hi,

I swapped a broken Iphone 7 screen and everything seemed to work fine even fingerprint.. But the front camera did not work after the swap, so i installed a new one and a battery, and now camera still doesnt work, and there is a vertical black line in the screen. Someone knows what went wrong?

Jonez - crwdns2934203:0crwdne2934203:0

I have a strange problem. i had a iphone 7 with the audio ic problem, so got another working one with a cracked screen. I have just switched the board and button from the good one to the broken audio ic one. now fingerprint ID works fine, but i am getting no haptic at all from the button. the phone works fine. both phones had button haptic before the swap.

sam caspian - crwdns2934203:0crwdne2934203:0

sorted it, tried reconnecting the cables, no joy. in the end i swapped over the taptic motor, and its fine now. I also swapped out them tri screws for normal + ones from all my spare parts.

sam caspian -

Thank you!, Evan Noronha (and 8 other contributors). Using this guide, I was able to disassemble and assemble back the screen. I will keep the forum posted for any other problems.

Hariharan Hariharasubramanian - crwdns2934203:0crwdne2934203:0

If you tore the top ribbon cable for the camera and what not, can you stil replace the screen and it work?

Kate Godfrey - crwdns2934203:0crwdne2934203:0

Why are all of these “replacement” guides actually just disassembly guides? You always cut the instructions off halfway. This doesn’t show anyone how to replace anything, just how to remove the screen and other connected components. How much extra effort would it actually be for you to include the rest of the instructions? Like 5 more photos per guide?

Josh O'Brien - crwdns2934203:0crwdne2934203:0

I believe it’s possible to create your own iFixit guides.

I’ve never had an issue with this. I mean sure it’d be nice, but for such a prolific and constantly updated resource, I don’t see the point in complaining too much about it. I’ve never felt like they don’t give me enough to complete a repair.

Sam -

In terms of this particular guide, the only thing missing in my opinion is removing the front sensor flex cable, earpiece speaker and backplate, but since many displays come with those parts attached I can understand the exclusion. At the end of the day, a disassembly guide is all one really needs for these repairs since you can follow the instructions backwards to install the new part once the broken part is disassembled, so adding steps for that seems somewhat redundant.

Sam -

Is it possible to replace the display without the adhesive? Or is it absolutely necessary?

Bryan Young - crwdns2934203:0crwdne2934203:0

You can it just won’t have the water resistant seal that the adhesive provides

jonathan whittington -

A tiny drop of super glue holds the plastic camera holder in place

Paul O'Donohoe - crwdns2934203:0crwdne2934203:0

Anyone found a way of getting the 3 1.2mm screws out? (step 13) They just won’t budge, and I think I’ve stripped the heads… What now?

Stephen Babbage - crwdns2934203:0crwdne2934203:0

Excellent guide. Thank you very much

Larry Welch - crwdns2934203:0crwdne2934203:0

I replaced the screen using this guide, however now Apple Pay doesn't work. Has anyone else experienced this? Is there a fix?

Dave - crwdns2934203:0crwdne2934203:0

I’ve just replace my Girlfriends iPhone7 screen and now she doesn’t have an screen rotation. I may have got some of the screws mixed up. I read somewhere about a magnetic screw in the wrong place can cause this. Does anyone know which screw I might have got wrong?

Mike - crwdns2934203:0crwdne2934203:0

I just replaced my screen with an original one from an board fried iPhone. Now when on it says it won’t recognize the touch id and directly shows on screen the white button. I have checked twice and no clue why. Any help?

Juan Herrera - crwdns2934203:0crwdne2934203:0

Are y’all sure this fix guide is for the iPhone 7 because the screen in this guide has 3 ribbon cables 2 at the bottom and 1 at the top but the one I ordered only has 2 both being at the bottom so I thought they sent me the wrong one so I sent it back and ordered one from someone else and it had only 2 both being at the bottom so I’ve come to a conclusion that this guide is incorrect

jonathan whittington - crwdns2934203:0crwdne2934203:0

Nevermind I see it doesn’t have the front facing camera preinstalled

jonathan whittington -

The screen you ordered is a screen without the camera and the speaker. The third cable that you are looking for is that of the camera and speaker, which will need to be transferred from the original screen as well as the shield.

[deleted] - crwdns2934203:0crwdne2934203:0

I just ordered the correct one with the camera and speaker pre installed but what do you mean by the shield

jonathan whittington -

i just finished putting my new screen on but when i turned my phone on it said your home button may need service but i was sure not to over tighten the screws around the touch id sensor like it said not to… what do i do now???

awhitt23 - crwdns2934203:0crwdne2934203:0

Took my time with this one and the odds were in my favor….Nailed this slightly novice repair!!!!However I could have used the precut waterproof gasket ifix offers instead of the roll type ….

Bryant Trambaugh - crwdns2934203:0crwdne2934203:0

complete thanks to the cool ones at ifix…thanks yall

Bryant Trambaugh - crwdns2934203:0crwdne2934203:0

What exactly is meant by rocking the screen? I can’t lift this thing for the life of me.

Anthony - crwdns2934203:0crwdne2934203:0

I’m having a problem with the home button not working after I replace the screen. I’ve never had this problem with the lower models before. If over tightening the screws is the problem, how tight do they need to be?

Carson - crwdns2934203:0crwdne2934203:0

Salve vorrei un vostro aiuto, il tasto home (preso dal vecchio display rotto) una volta sostituto il Touch ID funziona perfettamente (l’iPhone si sblocca e l impronta viene letta senza problemi) il tasto invece no (il click per uscire dalle app per intenderci) cosa può essere? Grazie per l’aiuto!

bernabbo - crwdns2934203:0crwdne2934203:0

excellent guide, took me 2 hours, not just one. Fortunately i followed all the picky advice (eg I wrote down and taped and labeled each screw to my notepad as I went). Would have benefited from magnifying glass - did take photos of screw driver tips with other phone and magnify picture as very difficult to see tri-lobe Y000 vs pentalobe (both tiny, not inter-changable).

After 2 focused hours phone looks and works like new, but expect it is now NOT water resistant at all.

Douglas Newberry - crwdns2934203:0crwdne2934203:0

Hello everyone,

I did this fix on my iPhone7 and the whole process whent really well ! The previous screen were shattered and litterally unusable so I needed a new one. After replacing the screen and before sealing it, I tested it real quick and the screen were working like a charm (tested only on the emergency call keyboard on the unlock screen) so I decided that the test was sufficient to seal it.

But after sealing it, I decided to use it for real. To unlock it and configure it back to life (the shattered screen probably made me done weird stuff so the phone was blocked really hard), I needed to be connected to iTunes to restore it properly.

But here is where things went really bad : the phone is charging on a USB outlet but it’s not recognised at all when connected to a computer. So my phone is actually working but I cannot use it at all because I need to connect it to iTunes. This is bullshit !

Did I make an error whil reassembling it ? Has anyone had this problem also ?

Many thanks for your help !

Dr Mario - crwdns2934203:0crwdne2934203:0

The video is a con. There is no way it comes apart this easily and using metal tools WILL damage the paintwork or chip the fine edge to the glass.

Anatole Beams - crwdns2934203:0crwdne2934203:0

Hi,

I forgot to put the protector in step 13 and 17 back, the iphone 7 is now sealed again. If i open it I will probably have to use new adhesive, which I don't have.

Phone seems to work.

Is this bad, will it overheat?

jonathanmmm - crwdns2934203:0crwdne2934203:0

Le téléphone fonctionnera et il n’y a pas de risque de surchauffe, le seul risque survient lors d’un choc brutal ou de vibration répété qui peuvent débrancher les connecteurs. Il ne devrait donc pas y avoir de problème si vous en prenez soin.

Cajuteq -

Anybody had the issue after replacing the screen where the front camera will work for photos/video but not in FaceTime?! Really odd! Thanks

jameswhit - crwdns2934203:0crwdne2934203:0

La nouvelle caméra n’est peux être pas du même modèle ou peut être FaceTime doit-il être réinstallé pour prendre en compte le changement, dur à dire…

Cajuteq -

I've done the repair but my screen is black can anyone help please

Bradley Graham - crwdns2934203:0crwdne2934203:0

Just did my 2nd replacement. The new seal around the edge isn’t too bad as long as you leave the smaller blue backing on, lay it over the back piece while making sure the edge of the film is just inside the metal rim of the phone. once its on, go around the edge with a spudger to seat the rubber against the metal. Then peel it slowly back… If the seal starts to come up, run the plastic over the film again pressing harder. As long as you’re careful it isn’t so bad, just slightly tedious.

Preston Conner - crwdns2934203:0crwdne2934203:0

If I am fixing the screen and doing a charging port replacement. Would buying the charging port tool kit have the tools required for a screen replacement?

Samuel Pantoja - crwdns2934203:0crwdne2934203:0

After replacing the battery in the iPhone 7, it popped up the window stating “Unable to activate Touch ID on this iPhone”. I thought I must have damaged the cabled to the screen and purchased this replacement assembly. However, after replacing and transferring the home button, I still get the same error. It’s not just touch ID, the home button itself does not register any touches. Does this mean the home button is toast? Without the home button, the phone is basically useless. I have double checked all the little cable connections and don’t see any problems. Any ideas?

Thanks

Peter Pappas - crwdns2934203:0crwdne2934203:0

I also have the home button . Bought a new home button and still have the same not activating issue.

sharpworx -

It’s a real PITA to line up the little casing at the back of the screen with the cavity it’s supposed to fit into inside the phone. It never lines up properly the first time and at that point the replacement waterproof seal around the screen gets ruined.

Sean Buckley - crwdns2934203:0crwdne2934203:0

how can i tell if somebody changing the screen the cud of broken my iphone 7

Leza Jane - crwdns2934203:0crwdne2934203:0

I’ve tried 3 or 4 aftermarket screens from different sources and the home button does not work on any of them. However when I put a cracked original apple screen back on it works fine. Is there some reprogramming step that I’m missing or am I just getting incredibly unlucky with my choose of screens…

grant_brennan - crwdns2934203:0crwdne2934203:0

This is not a tutorial for replacing the screen as titled! It is simply instructions for replacing the display & digitizer. It does not include the disassembly of the components of the display assembly. I am very disappointed in iFixit for not providing the proper procedures for one of the most common repairs.

kevs - crwdns2934203:0crwdne2934203:0

Doesn’t show how to remove the earpiece sensor assembly at the top?

busyfone - crwdns2934203:0crwdne2934203:0

Hi,

I followed these instructions and in the beginning it all worked well but now from time to time my home button just stops working. When I then try to restart the phone by holding the volume down and side button it just keeps switching between black screen and white screen with apple logo back and forth but doesn’t turn on.

I had some trouble putting the Touch ID cable back into its place so maybe that’s because of that, but can anyone confirm?

Valentin Harnisch - crwdns2934203:0crwdne2934203:0

If you follow the guide provided for applying the seal and making sure the seal is water tight (using heat gun, coins and heavy books) it will work. I accidentally dropped my phone into a bath of warm water the day after I replaced my screen and it worked! No water damage at all. That was 18 months ago and I’m typing this message with the same phone right now.

David Gordon - crwdns2934203:0crwdne2934203:0

remplacement facile, écran de très bonne qualité. Les couleurs, la fluidité, le tactile …. restent parfaits !! je recommande largement.

STRABACH - crwdns2934203:0crwdne2934203:0

Hi

What if have replaced the old screen with a second hand one ,from another Iphone(both ip 7),and the home button not working at all. Have bought a new home button and still doesnt work. Whyyy? Someone give me a clue.

Have done same to anothe iphone 7 and same thing.

So the home button should be alright but….no idea whats wrong

Claudiu Mihaiu - crwdns2934203:0crwdne2934203:0

You donuts, you forgot about the front top front like the front camera and speaker 🤦‍♂️🤦‍♀️

cheap parts - crwdns2934203:0crwdne2934203:0

What happens if you forget to unplug the battery before unplugging the other connections?

Abby Derr - crwdns2934203:0crwdne2934203:0

if you have a steady hand probably nothing will happen. otherwise there might be a short circuit

EnRico -

does the display require any reprogramming? as well as the battery? I don't want any non-genuine parts messages

0wen - crwdns2934203:0crwdne2934203:0

no, they did´nt

EnRico -

Great instructions, I fixed it!

sebastiancommic - crwdns2934203:0crwdne2934203:0

crwdns2917038:0crwdne2917038:0

crwdns2936625:0crwdne2936625:0:

crwdns2936751:024crwdne2936751:0 104

crwdns2936753:07crwdne2936753:0 685

crwdns2936753:030crwdne2936753:0 3,179

crwdns2942667:0crwdne2942667:0 1,222,988