crwdns2915892:0crwdne2915892:0
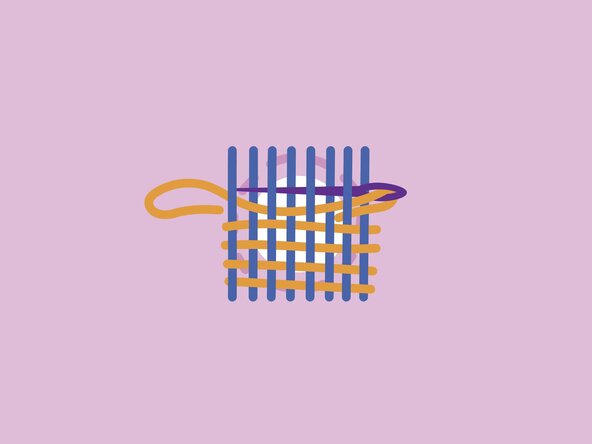
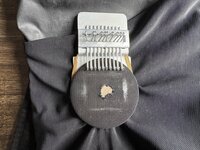
This guide demonstrates how to use a Speedy Weave—a small hand-held tool used for woven darning repairs. It holds warp threads in place and helps guide the weft thread over and under them in an even pattern, essentially acting like a mini loom. It's especially helpful for creating clean, consistent darning patches on holes or worn spots in both knits and wovens.
Hand-sewn repairs are a fun and effective way to extend the life of gear at home. DIY repairs won't void the Patagonia warranty—they're actually encouraged!
Patagonia items can also be taken in to a local retail store for repair evaluation or sent in to Patagonia through their mail-in repair service.
Let's get fixing!
Related Tutorials
Related Articles
crwdns2942213:0crwdne2942213:0
-
-
This tutorial outlines a specific technique where rows of stitches are laid on top of the fabric utilizing a device that expedites the weaving process. If you don't have a Speedy Weave, refer instead to the Woven Darn a Hole in a Knit tutorial.
-
-
-
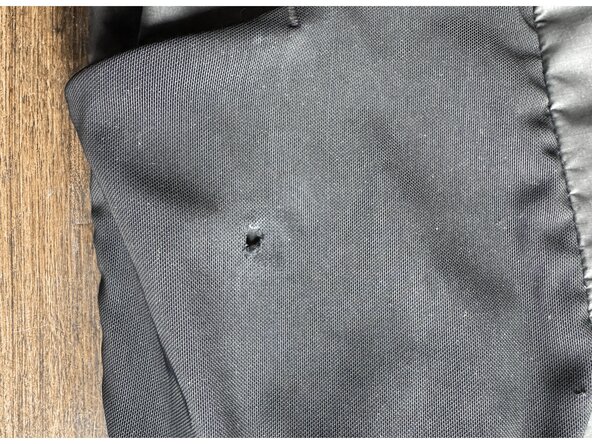
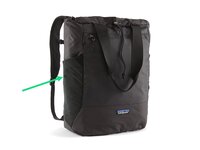
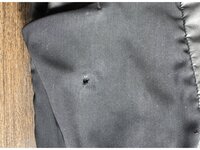
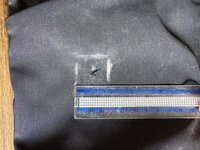
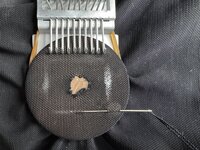
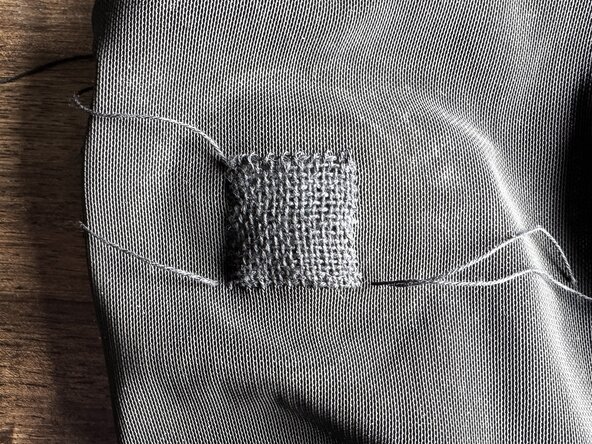
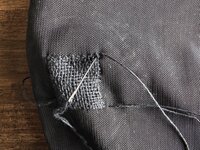
Locate the damage.
-
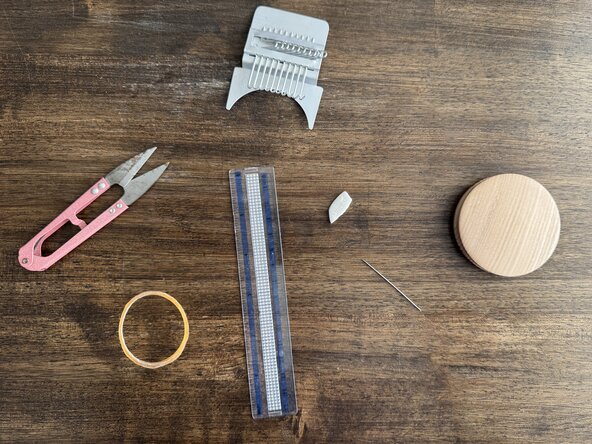
For the most invisible repair, choose a yarn or thread of similar weight, color, and materiality.
-
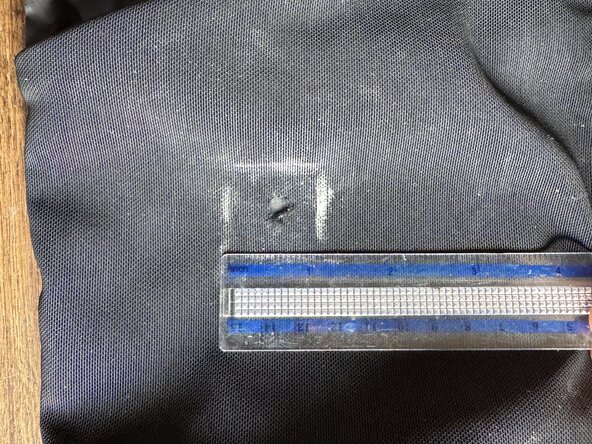
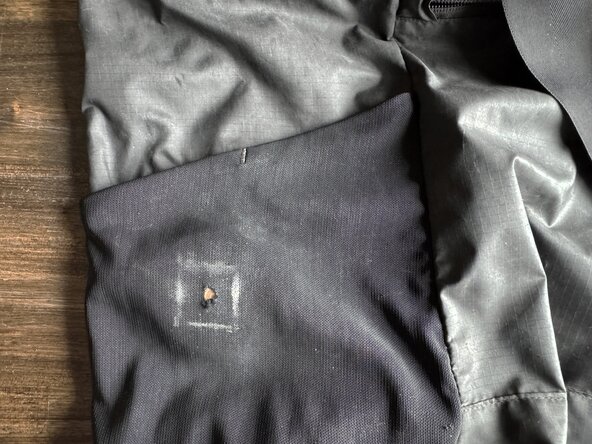
Draw a square around the hole about 1/4 inch (~6 mm) bigger than the damage on all sides.
-
-
-
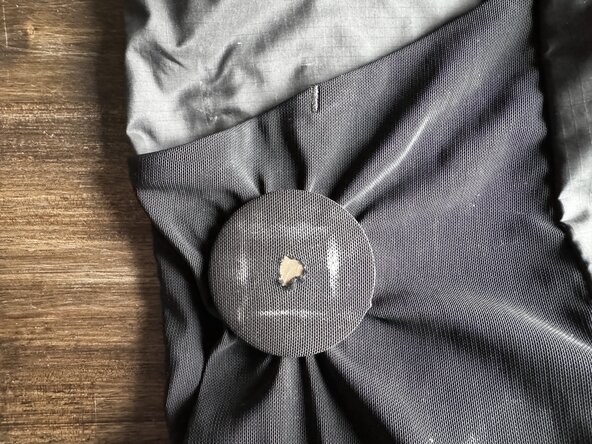
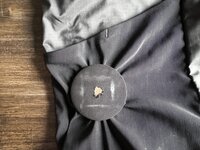
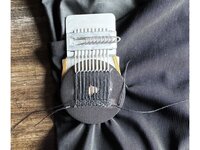
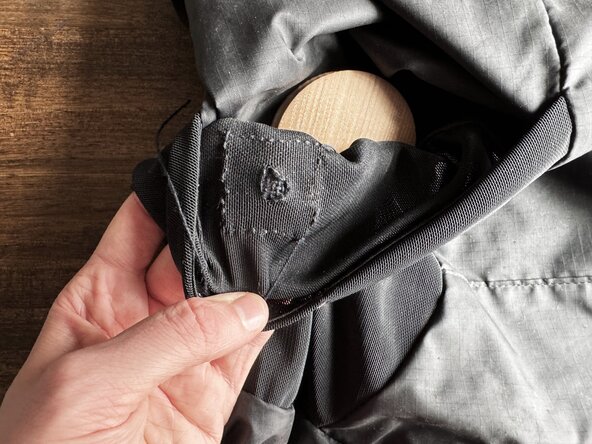
Place the circular base disk directly beneath the hole so only one layer of fabric lays over it.
-
Center the disk, with the rounded side up, under the marked damage area.
-
Without overstretching, place the rubber band around the disk, over the fabric, securing them together. The drawn square shouldn't be twisted.
-
-
-
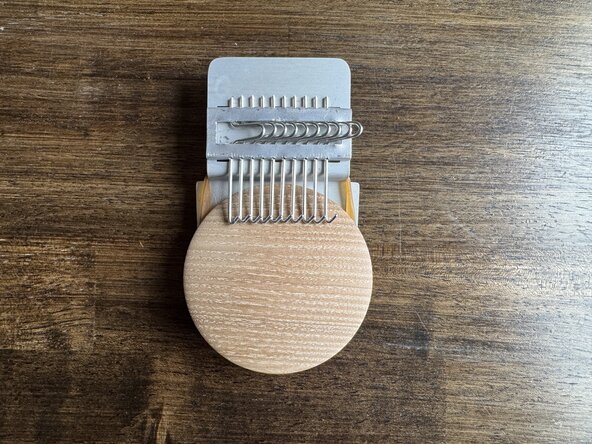
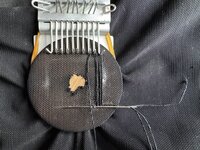
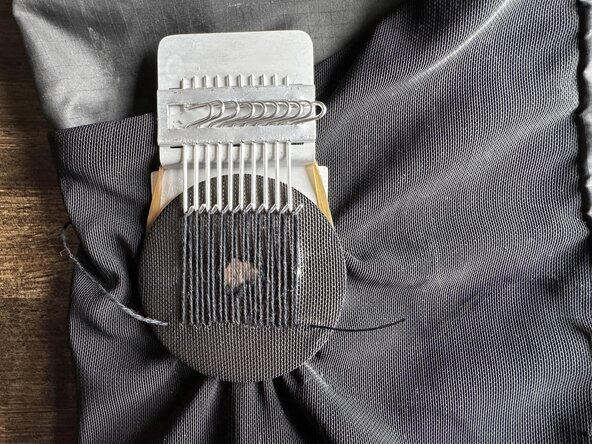
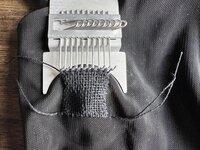
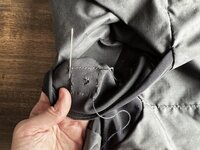
Place the metal weaving rig in the crease at the top of the disk. Secure another rubber band around all pieces to hold the weaving rig to the disk.
-
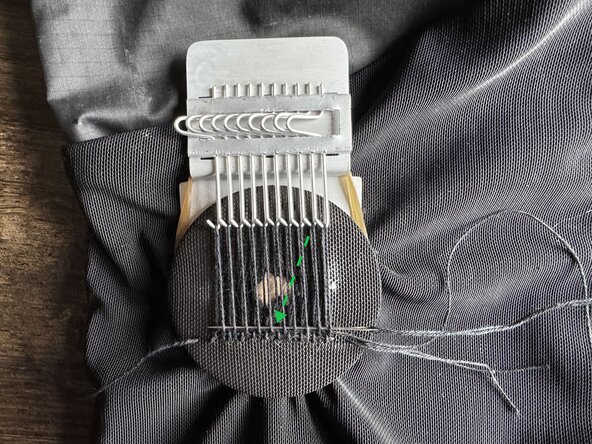
Push the warp hooks up until the tips of the hooks are at a 90 degree angle from the fabric surface, standing exactly upright.
-
A warp hook should align on the left and right sides with the marked square. Adjust the hooks until they align properly.
-
-
-
Thread an embroidery needle with a length of embroidery thread no longer than 32 inches (~81 cm). Don't knot the thread.
-
Make a horizontal stitch about 1/4 inch (~6 mm) long with the needle emerging at the bottom right corner of the drawn square. Pull the thread through until there's a short tail, about 1 inch (~25 mm) long.
-
Wrap the thread around the far right warp hook.
-
Pull the thread taught. Maintain even tension, but don't pull tight enough that the fabric pulls or the hole begins to close.
-
-
-
-
Make a small horizontal stitch at the bottom of the square, to the left of the initial stitch.
-
Wrap the thread around the second warp hook.
-
Continue this process until the warps cover the entire width of square or the thread begins to run out (stop when there's approximately 2 inches (~5 cm) left and see the next step).
-
-
-
If your remaining yarn nears 2 inches (~5 cm) in length, finish the section by taking a stitch beside the last bottom stitch and piercing the needle to surface 1/4 inch (~6 mm) below the square. Then start a new length of thread and continue the process.
-
-
-
After looping the thread over the leftmost warp hook, place the tip of the needle through the bottom left corner of the drawn square.
-
Resurface the needle 1/4 inch (~6 mm) away. Pull the thread taught and trim the thread tail to approximately 2 inches (~5 cm).
-
-
-
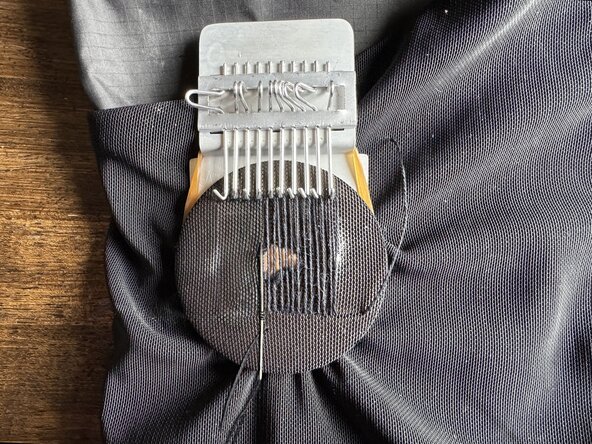
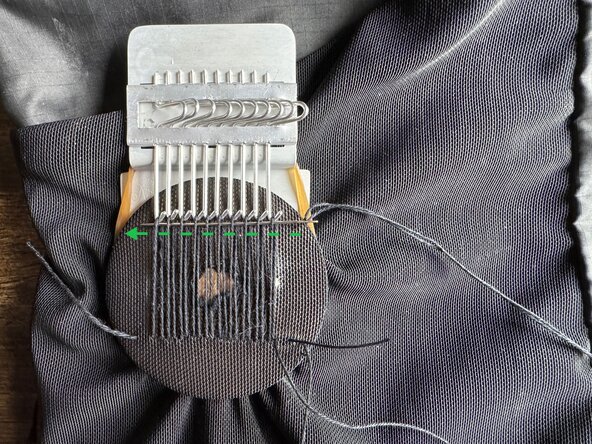
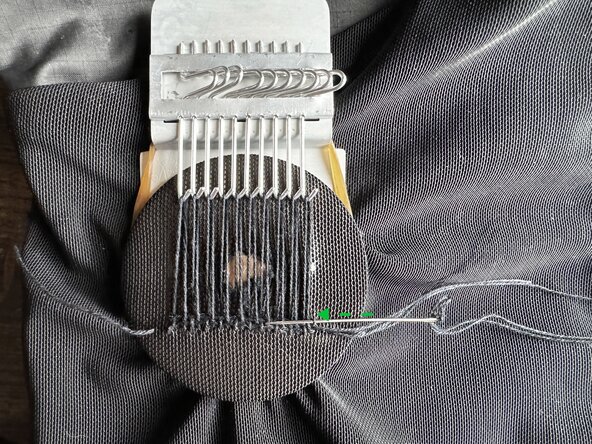
Starting 1/4 inch (~6 mm) from the bottom right corner, take a horizontal stitch and emerge directly above the first warp stitch.
-
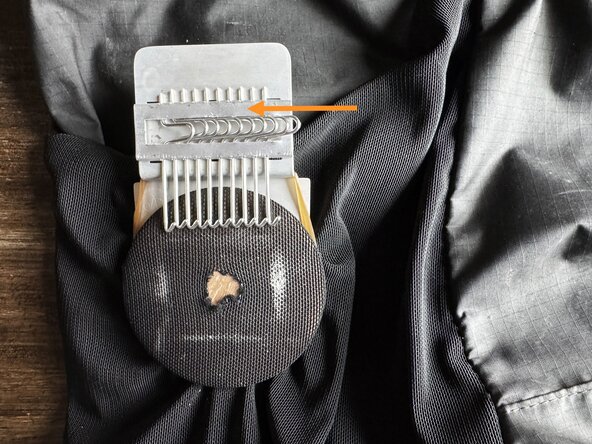
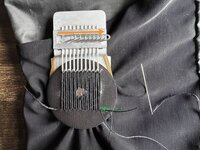
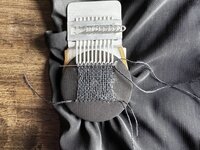
Flip all warp hooks to the right. This will raise every other thread to make a channel for the needle to pass through.
-
Slide the needle through the channel to weave the thread through the warp threads. This will be easiest done close to the warp hooks.
-
Finish each weft thread to the left side of the weaving by taking a small vertical stitch. Similarly to securing warp stitches, make this stitch so that the gap between each row is the same width as the thread.
-
-
-
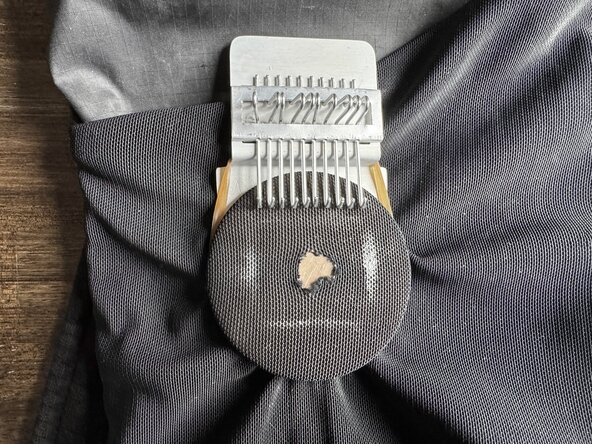
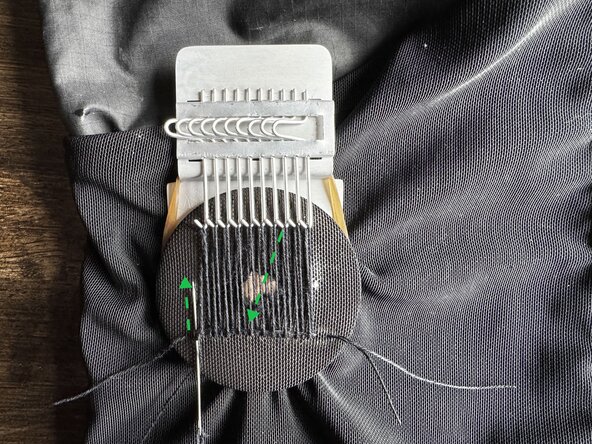
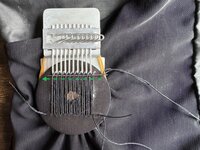
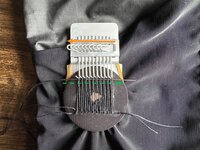
Use the needle to carefully push the row of thread down to the bottom of the weaving.
-
Flip the warp hooks to the left side of the weaving rig. The opposite warp threads from the previous row should now be lifted. Pass the needle through the channel.
-
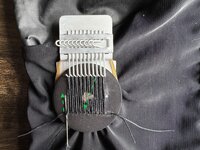
Continuing weaving the horizontal wefts from left to right, flipping the warp hooks each time, creating a securing stitch at the end of each pass, and pulling taught.
-
Tamp down each row of thread after making it. Attempt to mimic the tightness or looseness of the original fabric structure.
-
-
-
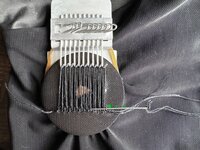
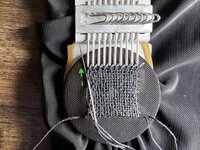
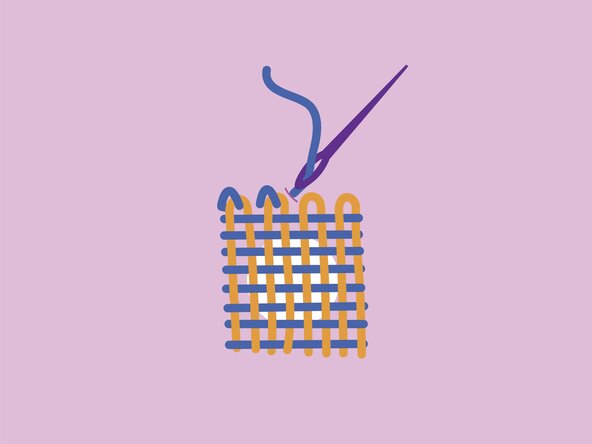
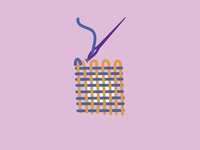
Once the top of the drawn square is reached, pierce the needle in the top corner and emerge 1/4 inch (~6 mm) away.
-
Keep the needle threaded and don't cut off the thread.
-
-
-
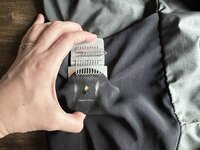
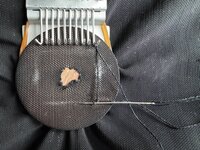
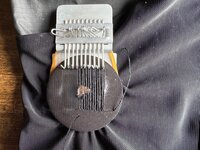
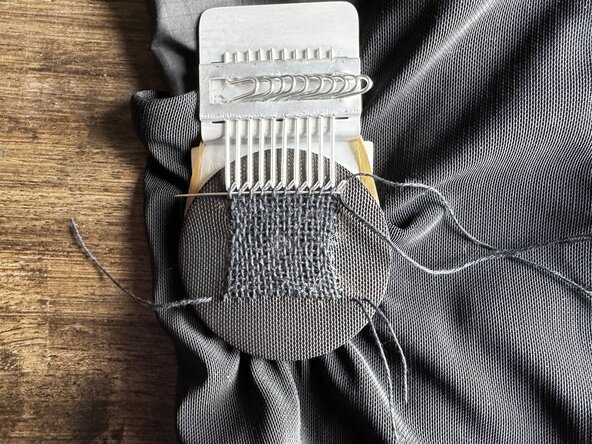
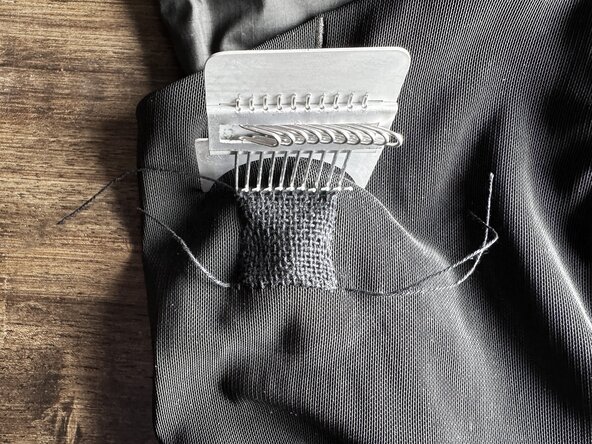
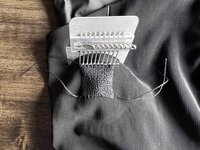
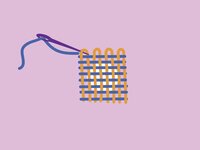
Remove the rubber band from around the weaving rig.
-
Carefully lower the warp hooks by lifting the rear of the weaving rig and remove them from the weaving.
-
-
-
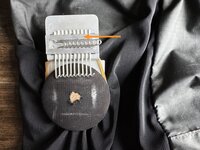
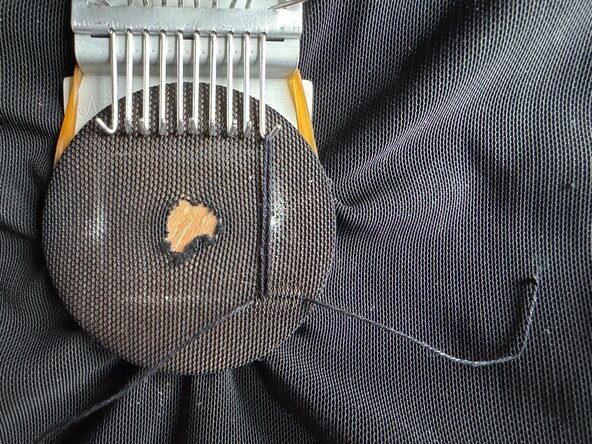
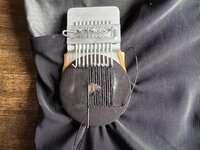
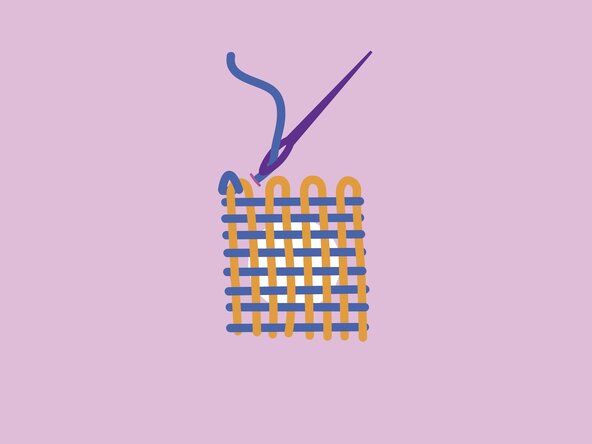
Secure the upper loops of the warp yarns by tacking down the top of each loop.
-
After the last tack stitch, trim the tail of the thread to about 2 inches (~4 cm).
-
-
-
Flip over the fabric.
-
With an empty needle, pull all the tails of thread to the back of the fabric.
-
-
-
Tie off all these loose thread tails, ensuring that all sections are taught but not overly tight.
-
For extra security, thread each end into the needle and knot it off using one of the techniques from Knot Thread to the Fabric (2 Ways).
-
-
-
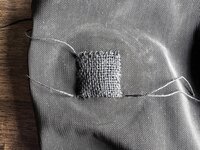
Carefully steam away chalk or pen markings.
-
Make sure there are no tucks or puckers in the surface of the fabric.
-
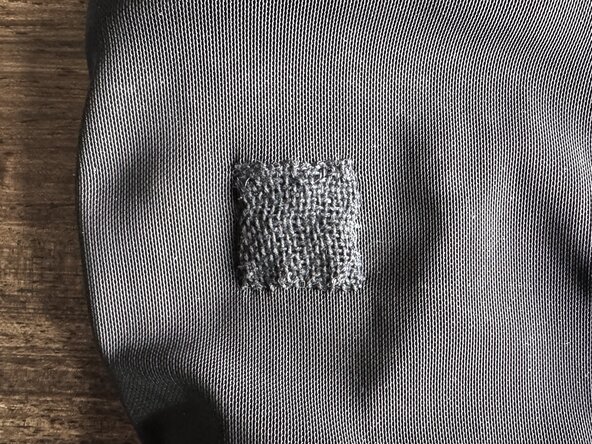
Ensure that the hole is fully covered and the patch secures all sides of damaged area.
-
-
-
YARN/THREAD LENGTH: A short length of yarn or thread may require frequent stops and restarts and can be prone to unthreading. Conversely, an overly long length can lead to tangling. An ideal yarn length is approximately 16 inches (~41 cm) when doubled, or 32 inches (~81 cm) in total.
-
LOOSE WARP LOOP: If a warp loop falls off, carefully replace it on the original hook, maintaining tension.
-
TAMPING DOWN ROWS: Tamping down each weft line after weaving is vital to maintaining even and accurate results.
-
CROOKED PATCH: Starting and stopping the weaving outside of the marked square will result in a crooked final patch. Warp yarns tacked down unevenly from the top horizontal edge will also result in a crooked final patch.
-