crwdns2915892:0crwdne2915892:0
This guide demonstrates how to use a hand sewn whip stitch to apply a fabric patch over a hole in a pair of Patagonia® Quandary pants. (Starting in Spring 2024, all Quandary Pants come with a matching fabric patch included!) Whip stitch is a simple looping technique that's great for attaching all kinds of fabric patches, providing both flexibility and durability.
Hand sewn repairs are a fun and effective way to extend the life of gear at home. DIY repairs won't void the Patagonia warranty—they're actually encouraged!
Patagonia items can also be taken in to a local retail store for repair evaluation or sent in to Patagonia through their mail-in repair service.
Let's get fixing!
Related Tutorials
Related Articles
crwdns2942213:0crwdne2942213:0
-
-
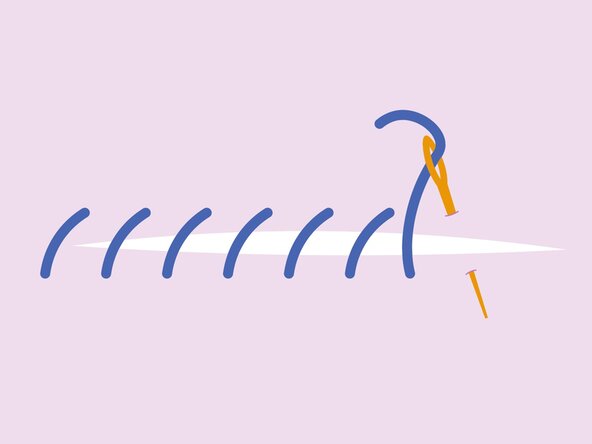
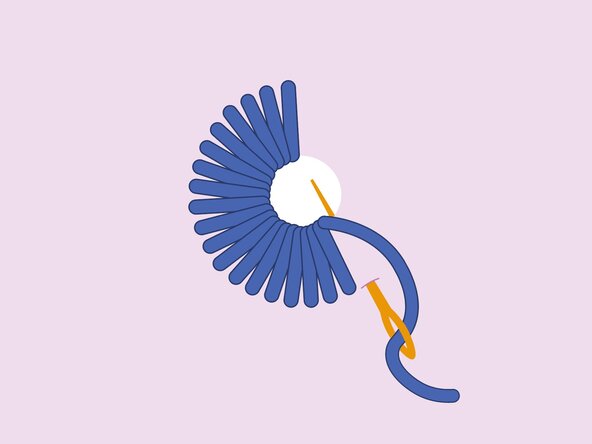
When placed close together, whip stitches can also reinforce an opening to create a buttonhole or a decorative eyelet.
 crwdns2952109:0crwdne2952109:0
-
-
-
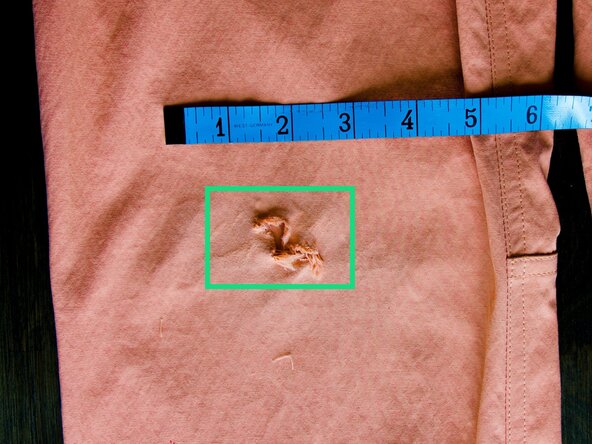
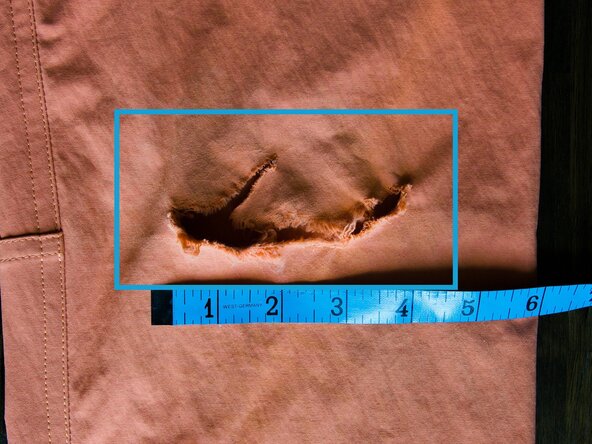
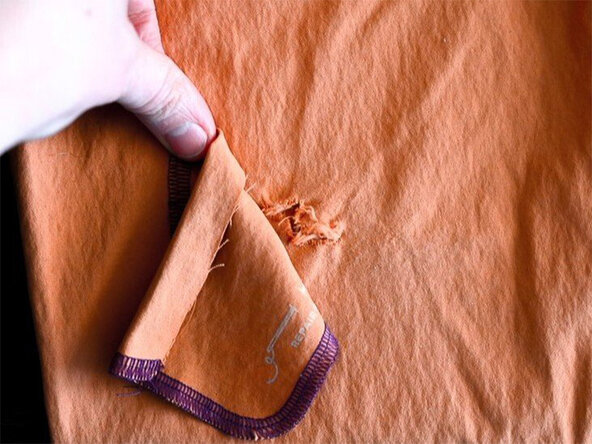
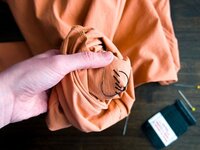
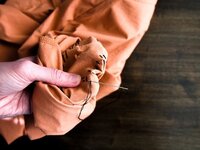
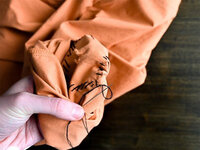
Locate and assess the damage.
-
If possible, stitch the tear closed. This will seal the tear on the inside of the patch so it doesn't grow bigger or get caught while the garment is being worn. See Whip Stitch on a Tear.
-
If the tear is too large or oddly shaped to be stitched closed, see the final step in this guide for details on creating an underpatch.
-
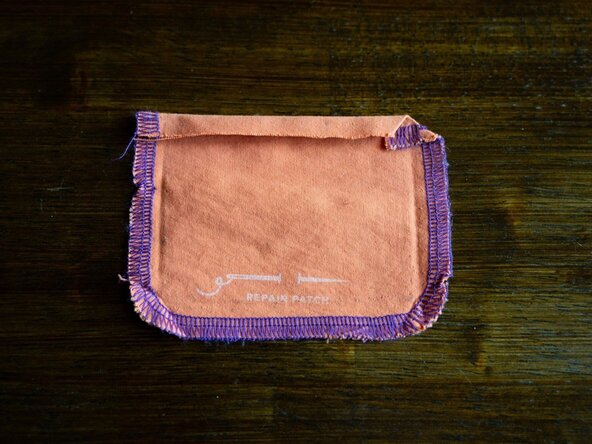
If you're repairing Patagonia Quandary Pants with a repair patch included, move on to the next step. Otherwise, see Make a Fabric Patch for guidance and best practices on making a fabric patch.
-
-
-
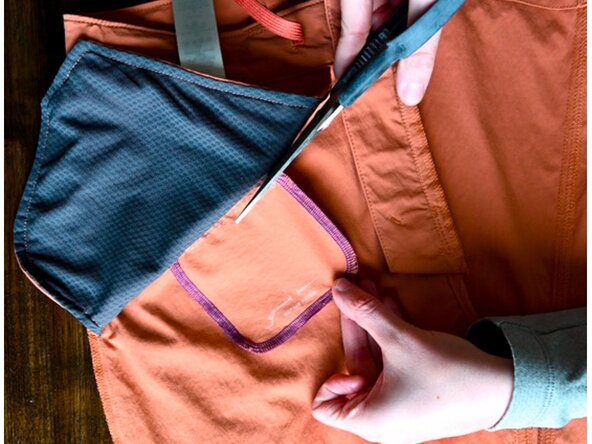
Cut the patch out of the pants along the marked cut line.
-
Fold over the raw edge and press with an iron.
-
-
-
Cut a length of thread approximately 24 inches (~61 cm) long.
-
Thread the needle and adjust the thread so there are equal lengths of thread on each side of the needle.
-
Tie an overhand knot with both ends to create a doubled length of thread.
-
See Needles and Thread for more details.
-
-
-
-
Position the fabric patch over the hole and pin it in place, ensuring the hole is centered.
-
-
-
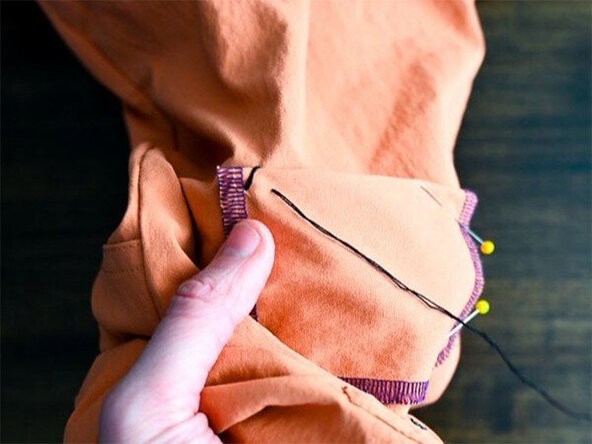
Insert the needle into the back of the patch, about 1/4 inch (~6 mm) in from the edge. Pull through so the thread knot is flush against the back of the patch.
-
Pierce the needle down at the edge of the patch, into the garment fabric adjacent to the first stitch.
-
Bring the back needle up approximately 1/4 inch (~6 mm) in from the edge of the patch and 1/4 inch (~6 mm) away from the first stitch. Pull the stitch tight.
-
-
-
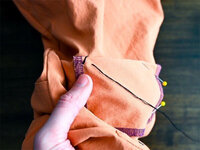
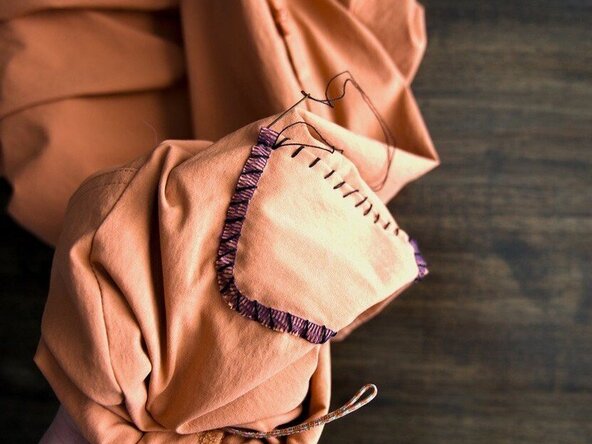
Continue the whip stitch technique around all four edges of the patch, taking care to maintain consistent stitch lengths.
-
-
-
When there's approximately 3 to 4 inches (76 to 102 mm) of thread left, pull the needle through to the interior of the garment.
-
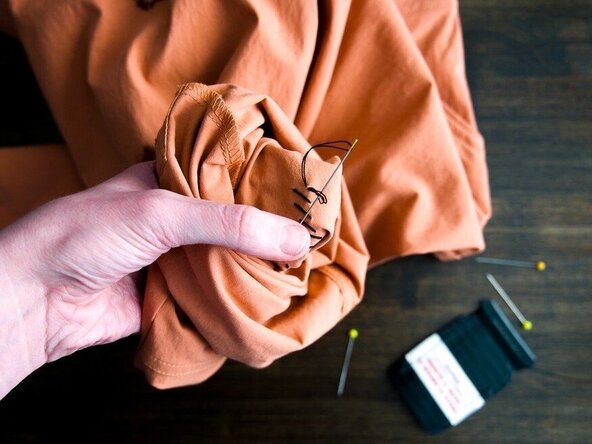
Make a secure knot on the backside of the fabric using one of the techniques from Knot Thread to the Fabric (2 Ways) and trim the extra thread.
-
Rethread the needle, knot both ends of the thread, and restart by coming up from behind the patch just as described in Step 6.
-
-
-
Once the needle is approximately 1/4 inch (~6 mm) from where the stitches began, pierce through to the backside of the garment.
-
Make a secure knot on the backside of the fabric using one of the techniques from Knot Thread to the Fabric (2 Ways) and trim the extra thread.
-
-
-
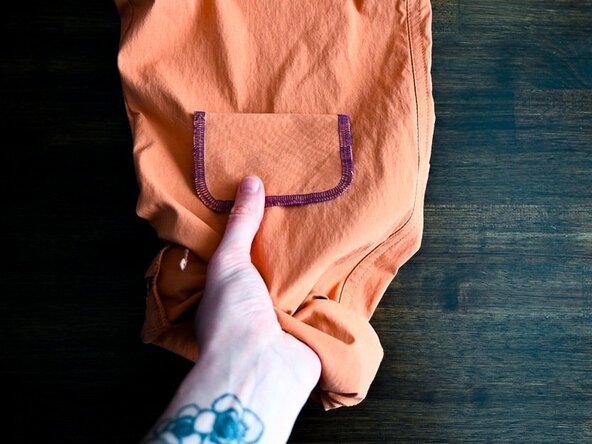
Check to make sure the patch is securely fastened and all loose thread ends are clipped.
-
-
-
UNDERPATCH: If the tear is too large to be stitched closed and there's concern the exposed tear will get caught while the garment is being worn, create an underpatch first. An underpatch is a smaller patch that's sewn over the hole on the backside before the main patch is sewn on the front.
-