crwdns2915892:0crwdne2915892:0
This repair guide was authored by the iFixit staff and hasn’t been endorsed by Google. Learn more about our repair guides here.
Use this guide to replace a broken screen on your Google Pixel Tablet.
Note: This guide was written for the iFixit replacement screen, which comes with adhesive pre-installed. If your new screen doesn't come with adhesive, you'll need thin, double-sided tape, such as Tesa 61395 Tape to complete this repair.
crwdns2942213:0crwdne2942213:0
-
-
Unplug any cables from your tablet and fully power it down.
-
-
-
If your screen is badly cracked, lay overlapping strips of packing tape over the glass to protect yourself and make disassembly easier.
-
-
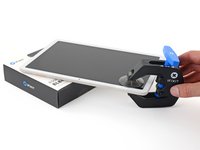
crwdns2935267:0crwdne2935267:0Clampy - Anti-Clamp$24.95
-
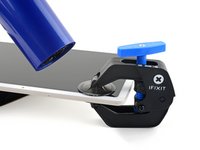
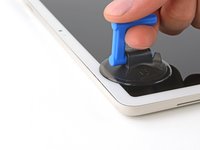
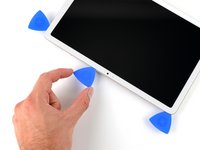
The next three steps demonstrate the Anti-Clamp, a tool we designed to make the opening procedure easier. If you aren't using the Anti-Clamp, skip down three steps for an alternate method.
-
Pull the blue handle backward to unlock the Anti-Clamp's arms.
-
Slide the arms over the top left corner, with one suction cup on the back cover and one on the screen.
-
Place an object under your tablet so it rests level between the Anti-Clamp's arms.
-
Squeeze the cups together to create suction.
-
-
-
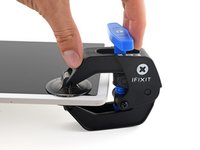
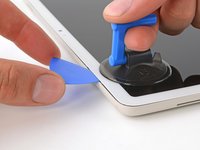
Pull the blue handle forward to lock the arms.
-
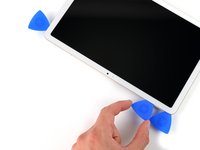
Turn the handle clockwise two full turns, or until the suction cups begin to stretch.
-
As the cups stretch, make sure they stay vertically aligned with each other. If they keep slipping, remove the Anti-Clamp and apply tape for the cups to stick to.
-
-
-
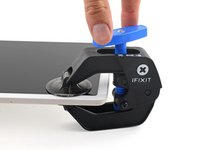
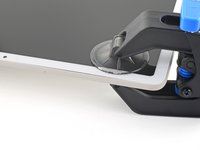
Use a hair dryer or heat gun to heat the top left corner of the screen until a gap forms between the glass and the frame.
-
Insert an opening pick into the gap.
-
Remove the Anti-Clamp using the pull tabs on the suction cups.
-
-
-
Rotate your tablet so the front camera is closest to you.
-
Apply a heated iOpener to the top left corner of the screen (now your bottom right, since the tablet is flipped around) for three minutes.
-
-
-
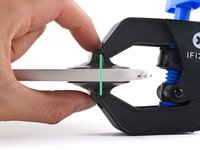
Apply a suction handle to the top left corner of the screen, as close to the top edge as possible.
-
Pull up on the suction handle with a strong, steady force until a gap forms between the glass and the frame.
-
Insert the tip of an opening pick into the gap.
-
Remove the suction handle.
This step is insanely hard. What the picture doesn't show is how to keep tablet from lifting off the table as you pull up. I've been at this step for an hour and the screen hasn't budged a half millimeter.
-
-
-
The top, bottom, and left edges have the thickest adhesive.
-
The right edge has slightly thinner adhesive.
-
At the top, near the front camera, the adhesive is very thin and delicate cables connect the screen to the frame.
-
-
-
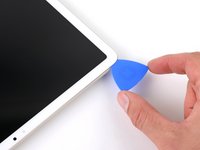
Slide your opening pick to the top left corner of the tablet.
-
Leave this pick inserted to prevent the adhesive from resealing.
-
-
-
Apply a heated iOpener to the left edge of the screen for two minutes.
-
-
-
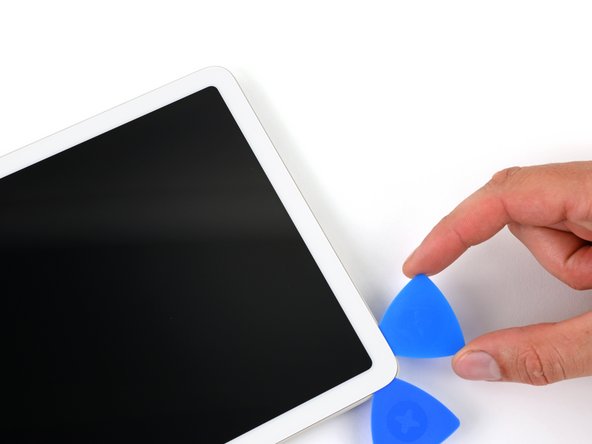
Insert a second opening pick in the top left corner of the screen.
-
Slide your pick to the bottom left corner of the screen to separate the left edge adhesive.
-
Leave this pick inserted to prevent the adhesive from resealing.
-
-
-
-
Apply a heated iOpener to the bottom edge of the screen for two minutes.
-
-
-
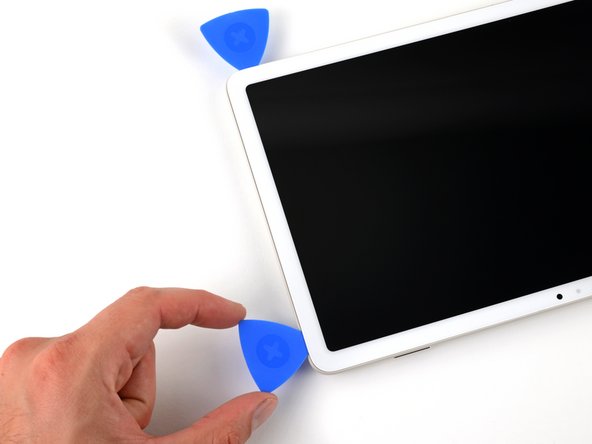
Insert a third opening pick in the bottom left corner.
-
Slide your pick to the bottom right corner of the screen to separate the bottom edge adhesive.
-
Leave this pick inserted to prevent the adhesive from resealing.
If your screen has cracks that extend to the edge, this step is insanely hard as well. The pick will not be able to slide cleanly under the crack boundaries. 10/10 difficulty repair for cracked screens.
-
-
-
Apply a heated iOpener to the right edge of the screen for two minutes.
-
-
-
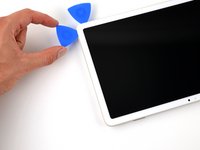
Insert a fourth opening pick in the bottom right corner.
-
Slide your pick to the top right corner to separate the right edge adhesive.
-
Leave this pick inserted to prevent the adhesive from resealing.
-
-
-
Apply a heated iOpener to the top edge of the screen for two minutes.
-
-
-
To mark where to avoid slicing too deep, it can be helpful to put a 6.3 cm (2.5 in) long strip of masking tape on the top edge, centered over the front camera.
-
-
-
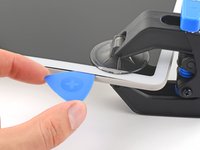
Insert a fifth opening pick in the top right corner of the screen.
-
Slide your pick toward the front camera. Stop when your pick is 3 cm (1.25 in) from the front camera.
-
Pull your pick out to a depth of 3 mm (1/8 inch) and slide it past the front camera.
-
When your pick is 3 cm past the front camera, insert it up to 6 mm deep, or about halfway between the tip and the iFixit logo, and slide it to the first pick you left in the top left corner.
-
-
-
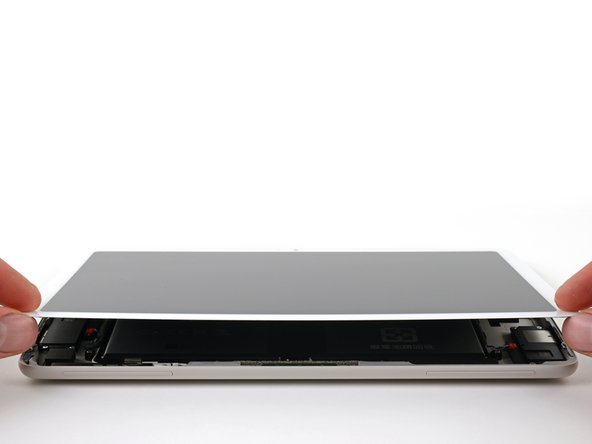
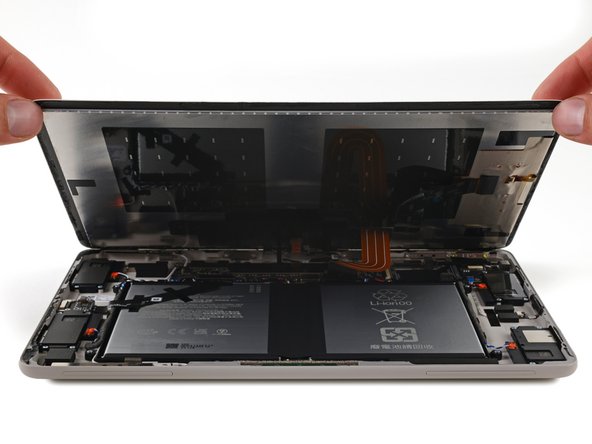
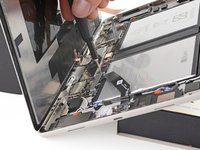
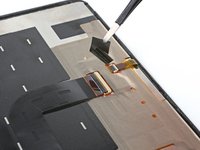
Grab and lift the bottom corners of the screen.
-
Tilt the screen open just enough to access the cables connecting the screen to the frame.
-
-
crwdns2935267:0crwdne2935267:0Tweezers$4.99
-
For the next three steps, hold the screen tilted open with one hand while you work with your other hand.
-
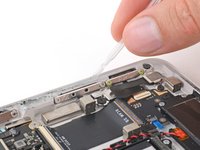
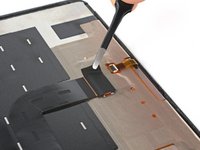
Use tweezers to peel and remove the black tape off of the screen cable connector.
-
Install new tape if the old piece is damaged and you have a replacement from your repair kit.
-
Now is a good time to test your tablet before sealing it up. Power it on and check that it works. Power it back down before you continue reassembly.
-
-
-
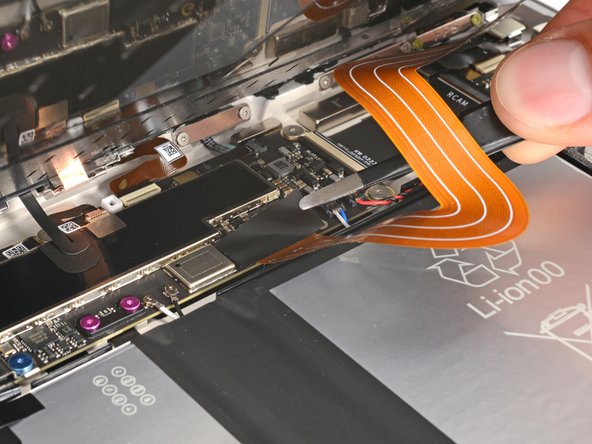
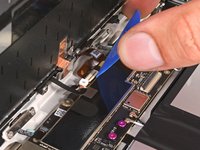
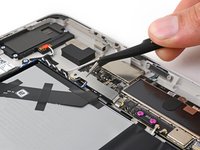
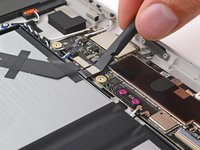
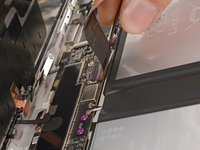
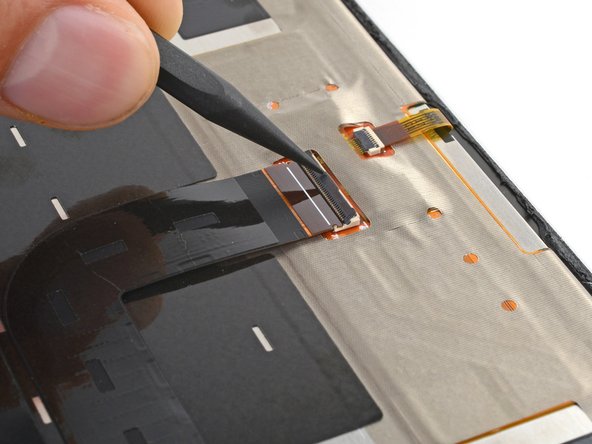
Use the point of a spudger or a clean fingernail to flip up the small locking flap on the inside edge (same side as the cable) of the screen cable ZIF connector.
-
Use tweezers or your fingers to pull the screen cable straight out of its socket.
-
-
-
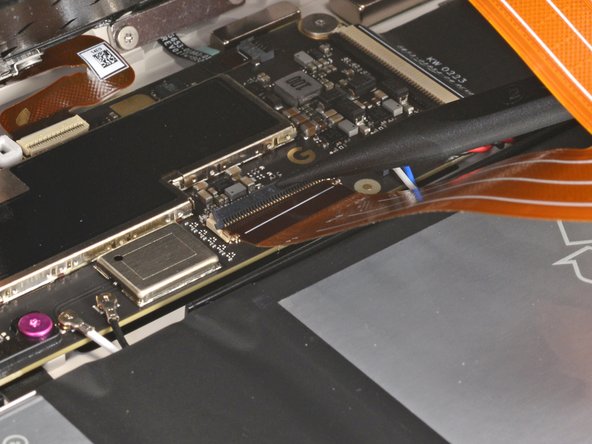
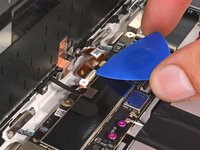
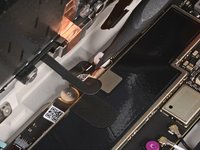
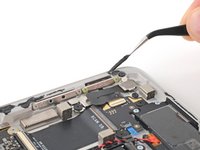
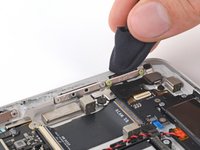
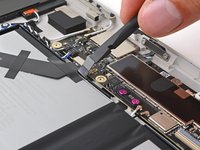
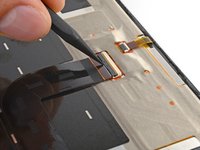
Use an opening pick to flip up the small locking flap on the outside edge (opposite the cable) of the front camera ZIF connector.
-
Use tweezers to pull the cable straight out of its socket.
-
-
-
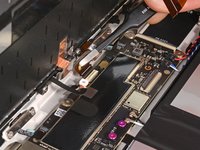
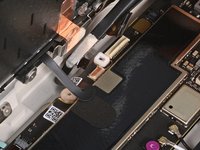
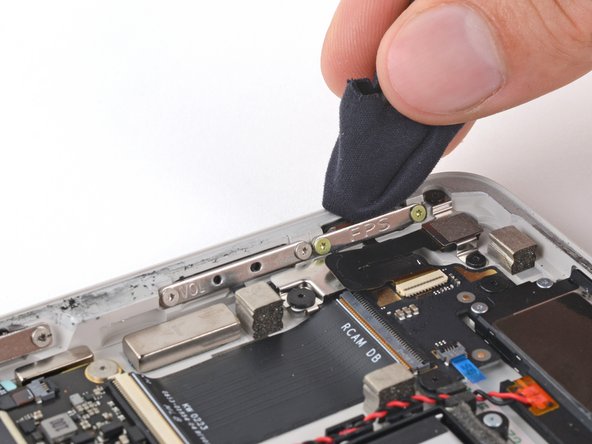
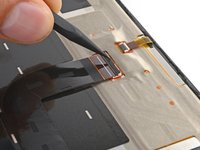
Use the point of your spudger or a clean fingernail to flip up the small locking flap on the inside edge of the front sensor connector.
-
Use tweezers to pull the cable straight out of its socket.
-
-
-
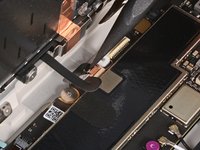
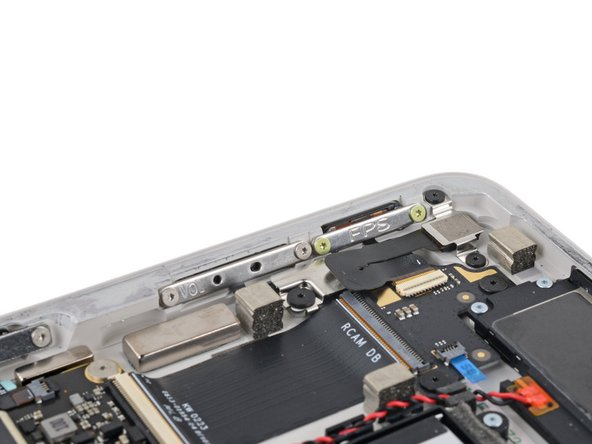
Remove the screen.
-
-
-
Use the flat end of your spudger or a clean fingernail to scrape up an edge of the leftover frame adhesive until you can grip it.
-
Use tweezers or your fingers to peel off large pieces of adhesive from the frame.
-
Repeat this process around the entire perimeter of the frame until there are no large pieces are left.
-
-
crwdns2935267:0crwdne2935267:0Microfiber Cleaning Cloths$3.99
-
Fill a pipette or syringe with highly-concentrated isopropyl alcohol (over 90%) and apply a few drops to the edge of the frame.
-
Wrap a microfiber or lint free cloth around the flat end of your spudger and scrub the frame until it's clean. Use more isopropyl alcohol as you go.
-
-
-
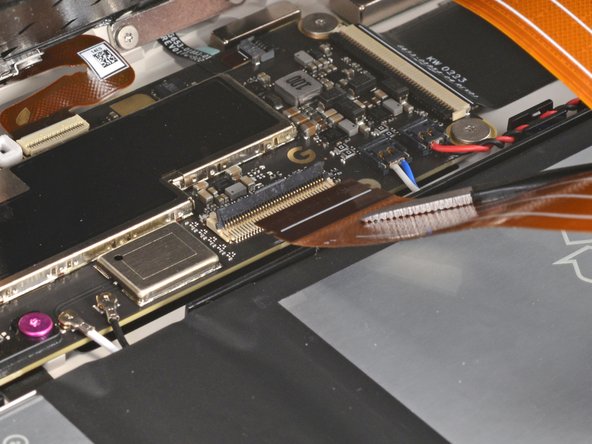
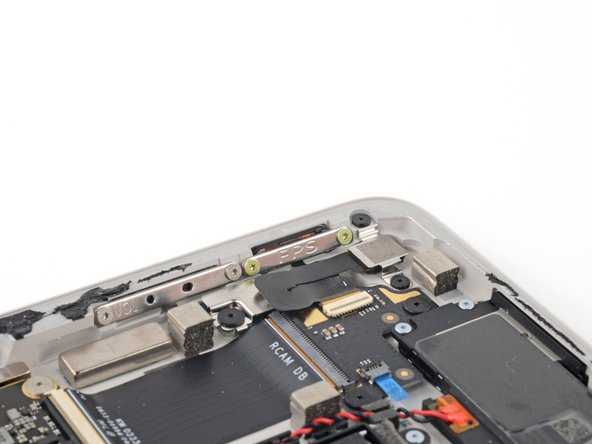
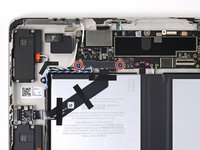
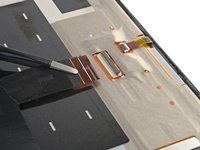
Use a Torx Plus 3IP driver to remove the two 2.6 mm screws securing the battery, USB-C, and speakers connectors cover.
-
Remove the cover.
-
-
-
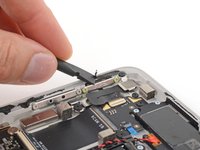
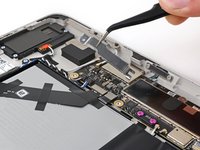
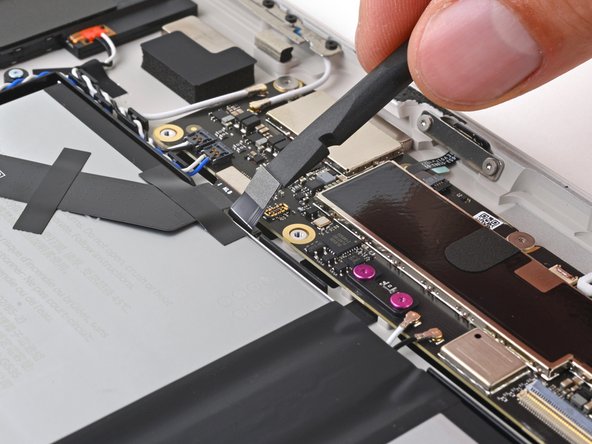
Use the flat end of your spudger to pry up and disconnect the battery press connector.
Why we have to disconnect battery connector here if we only want to replace screen? for safety? or other concern? thanks.
Yes, you're right about safety! The wide screen cable is very delicate and prone to shorting if it's inserted wrong. The danger is reflected in the reassembly step farther down in the guide. Essentially, you risk shorting the connector and creating a fire hazard if power runs through an improperly connected screen cable.
-
-
-
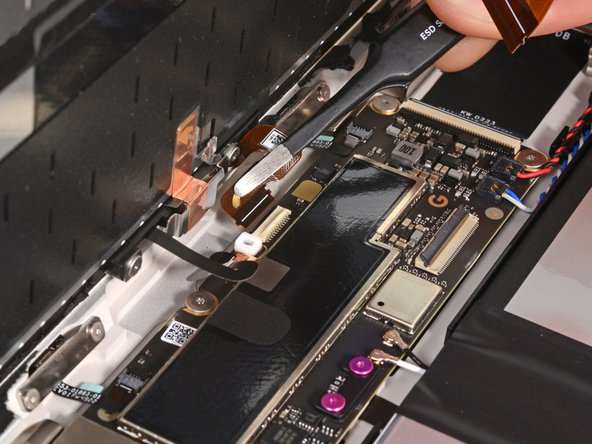
Prop up the bottom edge of the tablet on a box or similar object. Tilt the screen open and lean it against something so that it's angled up to 90 degrees.
-
Reconnect the small front sensor cable ZIF connector.
-
Reconnect the large screen cable ZIF connector.
-
Reconnect the battery press connector.
-
Use your Torx Plus 3IP driver to install the two 2.6 mm screws and fasten the connector cover.
-
Continue reassembly with these cables connected.
If the new screen doesn't come with adhesive, what size of double-sided tape would you recommand?
Holy &&^& this part was hard. Trying to slip each of those connectors in while not opening the screen away from the tablet more than 90 degrees was quite the challenge.
-
-
crwdns2935267:0crwdne2935267:0Tweezers$4.99
-
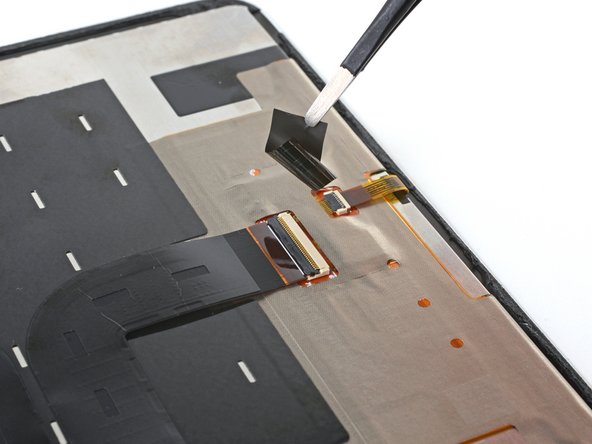
Use tweezers to peel up and remove the screen cable tape from the screen ZIF connector.
-
-
-
Use the point of your spudger or a clean fingernail to flip up the locking flap on the inside edge of the screen ZIF connector.
-
Use tweezers or your fingers to pull the screen cable straight out of its socket.
-


To reassemble your device, follow these instructions in reverse order.
Take your e-waste to an R2 or e-Stewards certified recycler.
Repair didn’t go as planned? Try some basic troubleshooting, or ask our Answers community for help.
To reassemble your device, follow these instructions in reverse order.
Take your e-waste to an R2 or e-Stewards certified recycler.
Repair didn’t go as planned? Try some basic troubleshooting, or ask our Answers community for help.
crwdns2935221:0crwdne2935221:0
crwdns2935229:03crwdne2935229:0

crwdns2915084:0crwdne2915084:0

Guide Team crwdns2935289:0Guide Teamcrwdne2935289:0
Staff
crwdns2931471:09crwdne2931471:0
crwdns2935297:013,052crwdne2935297:0
crwdns2947412:07crwdne2947412:0
Success... but at what cost!
Repair took 3 hours, and I would rate difficulty as high, maybe even very high. My kids cracked the screen with spiderweb style cracks which made this guide 10x harder. The picks would not slide cleanly across edges, they would get jammed into the shards of fractured screen, even though I had tape over it. In the end I had to take out the screen in a million pieces. I used the flathead screwdriver tip to scrape the adhesive off with my wife standing by with the vacuum to catch the glass dust and such.
Next time I'm selling my cracked tablet on ebay and using the proceeds to buy a new one. Probably similar cost but an order of magnitude less hassle. Still, thanks iFixit for this guide.
I agree with the review above. Difficult to repair with the ribbons. Buy open box and don’t worry about replacing the screen which is about 70% the cost of a replacement.
What to do if the Screen is too shattered to apply suction?
I gave it a try despite significant cracking. It worked but took several hours. I did have the first corner with no cracking and the suction and pick thing worked so I had high hopes but once I got to the cracked areas ( the rest is the edges) it all went downhill and became a slog.
I think my takeaway is that if I had done it when the crack first started and hadn't spiderwebed around it would have been pretty easy. Thus I should replace the second a crack shows up... Or live with it
PS on steps. There was no clear step to replace the camera cable so I had a bit of rework to do that once I realized that wasn't done. It would also help to have more clarity on how to actually adhere the screen... There are such detailed directions and then your are just left to figure it out at the end. One last comment is having reassembly directions as footnotes to steps throughout instead of just having them be their own steps at the end is a bit strange
Both the screen and the cable are not available in the UK. I managed to get the first from ebay, but the latter seems to be absent from everywhere (ebay, aliexpress, etc). Any idea where I could find one?
Difficult repair, old screen was not cracked until the pick sliding; then it exploded in my face.
Agree with John about the directions, very detailed until they are not.
MAKE SURE YOU SAVE THE SCREEN CABLE FROM THE ORIGINAL SCREEN!!
Nowhere in the directions is this mentioned, and due to the aforementioned screen explosion, I quickly bagged the screen and tossed it in the trash. My mistake admittedly, but I saw the cables for the camera and sensor and assumed all necessary cabling came with the new screen.
Due to the length of this repair, the old screen was put in the trash and hauled away before I finished scraping the old gunk and glass off the unit.
Will probably have 3 hours invested in this before it's done, not to mention having to wait another week to get the replacement screen cable.
Next time I'll just buy a (used) replacement tablet.
Wish Google offered repairs for this.
I agree with the others, this was way more difficult than "moderate" and took way more than 45 minutes.
What if your screen is so badly damaged you can't see the power off menu (or anything else on the screen)?
Lee Schneider - crwdns2934203:0crwdne2934203:0
Doesn't this Step contradict itself? It says you should let your battery fully drain before starting the repair and then tells you to power off the tablet. How will the battery fully drain if it's powered off?
Peter - crwdns2934203:0crwdne2934203:0