crwdns2933423:0crwdne2933423:0

Google Pixel 4a 5G USB-C Port Replacement

crwdns2942213:0crwdne2942213:0

  1. Google Pixel 4a 5G USB-C Port Replacement, Eject the SIM card tray: crwdns2935265:01crwdnd2935265:01crwdnd2935265:03crwdne2935265:0 Google Pixel 4a 5G USB-C Port Replacement, Eject the SIM card tray: crwdns2935265:01crwdnd2935265:02crwdnd2935265:03crwdne2935265:0 Google Pixel 4a 5G USB-C Port Replacement, Eject the SIM card tray: crwdns2935265:01crwdnd2935265:03crwdnd2935265:03crwdne2935265:0
    • Insert a SIM eject tool, bit, or straightened paper clip into the SIM tray hole.

    • Press directly into the hole to eject the SIM card tray.

    • Remove the SIM card tray.

  2. Google Pixel 4a 5G USB-C Port Replacement, Precautionary Notes: crwdns2935265:02crwdnd2935265:01crwdnd2935265:03crwdne2935265:0 Google Pixel 4a 5G USB-C Port Replacement, Precautionary Notes: crwdns2935265:02crwdnd2935265:02crwdnd2935265:03crwdne2935265:0 Google Pixel 4a 5G USB-C Port Replacement, Precautionary Notes: crwdns2935265:02crwdnd2935265:03crwdnd2935265:03crwdne2935265:0
    • You will need to pry the screen up to remove it from the phone. Read the following notes carefully before proceeding.

    • Take note of the two seams on the edge of your phone:

    • Screen seam: This seam separates the screen from the rest of the phone. This is where you have to pry.

    • Frame seam: This is where the plastic frame meets the back cover. It is held in place by screws. Do not pry at this seam.

    • Before you begin, note the following areas on the screen:

    • Screen flex cable: Do not insert the opening pick deeper than instructed or you risk damaging this cable.

    • Adhesive perimeter: Prying beyond this narrow perimeter without angling the pick will damage the OLED panel.

    i don't understand the "screen flex cable" nor the "adhesive perimeter" instructions

    Jonas Baumann - crwdns2934203:0crwdne2934203:0

  3. Google Pixel 4a 5G USB-C Port Replacement, Heat the right edge of the screen: crwdns2935265:03crwdnd2935265:01crwdnd2935265:01crwdne2935265:0
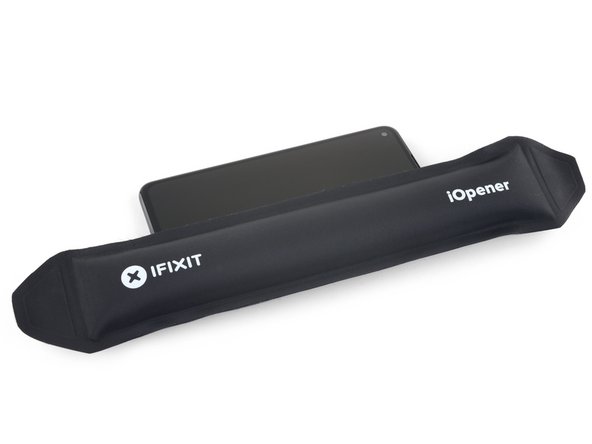
    • Apply a heated iOpener to the right edge of the display for one minute to soften the adhesive.

    • A hair dryer, heat gun, or hot plate may also be used, but be careful not to overheat the phone—the display and internal battery are both susceptible to heat damage.

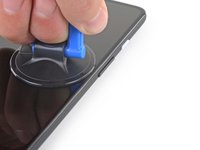
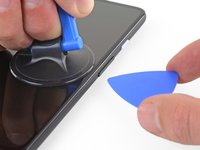
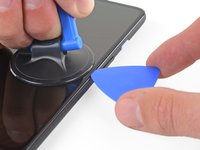
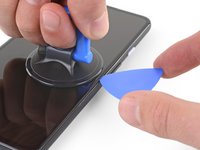
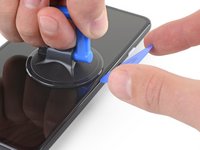
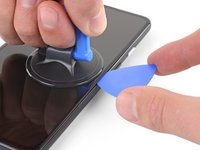
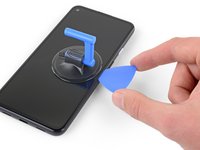
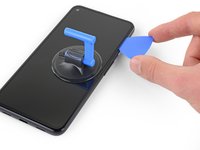
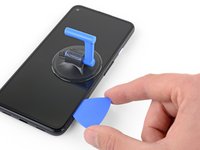
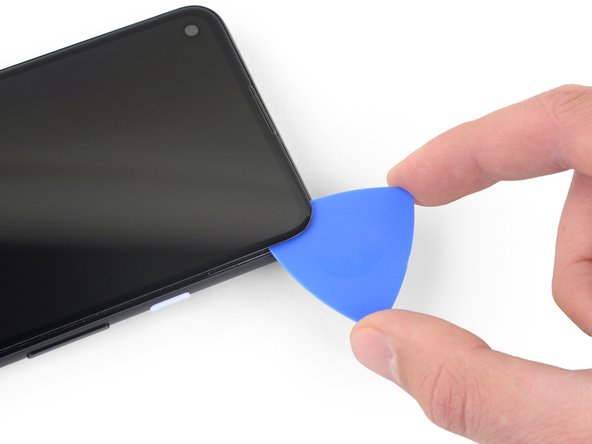
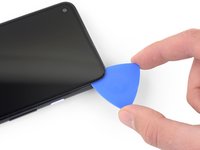
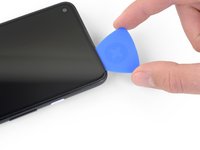
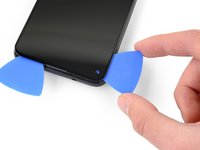
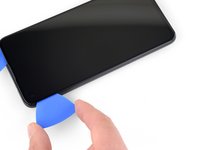
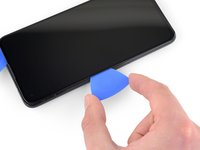
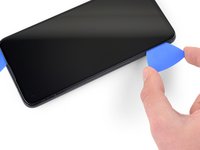
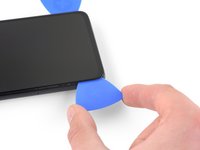
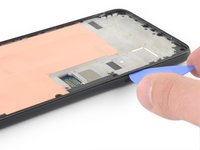
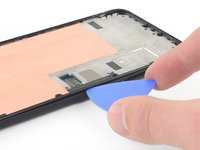
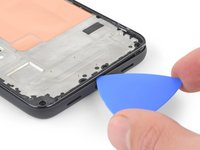
  4. Google Pixel 4a 5G USB-C Port Replacement, Insert an opening pick: crwdns2935265:04crwdnd2935265:01crwdnd2935265:03crwdne2935265:0 Google Pixel 4a 5G USB-C Port Replacement, Insert an opening pick: crwdns2935265:04crwdnd2935265:02crwdnd2935265:03crwdne2935265:0 Google Pixel 4a 5G USB-C Port Replacement, Insert an opening pick: crwdns2935265:04crwdnd2935265:03crwdnd2935265:03crwdne2935265:0
    • If your display is badly cracked, covering it with a layer of clear packing tape may allow the suction cup to adhere. Alternatively, very strong tape may be used instead of the suction cup. If all else fails, you can superglue the suction cup to the broken screen.

    • Place a suction cup as close to the right edge of the screen as possible.

    • Lift the suction cup with a strong steady force.

    • Insert the tip of an opening pick into the screen seam no more than 1 mm.

    When "lifting" the suction cup, press down while pivoting the handle away from the front/edge, as if opening a door.

    Soon-Hee - crwdns2934203:0crwdne2934203:0

    For a very cracked screen, I placed clear packing tape on top of the screen to use the suction cup at all. Also had to suction cup and pry/pick at multiple sides of the screen. Small fragments of broken glass won't pry up, so had to use tweezers to pull at glass fragments to release them from the adhesive underneath.

    Soon-Hee - crwdns2934203:0crwdne2934203:0

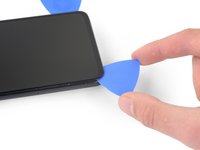
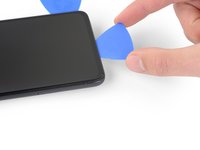
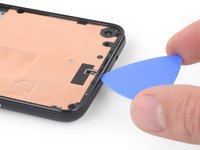
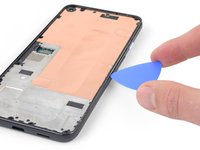
  5. Google Pixel 4a 5G USB-C Port Replacement, Guide the opening pick under the OLED panel: crwdns2935265:05crwdnd2935265:01crwdnd2935265:03crwdne2935265:0 Google Pixel 4a 5G USB-C Port Replacement, Guide the opening pick under the OLED panel: crwdns2935265:05crwdnd2935265:02crwdnd2935265:03crwdne2935265:0 Google Pixel 4a 5G USB-C Port Replacement, Guide the opening pick under the OLED panel: crwdns2935265:05crwdnd2935265:03crwdnd2935265:03crwdne2935265:0
    • This step shows how to insert your pick without damaging the OLED panel. Do this before slicing the adhesive.

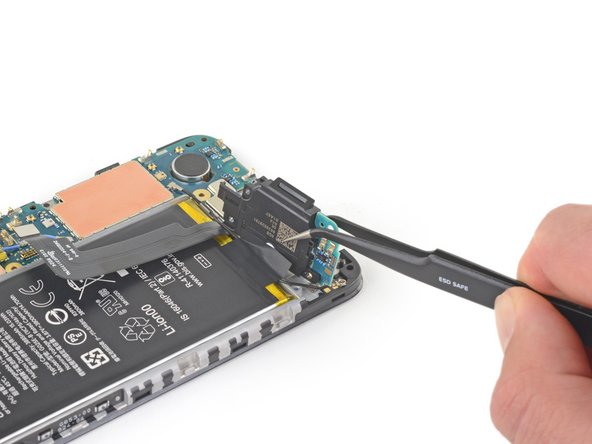
    • With the pick 1 mm into the gap, pivot the pick upwards to a steep angle.

    • At a steep angle, carefully push the pick into the gap about 1/4 inch (6 mm). The pick should slide in below the OLED panel.

    • Stop if you feel the point of the pick hitting a ridge. The pick may be pressing against the edge of the OLED panel. Angle the pick and try again.

    You don't exactly have to be utterly careful about damaging the panel. The glass+OLED screen as a whole is being replaced here. So it doesn't really matter if you accidentally damage the old OLED panel.

    Soon-Hee - crwdns2934203:0crwdne2934203:0

    If only the battery needs to be replaced, be sure to pay attention to the angle at which the pick is moved. Even the slightest deviation and the display is crap. I followed the instructions, but obviously I got to the display somewhere. Unfortunately the display now remains black and I have a flashing green bar at the top. So be careful.

    RiKER “MANiAC -NI-” - crwdns2934203:0crwdne2934203:0

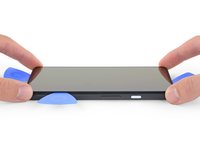
  6. Google Pixel 4a 5G USB-C Port Replacement, Slice through the display adhesive: crwdns2935265:06crwdnd2935265:01crwdnd2935265:03crwdne2935265:0 Google Pixel 4a 5G USB-C Port Replacement, Slice through the display adhesive: crwdns2935265:06crwdnd2935265:02crwdnd2935265:03crwdne2935265:0 Google Pixel 4a 5G USB-C Port Replacement, Slice through the display adhesive: crwdns2935265:06crwdnd2935265:03crwdnd2935265:03crwdne2935265:0
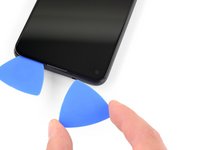
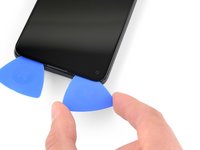
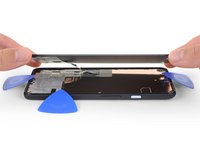
    • Slide the pick along the right edge of the screen to cut the adhesive.

    • Do not insert the pick more than 1/4 inch (6 mm) or you may damage the screen's flex cable.

    • Leave the pick in the bottom-right corner to prevent the adhesive from re-sealing.

  7. Google Pixel 4a 5G USB-C Port Replacement: crwdns2935265:07crwdnd2935265:01crwdnd2935265:03crwdne2935265:0 Google Pixel 4a 5G USB-C Port Replacement: crwdns2935265:07crwdnd2935265:02crwdnd2935265:03crwdne2935265:0 Google Pixel 4a 5G USB-C Port Replacement: crwdns2935265:07crwdnd2935265:03crwdnd2935265:03crwdne2935265:0
    • There's a mesh covering the earpiece speaker on the top edge of the screen. If you don’t have a replacement mesh, take care not to damage or lose this component.

    • The screen adhesive is weak, so you should not need to re-apply heat. If the screen is hard to slice, apply heat to the difficult area for one minute and try again.

    • Insert another opening pick into the right edge of the phone at an angle where a gap has already formed to prevent damage to the OLED panel.

    • Slide the opening pick around the top of the phone to cut the adhesive.

    • Leave the pick inserted along the top edge to prevent the adhesive from resealing.

    The replacement screen I purchased from iFixit Oceania in Sept 2022 included a new speaker mesh, already attached to the screen.

    Chris - crwdns2934203:0crwdne2934203:0

    The corners seems particularly tricky with the adhesive. Make sure to reapply heat in the corners. I cracked my screen while detaching the corners.

    Patrick Nantel - crwdns2934203:0crwdne2934203:0

  8. Google Pixel 4a 5G USB-C Port Replacement: crwdns2935265:08crwdnd2935265:01crwdnd2935265:03crwdne2935265:0 Google Pixel 4a 5G USB-C Port Replacement: crwdns2935265:08crwdnd2935265:02crwdnd2935265:03crwdne2935265:0 Google Pixel 4a 5G USB-C Port Replacement: crwdns2935265:08crwdnd2935265:03crwdnd2935265:03crwdne2935265:0
    • Insert another opening pick into the top edge of your phone at an angle where a gap has already formed to prevent damage to the OLED panel.

    • Use the pick to slice around the top-left corner where the camera window is.

    • If the screen is hard to slice, apply heat to the difficult area for one minute and try again.

    • Leave the pick inserted along the left edge of your phone to prevent the adhesive from re-sealing.

  9. Google Pixel 4a 5G USB-C Port Replacement: crwdns2935265:09crwdnd2935265:01crwdnd2935265:03crwdne2935265:0 Google Pixel 4a 5G USB-C Port Replacement: crwdns2935265:09crwdnd2935265:02crwdnd2935265:03crwdne2935265:0 Google Pixel 4a 5G USB-C Port Replacement: crwdns2935265:09crwdnd2935265:03crwdnd2935265:03crwdne2935265:0
    • Slide the opening pick to cut the adhesive along the left edge of your phone.

    • If the screen is hard to slice, apply heat to the difficult area for one minute and try again.

    • Keep in mind that you are now slicing near the screen flex cable and digitizer.

  10. Google Pixel 4a 5G USB-C Port Replacement: crwdns2935265:010crwdnd2935265:01crwdnd2935265:03crwdne2935265:0 Google Pixel 4a 5G USB-C Port Replacement: crwdns2935265:010crwdnd2935265:02crwdnd2935265:03crwdne2935265:0 Google Pixel 4a 5G USB-C Port Replacement: crwdns2935265:010crwdnd2935265:03crwdnd2935265:03crwdne2935265:0
    • Slide the opening pick around the bottom-left corner and across the bottom of the display to cut the rest of the adhesive.

    • If the screen is hard to slice, apply heat to the difficult area for one minute and try again.

    • Keep in mind that you are now slicing near the screen flex cable and digitizer.

  11. Google Pixel 4a 5G USB-C Port Replacement: crwdns2935265:011crwdnd2935265:01crwdnd2935265:02crwdne2935265:0 Google Pixel 4a 5G USB-C Port Replacement: crwdns2935265:011crwdnd2935265:02crwdnd2935265:02crwdne2935265:0
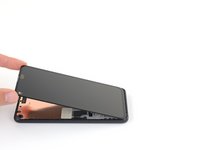
    • Once you have cut around the perimeter of the phone, carefully lift the right edge of the screen, partially opening the phone like a book.

    • Do not remove the screen yet.

    • Use an opening pick to carefully cut through any remaining adhesive.

  12. Google Pixel 4a 5G USB-C Port Replacement, Flip the screen over: crwdns2935265:012crwdnd2935265:01crwdnd2935265:03crwdne2935265:0 Google Pixel 4a 5G USB-C Port Replacement, Flip the screen over: crwdns2935265:012crwdnd2935265:02crwdnd2935265:03crwdne2935265:0 Google Pixel 4a 5G USB-C Port Replacement, Flip the screen over: crwdns2935265:012crwdnd2935265:03crwdnd2935265:03crwdne2935265:0
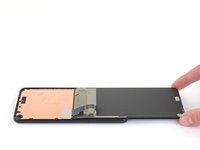
    • Lift from the top edge and swing the screen over the bottom edge until you can rest it glass-side down.

    • Be careful not to put any stress on the attached ribbon cable.

  13. Google Pixel 4a 5G USB-C Port Replacement, Disconnect the display: crwdns2935265:013crwdnd2935265:01crwdnd2935265:03crwdne2935265:0 Google Pixel 4a 5G USB-C Port Replacement, Disconnect the display: crwdns2935265:013crwdnd2935265:02crwdnd2935265:03crwdne2935265:0 Google Pixel 4a 5G USB-C Port Replacement, Disconnect the display: crwdns2935265:013crwdnd2935265:03crwdnd2935265:03crwdne2935265:0
    crwdns2935267:0crwdne2935267:0
    Tweezers
    $4.99
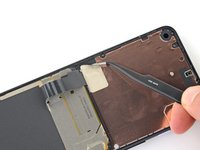
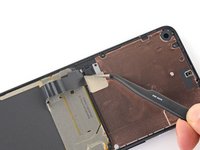
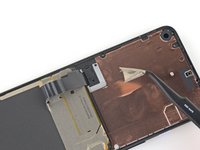
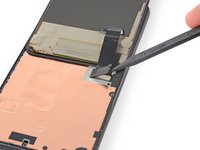
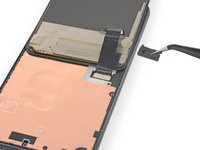
    • Use your fingernail or a pair of tweezers to carefully peel off the tape covering the screen connector.

    • If it is in good condition, you can re-use this tape during reassembly. Otherwise, replace it with a piece of Kapton tape.

    The replacement screen I purchased from iFixit Oceania in Sept 2022 included a new piece of tape.

    Chris - crwdns2934203:0crwdne2934203:0

  14. Google Pixel 4a 5G USB-C Port Replacement: crwdns2935265:014crwdnd2935265:01crwdnd2935265:03crwdne2935265:0 Google Pixel 4a 5G USB-C Port Replacement: crwdns2935265:014crwdnd2935265:02crwdnd2935265:03crwdne2935265:0 Google Pixel 4a 5G USB-C Port Replacement: crwdns2935265:014crwdnd2935265:03crwdnd2935265:03crwdne2935265:0
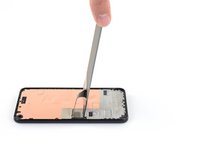
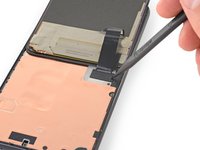
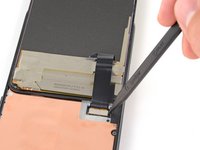
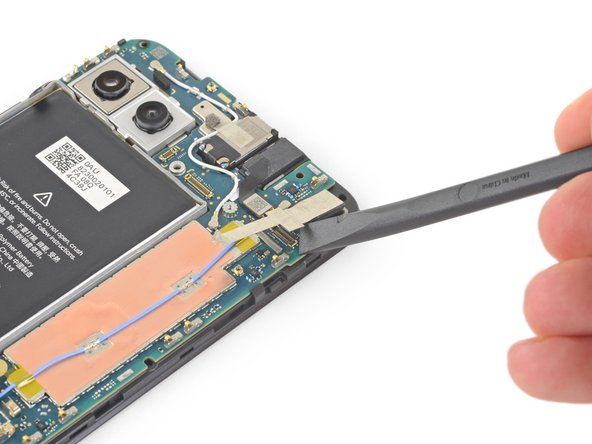
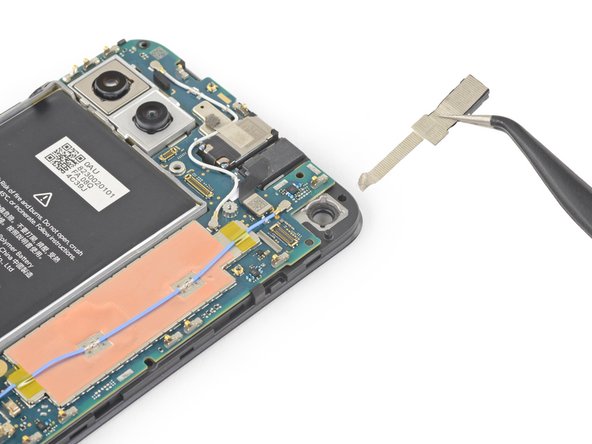
    • Insert the tip of a spudger into the opening of the plastic cover securing the screen flex cable.

    • Pry the plastic cover straight up until it pops out of place.

    • The plastic cover may spring into the air.

    • Remove the plastic cover.

  15. Google Pixel 4a 5G USB-C Port Replacement: crwdns2935265:015crwdnd2935265:01crwdnd2935265:02crwdne2935265:0 Google Pixel 4a 5G USB-C Port Replacement: crwdns2935265:015crwdnd2935265:02crwdnd2935265:02crwdne2935265:0
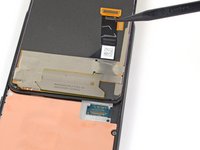
    • Use the tip of a spudger to pry up and disconnect the screen flex cable.

    • To re-attach press connectors like this one, carefully align and press down on one side until it clicks into place, then repeat on the other side. Do not press down on the middle. If the connector is misaligned, the pins can bend, causing permanent damage.

  16. Google Pixel 4a 5G USB-C Port Replacement, Remove the screen: crwdns2935265:016crwdnd2935265:01crwdnd2935265:03crwdne2935265:0 Google Pixel 4a 5G USB-C Port Replacement, Remove the screen: crwdns2935265:016crwdnd2935265:02crwdnd2935265:03crwdne2935265:0 Google Pixel 4a 5G USB-C Port Replacement, Remove the screen: crwdns2935265:016crwdnd2935265:03crwdnd2935265:03crwdne2935265:0
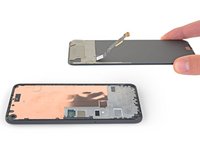
    • Remove the screen.

    • To install a new screen:

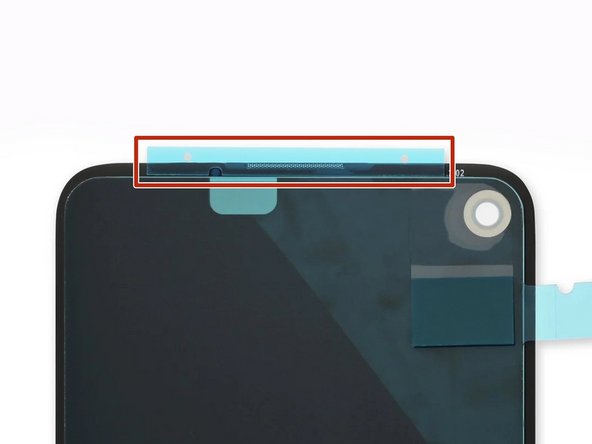
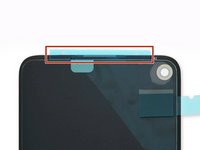
    • Check if your replacement screen has speaker mesh and top edge adhesive pre-installed.

    • If it does, you won't need the top edge adhesive.

    • If it doesn't, remove the larger clear liner from the top edge adhesive and apply it to the screen (not the frame). Make sure the larger cutout lines up with the speaker mesh.

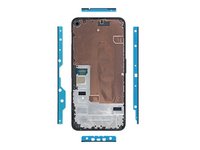
    • Follow this guide to apply the custom-cut adhesive.

    • Use the third photo as a reference to position your adhesives.

    • During the boot-up process after reassembly, the screen will go through a calibration sequence. Don't touch the screen during this process, as it could result in improper touch calibration and create touch issues.

    There are four adhesives provided in the current kit provided by ifixit. They have a blue and clear backing with a thin black strip, as shown on here. The adhesives instructions provided in this general guide are not very clear and I messed up my first one, which made the other three useless leading me to just buy a b-7000 adhesive instead. However, for anyone wanting to correctly use the ifixit adhesives, first line up the black strip on the edge of your phone where the screen will rest and peel off the first clear portion. Then peel off the blue portion and you will be left with a thin black adhesive strip. Do this for all four pieces in the configuration shown on the page linked above and then place your screen on, press down gently, then turn the phone screen down and place some books on to provide stronger contact between the adhesive and the new screen. Good luck!

    Graduate Agriculture - crwdns2934203:0crwdne2934203:0

    thanks a lot!

    Zurdits -

    That was so much clearer thank you!

    Jason De Dios -

    Super Anleitung. Allerdings habe ich die Kalibriersequenz leider nicht gesehen. Das Display funktioniert, aber der zweifinger Zoom arbeitet nicht. Kann man die Kalibriersequenz neu aufrufen oder was kann ich tun. In manchen Anleitungen steht, das man im Recovery Mode Display Befehle ausführen kann. Ein Werksreset des Pixel 4A 5G hat nicht geholfen.

    Beim ersten Neustart nach der Reparatur wird das Display eine Kalibriersequenz durchlaufen. Berühre das Display dabei nicht, der Touchscreen könnte nicht richtig kalibriert werden, was zu einer schlechten Funktion führen kann.

    Danke im voraus

    SteffenZimmWeimar - crwdns2934203:0crwdne2934203:0

    The adhesive strips do not cover the corners, and I guess there is a good chance of dust comming into the device. Had issues with the front camera after the first repair. Maybe the rounded corner strips could be included in the repair kit?

    Michael Bappert - crwdns2934203:0crwdne2934203:0

    I had a lot of old glue on the display. Since I only swapped the battery I recommend to remove all all glue on the display do guarantee that the new glue has a good sticking and nothing is too thick when pressing the old display on the new glue.

    Hassani Sabbah - crwdns2934203:0crwdne2934203:0

  17. Google Pixel 4a 5G USB-C Port Replacement, Remove the midframe screws: crwdns2935265:017crwdnd2935265:01crwdnd2935265:02crwdne2935265:0 Google Pixel 4a 5G USB-C Port Replacement, Remove the midframe screws: crwdns2935265:017crwdnd2935265:02crwdnd2935265:02crwdne2935265:0
    crwdns2935267:0crwdne2935267:0
    Magnetic Project Mat
    $19.95
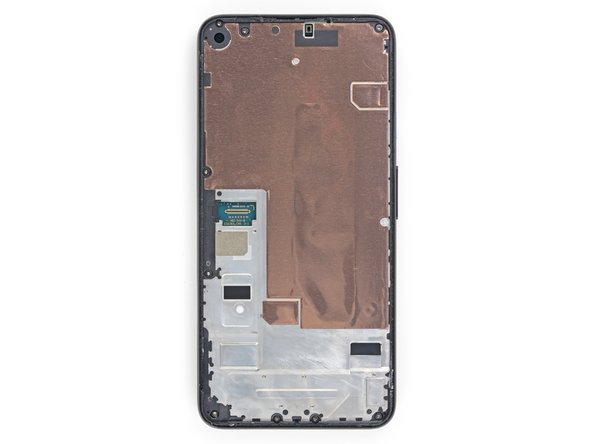
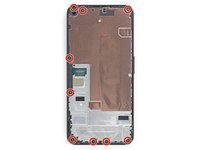
    • Use a T3 Torx driver to remove the nine 4.4 mm-long screws securing the back cover to the midframe.

    • Throughout this repair, keep track of each screw and make sure it goes back exactly where it came from.

    I found 2 extra screws in mine. FYI. (From America)

    L Daniel Wenger - crwdns2934203:0crwdne2934203:0

    I also have 11x T3 in a US model. And the two at the bottom near the USB-C port are shorter by ~1mm than the others.

    Erik Sorensen - crwdns2934203:0crwdne2934203:0

  18. Google Pixel 4a 5G USB-C Port Replacement, Separate the back cover from the midframe: crwdns2935265:018crwdnd2935265:01crwdnd2935265:03crwdne2935265:0 Google Pixel 4a 5G USB-C Port Replacement, Separate the back cover from the midframe: crwdns2935265:018crwdnd2935265:02crwdnd2935265:03crwdne2935265:0 Google Pixel 4a 5G USB-C Port Replacement, Separate the back cover from the midframe: crwdns2935265:018crwdnd2935265:03crwdnd2935265:03crwdne2935265:0
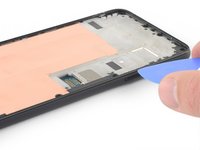
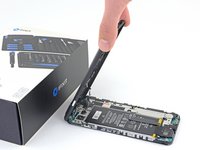
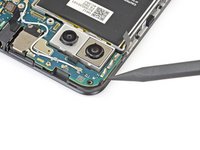
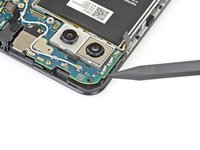
    • Insert an opening pick into the seam between the midframe and the back cover, right above the SIM card slot.

    • Slide the opening pick along the right edge of your phone to release the plastic clips securing the back cover to the midframe.

  19. Google Pixel 4a 5G USB-C Port Replacement: crwdns2935265:019crwdnd2935265:01crwdnd2935265:03crwdne2935265:0 Google Pixel 4a 5G USB-C Port Replacement: crwdns2935265:019crwdnd2935265:02crwdnd2935265:03crwdne2935265:0 Google Pixel 4a 5G USB-C Port Replacement: crwdns2935265:019crwdnd2935265:03crwdnd2935265:03crwdne2935265:0
    • Continue sliding the opening pick along the top, left, and bottom edges of your phone until all of the plastic tabs securing the back cover to the midframe are released.

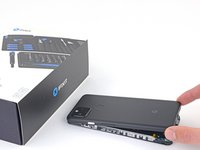
  20. Google Pixel 4a 5G USB-C Port Replacement: crwdns2935265:020crwdnd2935265:01crwdnd2935265:03crwdne2935265:0 Google Pixel 4a 5G USB-C Port Replacement: crwdns2935265:020crwdnd2935265:02crwdnd2935265:03crwdne2935265:0 Google Pixel 4a 5G USB-C Port Replacement: crwdns2935265:020crwdnd2935265:03crwdnd2935265:03crwdne2935265:0
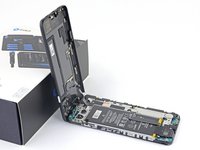
    • Flip your phone over so the back cover is facing up.

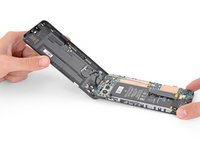
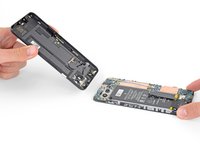
    • Carefully swing the back cover up to an upright position.

    • Do not remove the back cover. It is still attached by two ribbon cables.

    • Rest the back cover against an object such as a cardboard box or soda can.

    Be very gentle when removing the back panel, the ribon for the fingerprint broke and I had to wait 4 weeks to obtain it from China

    clem - crwdns2934203:0crwdne2934203:0

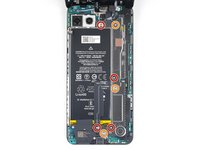
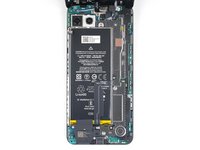
  21. Google Pixel 4a 5G USB-C Port Replacement, Remove the motherboard bracket: crwdns2935265:021crwdnd2935265:01crwdnd2935265:02crwdne2935265:0 Google Pixel 4a 5G USB-C Port Replacement, Remove the motherboard bracket: crwdns2935265:021crwdnd2935265:02crwdnd2935265:02crwdne2935265:0
    • Use a T3 Torx screwdriver to remove the seven screws securing the motherboard bracket:

    • Four 4.0 mm-long screws

    • Three 2.1 mm-long screws

    Hi. Thank you for the great Tuto! Do you know where can I find a replacement battery?

    Nicolas AUCONIE - crwdns2934203:0crwdne2934203:0

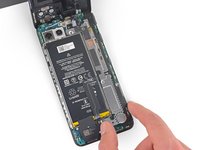
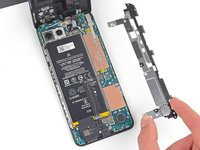
  22. Google Pixel 4a 5G USB-C Port Replacement: crwdns2935265:022crwdnd2935265:01crwdnd2935265:02crwdne2935265:0 Google Pixel 4a 5G USB-C Port Replacement: crwdns2935265:022crwdnd2935265:02crwdnd2935265:02crwdne2935265:0
    • Remove the motherboard bracket.

  23. Google Pixel 4a 5G USB-C Port Replacement, Disconnect the battery: crwdns2935265:023crwdnd2935265:01crwdnd2935265:02crwdne2935265:0 Google Pixel 4a 5G USB-C Port Replacement, Disconnect the battery: crwdns2935265:023crwdnd2935265:02crwdnd2935265:02crwdne2935265:0
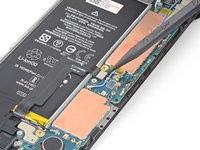
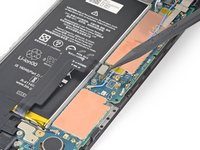
    • Use the tip of a spudger to disconnect the battery cable from the motherboard.

    Keep in mind this cable when putting board back in place

    Ivan Andrijic - crwdns2934203:0crwdne2934203:0

  24. Google Pixel 4a 5G USB-C Port Replacement, Remove the back cover: crwdns2935265:024crwdnd2935265:01crwdnd2935265:02crwdne2935265:0 Google Pixel 4a 5G USB-C Port Replacement, Remove the back cover: crwdns2935265:024crwdnd2935265:02crwdnd2935265:02crwdne2935265:0
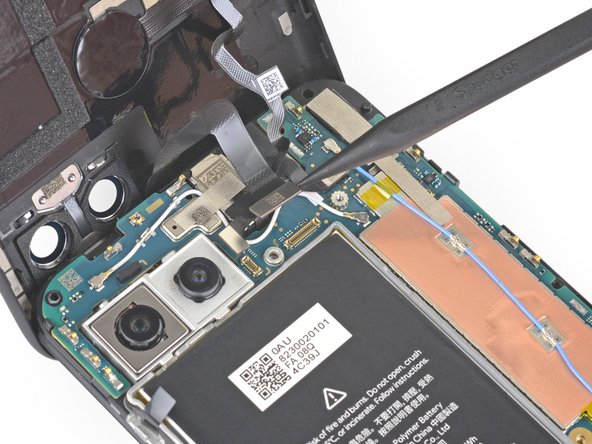
    • Use the tip of a spudger to pry up and disconnect the fingerprint sensor cable.

  25. Google Pixel 4a 5G USB-C Port Replacement: crwdns2935265:025crwdnd2935265:01crwdnd2935265:02crwdne2935265:0 Google Pixel 4a 5G USB-C Port Replacement: crwdns2935265:025crwdnd2935265:02crwdnd2935265:02crwdne2935265:0
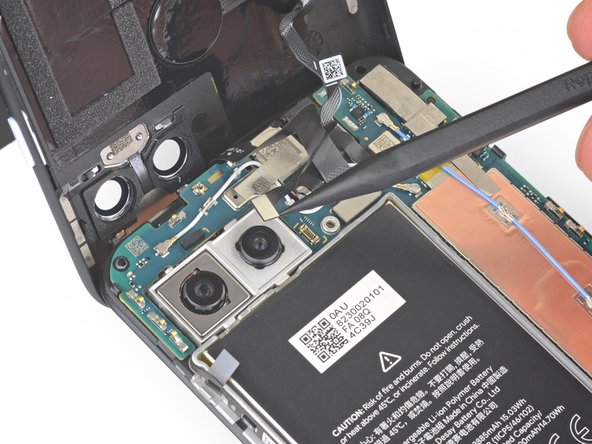
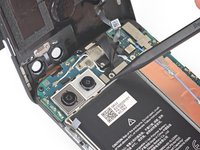
    • Use the tip of a spudger to pry up and disconnect the front sensor array cable.

  26. Google Pixel 4a 5G USB-C Port Replacement: crwdns2935265:026crwdnd2935265:01crwdnd2935265:02crwdne2935265:0 Google Pixel 4a 5G USB-C Port Replacement: crwdns2935265:026crwdnd2935265:02crwdnd2935265:02crwdne2935265:0
    • Remove the back cover.

  27. Google Pixel 4a 5G USB-C Port Replacement, Remove the front-facing camera: crwdns2935265:027crwdnd2935265:01crwdnd2935265:02crwdne2935265:0 Google Pixel 4a 5G USB-C Port Replacement, Remove the front-facing camera: crwdns2935265:027crwdnd2935265:02crwdnd2935265:02crwdne2935265:0
    crwdns2935267:0crwdne2935267:0
    Tweezers
    $4.99
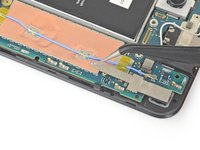
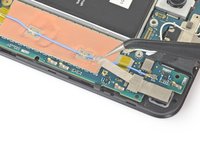
    • Use your fingers or a pair of tweezers to peel the tape off of the copper foil.

    • The copper foil is thin and easily punctured.

  28. Google Pixel 4a 5G USB-C Port Replacement: crwdns2935265:028crwdnd2935265:01crwdnd2935265:03crwdne2935265:0 Google Pixel 4a 5G USB-C Port Replacement: crwdns2935265:028crwdnd2935265:02crwdnd2935265:03crwdne2935265:0 Google Pixel 4a 5G USB-C Port Replacement: crwdns2935265:028crwdnd2935265:03crwdnd2935265:03crwdne2935265:0
    • Use the flat end of a spudger to disconnect the front-facing camera from the motherboard.

    • Remove the front-facing camera.

  29. Google Pixel 4a 5G USB-C Port Replacement, Remove the loudspeaker: crwdns2935265:029crwdnd2935265:01crwdnd2935265:02crwdne2935265:0 Google Pixel 4a 5G USB-C Port Replacement, Remove the loudspeaker: crwdns2935265:029crwdnd2935265:02crwdnd2935265:02crwdne2935265:0
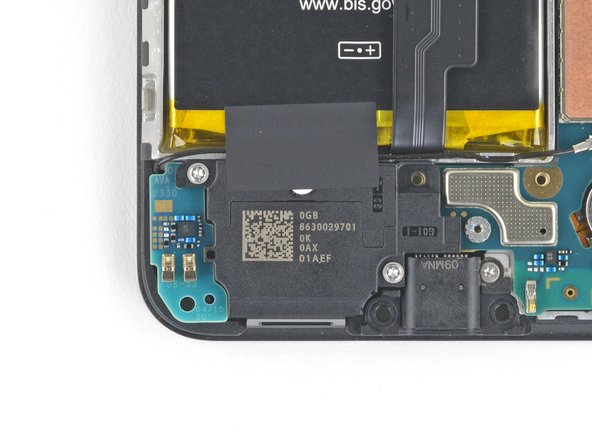
    • Use a T3 Torx driver to remove the two 4.2 mm-long screws from the loudspeaker assembly.

  30. Google Pixel 4a 5G USB-C Port Replacement: crwdns2935265:030crwdnd2935265:01crwdnd2935265:03crwdne2935265:0 Google Pixel 4a 5G USB-C Port Replacement: crwdns2935265:030crwdnd2935265:02crwdnd2935265:03crwdne2935265:0 Google Pixel 4a 5G USB-C Port Replacement: crwdns2935265:030crwdnd2935265:03crwdnd2935265:03crwdne2935265:0
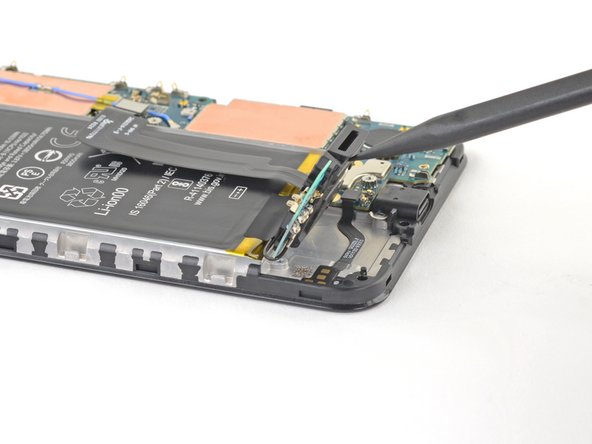
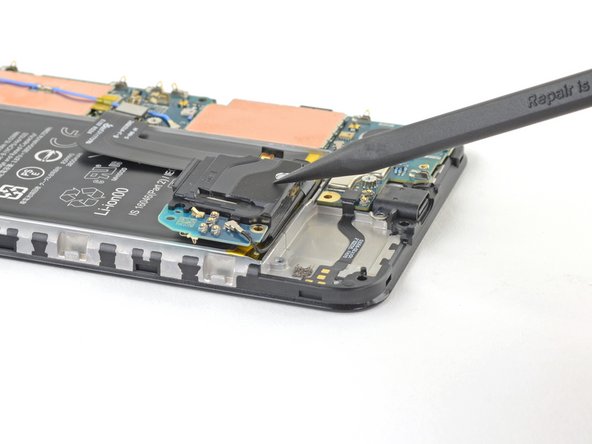
    • Insert the tip of a spudger underneath the loudspeaker assembly.

    • Be careful not to puncture the white membranes on either side of the loudspeaker if you are intending to reuse it.

    • Flip the loudspeaker assembly over so it lightly rests on top of the battery.

  31. Google Pixel 4a 5G USB-C Port Replacement: crwdns2935265:031crwdnd2935265:01crwdnd2935265:02crwdne2935265:0 Google Pixel 4a 5G USB-C Port Replacement: crwdns2935265:031crwdnd2935265:02crwdnd2935265:02crwdne2935265:0
    crwdns2935267:0crwdne2935267:0
    Tweezers
    $4.99
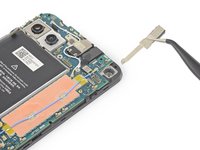
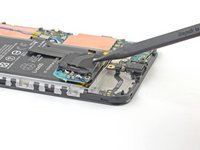
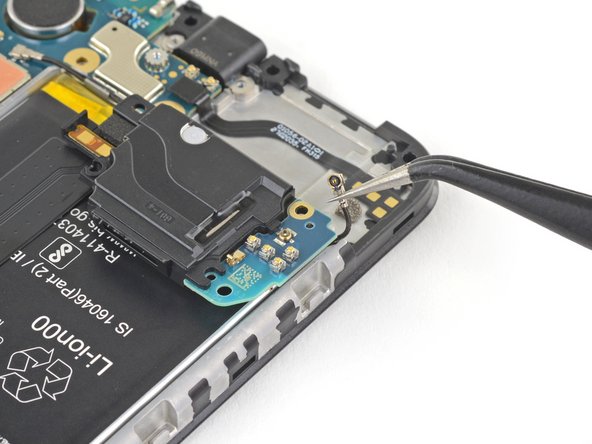
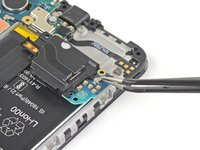
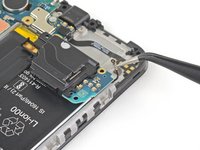
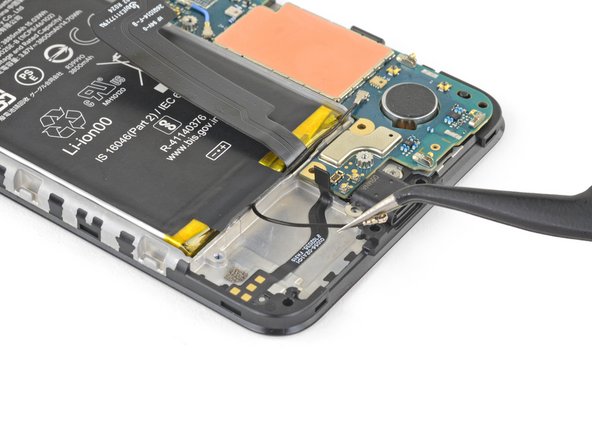
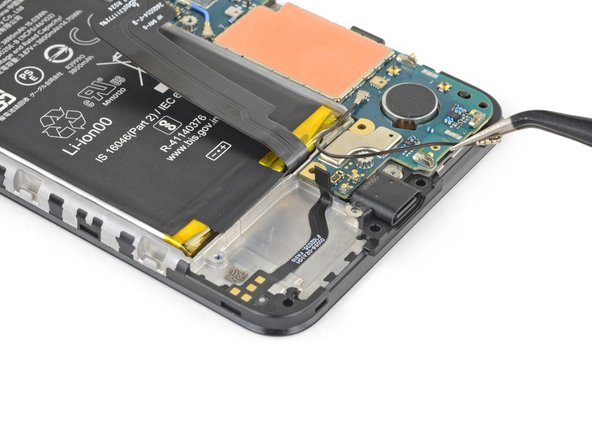
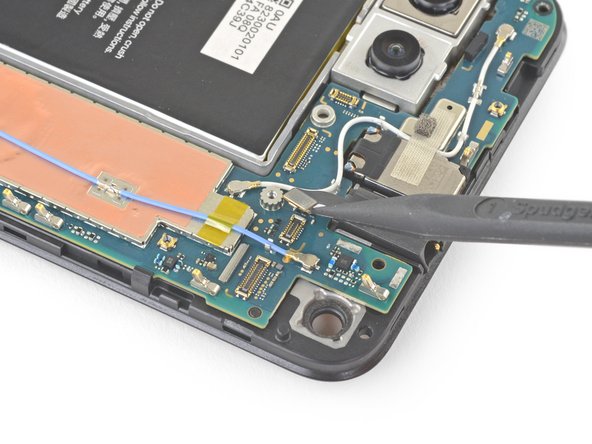
    • Use a pair of tweezers to disconnect the antenna cable from the loudspeaker assembly.

    • Grab the metal connector of the antenna cable with your tweezers—not the plastic cable.

  32. Google Pixel 4a 5G USB-C Port Replacement: crwdns2935265:032crwdnd2935265:01crwdnd2935265:03crwdne2935265:0 Google Pixel 4a 5G USB-C Port Replacement: crwdns2935265:032crwdnd2935265:02crwdnd2935265:03crwdne2935265:0 Google Pixel 4a 5G USB-C Port Replacement: crwdns2935265:032crwdnd2935265:03crwdnd2935265:03crwdne2935265:0
    • Carefully peel the loudspeaker assembly up off the tape underneath it.

    • Be careful not to puncture the white membranes on either side of the loudspeaker if you are intending to reuse it.

    • Remove the loudspeaker assembly.

  33. Google Pixel 4a 5G USB-C Port Replacement, De-route the antenna flex cable: crwdns2935265:033crwdnd2935265:01crwdnd2935265:03crwdne2935265:0 Google Pixel 4a 5G USB-C Port Replacement, De-route the antenna flex cable: crwdns2935265:033crwdnd2935265:02crwdnd2935265:03crwdne2935265:0 Google Pixel 4a 5G USB-C Port Replacement, De-route the antenna flex cable: crwdns2935265:033crwdnd2935265:03crwdnd2935265:03crwdne2935265:0
    crwdns2935267:0crwdne2935267:0
    Tweezers
    $4.99
    • Use your fingers or a pair of tweezers to pull the antenna cable out from underneath the tape covering it.

  34. Google Pixel 4a 5G USB-C Port Replacement, Disconnect the loudspeaker cable: crwdns2935265:034crwdnd2935265:01crwdnd2935265:02crwdne2935265:0 Google Pixel 4a 5G USB-C Port Replacement, Disconnect the loudspeaker cable: crwdns2935265:034crwdnd2935265:02crwdnd2935265:02crwdne2935265:0
    • Use the tip of a spudger to disconnect the loudspeaker cable from the motherboard.

    Keep in mind this cable when putting board back in place

    Ivan Andrijic - crwdns2934203:0crwdne2934203:0

  35. Google Pixel 4a 5G USB-C Port Replacement, Disconnect the headphone jack: crwdns2935265:035crwdnd2935265:01crwdnd2935265:02crwdne2935265:0 Google Pixel 4a 5G USB-C Port Replacement, Disconnect the headphone jack: crwdns2935265:035crwdnd2935265:02crwdnd2935265:02crwdne2935265:0
    • Use the tip of a spudger to disconnect the headphone jack cable from the motherboard.

  36. Google Pixel 4a 5G USB-C Port Replacement: crwdns2935265:036crwdnd2935265:01crwdnd2935265:03crwdne2935265:0 Google Pixel 4a 5G USB-C Port Replacement: crwdns2935265:036crwdnd2935265:02crwdnd2935265:03crwdne2935265:0 Google Pixel 4a 5G USB-C Port Replacement: crwdns2935265:036crwdnd2935265:03crwdnd2935265:03crwdne2935265:0
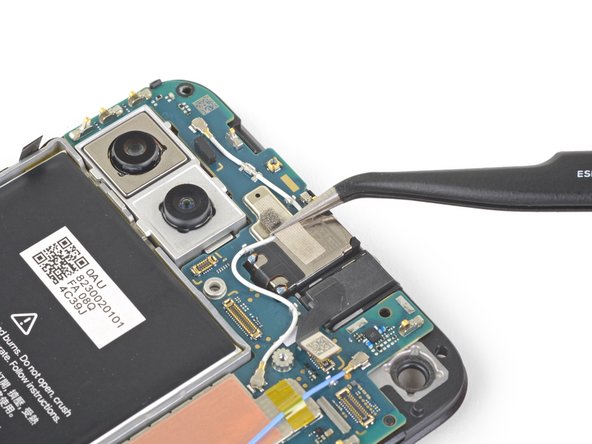
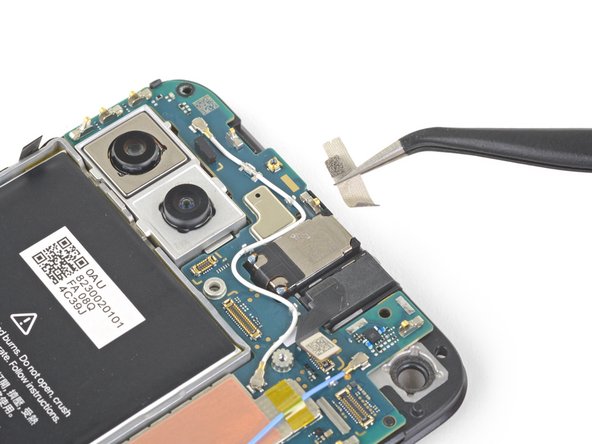
    • Use a pair of tweezers to remove the tape on the earpiece speaker covering the antenna flex cable.

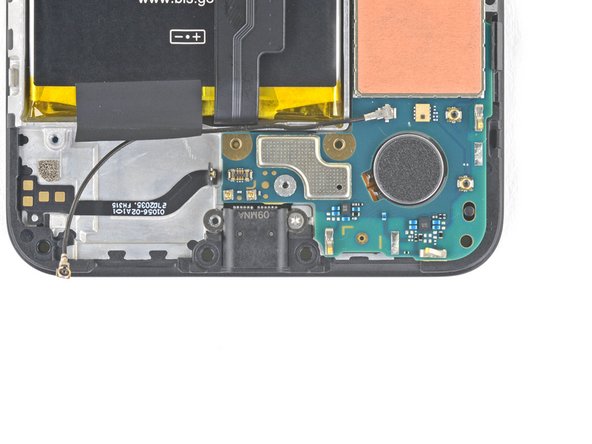
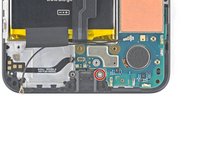
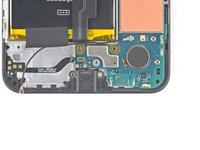
  37. Google Pixel 4a 5G USB-C Port Replacement, Remove the charging port screw: crwdns2935265:037crwdnd2935265:01crwdnd2935265:02crwdne2935265:0 Google Pixel 4a 5G USB-C Port Replacement, Remove the charging port screw: crwdns2935265:037crwdnd2935265:02crwdnd2935265:02crwdne2935265:0
    • Use a T3 Torx screwdriver to remove the 2.1 mm-long screw securing the charging port.

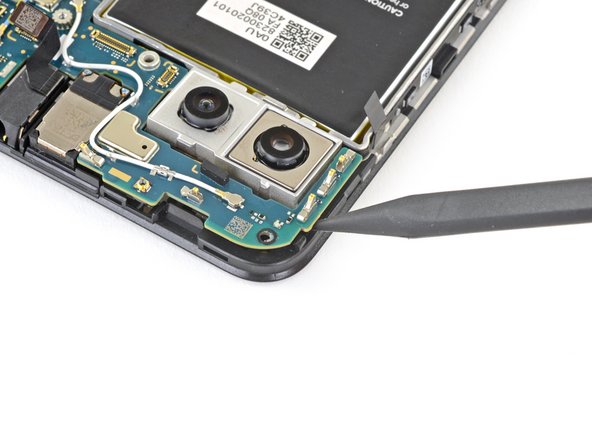
  38. Google Pixel 4a 5G USB-C Port Replacement, Remove the motherboard: crwdns2935265:038crwdnd2935265:01crwdnd2935265:02crwdne2935265:0 Google Pixel 4a 5G USB-C Port Replacement, Remove the motherboard: crwdns2935265:038crwdnd2935265:02crwdnd2935265:02crwdne2935265:0
    • The motherboard is secured to the midframe by plastic clips.

    • Insert the tip of a spudger into the gap between the motherboard and the midframe near the front-facing cameras to pop it free from the first clip.

  39. Google Pixel 4a 5G USB-C Port Replacement: crwdns2935265:039crwdnd2935265:01crwdnd2935265:03crwdne2935265:0 Google Pixel 4a 5G USB-C Port Replacement: crwdns2935265:039crwdnd2935265:02crwdnd2935265:03crwdne2935265:0 Google Pixel 4a 5G USB-C Port Replacement: crwdns2935265:039crwdnd2935265:03crwdnd2935265:03crwdne2935265:0
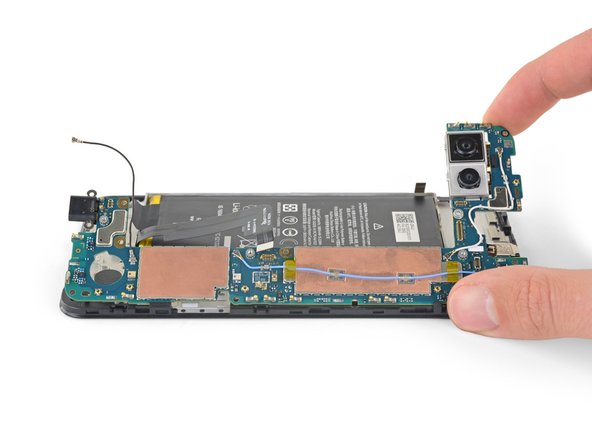
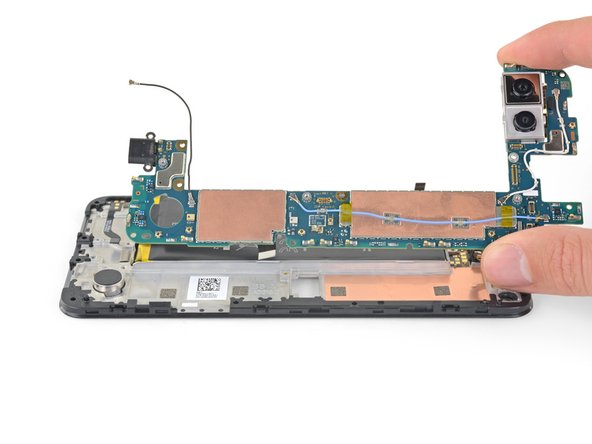
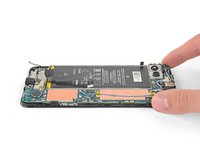
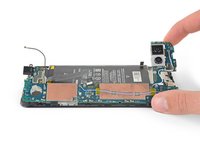
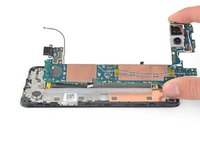
    • Grab the motherboard with your fingers and open it like a book.

    • This will release the rest of the clips.

    • Lift the motherboard straight out to remove it.

    Mine (US model) has the two "squeeze sensor" cables on the middle of the motherboard. These need to be disconnected before lifting it out.

    Erik Sorensen - crwdns2934203:0crwdne2934203:0

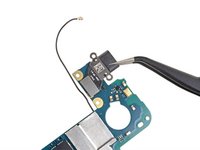
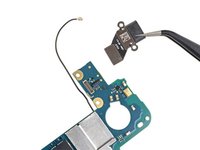
  40. Google Pixel 4a 5G USB-C Port Replacement, Remove the USB-C port assembly: crwdns2935265:040crwdnd2935265:01crwdnd2935265:02crwdne2935265:0 Google Pixel 4a 5G USB-C Port Replacement, Remove the USB-C port assembly: crwdns2935265:040crwdnd2935265:02crwdnd2935265:02crwdne2935265:0
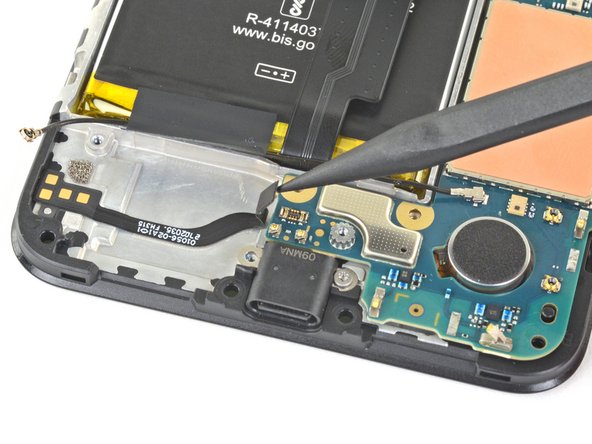
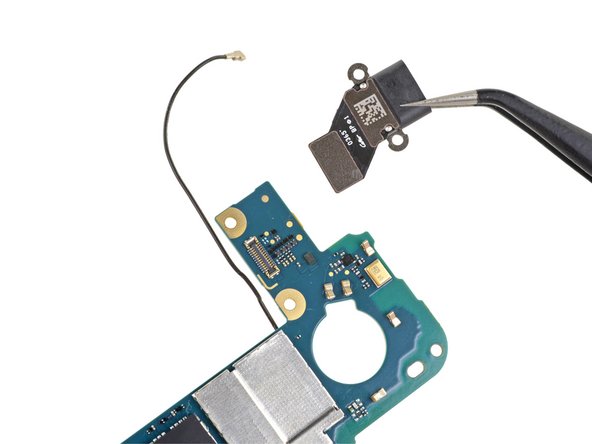
    • Use a spudger to pry up and disconnect the USB-C port press connector from the motherboard.

    • Remove the USB-C port assembly from the motherboard.

crwdns2915888:0crwdne2915888:0

To reassemble your device, follow the above steps in reverse order.

Take your e-waste to an R2 or e-Stewards certified recycler.

Repair didn’t go as planned? Try some basic troubleshooting, or ask our Answers community for help.

crwdns2935229:011crwdne2935229:0

Sam Omiotek

crwdns2935283:002/25/19crwdne2935283:0

85.887 crwdns2915208:0crwdne2915208:0

crwdns2935297:0290crwdne2935297:0

crwdns2947412:014crwdne2947412:0

I have to take out the screen just to change the charge port ?

Anagazo - crwdns2934203:0crwdne2934203:0

That's pretty standard with modern phones

Rin Blackbird -

Where did you buy the replacement part?

Rin Blackbird - crwdns2934203:0crwdne2934203:0

Thanks for the tip, Mark. Unfortunately mobilesentrix.com does not sell directly consumers, so if you are a hobbyist repairing your own phone (like myself) you would not be able to buy the charging port from them. I don’t know if you can update your comment, but if you can I would.

Regarding finding a non-Amazon place to buy the charging port I’m unfortunately still looking for a reputable source that sells to consumers.

Maxwell Burton -

I got a slightly burned smell from the charging port and it no longer charges… Should I just replace the USB C port?

jaycee3 - crwdns2934203:0crwdne2934203:0

great guide. thanks a lot! worked like a charm for me.

Mark - crwdns2934203:0crwdne2934203:0

I replaced the charging port and the LCD is not turning back on. I was extra cautious with the process of removing the screen and checked connectors. What would cause that issue?

Alexandria - crwdns2934203:0crwdne2934203:0

does it use the same charging port as the 4a?

AS versiontwo - crwdns2934203:0crwdne2934203:0

I had one broken screw among the 6 holding the motherboard, and while trying to remove it, I broke the fingerprint cable where it's twisting.

Be extra careful with that part, it's way more fragile than I thought, don't end up with a dead pixel like me.

Feel like the difficulty of this repair should be raised, I found the steps much harder than other moderate guides

Auguste Charpentier - crwdns2934203:0crwdne2934203:0

Great guide, more effective than YouTube video's that miss eye for details that cause damage. Just succesfully replaced the charging port in 2 hours time ;-), back on stable Google Auto now.

Reint-Jan de Blois - crwdns2934203:0crwdne2934203:0

I didn't foresee how intimidating a repair seems to be at first, but once I got into it everything was clear and the repairs worked! Got to change the USB-C port, the battery and a broken screen all at once to give my Pixel a new life of its own, and it took only a few hours. Thanks for the useful guides!

Trimmtab - crwdns2934203:0crwdne2934203:0

OK, so this tells you how to get the USB-C port out, but what about putting it all back together?

Michelle Montano - crwdns2934203:0crwdne2934203:0

Hallo!

Leider ist mir das bei Schritt 22 zu sehen ist, diese Klemme wo die Ladeeinheit angeklickt wird, abgebrochen. Brauchte dann so ein Teil.

Gibt es die Möglichkeit das Handy ohne Akku zu nutzen? Kann man das nur geschlossen anschalten?

LG

Chris - crwdns2934203:0crwdne2934203:0

crwdns2917038:0crwdne2917038:0

crwdns2936625:0crwdne2936625:0:

crwdns2936751:024crwdne2936751:0 3

crwdns2936753:07crwdne2936753:0 26

crwdns2936753:030crwdne2936753:0 117

crwdns2942667:0crwdne2942667:0 13,333