crwdns2915892:0crwdne2915892:0
Use this guide to replace the Force Touch gasket in your Apple Watch Series 2. This guide shows the procedure while leaving the display connected. If you prefer to disconnect the display or are replacing the display anyway, please refer to this guide and replace the Force Touch gasket after removing the display.
If your Force Touch function works correctly and you just need new adhesive to re-seal your watch, follow the adhesive replacement guide instead.
crwdns2942213:0crwdne2942213:0
-
-
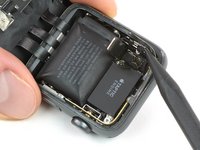
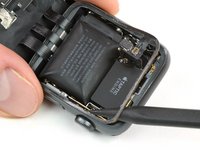
Before starting repairs, take your watch off the charger and power it down.
-
-
-
Prepare an iOpener (or grab a hair dryer or heat gun) and heat the face of the watch until it's slightly too hot to touch.
-
Leave the iOpener on the watch for at least a minute to fully heat the screen and soften the adhesive holding it to the case.
I have heated up the iOpener to 165 degrees and left it on for more than a minute. No way I can lift the screen off with the exact knife. Tried different angles in various places, but no go. I also used a hair dryer un til the watch screen was too hot to touch and even tried a very hard cutting tool blade and also no go. Could n ever get the blade under the face I applied enough force where I could see that the blade left small marks, not very big, but could never get anything to move or lift. What am I doing wrong? I spent 47 years at a global computer company and I am used to taking apart small things and applying force when required. I don’t know what I am doing wrong. Please help me.
Getting the initial gap is not easy. Maybe a playing card could work its way in the tiny gap and cut some adhesive. After that there might be some success with an exacto knife. Or you want to try a piece of aluminum foil (folded for more rigidity) for cutting the adhesive. Be aware of the force touch gasket and that it might get damaged during that procedure.
I finally used a hot air gun set to 150 deg. C heating up the edges by slowly spinning the watch around before the technique worked. Difficult is the level noted and it’s correct. Finally worked and watch perfectly functioning.
I used a heat gun, too. I was worried after reading comments that it would burn up the LCD, so I heated it a little bit at a time, rotating it like you did, and checking to see if I could get my knife under it. I must have hit one of the buttons because it did turn on, but that did reassure me that the display was okay.
It's open. Now that the watch and I have had a few minutes to cool down, I'm ready for the next step. Not as difficult as I thought it could be. Tomorrow, I'll be replacing the battery in an iPod Touch 6th Gen.
bester -
I had to heat the iOpener 2 times and leave it on top of the watch for 10 minutes.
-
-
crwdns2935267:0crwdne2935267:0Safety Glasses$3.19
Don’t cut your finger off!
The Watch 3 stainless Steel has an additional Frame. Where do i have To Open it?
I wore thick gardening gloves just to be safe 😅 and it took a while but the screen did come off.
-
-
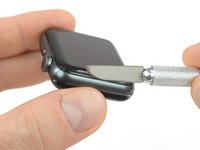
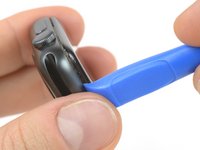
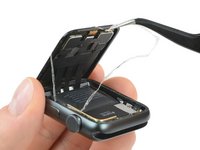
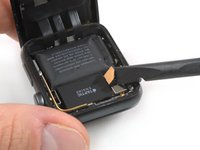
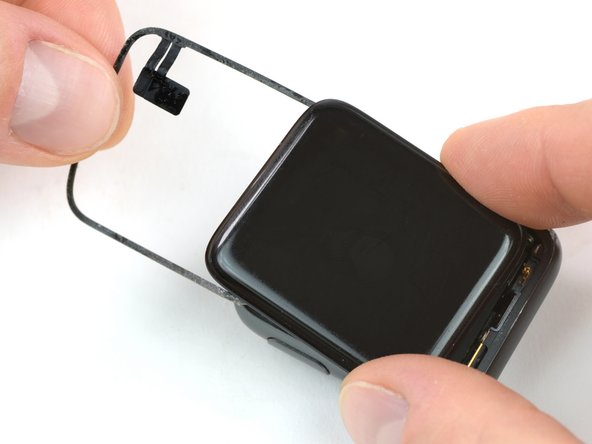
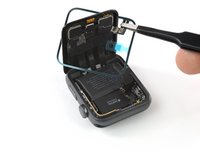
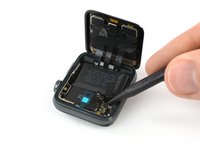
Place the edge of a curved blade into the thin gap between the display and the outer case. Start at the short side of the display, closest to the digital crown.
-
Press firmly straight down into the gap.
-
Once inserted, tilt the blade to pry the display open slightly.
It’s difficult to grip case in a way that keeps fingers safe from the blade but doesn’t hit the side buttons and turn the device on!
If it’s a struggle to get the display to release, warm case for a few more minutes.
I have tried so may times to get the display to release but nothing works. Should have bought a new watch LOL. Kept the iOpener on 2 times for 10 minutes and it still won't open. There must be a better way.
Hi Susan,
if you're struggling to get the adhesive loose enough a hair dryer, heat gun, or hot plate may also be used, but be careful not to overheat the device. The edge should feel slightly too hot to the touch.
It's no way to place the edge of a curved blade into the thin gap between the display and the outer case!! The blade is far too think to place into the thin gap for mine😭 already heated the watch with hair dryer for like 10minutes..
-
-
-
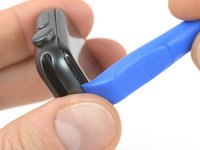
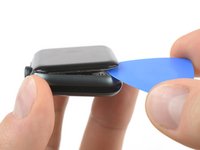
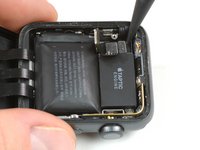
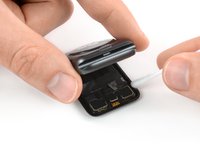
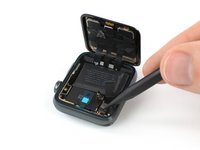
Once you've opened a small gap with the curved blade, remove the blade and insert the thinner edge of an opening tool into the gap.
-
Push the opening tool into the gap, using your thumb as a pivot to lift the display open a bit farther.
-
-
-
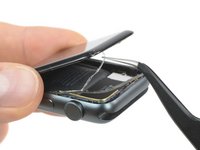
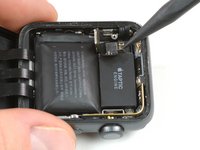
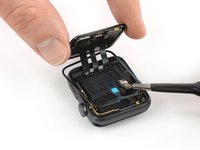
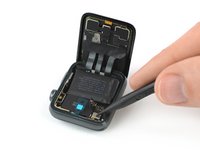
Insert an opening pick under the display and carefully separate the Force Touch gasket from the display.
-
Slide the pick around the display to separate the adhesive between the Force Touch gasket and the display.
-
-
crwdns2935267:0crwdne2935267:0Tweezers$4.99
-
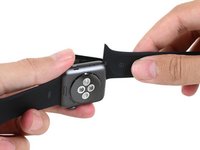
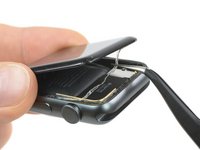
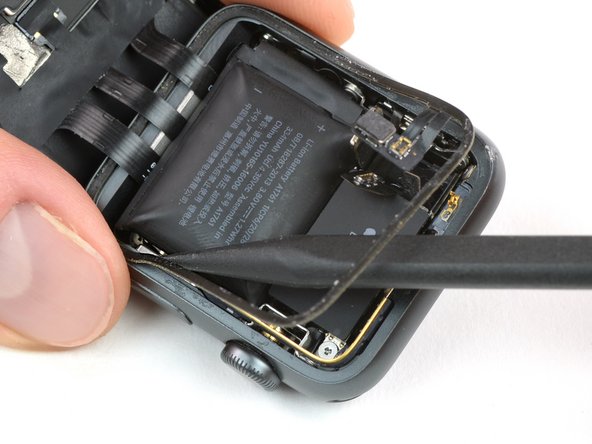
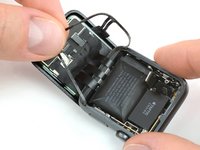
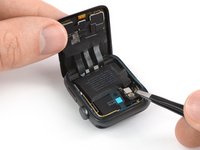
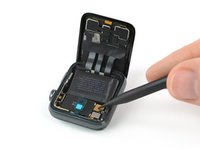
Open the display to about a 45° angle, and use tweezers to peel off the adhesive between the display and the Force Touch gasket.
-
Thread the adhesive around and behind the display cables to get it off completely.
There seems to be something attached to this end that I am supposed to open looks like something metal which isn’t showing on your photos, whatever it is doesn’t want disconnect and I am worried about forcing it in case I break something . Mine are a a series 3
-
-
-
-
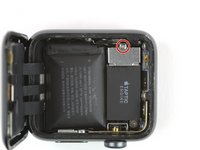
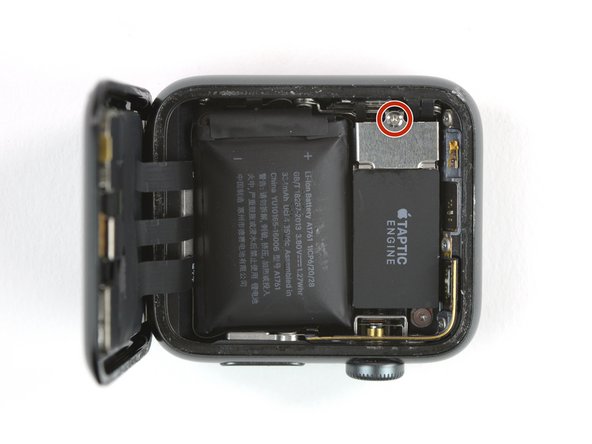
Use a Y000 driver to remove the Tri-point screw securing the metal battery connector cover.
-
Remove the cover.
-
-
-
Disconnect the battery by prying its connector straight up with the edge of a pry tool.
-
Bend the connector up slightly to make sure it does not make contact by accident.
-
-
-
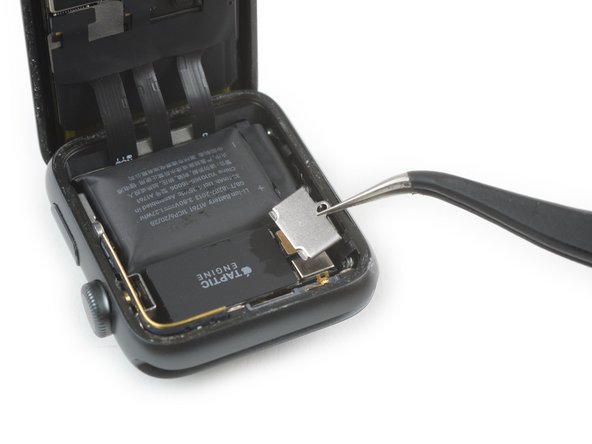
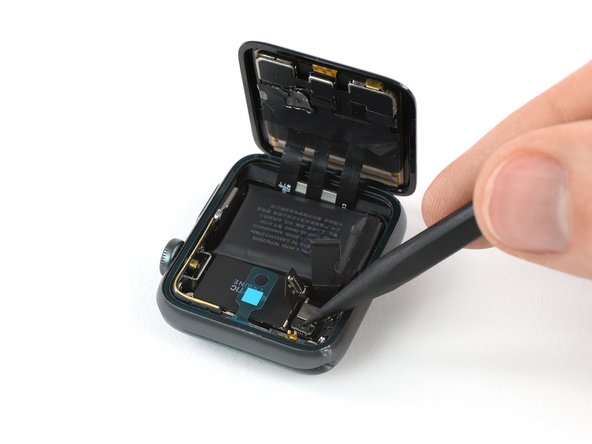
Use the tip of a pry tool to disconnect the Force Touch gasket by prying it straight up from the outside edge.
-
-
crwdns2935267:0crwdne2935267:0Tweezers$4.99
-
Lift up the connector plate of the Force Touch gasket.
-
Slide your tweezers or a pry tool underneath the gasket to separate the glue underneath.
-
Separate the glue all around the perimeter of the watch except the edge where the display cables lie, to avoid ripping them by accident.
-
-
-
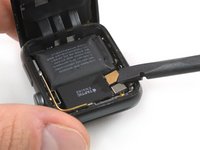
Carefully pull the Force Touch gasket over and around the display.
-
Flip the display almost shut so that you can safely peel the Force Touch gasket from the remaining edge.
-
Remove the Force Touch gasket.
-
-
crwdns2935267:0crwdne2935267:0Adhesive Cleanup Kit (Set of 12)$7.99
-
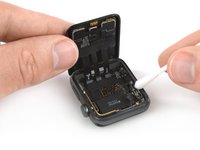
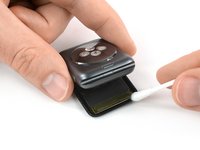
Apply a little bit of isopropyl alcohol (>90%) to a Q-tip or use a cleaning pad to gently remove any remaining adhesive from the former force touch gasket.
-
-
-
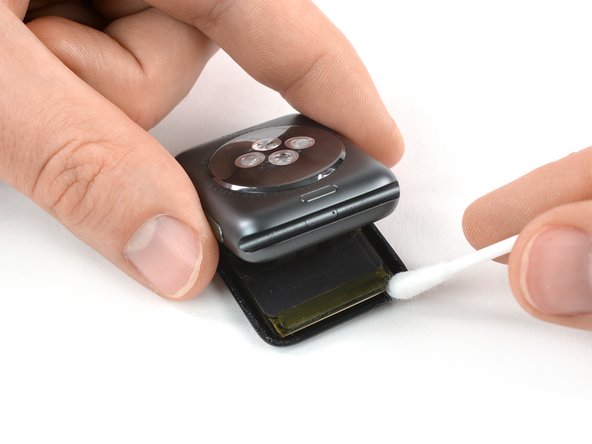
Flip the watch upside-down so the display lays flat while slightly lifting up the case.
-
Carefully remove any remaining adhesive from the back of the display.
-
-
-
Use a pair of tweezers to carefully remove the protective liner from the bottom of your new Force Touch gasket, exposing the adhesive underneath.
There’s a clear plastic stiffener that must be removed at the same time as or just before removing the protective liner. Be careful to remove only the plastic and not the protective liners, it is possible!
-
-
-
Hold the Force Touch gasket diagonally to thread it over the display.
-
Slightly tilt the display forward so you can align the Force Touch gasket with the frame.
-
Starting on the corner opposite the Force Touch gasket connector, set the gasket onto the frame, and press it down.
-
-
-
Use a pry tool to fold the connector plate of the Force Touch gasket down into its recess.
-
Reconnect the flex cable by pressing it down gently.
-
-
-
Use the point of a spudger to bend the battery connector back into its original position.
-
Gently press down to reconnect the battery flex cable.
-
-
-
Use a pair of tweezers to place the metal plate covering the battery connector back in its original position.
-
Install the Tri-point #000 screw.
My watch didn’t turn until I connected it to a charger…
-
-
-
Use a pair of tweezers to gently remove the protective film on top of the Force Touch gasket.
-
-
-
Align the display and press it down firmly onto the adhesive.
-


Take your e-waste to an R2 or e-Stewards certified recycler.
Repair didn’t go as planned? Try some basic troubleshooting, or search our Answers forum for help.
Take your e-waste to an R2 or e-Stewards certified recycler.
Repair didn’t go as planned? Try some basic troubleshooting, or search our Answers forum for help.
crwdns2935221:0crwdne2935221:0
crwdns2935229:050crwdne2935229:0

crwdns2915084:0crwdne2915084:0

Tobias Isakeit - Repairability Engineer crwdns2935289:0Tobias Isakeit - Repairability Engineercrwdne2935289:0
Business
crwdns2934841:01crwdne2934841:0
crwdns2935297:01,137crwdne2935297:0
crwdns2947412:07crwdne2947412:0
Hola, Me presento como nuevo y NOVATO. Me llamo Jaime, y Yo creo que os mereceis un 10. La caña de España.
Hola Jaime! Bienvenido! Muchas gracias por tu comentario. Nos alegra que te guste nuestro sitio. Cualquier duda que tengas, no dudes en consultarme. Soy la moderadora y líder de la comunidad hispanohablante.
The gasket comes with all the necessary adhesive or you need to put he the sealing adhesive separately? I need to replace my screen and I got the gasket and screen but don’t know if I need glue to waterproof it?
I bought iFixit’s battery replacement kit and the gasket which I received had adhesive on both sides, just like in this guide.
The repair kit does comes with extra gasket adhesive, which confused me at first. The extra adhesive is included in case you manage to open the watch without damaging the original gasket.
I have no idea why they include the extra adhesives. When I tried to use one the screen sat too high and it looked bad.
Thank you for an awesome guide. It got a little dodgy for a second there, but I replaced the screen, Force Touch Gasket and Battery. It works as new!
Congrats, welcome to the club of fixers :)
Verify your model. The back of the Cellular model just says GPS, so be sure to check the groves where the watch band goes to determine you model. I made the mistake of just reading the back of the device and since I’d been gifted the device didn’t know it was cellular. Cellular has a different type of touch force gasket, different screen, and different battery connections.
Ryan Holt - crwdns2934203:0crwdne2934203:0
From what I just read on Apple, the only differences in watch series 3 is 38mm and 42mm.
mcr4u2 -
As a consumer all you need to know are 38mm and 42mm
Michael Adoga - crwdns2934203:0crwdne2934203:0
The back will say GPS LTE if it’s the cellular version. If it doesn’t say LTE it is only the GPS version. The displays are different whether or not it is LTE(cellular).
themepark - crwdns2934203:0crwdne2934203:0
This alternative method only reboots the watch.
Gregg Stanley - crwdns2934203:0crwdne2934203:0