crwdns2933423:0crwdne2933423:0

Sostituzione digitizer iPad 7

crwdns2936315:0crwdne2936315:0
crwdns2936321:0crwdne2936321:0
crwdns2931653:023crwdne2931653:0
iPad 7 Cracked Digitizer Replacement: crwdns2935265:00crwdnd2935265:01crwdnd2935265:02crwdne2935265:0 iPad 7 Cracked Digitizer Replacement: crwdns2935265:00crwdnd2935265:02crwdnd2935265:02crwdne2935265:0
  • Take the new gasket and look at it closely. There should be 2 rings of adhesive on it being covered up by blue strips of plastic. You will also notice there are 2 notches on thw inner portion of the gasket. This will help guide you with installing the new gasket

  • Insert the home button perpendicular to the gasket making sure to have it go through the 2 inner notches of the gasket and having the blue adhesives strips towards the part of the button where your finger clicks.

  • Once the gasket is on the home button but not applied, we need to apply the gasket.

  • One notch of the inner part of the gasket will go where the flex cable meets the home button.

  • When you remove the inside ring blue plastic, that adhesive is suppose to adhere to the home button.

  • Remove the inner most blue plastic by using ESD safe tweezers and an xacto knife. You will use the xacto knife to CAREFULLY cut a notch on the blue plastic so that way you can remove it easily from the home button.

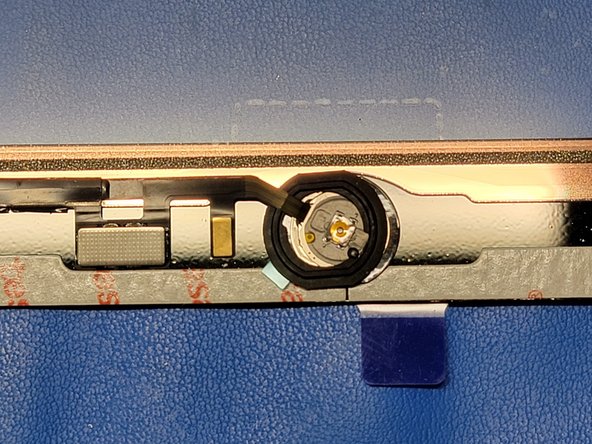
  • Lift the home button up and use ESD safe tweezers remove the outermost blue plastic. Since the gasket is applied to the home button now, the outer blue plastic should come right off without the need to cut. Place the home button inside the hole of the digitizer. Once you are confident it is in the right position, firmly press down on the gasket.

  • Place the home button in the hole of the digitizer, and angle the flex cable towards the left of the digitizer (the side where the digitizer flex cables are).

Prendi la nuova guarnizione e e controllala da vicino. Ci dovrebbero essere 2 anelli di adesivo coperti da delle protezioni in plastica blu. Ci sono anche 2 rientranze nella parte interna della guarnizione. Queste ti aiuteranno a posizionarla mentre la installi.

Infila il tasto Home perpendicolarmente alla guarnizione assicurandoti che passi attraverso le 2 rientranze interne, e che le due protezioni in plastica blu siano rivolte verso la parte esterna del tasto.

Una volta che la guarnizione è sulla parte inferiore del tasto Home, dovrai incollarla.

Una rientranza della parte interna della guarnizione deve andare dove il cavo a nastro esce dal tasto Home.

Quando rimuovi la protezione in plastica blu più interna, l'adesivo deve incollarsi al tasto Home.

Rimuovi la protezione in plastica blu più interna usando delle pinzette anti ESD e un coltello xacto. Dovrai usare il coltello xacto per tagliare ATTENTAMENTE una la protezione in plastica blu in modo da poterla rimuovere facilmente dalla guarnizione.

Solleva il tasto Home e usa le pinzette anti ESD per rimuovere la protezione più esterna. In quanto la guarnizione è ora incollata al tasto Home, la protezione esterna dovrebbe essere facile da rimuovere senza tagliarla. Posiziona il tasto Home nel foro del digitizer. Una volta messo nella posizione corretta, premi con decisione la guarnizione.

Posiziona il tasto Home nel foro del digitizer e inclina il cavo a nastro verso la sinistra del digitizer (il lato dove sono i cavi del digitizer).

crwdns2944171:0crwdnd2944171:0crwdnd2944171:0crwdnd2944171:0crwdne2944171:0