crwdns2933423:0crwdne2933423:0

Sostituzione digitizer iPad 7

crwdns2936315:0crwdne2936315:0
crwdns2936321:0crwdne2936321:0
crwdns2931653:022crwdne2931653:0
iPad 7 Cracked Digitizer Replacement, New Digitizer: crwdns2935265:00crwdnd2935265:01crwdnd2935265:03crwdne2935265:0 iPad 7 Cracked Digitizer Replacement, New Digitizer: crwdns2935265:00crwdnd2935265:02crwdnd2935265:03crwdne2935265:0 iPad 7 Cracked Digitizer Replacement, New Digitizer: crwdns2935265:00crwdnd2935265:03crwdnd2935265:03crwdne2935265:0
New Digitizer
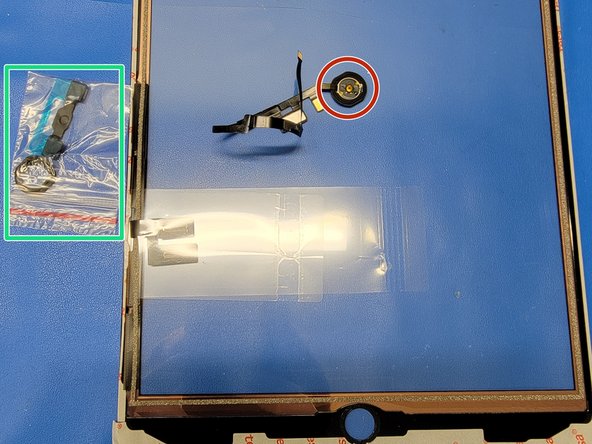
  • Gather your new home button bracket, gasket

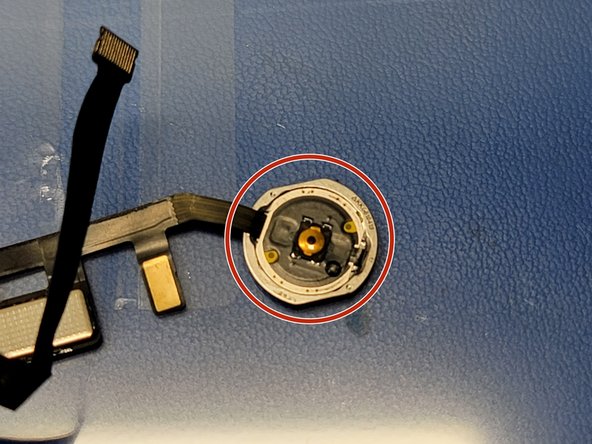
  • VERY CAREFULLY remove old gasket from home button. We use ESD tweezers to do this very slowly and accurately as to not break the home button

  • If you don't have a replacement gasket, don't worry. Don't remove gasket from home button. Instead you will use new tesa tape or a bit of glue to adhere the gasket to the new digitizer

  • While doing this, make sure to not rip, tear, or otherwise break the home button flex cable. This will cause irreparable damage to the touch ID and home button

Prepara il nuovo supporto e la nuova guarnizione del tasto Home.

Rimuovi MOLTO ATTENTAMENTE la vecchia guarnizione dal tasto Home. Usa delle pinzette anti ESD per farlo molto lentamente ed attentamente, in modo da non rompere il tasto Home.

Se non hai una guarnizione nuova, non preoccuparti. Non rimuovere quella originale dal tasto Home. Dovrai usare del nastro Tesa o della colla per incollarla al nuovo digitizer.

Mentre esegui questa procedura, stai attento a non tirare, piegare, strappare o rompere il cavo a nastro del tasto Home. Ciò potrebbe causare dei danni irreparabili al tasto Home e al Touch ID.

crwdns2944171:0crwdnd2944171:0crwdnd2944171:0crwdnd2944171:0crwdne2944171:0