crwdns2933423:0crwdne2933423:0

Sostituzione digitizer iPad 7

crwdns2936315:0crwdne2936315:0
crwdns2936321:0crwdne2936321:0
crwdns2931653:024crwdne2931653:0
iPad 7 Cracked Digitizer Replacement: crwdns2935265:00crwdnd2935265:01crwdnd2935265:03crwdne2935265:0 iPad 7 Cracked Digitizer Replacement: crwdns2935265:00crwdnd2935265:02crwdnd2935265:03crwdne2935265:0 iPad 7 Cracked Digitizer Replacement: crwdns2935265:00crwdnd2935265:03crwdnd2935265:03crwdne2935265:0
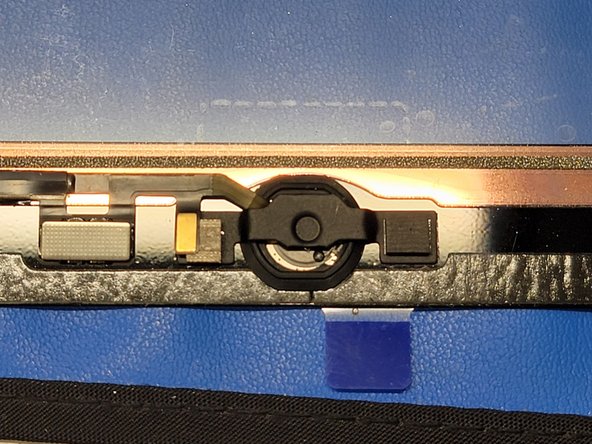
  • Take the metal bracket and remove the white paper covering the adhesive on the cushion

  • Take the blue plastic off the metal bracket

  • If reusing old bracket, take tesa tape or glue and apply a little amount to both ends where the bracket will adhere to the digitizer

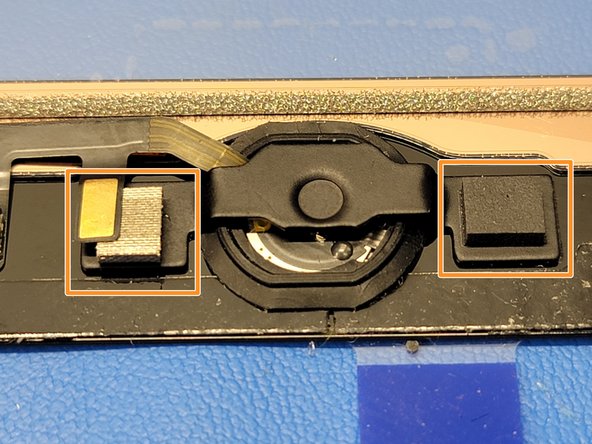
  • Align the bracket with the cushion to the left and the indent on the bracket in the center of the home button.

  • Make sure to lift the flex cable gently over the metal bracket before pressing down

  • Once aligned, and flex cable is placed in the correct position over the bracket, firmly but gently press the 2 sides of the bracket onto the digitizer.

Prendi il supporto in metallo e rimuovi la carta bianca protettiva sull'adesivo del cuscinetto.

Rimuovi la plastica blu dal supporto.

Se stai riutilizzando il supporto originale, applica del nastro Tesa o della colla su entrambe le estremità che si incolleranno al digitizer.

Allinea il supporto con il cuscinetto a sinistra e la rientranza del supporto con il centro del tasto Home.

Assicurati di sollevare delicatamente il cavo a nastro sopra il supporto in metallo prima di premerlo in posizione.

Una volta allineato il supporto e posizionato il cavo a nastro correttamente sopra il supporto, premi delicatamente ma con decisione i 2 bordi del supporto sul digitizer.

crwdns2944171:0crwdnd2944171:0crwdnd2944171:0crwdnd2944171:0crwdne2944171:0