crwdns2933423:0crwdne2933423:0

Installation de BL Touch sur CR-10S Pro

crwdns2936315:0crwdne2936315:0
crwdns2936317:0crwdne2936317:0
crwdns2931653:07crwdne2931653:0
CR-10S Pro BL Touch Install, Bottom Section 1a.: crwdns2935265:00crwdnd2935265:01crwdnd2935265:03crwdne2935265:0 CR-10S Pro BL Touch Install, Bottom Section 1a.: crwdns2935265:00crwdnd2935265:02crwdnd2935265:03crwdne2935265:0 CR-10S Pro BL Touch Install, Bottom Section 1a.: crwdns2935265:00crwdnd2935265:03crwdnd2935265:03crwdne2935265:0
Bottom Section 1a.
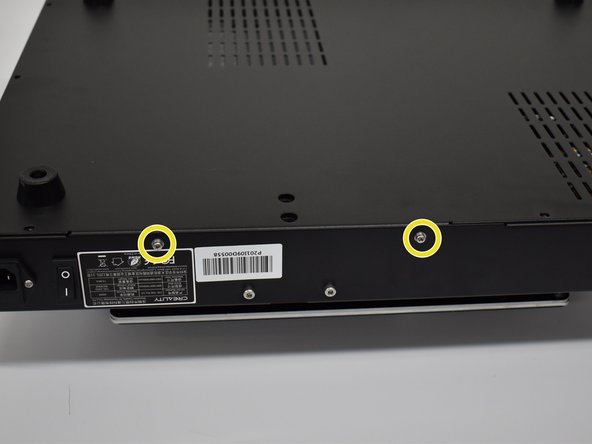
  • Using a #1 Phillips screwdriver, remove the 11 screws on the bottom and 2 screws on each side for a total of 15. Next, remove the bottom cover.

  • Unplug the original ribbon cable (not shown)

  • Plug in new connections. For clarity, we only have the new connections shown here.

  • Ribbon Cable (keyed)

  • 3 pin black plug into D11 (end row towards SD card slot) Orange wire will face the ribbon cable like in the picture.

  • 2 pin white plug into Z+ (connection closest to the ribbon cable) From the same view as the picture, use the right 2 pins.

  • Hot glue is optional.

À l'aide d'un tournevis cruciforme n° 1, retirez les 11 vis du bas et les 2 vis de chaque côté donc un total de 15 vis. Ensuite, retirez le couvercle inférieur.

Débranchez le câble ruban d'origine (pas de photo).

Branchez les nouvelles connexions. Pour plus de clarté, seules les nouvelles connexions sont représentées.

Câble plat (avec verrouillage).

Fiche noire à 3 broches dans D11 (extrémité de la rangée vers la fente pour la carte SD). Le fil orange fera face au câble plat comme sur la photo.

Fiche blanche à 2 broches sur Z+ (connexion la plus proche du câble plat). Avec la carte posée telle que sur la photo, utilisez les 2 broches de droite.

La colle chaude est optionnelle.

crwdns2944171:0crwdnd2944171:0crwdnd2944171:0crwdnd2944171:0crwdne2944171:0