crwdns2933423:0crwdne2933423:0

Installation de BL Touch sur CR-10S Pro

crwdns2936315:0crwdne2936315:0
crwdns2936317:0crwdne2936317:0
crwdns2931653:06crwdne2931653:0
CR-10S Pro BL Touch Install, Top Section 2c.: crwdns2935265:00crwdnd2935265:01crwdnd2935265:02crwdne2935265:0 CR-10S Pro BL Touch Install, Top Section 2c.: crwdns2935265:00crwdnd2935265:02crwdnd2935265:02crwdne2935265:0
Top Section 2c.
  • Reinstall a new zip tie.

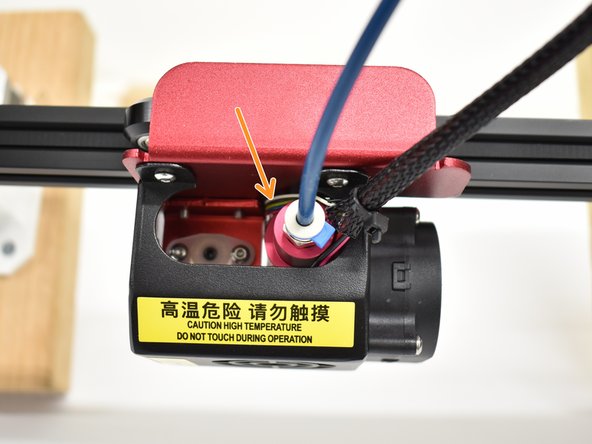
  • Route BL Touch wires behind hot end as shown.

  • Reattach the X-Carriage

  • Tighten the bottom wheel and reattach the belt on both sides (look at step 1 for images).

  • Reattach the front fan cover, paying attention to all wires.

  • Reattach belt ends to the X-Carriage

  • Push X-Axis idler to the right to tighten the belt tension and tighten the socket head screws.

  • Do not pinch any wires on reassembly.

Mettez un nouveau serre-câbles.

Acheminez les fils BL Touch derrière la la zone chaude comme indiqué.

Remettre en place le chariot X.

Serrez la roue inférieure et rattachez la courroie des deux côtés (regardez l’étape 1 pour les images).

Remettez le couvercle du ventilateur avant en faisant attention à tous les fils.

Rattachez les extrémités de la courroie au chariot X.

Poussez le tendeur de l'axe X vers la droite pour ajuster la tension de la courroie et serrez les vis à tête creuse.

Ne coincez pas de fils lors du remontage.

crwdns2944171:0crwdnd2944171:0crwdnd2944171:0crwdnd2944171:0crwdne2944171:0