crwdns2933423:0crwdne2933423:0

Instalación de BL Touch CR-10S Pro

crwdns2936315:0crwdne2936315:0
crwdns2936331:0crwdne2936331:0
crwdns2931653:06crwdne2931653:0
CR-10S Pro BL Touch Install, Top Section 2c.: crwdns2935265:00crwdnd2935265:01crwdnd2935265:02crwdne2935265:0 CR-10S Pro BL Touch Install, Top Section 2c.: crwdns2935265:00crwdnd2935265:02crwdnd2935265:02crwdne2935265:0
Top Section 2c.
  • Reinstall a new zip tie.

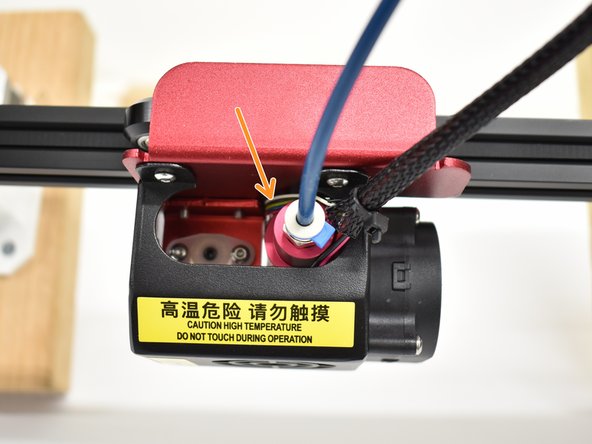
  • Route BL Touch wires behind hot end as shown.

  • Reattach the X-Carriage

  • Tighten the bottom wheel and reattach the belt on both sides (look at step 1 for images).

  • Reattach the front fan cover, paying attention to all wires.

  • Reattach belt ends to the X-Carriage

  • Push X-Axis idler to the right to tighten the belt tension and tighten the socket head screws.

  • Do not pinch any wires on reassembly.

Vuelve a instalar una nueva brida de plástico.

Pasa los cables BL Touch detrás del extremo caliente como se muestra.

Vuelve a colocar el carro X

Vuelve a colocar el carro X

Aprieta la rueda inferior y vuelve a colocar el cinturón en ambos lados (consulta el paso 1 para ver las imágenes).

Vuelve a colocar la cubierta del ventilador frontal, prestando atención a todos los cables.

Empuja la rueda guía del eje X hacia la derecha para aumentar la tensión de la correa y apretar los tornillos de cabeza hueca.

No pellizques ningún cable al volver a montar.

crwdns2944171:0crwdnd2944171:0crwdnd2944171:0crwdnd2944171:0crwdne2944171:0