
iPhone 6 Volume Control Cable Replacement

crwdns2944107:0crwdnd2944107:0Sam Goldheartcrwdnd2944107:0crwdnd2944107:0crwdnd2944107:06crwdnd2944107:0crwdne2944107:0
crwdns2944111:0Maw 10, 2024crwdne2944111:0
crwdns2915892:0crwdne2915892:0
crwdns2942287:0crwdne2942287:0Use this guide to replace a malfunctioning volume control cable—this includes the electronic switches responsible for volume up and down, and the ring/silent control.
If you're looking to replace the physical button covers, we have a guide for that too: iPhone 6 Volume Control Buttons Replacement
crwdns2942213:0crwdne2942213:0
crwdns2943213:0crwdne2943213:0


crwdns2943215:0crwdne2943215:0


crwdns2944105:0crwdne2944105:0

-
-
Power off your iPhone before beginning disassembly.
-
Remove the two 3.6 mm-long P2 Pentalobe screws next to the Lightning connector.
-
-
crwdns2935267:0crwdne2935267:0Clampy - Anti-Clamp$24.95
-
Pull the blue handle backwards to unlock the Anti-Clamp's arms.
-
Slide the arms over either the left or right edge of your iPhone.
-
Position the suction cups near the bottom edge of the iPhone just above the home button—one on the front, and one on the back.
-
Squeeze the cups together to apply suction to the desired area.
-
-
-
Pull the blue handle forwards to lock the arms.
-
Turn the handle clockwise 360 degrees or until the cups start to stretch.
-
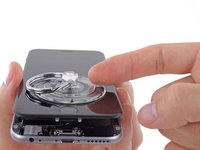
Insert an opening pick under the screen when the Anti-Clamp creates a large enough gap.
-
Skip the next three steps.
-
-
crwdns2935267:0crwdne2935267:0Clampy - Anti-Clamp$24.95
-
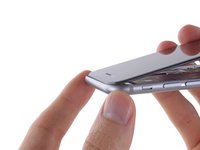
If you don't have an Anti-Clamp, use a single suction cup to lift the front panel:
-
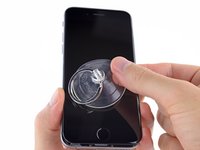
Press a suction cup onto the screen, just above the home button.
-
-
-
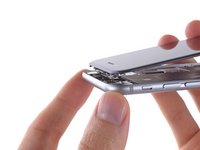
While holding the iPhone down with one hand, pull up on the suction cup to slightly separate the front panel assembly from the rear case.
-
Using a plastic opening tool, begin to gently pry the rear case down, away from the display assembly, while continuing to pull up with the suction cup.
-
-
-
Pull the plastic nub to release the vacuum seal on the suction cup.
-
Remove the suction cup from the display assembly.
-
-
-
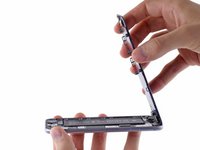
Open the iPhone by swinging the home button end of the front panel assembly away from the rear case, using the top of the phone as a hinge.
-
-
-
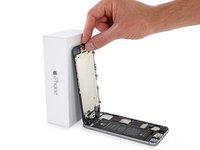
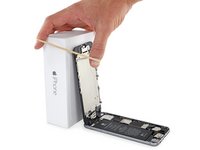
Open the display to about a 90º angle, and lean it against something to keep it propped up while you're working on the phone.
-
Add a rubber band to keep the display securely in place while you work. This prevents undue strain on the display cables.
-
-
crwdns2935267:0crwdne2935267:0Magnetic Project Mat$19.95
-
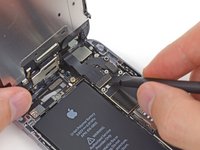
Remove the following Phillips screws from the battery connector bracket:
-
One 2.2 mm screw
-
One 3.2 mm screw
-
-
-
Remove the metal battery connector bracket from the iPhone.
-
-
-
Use a plastic opening tool to gently pry the battery connector up from its socket on the logic board.
-
-
-
Remove the following five Phillips screws securing the front panel assembly cable bracket:
-
Three 1.2 mm screws
-
One 1.7 mm screw
-
One 3.1 mm screw
-
-
-
Remove the front panel assembly cable bracket from the logic board.
-
-
-
Use a spudger or a fingernail to disconnect the front-facing camera and sensor cable connector.
-
-
-
Use a spudger or a fingernail to disconnect the home button cable connector.
-
-
-
Use a spudger or a fingernail to disconnect the display data cable connector.
-
-
-
Use the flat end of a spudger to disconnect the digitizer cable connector.
-
-
-
Remove the front panel assembly from the rear case.
-
-
crwdns2935267:0crwdne2935267:0Tweezers$4.99
-
Peel back the first battery adhesive tab from the bottom right edge of the battery.
-
-
-
Slowly pull the adhesive tab away from the battery, toward the bottom of the iPhone.
-
Pull steadily, maintaining constant tension on the strip until it slips out from between the battery and the rear case. For best results, pull the strip at a 60º angle or less.
-
If the strip breaks, carefully try to retrieve it with your tweezers (without damaging the battery) and continue pulling. If the strip breaks off underneath the battery and can't be retrieved, continue with the steps below.
-
-
-
Repeat for the second strip.
-
Wait about one minute for the alcohol solution to weaken the adhesive. Use the flat end of a spudger to gently lift the battery.
-
-
-
If the battery remains stuck to the rear case, prepare an iOpener or use a hair dryer to heat the rear case directly behind the battery. It should be slightly too hot to touch comfortably.
-
Then, use a plastic opening tool to gently lift the battery.
-
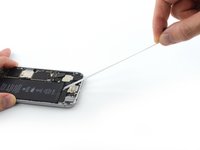
A stronger alternative to floss is an unwound guitar string, such as a 0.009 E string from a 12-string set.
The bad news was that the adhesive strip ripped on the logic-board side. The good news is that recovery was not as difficult as I thought. By using a hair dryer, and some very patient wedging with a credit card, I was able to separate the battery from the adhesive, and then remove it. Some simple cleanup with tweezers got the adhesive sticking to the case. Just make sure you get it right on the edge side, or this technique will be a lot harder to pull off.
I screwed up the peeling part but I managed to get it through with a credit card.
Important, do not force the card down. Just take your time pushing and moving the card left and right. When the battery was up I just kept going with my hand, reeeeeally slowly and with constant force (so that it peels off the remaining straps).
The left side adhesive strip broke where I couldnt reach it. I tried dental floss but it wasnt strong enough in my case to cut through the adhesive, but I had 20lb fishing line that I had used to remove an emblem from a car and that worked well. I think the key is to pull the adhesive strips nearly straight down and not to the side.
Both adhesive tabs broke for me. I ended up starting with the hairdryer then trying floss and then a plastic card which was too flimsy. In the end I used the plastic wedging tool to pry the battery up and hold it there. With the battery raised, on the side closest to the phone edge I was able to scrape the adhesive strip together enough with the tweezers and then my fingers to pull at it laterally stretching it so that it came away in one piece. The battery was slightly dented and bent, but not punctured at this point. The second strip near the logic board was much higher and necessitated bending the battery much more and just holding it there. I couldn't get the battery up enough for fear of a puncture so I just held it there as the adhesive slowly detached itself and in the end the battery just popped free. Not sure if the warming from the hair dryer made any difference.
I used an ID card (without magnetic strip) just like the picture above to wedge the battery up to reach the broken adhesive strip.
This part is where I almost gave up. The strips broke, I tried to pry it out, then I heated the back with a hair dryer. I used an ID card and got under it and shimmied left and right until the battery was able to break look from the strips. Afterwards the battery was bent which concerned me it could just break. At this point I realized, yes, Apple does not want you to get in their phones. After it came out all went well and was glad to have finished this.
For me the strips broke and I had to use credit card to detach the battery. This is quite tricky thing.
Cool trick, used hair dryer and gentle persuasions.
Be careful if you have failed to pull out the adhesive near logic board. Since the cable responsible for power button and mic near the back cam lays above apple’s logo plate, when you pull out the battery with logo plate sticked with it, you may damage the cable. Mine cable was damaged in this way.
Used the floss technique and damaged the volume control cable. Fortunately complete cable and button assembly is a $9 part on Amazon.
If u read the instructions in advance this is where u consider not doing this. Getting the battery away from the adhesive strips is a bear. The floss idea is a joke.
Battery removal with adhesive stuck under the battery using floss personal record was around 10 minutes.
using fishing line worked well for me. the wire was cutting into the battery pack and dental floss would not work.
I too found that fishing line, specifically 10 lb test Fireline braid fishing line, is an excellent alternative to floss or wire due to its strength and small diameter. I tied washers on each end using a Palomar note to provide a secure grip.
Both adhesive strips broke despite heating. Then the floss broke. Likewise, here is where I almost gave up. Used an old credit card gently, and bent the battery a little bit with constant fear that I would be starting a fire. Some patience, and with a few minutes, it was out.
If you need to use dental floss, use the thin type and double strand it. Have extra on hand in case that breaks.
If the adhesive strips break, take your time removing the battery. Yes the battery will turn into a big fire ball if it is bent too much or punctured with a screwdriver while trying to pry it out. Not sure which one was the culprit. It gives a new meaning to the term “Burn Phone”. Luckily, only the volume control ribbon cable needed to be replaced. Even after the battery caught fire and was removed, the adhesive strips remained on the case and I had to scrape them off. I also had to remove some of the melted plastic so the new battery would fit in properly.
So, as you are trying to blow out your flaming battery like a giant birthday candle, remember to blow the flames away from the logic board and other sensitive components.
This is why the instructions say to discharge the battery before you start. Battery fires are really dangerous! Stay safe out there. If you do somehow end up with a battery fire, do NOT blow on it or get your face anywhere near it. Have a bucket of sand ready to pour on top of it if you’re doing something risky. But seriously, just drain the battery first and you’ll have very little chance of a problem.
Hardest part. The adhesive is extremely… adhesive. Dentalt floss didn’t work, credit card bent out of shape. By this time the battery was already bent to the point where I could use the tweezers to pull the white tape sideways from under the battery. Being strong tape, I was able to pull it out along the side of the battery all the way. That was actually easy. Strangely there seemed to be only one strip.
YOU have to remove the VIBRATOR so it does not CUT the strips. Keep grabbing up close after pulling some out. these are over 2 feet long so be gentle..pull low and away, not up ever. Good Luck!
That was hard to remove but I did it. Be careful about the lower frame edges, it’s so sharp, it cut my finger.
Ich habe gleich den Weg gewählt, den Akku zu erwärmen (mit dem Föhn von unten) und dann denn Akku vorsichtig mit einem Kunststoffspachtel rausgehebelt! (Das riskante entfernen der Stecker für Display und Touch habe ich nicht gemacht...ging auch so gut!)
-
-
-
Remove the battery from the iPhone.
-
Before you adhere the replacement battery, temporarily reconnect the battery connector to the logic board socket. This ensures that the battery is properly aligned in its recess.
-
Adhere the battery, disconnect it, and continue reassembling your device.
-
-
-
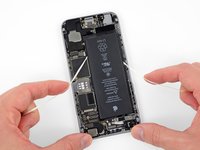
Remove the following Phillips #00 screws from the upper cable bracket:
-
One 2.9 mm screw
-
One 2.2 mm screw
-
-
-
Remove the upper cable bracket from the iPhone.
-
-
-
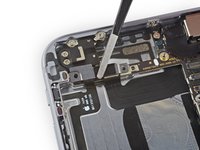
Remove the following four Phillips #00 screws from the contact bracket:
-
One 1.5 mm screw
-
One 1.4 mm screw
-
Two 2.1 mm screws
-
-
-
Remove the contact bracket from the iPhone.
-
-
-
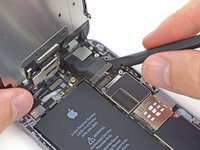
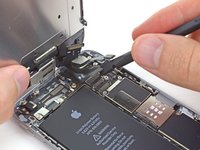
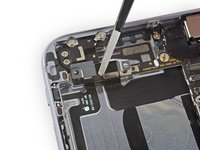
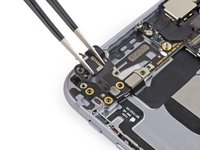
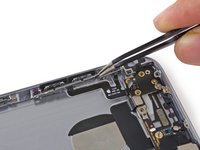
Use the flat end of a spudger to lift the volume control cable connector up off of its socket.
-
-
-
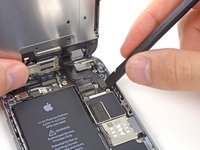
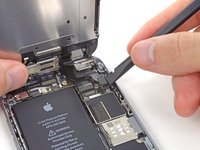
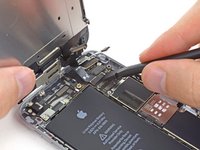
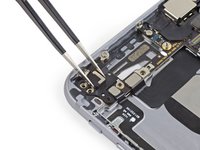
Remove the following Phillips #00 screws from the volume control cable brackets:
-
Two 2.3 mm screws
-
One 1.8 mm scew
-
-
-
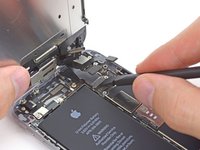
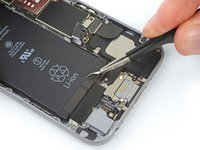
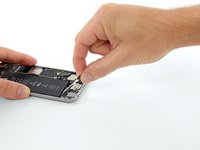
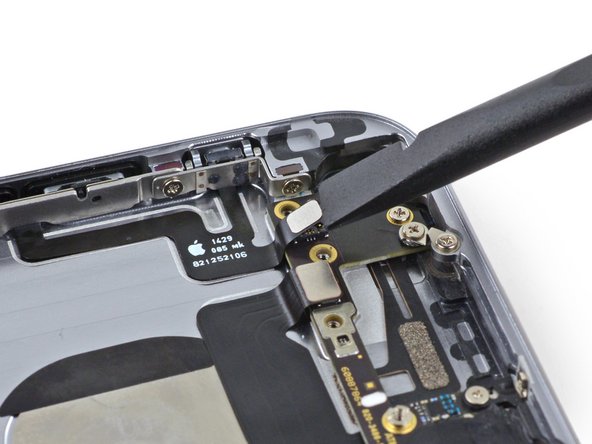
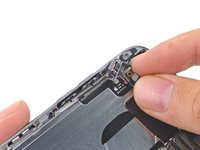
Pull the hold switch and volume control button brackets away from the rear case to allow access to the button covers.
-
-
-
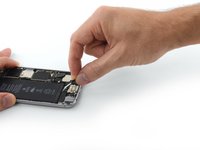
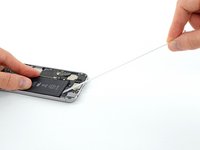
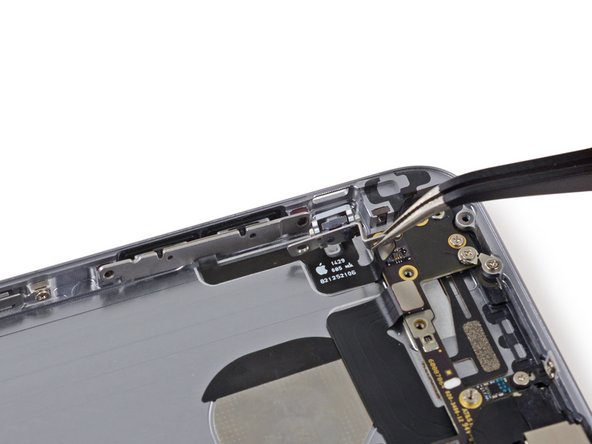
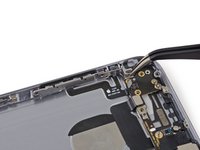
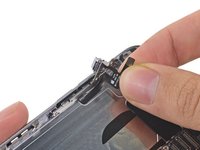
Begin to peel the volume control button cable up from the rear case starting from the connector end.
-
Be gentle when peeling the thin portions of the cable up from the case.
-
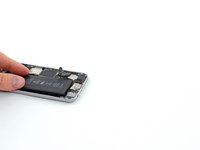
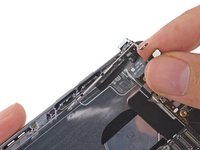
Remove the volume control button cable from the rear case.
-


To reassemble your device, follow these instructions in reverse order.
crwdns2935221:0crwdne2935221:0
crwdns2935229:059crwdne2935229:0
crwdns2947821:0crwdne2947821:0
crwdns2947823:0crwdne2947823:0


crwdns2947412:02crwdne2947412:0
These instructions are so AWESOME to be able to reference! That last 1.8mm screw was a pain to get out of my phone. Step-by-Step, worked EXCELLENT. Thanks for posting these!
TRICKY BITS: replacing the mute switch lever onto the cable assembly is a bit…interesting. It was only when I used the Head Magnifier that I was able to see the mechanics of the switch and fit it on. There needs to be a seriously microscopic shot of that mechanical fit!
But, get the magnifier, it’s great for digging out splinters from your fingers.
SUGGESTION: Once you get the switch and the bracket situated, but before you stick the control cable to the case, make sure the switch functions. I had to loosen the three screws and place pressure on the assembly, holding the switch firmly in place, before it made a solid fit-then I tightened the three screws. Voila, the switch works!
Only then should did I bond the cable to the case
And now my phone rings again! Yay, no more missed calls!