crwdns2915892:0crwdne2915892:0
Use this guide to replace the battery in your iPhone 15 Pro.
iPhone batteries are rated to hold 80% of their capacity for up to 500 charge cycles, or roughly 18–24 months. If your iPhone needs to be charged more often or runs slower, it might be time to replace the battery.
You'll need replacement screen adhesive to complete this repair. If your new battery doesn't come with adhesive pre-installed, you'll need replacement adhesive for it as well.
If your battery is swollen, take appropriate precautions.
Note: Due to Apple's parts pairing restrictions, on iOS 17.6 and earlier, you may receive warnings about your replacement part and lose access to battery health data, but your new battery will otherwise work normally. On iOS 18 and newer, calibrate authentic Apple batteries using Repair Assistant.
crwdns2942213:0crwdne2942213:0
-
-
Unplug all cables from your phone.
-
Hold the power and either volume button and slide to power off your phone.
-
-
-
If your screen or back glass is cracked, lay overlapping strips of packing tape over the glass to protect yourself and make disassembly easier.
如果您的螢幕或後玻璃破裂,請將包裝膠帶貼在玻璃上以保護自己並使拆卸更容易。
確保底部邊緣附近有一個足夠大的光滑區域,以便吸盤可以吸附在上面。
-
-
-
Measure 3 mm from the tip and mark the opening pick with a permanent marker.
Got to step 2 and realized the fix kit doesn't include an opening pick! Looks like a guitar pick, and I have those lying around. Is that expected? Looks like the pick is used in many steps below. There's a little blue crowbar that isn't mentioned in the instructions. Perhaps that replaces the opening pick?
Hi! I can't see which guide you were using when writing this comment. Can you reply here with which guide and fix kit you used?
I see you posted this in Meta. I hope it's resolved soon! In the meantime, a guitar pick may work well enough for your repair.
what fix kit?
My fix kit didn't include an opening pick either
Make sure you check inside the black boxes after emptying them. My pick was stuck inside one of the boxes.
My AliExpress refurbished screen came with a pick that has a coin-like circle that pops out, so no modification was necessary
the picture shows 3 cm but the description says 3 mm's. Which one is it?
That is a misunderstanding. It is a ruler with a scale for cm, it shows 0.3 cm, i.e. 3 mm.
VauWeh -
Oh, come ON!
Big Ed -
It will ALWAYS be millimeters on a phone, but this step is ridiculous, skip it!
@leifdewolf I wouldn't skip it for a first repair.
It's not an Ifixit KIT if it doesn't include everything. You'll need to order the opening pic separately. Or head to Walmart like myself and look for guitar pics. Hopefully, this will work just as well.
No pick in mine as well. It’s really not clear that you have to order this separately when ordering an IPhone SE 202/2022 screen repair kit. Is this the case?
Frustrated, I ordered a compact package where everything was encapsulated. Useless suction tools could not separate the screen. If it is unable to decouple the screen, then why sucking suction tools you have provided.
For my kit the triangle pick was stuck inside the box with the screen not with the other tools maybe it's also there for you
Y’all are getting far, FAR too detailed with some of this stuff…. Measuring and marking the pick that you won’t actually use to open the device?!? lol that’s kinda funny. Just heat it up, grab a spudger, and the back just pops right off! The iFixit tech need to stick to the KISS method more often, you know KEEP IT SIMPLE STUPID!!! Like l, for reals, I’ve been doing this stuff for YEARS and using iFixit guides regularly and this is just ridiculous at this point!
Will the phone still work if the sensor assembly on the back of the screen is damaged?
I don't have a pick, but how much better are these picks than an old credit card for opening an iPhone 13 mini?
The pick in my iFixIt kit was packed with the battery, not with the rest of the toolkit.
-
-
-
Use a P2 pentalobe screwdriver to remove the two 7 mm‑long screws on either side of the charging port.
-
-
-
Use a hair dryer or heat gun to heat the bottom edge of the screen until it's hot to the touch.
-
-
-
Apply a suction handle to the bottom edge of the screen.
-
Pull up on the handle with a strong, steady force to create a gap between the screen and the frame.
-
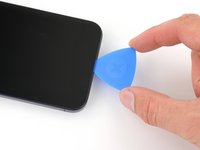
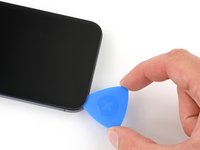
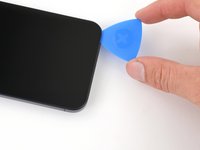
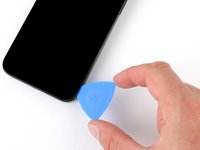
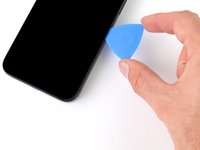
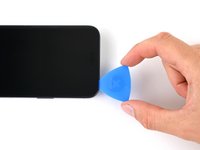
Insert the tip of an opening pick into the gap.
-
-
-
There are two delicate cables connecting the screen to the phone: one just above the action button, and the other near the middle of the left edge.
-
There are multiple spring contacts around the perimeter of the phone. Be extra careful not to insert your pick deeper than suggested in these locations to avoid bending the contacts.
触点被弄断了 怎么办??
this screen picture is for iphone 15 pro max lcd, not iphone 15 pro
-
-
-
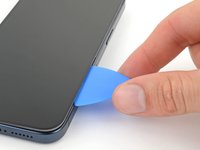
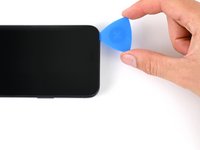
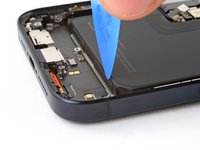
Slide your pick back and forth along the bottom edge to separate the adhesive.
-
Leave your pick inserted in the bottom right corner to prevent the adhesive from re-sealing.
-
-
-
Heat the right edge of the screen until it's hot to the touch.
-
-
-
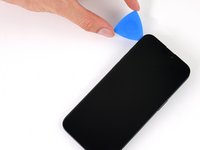
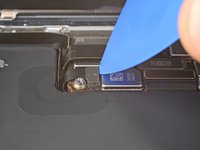
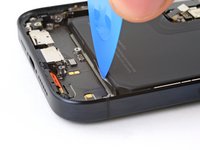
Slide your pick around the bottom right corner of the screen and toward the power button until you feel a hard stop at a clip securing the screen.
-
Rotate your pick so the flat edge is under the screen.
-
-
-
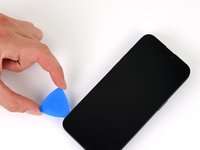
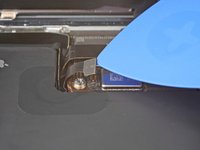
Twist the pick to increase the gap between the screen and the frame until the right clip releases.
-
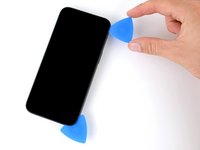
Insert a second opening pick to the right of the first pick.
-
-
-
Slide the first pick back to the bottom right corner of the screen.
-
Slide the second pick to the top right corner of the screen to separate the adhesive.
-
Leave these picks inserted to prevent the adhesive from resealing.
-
-
-
-
Heat the top edge of the screen until it's hot to the touch.
-
-
-
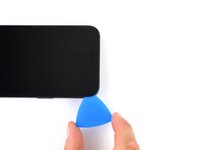
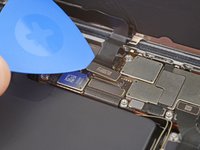
Slide your pick around the top right corner and along the top edge to release the two clips and adhesive securing it.
-
-
-
Heat the left edge of the screen until it's hot to the touch.
-
-
-
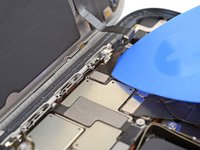
Rotate your pick around the top left corner of the screen.
-
Slide your pick to the bottom left corner of the screen to separate the adhesive.
-
-
-
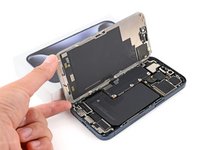
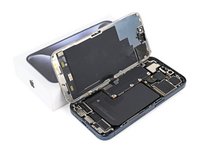
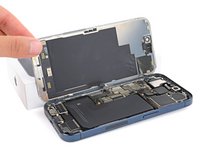
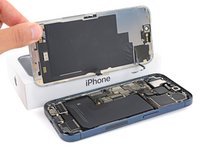
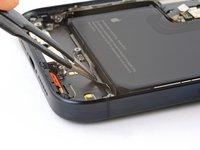
Place a small box or stack of books to the left of your phone so you can prop up the screen while disconnecting its cables.
-
Swing up the right edge of the screen like the front cover of a book.
-
Prop up the screen so you can access its cables without straining them.
-
-
-
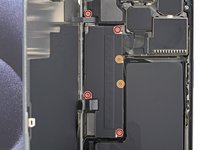
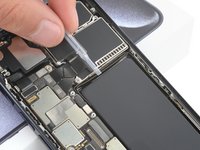
Use a Y000 screwdriver to remove the six screws securing the logic board cover:
-
Four 1.6 mm‑long screws
-
Two 1.3 mm‑long screws
-
-
-
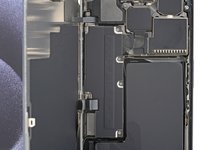
Rotate the bottom of the logic board cover counterclockwise and slide the top left corner out from under the ambient light sensor cable to remove it.
-
-
-
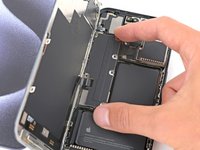
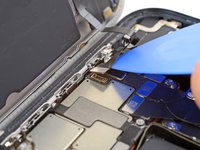
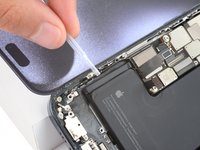
Use the tip of an opening pick to pry up and disconnect the battery press connector from the bottom right corner of the logic board.
-
-
-
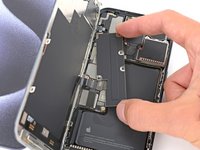
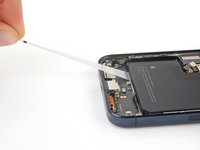
Use the tip of an opening pick to pry up and disconnect the screen cable from the center of the logic board.
-
-
-
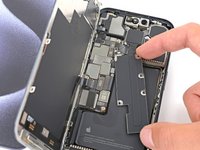
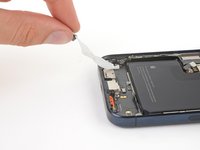
Gently slide the tip of an opening pick under the ambient light sensor cable near the top left corner of the logic board.
-
Lift the cable to disconnect it.
-
-
-
Remove the screen.
-
-
-
Use a Phillips #000 screwdriver to remove the four screws securing the loudspeaker:
-
One 2.7 mm‑long screw
-
Three 2 mm‑long screws
-
-
-
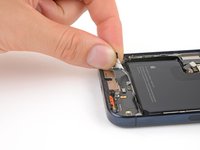
Lift the bottom edge of the loudspeaker until you can grab it with your fingers.
-
Peel the loudspeaker from the plastic buffer on its top edge and remove it.
-
-
-
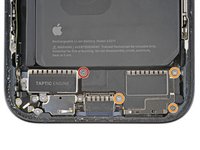
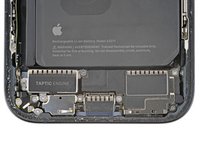
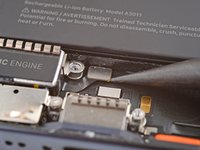
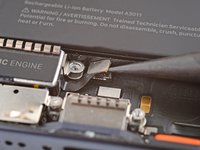
Use the point of a spudger to pry up and disconnect the Taptic Engine press connector.
-
-
-
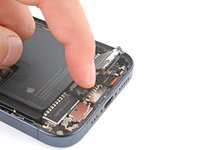
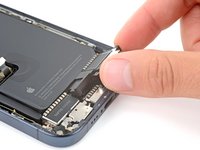
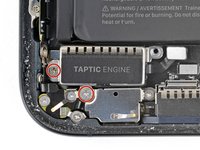
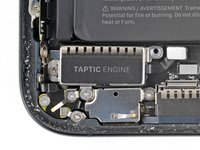
Use a Phillips #000 screwdriver to remove the two 2 mm‑long screws securing the Taptic Engine.
-
-
-
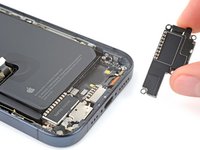
Remove the Taptic Engine.
-
-
-
Each strip has a black pull tab at its end, which is lightly adhered to the edge of the battery.
-
-
crwdns2935267:0crwdne2935267:0Tweezers$4.99
-
Use the tip of an opening pick to gently unstick an edge of an adhesive pull tab from the edge of the battery.
-
Use blunt nose tweezers to grip the edge of the pull tab and pull it completely off the edge of the battery.
-
Repeat for the other two pull tabs.
-
-
-
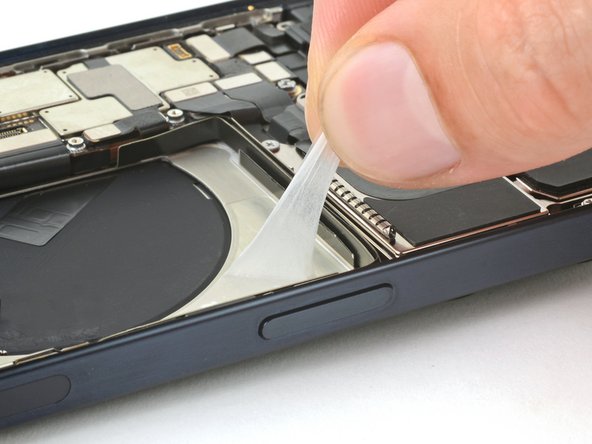
Pull one of the pull tabs out from under the battery until you can grip it with your fingers or wrap it around your tool.
-
Hold the phone steady using the edges of the frame—don't press down on the battery.
-
Pull the strip slowly, evenly, and at a low angle without dragging on other components.
-
Continue pulling, re-gripping or wrapping it around your tool as you go, until the strip fully releases from under the battery.
-
Repeat this step for the other two strips.
-
-
-
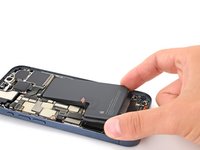
If the top strip remains, prop up the top edge of the phone.
-
If either of the bottom strips remain, prop up the left edge of the phone (the side with the volume buttons).
-
Use a pipette or syringe to apply a few drops of highly-concentrated isopropyl alcohol (over 90%) to the elevated edge of the battery.
-
Wait one minute for the isopropyl alcohol to flow under the battery and soften the adhesive.
-
-
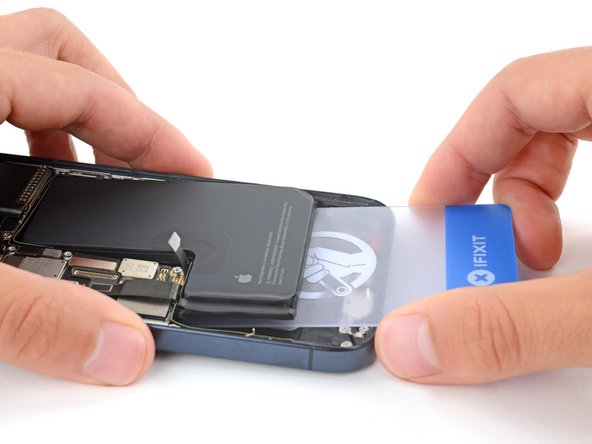
crwdns2935267:0crwdne2935267:0Plastic Cards$2.99
-
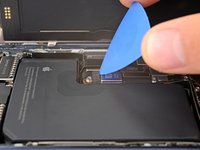
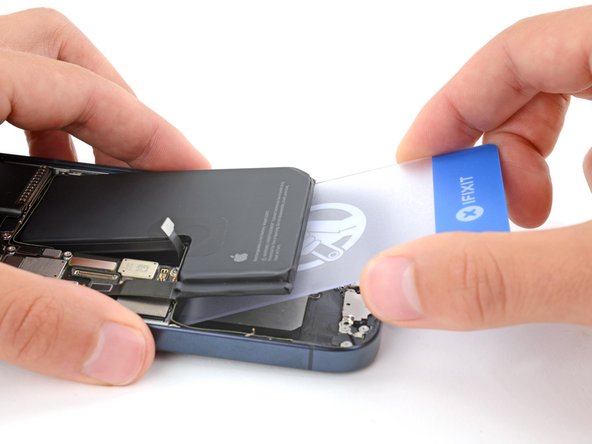
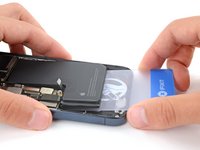
Insert the short edge of a plastic card between the bottom edge of the battery and the frame.
-
Gently pry up the battery until the adhesive fully separates.
-
-
crwdns2935267:0crwdne2935267:0Stretch Release Battery Adhesive$3.99
-
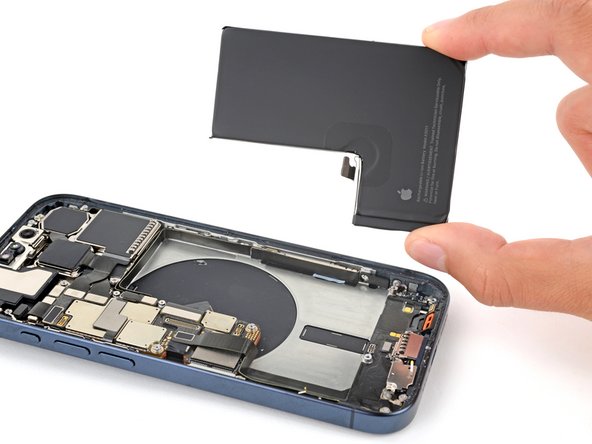
Remove the battery.
-
Clean your frame with isopropyl alcohol and a lint-free or microfiber cloth.
-
Before applying adhesive, temporarily reconnect your new battery and place it in its recess to check if it fits and that the cable reaches the socket on the logic board. Disconnect the battery before continuing.
-
Check out this guide to apply new stretch release adhesive strips to your battery, if it doesn't already come with adhesive installed.
-
If you don't have stretch release adhesive, use thin, double-sided tape to secure it.
-


To reassemble your iPhone, follow these instructions in reverse order.
After your repair, depending on the replacement part, you may be able to calibrate it using Apple's Repair Assistant, available as of iOS 18. Update your device, navigate to Settings → General →About → Parts & Service History, tap Restart & Finish Repair, and follow the onscreen prompts.
For optimal performance, calibrate your newly installed battery after completing this guide.
Take your e-waste to an R2 or e-Stewards certified recycler.
Repair didn’t go as planned? Try some basic troubleshooting, or ask our Answers community for help.
crwdns2935221:0crwdne2935221:0
crwdns2935229:08crwdne2935229:0


crwdns2947412:02crwdne2947412:0
Very detailed
Exelente tutorial , gracias
在開始維修之前,請讓手機電池電量耗盡 25% 以下——充電的鋰離子電池如果損壞可能會起火。
拔掉手機上的所有電纜。
按住電源和任一音量按鈕並滑動即可關閉手機。
Ansel Lin - crwdns2934203:0crwdne2934203:0