crwdns2915892:0crwdne2915892:0
Use this guide to replace the accessory antenna board in an Xbox Series X.
If your Xbox controllers repeatedly disconnect after a few minutes, replacing the accessory antenna board might be the fix.
Before you begin, completely power down and unplug all cables from your console. Remember to follow general electrostatic discharge (ESD) safety procedures while repairing the console.
crwdns2942213:0crwdne2942213:0
-
-
Use a pair of tweezers to remove the sticker hiding the first screw on the back panel, near the base.
-
-
-
Use a pair of blunt tweezers to peel back the large sticker on the back panel to reveal the second screw.
Recommend using a hair dryer to soften the label adhesive.
Microsoft can void your warranty. They can use whatever excuse if it is sent in because you opened it and you cannot prove you didn’t damage it.
actually those stickers would look better after removal if you use a really sharp blade to slide under it and get a corner up, then use your fingers to peel it, since it wouldn't leave those wrinkles and rough edges.
-
-
crwdns2935267:0crwdne2935267:0Magnetic Project Mat$19.95
-
Use a T8 Torx driver to remove the two 7.4 mm‑long screws securing the back panel.
-
-
-
Insert the flat end of a spudger into the gap between the back panel and the shell, near the left side of the base.
-
Pry up the back panel to release it from the locking clips.
-
-
-
Insert the flat end of a spudger into the gap between the back panel and the shell, near the right side of the base.
-
Pry up the back panel to release it from the locking clips.
-
-
-
Grip the back panel at the opening you just created and pull it up and away from the shell to unclip the long edges.
-
-
-
Tilt the back panel up and pull it away from the top edge of the shell to release it from the gap.
-
Remove the back panel.
-
-
-
Use a T8 Torx driver to remove the three screws securing the fan to the center chassis:
-
One 10.5 mm pancake screw
-
Two 8.8 mm screws
are there any 10.5mm wide head screw for the xbox fan for sale because i need a replacement because i accidentally broke mine
If the 10.5 mm screw isn’t budging, use some pliers to loosen it
-
-
-
crwdns2935267:0crwdne2935267:0Tweezers$4.99
-
Use your fingers or a pair of blunt tweezers to grip the edges of the fan cable connector, and pull up to disconnect it from the center chassis.
But don’t pull the connectors with tweezers because you will inevitably still damage the cable as you have no grip on the connector and the tweezers will slip.
Tweezers do not work
-
-
-
Slide the fan out of its slot to remove it.
-
-
-
Use the flat end of a spudger to lift up on the locking tab holding the base to the shell.
-
-
-
Grip the base and rotate it counterclockwise to unlock it from the shell.
-
Remove the base.
had trouble getting the base off, what worked for me is setting the console on the table sitting on the base and turning the whole console while pushing down.
-
-
-
Use a T8 Torx driver to remove the two 8.8 mm screws securing the optical drive's vibration isolator to the shell: one on the base and one on the top of the isolator.
-
-
-
Lift up the optical drive's vibration isolator to remove it.
-
-
crwdns2935267:0crwdne2935267:0Tweezers$4.99
-
Use a pair of blunt tweezers to grip the edges of the optical drive power connector and pull up to disconnect it from the optical drive.
-
Use your fingers to pull up and disconnect the data cable from the optical drive.
Once again, DO NOT use tweezers to pull these connectors out. That’s a great way to slip and damage something.
I managed to get the power connector unplugged, but the data cable just refuses to move. I've used quite a bit of force, and using any more feels like I would damage it. I have no clue on how to get it out safely :(
Try to "walk" the connector out: pry up one side, then the other. Best of luck!
-
-
-
Grip the top edge of the optical drive and pull it out of its slot in the shell to remove it.
-
-
-
Use the flat end of a spudger to flip open the metal locking tab on the USB port ribbon cable.
-
-
-
Use a pair of tweezers to pull up on the black plastic pull tab to disconnect the USB port cable.
The silver ribbon cable is glued down to the center chassis, so only pulling on the black plastic pull tab will result in it pulling free from the cable as that tab is only glued to the cable.
Better to heat the silver ribbon cable's adhesive with a hair dryer, separate the cable from the center chassis, and then pull the cable from the connector using the black plastic pull tab.
-
-
-
Use the pointed end of a spudger to depress the metal tab on the side of the power button cable's board connector.
-
With the metal tab depressed, use a pair of tweezers to pull up on the pull tab to disconnect the power button cable from the center chassis.
I broke this connector during disassembly. Is there a part number I can use to get a replacement on Mouser or Digikey?
I broke this connector during disassembly too. Where can I get this connector?
the manufacturer of connectors in series x is I-PEX. exact part number (as far as I'm not mistaken) 20535-010E-02 EVAFLEX 5-VS. 0.5mm pin spacing (10pin connector). a possible rescue may be to desolder the connector from the switch board and solder it permanently there.
How do I purchase this from their website?
I have these connectors. Baycroc@fedtel.net
Would we be able to order them from you directly
Yes would we be able to order these connectors directly from you?
There is no black pull tab on mine😬. How am I supposed to pull it safely?
-
-
-
Use a T8 Torx driver to remove the three 7.4 mm screws securing the center chassis assembly to the shell.
-
-
-
Gently peel the taped USB port ribbon cable off of the heatsink.
-
-
-
Grip the center chassis and pull it towards the green fan grille at the top of the shell, uncoupling the guide pegs from the shell.
-
Lift out the center chassis assembly to remove it from the shell.
-
-
-
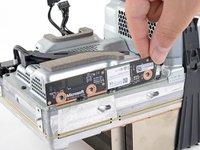
Use a T8 Torx driver to remove the three 9.6 mm screws securing the antenna board to the center chassis.
-
-
-
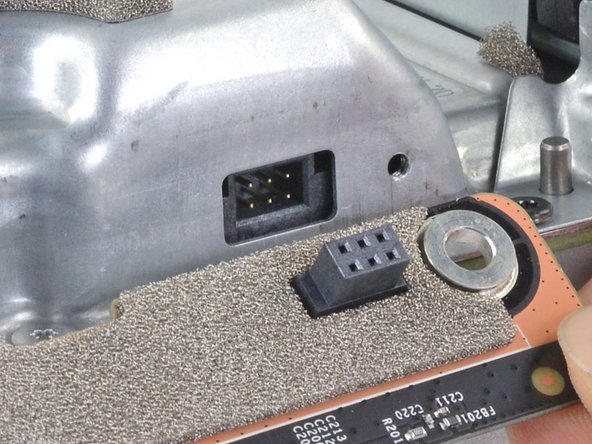
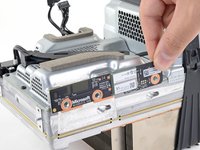
Grip the antenna board and pull it directly away from the center chassis to disconnect it.
-
To reassemble your device, follow these instructions in reverse order.
Take your e-waste to an R2 or e-Stewards certified recycler.
Repair didn’t go as planned? Try some basic troubleshooting, or ask our Xbox Series X Answers community for help.
To reassemble your device, follow these instructions in reverse order.
Take your e-waste to an R2 or e-Stewards certified recycler.
Repair didn’t go as planned? Try some basic troubleshooting, or ask our Xbox Series X Answers community for help.
crwdns2935221:0crwdne2935221:0
crwdns2935229:08crwdne2935229:0
crwdns2947412:05crwdne2947412:0
Had a Xbox Series X with a completely non-functional sync button, xbox light did not blink upon pressing it. Controllers or other Xbox wireless accessories did not work either. Replacing this board fixed that issue! In case anyone else runs into the same problem.
had exact same issue, replacing with this board fixed it for me also.
This was extremely well described. For me, however it did not solve my problem. I solved my controller connectivity and wifi issue simply by plugging in a powered external hard drive into the front USB of my Xbox Series X. It appears that possibly the power supply was not generating enough power and this little boost has sorted it. It only worked after I connected the external powered drive and then rebooted.
Great guide! I bought my first ever iFixit kit and followed this guide for my first true electronics repair. My Xbox Series X was sitting mostly unused for over two years because of this part failure and Microsoft quoted my $290+ for a repair. I was able to get things back up and running well within the hour timeframe.
I had an issue where Xbox Controllers kept disconnecting every 5-15 minutes and then immediately reconnect. This would pause the game asking for a controller and was very annoying. I tried all the recommended troubleshooting steps online but the only thing that fixed it was replacing this board following these excellent instructions. I didn't need to replace the separate WiFi board either so this wasn't that difficult of a fix.


