crwdns2933423:0crwdne2933423:0

Xbox Series X|S Wireless Controller (Model 1914) Full Disassembly

crwdns2942213:0crwdne2942213:0

  1. Xbox Series X|S Wireless Controller (Model 1914) Full Disassembly, Remove batteries: crwdns2935265:01crwdnd2935265:01crwdnd2935265:01crwdne2935265:0
    • Remove the batteries, then hold the Xbox button for a few seconds to drain any remaining power.

    • This will make sure you don't shock yourself or short the device.

  2. Xbox Series X|S Wireless Controller (Model 1914) Full Disassembly, Opening the device: crwdns2935265:02crwdnd2935265:01crwdnd2935265:03crwdne2935265:0 Xbox Series X|S Wireless Controller (Model 1914) Full Disassembly, Opening the device: crwdns2935265:02crwdnd2935265:02crwdnd2935265:03crwdne2935265:0 Xbox Series X|S Wireless Controller (Model 1914) Full Disassembly, Opening the device: crwdns2935265:02crwdnd2935265:03crwdnd2935265:03crwdne2935265:0
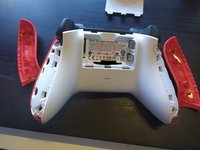
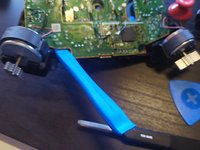
    • The second step is to remove the side plates that rest against your palms. This can be done with an iFixit opening tool or some iFixit opening picks.

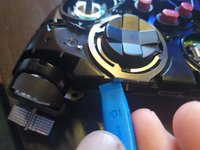
    • If you have an opening tool, insert it near the tip as shown and "pry" the side plate away from the controller. You'll hear a click as the clips come loose. Slide the tool around the plate, prying as you encounter resistance, until it comes free.

    • If you also have an opening pick, it can be helpful to insert one near the bottom once the plate loosens. Otherwise, the clips at the bottom may reconnect while you're working on the others.

    • This takes a bit of force, but apply it slowly at first. If the prying tool slips, you could end up jabbing yourself.

    • If you only have opening picks, press them between the side and front plates. At first, you'll only be able to insert them in certain spots; push them in as deeply as you can until you have a few in place. Then, wiggle and slide the picks until you hear the clips loosen.

    • The clips can be difficult to locate, so you may need to experiment a bit. The picture may help give you an idea how to get started.

  3. Xbox Series X|S Wireless Controller (Model 1914) Full Disassembly, Removing the front and backplate: crwdns2935265:03crwdnd2935265:01crwdnd2935265:03crwdne2935265:0 Xbox Series X|S Wireless Controller (Model 1914) Full Disassembly, Removing the front and backplate: crwdns2935265:03crwdnd2935265:02crwdnd2935265:03crwdne2935265:0 Xbox Series X|S Wireless Controller (Model 1914) Full Disassembly, Removing the front and backplate: crwdns2935265:03crwdnd2935265:03crwdnd2935265:03crwdne2935265:0
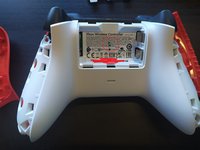
    • Remove 5 screws shown on the picture using the T8 bit.

    • The screw in the middle is underneath the sticker in the battery bay. You can push the screwdriver bit through the sticker, or peel it away. There is only one screw!

    • Please note that this makes both the front and back plates completely loose from the controller.

    On the model released in 2021 (Microsoft Model # QAU-00011), the screws require the T8 Security bit

    Jen Robinson - crwdns2934203:0crwdne2934203:0

    My model 1914 (the black one that came with the XSX) has T2 bits here instead of the T8 mentioned. This goes for all 5 screws.

    addvariety - crwdns2934203:0crwdne2934203:0

    Mine that came with Xbox X 2021, needed T9 security bit. M1142084-007

    comstar - crwdns2934203:0crwdne2934203:0

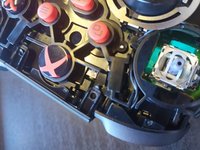
  4. Xbox Series X|S Wireless Controller (Model 1914) Full Disassembly, Joysticks and d-pad: crwdns2935265:04crwdnd2935265:01crwdnd2935265:03crwdne2935265:0 Xbox Series X|S Wireless Controller (Model 1914) Full Disassembly, Joysticks and d-pad: crwdns2935265:04crwdnd2935265:02crwdnd2935265:03crwdne2935265:0 Xbox Series X|S Wireless Controller (Model 1914) Full Disassembly, Joysticks and d-pad: crwdns2935265:04crwdnd2935265:03crwdnd2935265:03crwdne2935265:0
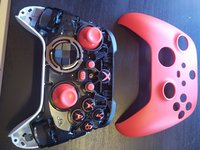
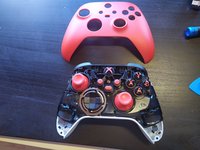
    • Now the front plate is removed we can also remove the backplate.

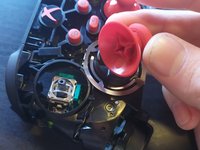
    • If you only need to swap the joysticks you can just pull them off, replace, and reassemble.

    • Or if you just want to replace the d-pad you can lift the metal ring up and just pick it up and replace it.

    • If you are going further in the guide, you do need to remove the joysticks, but can leave the d-pad in place.

  5. Xbox Series X|S Wireless Controller (Model 1914) Full Disassembly, Removing the sync button plate: crwdns2935265:05crwdnd2935265:01crwdnd2935265:03crwdne2935265:0 Xbox Series X|S Wireless Controller (Model 1914) Full Disassembly, Removing the sync button plate: crwdns2935265:05crwdnd2935265:02crwdnd2935265:03crwdne2935265:0 Xbox Series X|S Wireless Controller (Model 1914) Full Disassembly, Removing the sync button plate: crwdns2935265:05crwdnd2935265:03crwdnd2935265:03crwdne2935265:0
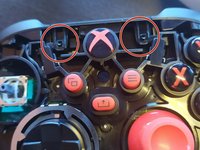
    • Now we are going to take off the little plate between the bumpers to futher access the controller.

    • Start by pushing the two little plastic pieces on either side of the xbox on/off button.

    • Just push the little pieces up and away from the controller (plate may shoot away so hold it a little).

    • (sorry for blurry pics)

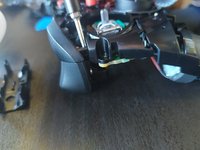
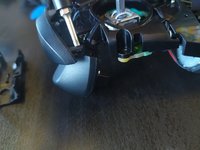
  6. Xbox Series X|S Wireless Controller (Model 1914) Full Disassembly, Removing the bumpers: crwdns2935265:06crwdnd2935265:01crwdnd2935265:03crwdne2935265:0 Xbox Series X|S Wireless Controller (Model 1914) Full Disassembly, Removing the bumpers: crwdns2935265:06crwdnd2935265:02crwdnd2935265:03crwdne2935265:0 Xbox Series X|S Wireless Controller (Model 1914) Full Disassembly, Removing the bumpers: crwdns2935265:06crwdnd2935265:03crwdnd2935265:03crwdne2935265:0
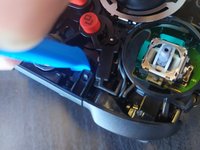
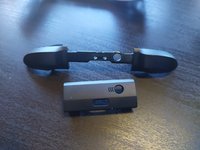
    • To remove the bumper, on either sides are little pieces of platic just like the ones we just undid, just push it away from the controller. I like to use the screwdriver for this ones since its a little smaller and gets behind the plastic easier.

    • I also added a pic of the bumper so you can see how it looks if you need to buy a new one (mine broke within a year).

  7. Xbox Series X|S Wireless Controller (Model 1914) Full Disassembly, Removing the trigger caps: crwdns2935265:07crwdnd2935265:01crwdnd2935265:03crwdne2935265:0 Xbox Series X|S Wireless Controller (Model 1914) Full Disassembly, Removing the trigger caps: crwdns2935265:07crwdnd2935265:02crwdnd2935265:03crwdne2935265:0 Xbox Series X|S Wireless Controller (Model 1914) Full Disassembly, Removing the trigger caps: crwdns2935265:07crwdnd2935265:03crwdnd2935265:03crwdne2935265:0
    • Next we are going to remove the trigger caps. Use a T6 bit for this.

    • Remove the screws on the backsides of the caps and just gently push the plastic around the trigger from the outside towards the inside

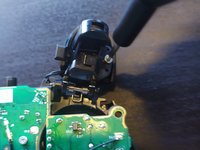
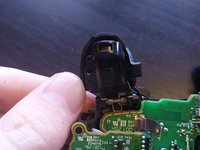
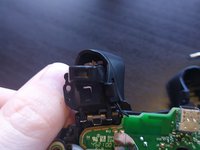
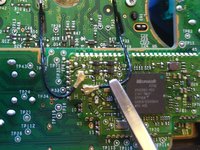
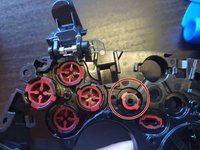
    • Be careful of the small gray rumble motors. Try not to let them dangle by their wires while working.

    Does anyone know what size screws these are? I seem to have misplaced them during the reassembly and the controller rattles a lot now. I might try looking for a broken donor controller and take the screws from that. Thank you.

    Thomas Hunsaker - crwdns2934203:0crwdne2934203:0

  8. Xbox Series X|S Wireless Controller (Model 1914) Full Disassembly, Removing the Bluetooth antennas: crwdns2935265:08crwdnd2935265:01crwdnd2935265:02crwdne2935265:0 Xbox Series X|S Wireless Controller (Model 1914) Full Disassembly, Removing the Bluetooth antennas: crwdns2935265:08crwdnd2935265:02crwdnd2935265:02crwdne2935265:0
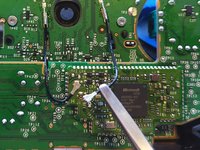
    • To remove the motherboard (top one) we first disconnect the Bluetooth antennas. We do this by slowly lifting up the connectors on the side of the motherboard.

  9. Xbox Series X|S Wireless Controller (Model 1914) Full Disassembly, Removing the rumble motors: crwdns2935265:09crwdnd2935265:01crwdnd2935265:02crwdne2935265:0 Xbox Series X|S Wireless Controller (Model 1914) Full Disassembly, Removing the rumble motors: crwdns2935265:09crwdnd2935265:02crwdnd2935265:02crwdne2935265:0
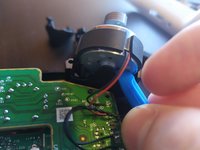
    • Now remove the big rumble motors by pushing a little plastic piece back and lifting the motor up (remember to minimize strain on the wires).

    • Next we need to remove the little rumble motors in the triggers from the top, just make sure the wires aren't connected to the chassis anymore.

  10. Xbox Series X|S Wireless Controller (Model 1914) Full Disassembly, Removing the motherboard: crwdns2935265:010crwdnd2935265:01crwdnd2935265:03crwdne2935265:0 Xbox Series X|S Wireless Controller (Model 1914) Full Disassembly, Removing the motherboard: crwdns2935265:010crwdnd2935265:02crwdnd2935265:03crwdne2935265:0 Xbox Series X|S Wireless Controller (Model 1914) Full Disassembly, Removing the motherboard: crwdns2935265:010crwdnd2935265:03crwdnd2935265:03crwdne2935265:0
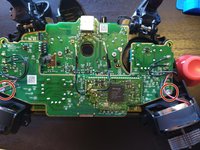
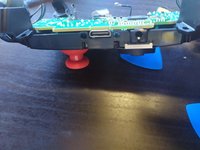
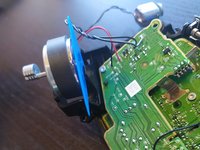
    • Next we remove the two screws in the bottom corners (using T6 bit). Next we can lift the motherboard up. NOTE that the 3.5mm jack is not soldered and just sandwiched between the two boards.

    • When assembling the device note that the multiple metal pieces on the 3.5mm go towards the motherboard.

    • For removing the motherboard just simply lift it from one of the corners without bending it too much. (sorry the camera was out of focus)

  11. Xbox Series X|S Wireless Controller (Model 1914) Full Disassembly, Removing the daughter plate: crwdns2935265:011crwdnd2935265:01crwdnd2935265:03crwdne2935265:0 Xbox Series X|S Wireless Controller (Model 1914) Full Disassembly, Removing the daughter plate: crwdns2935265:011crwdnd2935265:02crwdnd2935265:03crwdne2935265:0 Xbox Series X|S Wireless Controller (Model 1914) Full Disassembly, Removing the daughter plate: crwdns2935265:011crwdnd2935265:03crwdnd2935265:03crwdne2935265:0
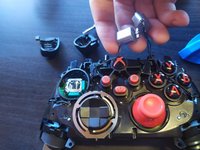
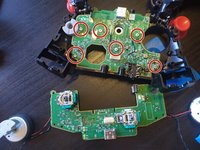
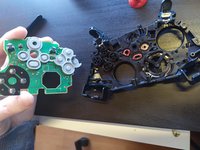
    • Now we remove the last six screws (still T6). After those you can lift the daughter board. The buttons will be loose after removing, so take care not to lose them.

    • Remove the buttons before flipping the controller chassis

    • Buttons are keyed to ensure they are in the right position and orientation. Check placement if one doesn't seem to fit.

  12. Xbox Series X|S Wireless Controller (Model 1914) Full Disassembly, Tips for assembly: crwdns2935265:012crwdnd2935265:01crwdnd2935265:02crwdne2935265:0 Xbox Series X|S Wireless Controller (Model 1914) Full Disassembly, Tips for assembly: crwdns2935265:012crwdnd2935265:02crwdnd2935265:02crwdne2935265:0
    • When assembling, these might be nice to know. When placing the big rumble motors, place the plectrum in first so it just slides in.

    • When the daugtherboard is placed back in the chassis, check if all the buttons work(except B that goes to the motherboard).

    • (It took me a second to find that my Y was dislodged because the controller was resting on it, that meant I couldn't press it and couldn't pull the RT all the way down, so I had to go back some steps).

    • When putting back the D-pad ring, make sure the top is sitting deep enough or you could run into trouble.

    • When placing the wires back for the trigger rumble motors... just put on some good music and try to keep you patience.

    • Please when you are almost done and only need to put the side plates (step 2) check before finishing if everything works. You can easily do this using this link https://gamepad-tester.com/

crwdns2915888:0crwdne2915888:0

To reassemble your device, follow these instructions in reverse order.

I just want to say that I really hope this guide can help people as I noticed there was none available at the time of writing. If you found this helpful please leave a comment, or if you have tips for how I can improve the guide please let me know.

This was my first guide so I hope I was clear enough, good luck and most of all have fun!

*PS: The stock image of the thumbs up is a copyright free picture from Pixabay

crwdns2935229:058crwdne2935229:0

yoeri

crwdns2935283:003/03/22crwdne2935283:0

1,749 crwdns2915208:0crwdne2915208:0

crwdns2935295:0crwdne2935295:0

crwdns2947412:010crwdne2947412:0

The motherboard is a printed circuit board and foundation of a computer that is the biggest board in a computer chassis. It allocates power and allows communication to and between the CPU, RAM, and all other computer hardware components. https://www.ifixit.com/Guide/Xbox+One+Wi...+resultsFull+Disassembly/148234

Thanks

Maurene - crwdns2934203:0crwdne2934203:0

Nicely done! Thanks! I submitted some changes just to clean up formatting, spelling, grammar, etc.

Ryn S - crwdns2934203:0crwdne2934203:0

Nice guide, simple but concise!

If anyone wonders some day with the Forza special edition 1914 controller, it has an additional rubberized section like the clipped on side rails. The Forza controller disassembles in the same way as this guide, you do not pry off or remove the additional inner grip strip. The additional inner grip strip is permanently bonded to the bottom shell piece, with no new screws under it or anything.

Jenny Bee - crwdns2934203:0crwdne2934203:0

Good guide! Helped me disassemble things to find the bumper strip (LB/RB) LB button wasn't right. Fixed the support clicking the LB switch and reassembled it. My nephew should be happy about it being fixed and I now know that if the repair doesn't hold what part needs replacing! Thank you!

B Gardiner - crwdns2934203:0crwdne2934203:0

Thanks for the guide. Helped me with not destroying controller while trying to fix it. Does anyone by a change know a part number on the O10 component (its right above headphone jack) in Step 11 image?

Dionyz - crwdns2934203:0crwdne2934203:0

I banged my controller and had an issue where my left bumper/trigger wouldn't press down properly. I used this guide to disassemble my controller, and found that the thinner part of plastic that holds in the T8 torx screw to the bottom plate next to the left trigger broke off and was wedged between the bumper and the PCB. Since I removed that tiny little hunk of plastic, my bumper works perfectly.

The only issue is that the top plate doesn't sit flush with the side plate and to a lesser extent, the side plate doesn't sit flush with the bottom on the left side since the torx screw only touches the half of the backplate toward the center of the controller, but this is superficial and not worth buying a new backplate. I've very grateful for this well constructed guide!

Calvin Miner - crwdns2934203:0crwdne2934203:0

As I've mentioned at the applicable section, my model 1914 is a black one that came with my XSX, yet it requires T2 screws (5 in total) for step 3. Keep this in mind and maybe check before potentially buying T8 when you don't need it. Or even worse: you buy T8 and find out that you need T2. Especially if you don't already own something like the iFixit pro kit that contains basically every bit you can every need.

addvariety - crwdns2934203:0crwdne2934203:0

Having trouble with the J2 connector (model 1914), it's different from the more usual circular J1 found in things like phones, it doesn't seem to push back down easily on the mounting point. Any advice before I try percussive maintenance?!

ColdRFusion - crwdns2934203:0crwdne2934203:0

I hate the fact that the rumble motors are soldered on. They can come off so easily during normal maintenance (i.e. cleaning)

icecoldsnake - crwdns2934203:0crwdne2934203:0

The screw behind the sticker is a security screw. I believe that'd be a T8H bit.

Glad I checked before bothering to pull the side plates.

Jason Ziniel - crwdns2934203:0crwdne2934203:0

crwdns2917038:0crwdne2917038:0

crwdns2936625:0crwdne2936625:0:

crwdns2936751:024crwdne2936751:0 162

crwdns2936753:07crwdne2936753:0 1,158

crwdns2936753:030crwdne2936753:0 5,304

crwdns2942667:0crwdne2942667:0 115,433