crwdns2915892:0crwdne2915892:0
Follow this guide to remove the eye tube gasket for repairs or replacement on the Valve Index VR headset.
Power off and unplug your Index before you begin your repair.
crwdns2942213:0crwdne2942213:0
-
-
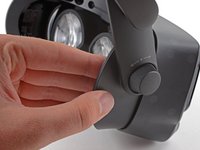
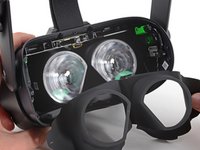
Twist the eye tube relief knob clockwise to fully extend it.
-
-
-
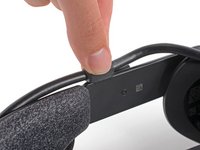
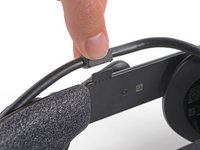
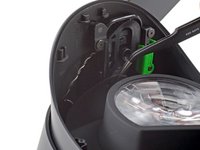
Insert the flat end of a spudger in between the bottom of the head strap clip and the head strap padding.
-
Pry up on the head strap clip until it is unclipped from the head strap.
Do you sell replacement clips?
I didn't really see the need to unclip this or do the next step so I skipped it. It seems easy enough to unplug the cable while it's still attached to these, so unless you're really concerned about the cable bending a little more than it already does it seems unnecessary.
-
-
-
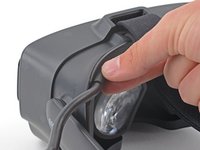
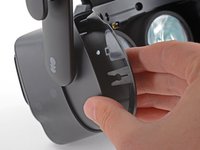
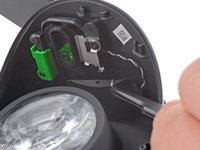
Use your hand to gently pull the face gasket straight off of the headset.
-
-
-
Use your fingers to pull the tether cable straight up off of the head strap cable guide.
-
-
-
-
Pull the tether cable straight back out of the headset.
-
-
-
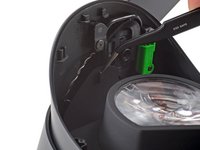
Use a T5 Torx screwdriver to remove the four 6.0 mm screws securing the face gasket bezel to the headset.
-
-
-
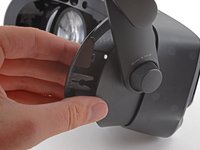
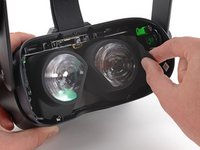
Grab the left edge of the face gasket bezel with your hand and slide it off of the headset.
This was a little tricky. There's a latching mechanism inside the bezel that requires squeezing the sides a bit to unlatch. In exactly the same hand position as the photo, you need to squeeze. Absolutely don't pry it off or it will snap.
-
-
-
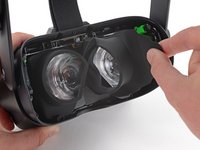
Repeat the previous step for the right side of the face gasket bezel.
-
Remove the face gasket bezel.
-
-
crwdns2935267:0crwdne2935267:0Tweezers$4.99
-
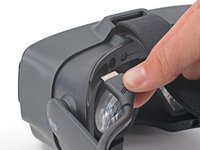
Use a pair of tweezers to separate the left edge of the eye tube gasket from the headset.
-
Repeat the process for the right edge of the gasket.
-
-
-
Gently peel the eye tube gasket out of the headset.
my headset has an additional piece of plastic that yours doesnt have, and its not letting me remove the lenses in later steps
There is a plastic piece behind the gasket that will prevent the eye tubes from coming out which isn't listed in this guide. It has 3 clasps and pries out horizontally.
I was pleased to discover that the adhesive on the rubber gasket stays sticky enough to stay in place after reassembly (at least so far) so you may not need to worry about reapplying new glue.
-


Compare your new replacement part to the original part—you may need to transfer remaining components or remove adhesive backings from the new part before installing.
To reassemble your device, follow the above steps in reverse order.
Take your e-waste to an R2 or e-Stewards certified recycler.
Repair didn’t go as planned? Try some basic troubleshooting, or ask our Valve Index Answers community for help.
crwdns2935221:0crwdne2935221:0
crwdns2935227:0crwdne2935227:0

crwdns2947410:01crwdne2947410:0
The whole replacement step are not there, only to remove it, it's a false guide, doesn't tell you how to install it at all.