crwdns2915892:0crwdne2915892:0
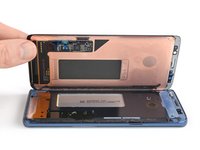
Use this guide to replace a cracked or broken display on your Samsung Galaxy S9.
Before disassembling your phone, discharge the battery below 25%. The battery can catch fire and/or explode if accidentally punctured, but the chances of that happening are much lower if discharged.
Note: This guide instructs you to replace only the display while leaving the original frame, motherboard, and battery in place. However, some replacement screens for this phone come pre-installed in a new frame (a.k.a. chassis), which requires a very different procedure—transplanting your phone's internals and installing a new battery. Make sure you have the correct part before starting this guide.
This guide involves removing the rear glass cover; you will need replacement adhesive to reattach the back cover to the phone. If your replacement display does not come with adhesive, use a strong double-sided tape such as Tesa 61395 to secure it.
Opening the Samsung Galaxy S9 will damage the waterproof seals on the device. If you do not replace the adhesive seals, your phone will function normally, but will lose its water protection.
If the frame is damaged or bent, it's important to replace it, or else the new screen may not mount correctly and can suffer damage from uneven pressure.
The process of separating the display from the frame usually destroys the display, so don't follow this guide unless you intend to replace the display.
crwdns2942213:0crwdne2942213:0
-
-
Before you begin, switch off your phone.
-
Apply a heated iOpener to a long edge of the phone to loosen the adhesive beneath the rear glass. Apply the iOpener for at least two minutes.
-
-
-
In the following steps, you'll be cutting through the adhesive securing the back cover.
-
You'll be slicing through the adhesive in the areas shown:
-
Thick portions of adhesive
-
Thin areas of adhesive
-
Avoid prying or slicing in this area, to protect the fingerprint sensor flex cable.
-
-
-
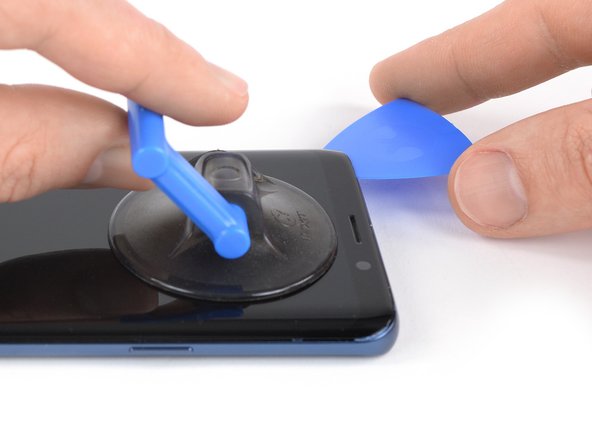
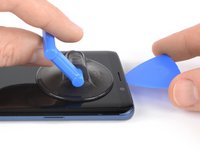
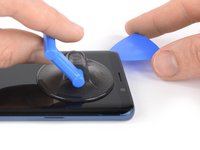
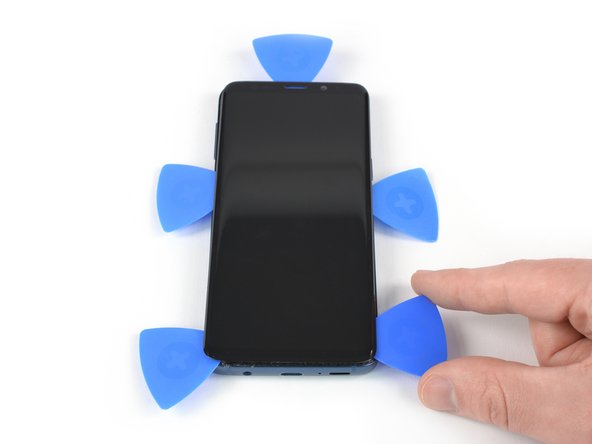
Press a suction cup onto the back cover.
-
Lift the back cover's bottom edge with your suction cup, opening a slight gap between the back cover and the frame.
-
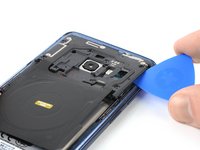
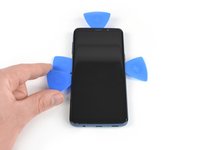
Insert an opening pick in the gap you created and slide it to the bottom right corner.
-
Insert a second opening pick and slide it to the bottom left corner.
-
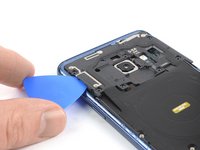
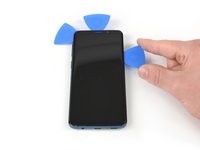
Insert a third opening pick to prevent the adhesive from resealing during the rest of the removal procedure.
-
-
-
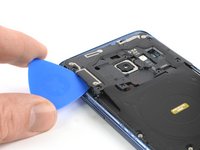
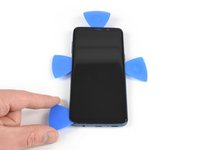
While inserting only the tip of the opening pick, slide it from the bottom left corner along the side to the top.
-
Slide the pick around the top corner and leave it there to prevent the adhesive from resealing.
-
-
-
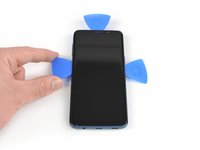
Slide the opening pick from the bottom right corner along the side to the top.
-
Slide the opening pick around the corner and cut the remaining adhesive at the top of the phone.
-
-
-
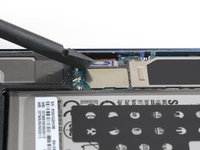
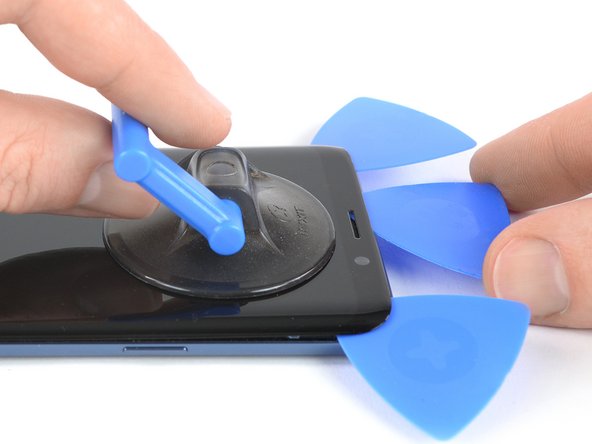
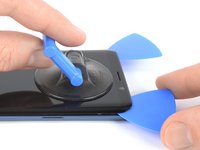
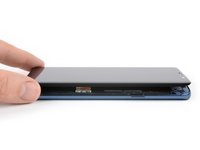
Carefully lift the side of the rear glass where the volume button is located.
-
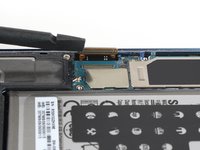
Use the edge of a spudger to pry up and disconnect the fingerprint sensor flex cable.
-
-
-
-
Remove the eight 4 mm Phillips #00 screws.
-
-
-
Insert an opening pick under the right side of the plastic cover containing the NFC antenna and charging coil.
-
Twist or pry to release the plastic clips securing the cover.
-
-
-
Insert an opening pick under the left side of the plastic cover.
-
Twist or pry to release the plastic clips securing the cover.
-
-
-
Remove the plastic cover containing the NFC antenna and charging coil.
-
-
-
Use the flat end of a spudger to pry up and disconnect the battery flex cable.
-
-
-
Remove the two 4 mm Phillips #00 screws holding the plastic cover in place.
-
-
-
Remove the plastic cover from the motherboard.
-
-
-
Use the flat end of a spudger to disconnect the display flex cable.
-
-
-
Prepare an iOpener and apply it to the display for at least two minutes to loosen the adhesive beneath.
-
Lay overlapping strips of clear packing tape over the display until the whole face is covered.
-
This will keep glass shards contained and provide structural integrity when prying and lifting the display.
-
-
-
Once the screen is warm to the touch, apply a suction cup to the upper edge of the phone.
-
Insert an opening pick in the gap and start to cut the adhesive by sliding it to the top left corner.
-
-
-
Insert another opening pick and slide it to the top right corner of the phone.
-
Insert a third opening pick to prevent the adhesive from resealing during the display removal.
-
-
-
Start to slide the right opening pick half way down the side of the frame to cut the adhesive.
-
Slide the left opening pick half way down the frame and leave it in its place.
-
-
-
Insert a fourth opening pick at the left side of the frame and slide it down to the bottom left corner to cut the adhesive.
-
Insert a fifth opening pick at the right side and cut the remaining adhesive with it.
-
-
-
Once you cut the adhesive on all sides of the phone you can slowly lift the display upwards and remove it.
-


Compare your new replacement part to the original part—you may need to transfer remaining components or remove adhesive backings from the new part before installing.
The best way to secure the new screen is with a sheet of custom-cut double-sided tape. Apply the tape to the back of the screen, then carefully feed the display cable through the frame. Align the screen and press it into place.
To reassemble your device, follow the above steps in reverse order.
After you've completed the repair, follow this guide to test your repair.
If possible, turn on your phone and test your repair before installing new adhesive and resealing the phone.
Take your e-waste to an R2 or e-Stewards certified recycler.
Repair didn’t go as planned? Check out our Answers community for troubleshooting help.
crwdns2935221:0crwdne2935221:0
crwdns2935229:079crwdne2935229:0


crwdns2947412:06crwdne2947412:0
Hi replaced the whole screen and frame but board is overheating?
A bit of guidance on where the adhesive seal goes would be nice. I believe I got it right.
digitizer is stuck to glass, and came apart
I followed the entire guide and still got a black screen of death.
Na het uitvoeren van alle stappen kwam ik een goudfolie tegen achter het scherm. Deze zie ik niet terug in jouw beschrijving. Wat kan ik doen?