crwdns2933423:0crwdne2933423:0

Samsung Galaxy S24 Battery Replacement

crwdns2942213:0crwdne2942213:0

  1. Samsung Galaxy S24 Battery Replacement, Prepare your phone for disassembly: crwdns2935265:01crwdnd2935265:01crwdnd2935265:02crwdne2935265:0 Samsung Galaxy S24 Battery Replacement, Prepare your phone for disassembly: crwdns2935265:01crwdnd2935265:02crwdnd2935265:02crwdne2935265:0
    • Let your phone's battery drain below 25% before starting this repair. A charged lithium-ion battery may catch fire if damaged.

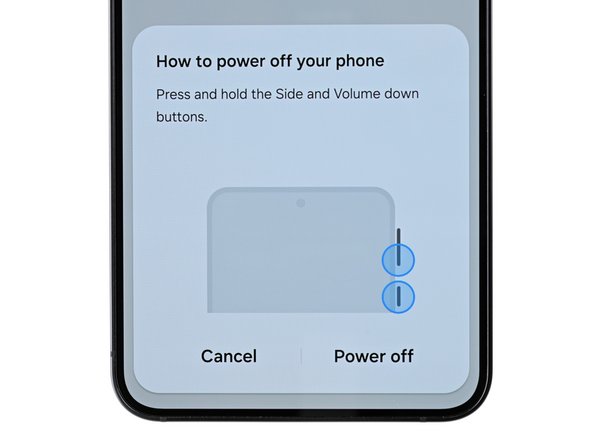
    • Completely power off your phone and unplug all cables.

  2. Samsung Galaxy S24 Battery Replacement, Heat the right edge: crwdns2935265:02crwdnd2935265:01crwdnd2935265:01crwdne2935265:0
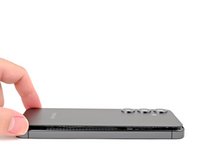
    • Heat an iOpener and apply it to the right edge of the back cover for two minutes.

    • You can use also use a hair dryer or heat gun to heat the right edge of the back glass until it's hot to the touch.

    • Be careful not to heat the phone hotter than this—the battery is susceptible to heat damage.

  3. Samsung Galaxy S24 Battery Replacement, Insert an opening pick: crwdns2935265:03crwdnd2935265:01crwdnd2935265:03crwdne2935265:0 Samsung Galaxy S24 Battery Replacement, Insert an opening pick: crwdns2935265:03crwdnd2935265:02crwdnd2935265:03crwdne2935265:0 Samsung Galaxy S24 Battery Replacement, Insert an opening pick: crwdns2935265:03crwdnd2935265:03crwdnd2935265:03crwdne2935265:0
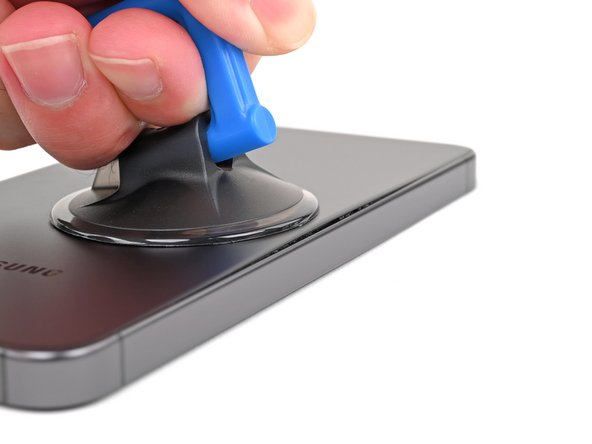
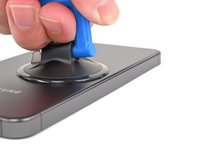
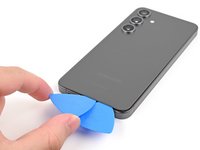
    • Apply a suction handle to the back cover, as close to the center of the right edge as possible.

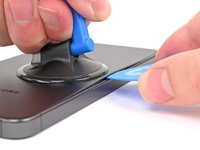
    • Pull up on the suction handle with strong, steady force to create a gap between the cover and the frame.

    • If you have trouble, apply more heat to further soften the adhesive.

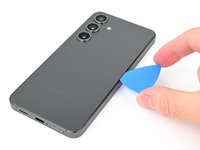
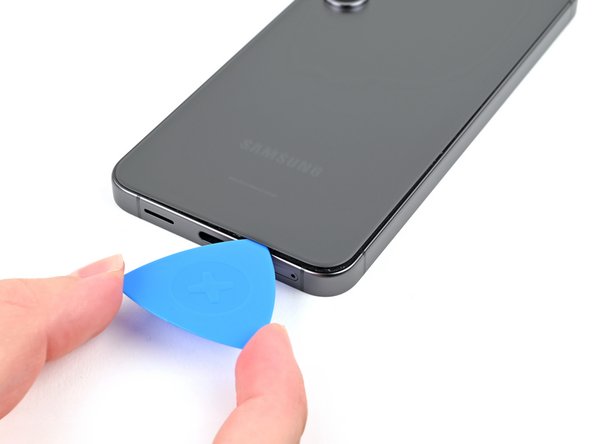
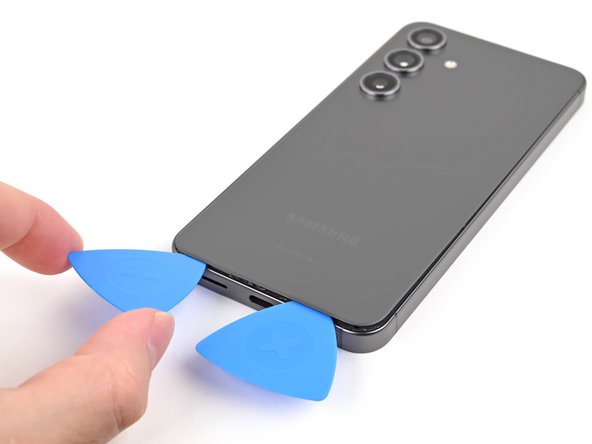
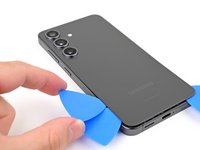
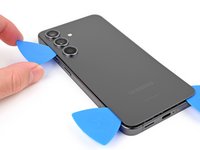
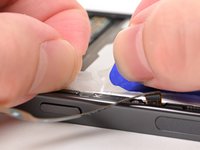
    • Insert an opening pick into the gap.

  4. Samsung Galaxy S24 Battery Replacement, Separate the right adhesive: crwdns2935265:04crwdnd2935265:01crwdnd2935265:03crwdne2935265:0 Samsung Galaxy S24 Battery Replacement, Separate the right adhesive: crwdns2935265:04crwdnd2935265:02crwdnd2935265:03crwdne2935265:0 Samsung Galaxy S24 Battery Replacement, Separate the right adhesive: crwdns2935265:04crwdnd2935265:03crwdnd2935265:03crwdne2935265:0
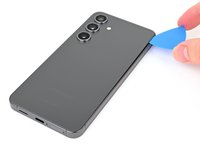
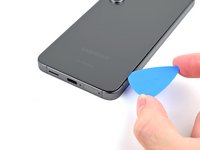
    • Slide your opening pick along the right edge between the back cover and the frame to slice through the adhesive.

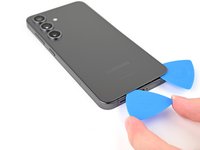
    • Leave your opening pick in the bottom right corner to keep the adhesive from resealing.

  5. Samsung Galaxy S24 Battery Replacement, Heat the bottom edge: crwdns2935265:05crwdnd2935265:01crwdnd2935265:01crwdne2935265:0
    • Reheat your iOpener and apply it to the bottom of the back cover for two minutes.

  6. Samsung Galaxy S24 Battery Replacement, Separate the corner adhesive: crwdns2935265:06crwdnd2935265:01crwdnd2935265:02crwdne2935265:0 Samsung Galaxy S24 Battery Replacement, Separate the corner adhesive: crwdns2935265:06crwdnd2935265:02crwdnd2935265:02crwdne2935265:0
    • Rotate the opening pick around the bottom right corner to separate the adhesive.

  7. Samsung Galaxy S24 Battery Replacement, Separate the bottom adhesive: crwdns2935265:07crwdnd2935265:01crwdnd2935265:02crwdne2935265:0 Samsung Galaxy S24 Battery Replacement, Separate the bottom adhesive: crwdns2935265:07crwdnd2935265:02crwdnd2935265:02crwdne2935265:0
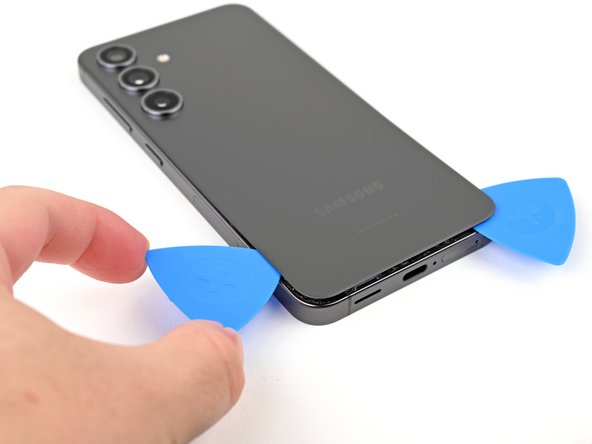
    • Insert a second opening pick to the left of the first one and slide it along the bottom edge to slice through the adhesive.

    • Leave your opening pick in the bottom left edge to prevent the adhesive from resealing.

  8. Samsung Galaxy S24 Battery Replacement, Heat the left edge: crwdns2935265:08crwdnd2935265:01crwdnd2935265:01crwdne2935265:0
    • Reheat your iOpener and apply it to the left side of the back cover for two minutes.

  9. Samsung Galaxy S24 Battery Replacement, Separate the corner adhesive: crwdns2935265:09crwdnd2935265:01crwdnd2935265:02crwdne2935265:0 Samsung Galaxy S24 Battery Replacement, Separate the corner adhesive: crwdns2935265:09crwdnd2935265:02crwdnd2935265:02crwdne2935265:0
    • Rotate the opening pick around the bottom left corner to separate the adhesive.

  10. Samsung Galaxy S24 Battery Replacement, Separate the left adhesive: crwdns2935265:010crwdnd2935265:01crwdnd2935265:02crwdne2935265:0 Samsung Galaxy S24 Battery Replacement, Separate the left adhesive: crwdns2935265:010crwdnd2935265:02crwdnd2935265:02crwdne2935265:0
    • Insert a third opening pick above the last one and slide it along the left edge to slice through the adhesive.

    • Only insert your pick up to 4 mm deep to avoid damaging the rear cameras or flash.

    • Leave your opening pick in the top left corner to prevent the adhesive from resealing.

  11. Samsung Galaxy S24 Battery Replacement, Heat the top edge: crwdns2935265:011crwdnd2935265:01crwdnd2935265:01crwdne2935265:0
    • Reheat your iOpener and apply it to the top of the back cover for two minutes.

  12. Samsung Galaxy S24 Battery Replacement, Separate the corner adhesive: crwdns2935265:012crwdnd2935265:01crwdnd2935265:02crwdne2935265:0 Samsung Galaxy S24 Battery Replacement, Separate the corner adhesive: crwdns2935265:012crwdnd2935265:02crwdnd2935265:02crwdne2935265:0
    • Rotate the opening pick around the top left corner to separate the adhesive.

  13. Samsung Galaxy S24 Battery Replacement, Separate the top adhesive: crwdns2935265:013crwdnd2935265:01crwdnd2935265:03crwdne2935265:0 Samsung Galaxy S24 Battery Replacement, Separate the top adhesive: crwdns2935265:013crwdnd2935265:02crwdnd2935265:03crwdne2935265:0 Samsung Galaxy S24 Battery Replacement, Separate the top adhesive: crwdns2935265:013crwdnd2935265:03crwdnd2935265:03crwdne2935265:0
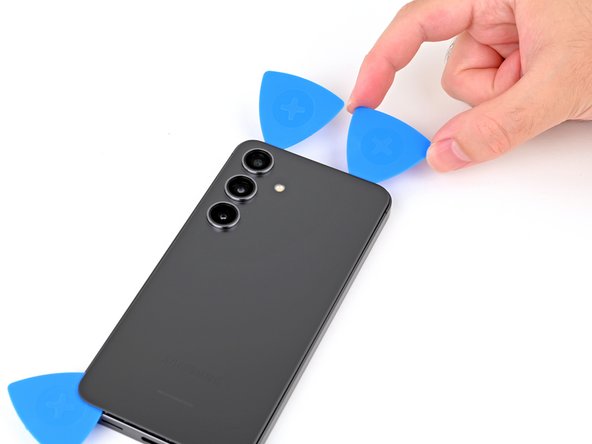
    • Insert a fourth opening pick in the top left corner at the same depth and slide it along the top edge and around the top right corner to slice through the adhesive.

  14. Samsung Galaxy S24 Battery Replacement, Separate the flash adhesive: crwdns2935265:014crwdnd2935265:01crwdnd2935265:02crwdne2935265:0 Samsung Galaxy S24 Battery Replacement, Separate the flash adhesive: crwdns2935265:014crwdnd2935265:02crwdnd2935265:02crwdne2935265:0
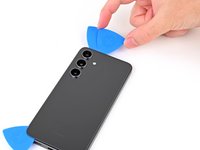
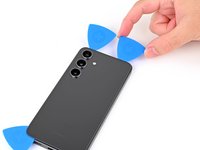
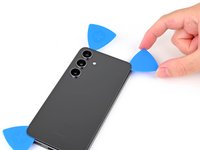
    • Insert a fifth opening pick directly above the camera flash cutout.

    • Insert the opening pick under the top of the back cover until you feel it start to snag on the flash adhesive.

    • Insert the pick deeper into the phone until you feel the adhesive completely separate from the back cover.

    • Don't insert the pick any deeper than its center point to avoid damaging the rear cameras.

  15. Samsung Galaxy S24 Battery Replacement, Remove the back cover: crwdns2935265:015crwdnd2935265:01crwdnd2935265:02crwdne2935265:0 Samsung Galaxy S24 Battery Replacement, Remove the back cover: crwdns2935265:015crwdnd2935265:02crwdnd2935265:02crwdne2935265:0
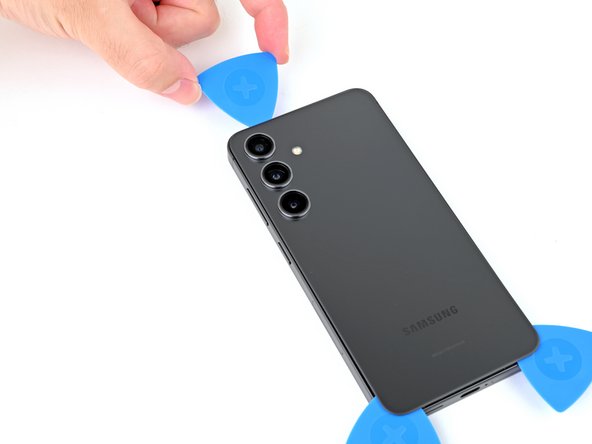
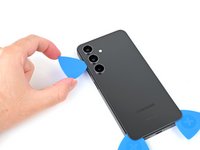
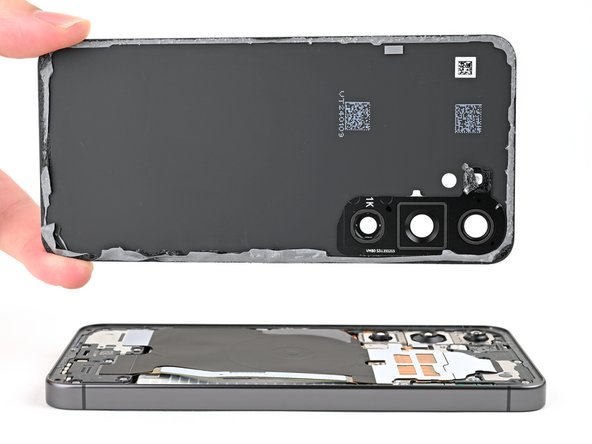
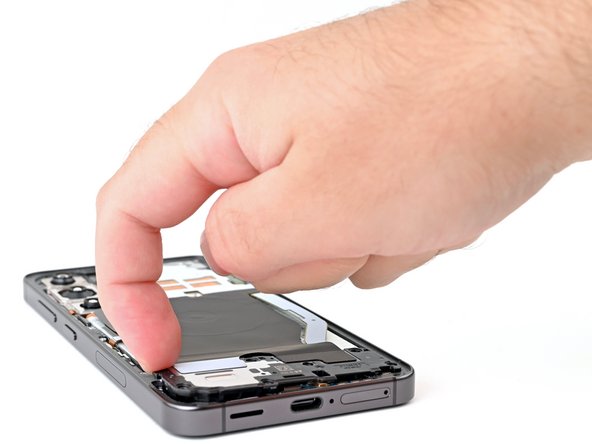
    • Pick up the back cover by its edges and remove it from the phone.

    • If your cover is still sticking to the frame, slide the tip of an opening pick around the perimeter until the cover completely separates.

    • During reassembly:

    • This is a good point to power on your phone and test all functions before sealing it up. Be sure to power your phone back down completely before you continue working.

    • Remove any adhesive chunks with a pair of tweezers or your fingers. Apply heat and isopropyl alcohol (90% or greater) if you're having trouble removing the adhesive.

    • If you're using custom-cut adhesives, follow this guide.

    • If you're using double-sided tape, follow this guide.

  16. Samsung Galaxy S24 Battery Replacement, Disconnect the wireless charging coil: crwdns2935265:016crwdnd2935265:01crwdnd2935265:02crwdne2935265:0 Samsung Galaxy S24 Battery Replacement, Disconnect the wireless charging coil: crwdns2935265:016crwdnd2935265:02crwdnd2935265:02crwdne2935265:0
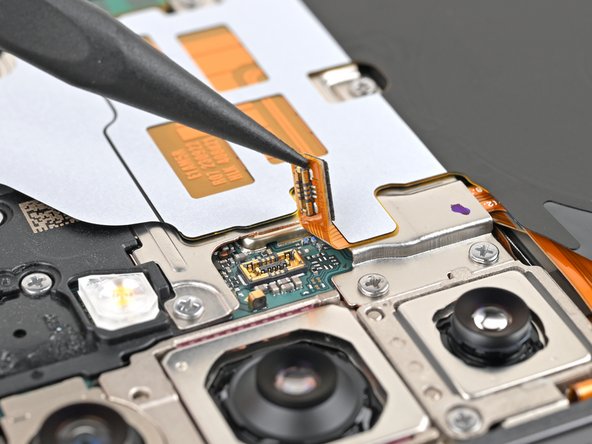
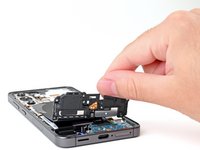
    • Use the point of your spudger to pry up and disconnect the wireless charging coil press connector from the motherboard.

    • To re-attach press connectors, align the connector carefully over its socket and press down with your fingertip—first on one side, then the other—until it clicks into place. Don't try to force the connector into place. If you're having trouble, reposition it and try again.

  17. Samsung Galaxy S24 Battery Replacement, Remove the wireless charging coil and loudspeaker screws: crwdns2935265:017crwdnd2935265:01crwdnd2935265:03crwdne2935265:0 Samsung Galaxy S24 Battery Replacement, Remove the wireless charging coil and loudspeaker screws: crwdns2935265:017crwdnd2935265:02crwdnd2935265:03crwdne2935265:0 Samsung Galaxy S24 Battery Replacement, Remove the wireless charging coil and loudspeaker screws: crwdns2935265:017crwdnd2935265:03crwdnd2935265:03crwdne2935265:0
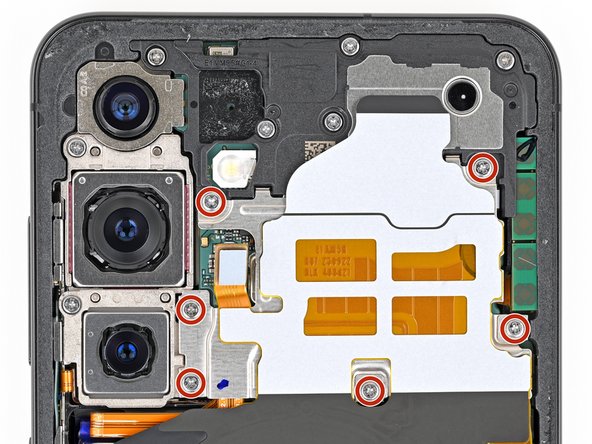
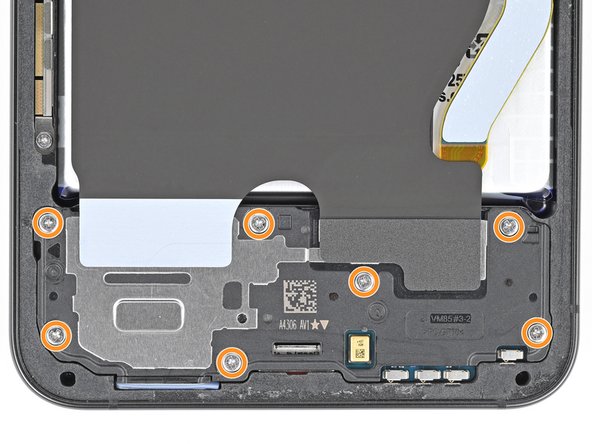
    • Use a Phillips screwdriver to remove the thirteen 3.5 mm‑long screws securing the wireless charging coil and the loudspeaker:

    • Six screws securing the wireless charging coil

    • Seven screws securing the loudspeaker

  18. Samsung Galaxy S24 Battery Replacement, Remove the wireless charging coil and loudspeaker: crwdns2935265:018crwdnd2935265:01crwdnd2935265:02crwdne2935265:0 Samsung Galaxy S24 Battery Replacement, Remove the wireless charging coil and loudspeaker: crwdns2935265:018crwdnd2935265:02crwdnd2935265:02crwdne2935265:0
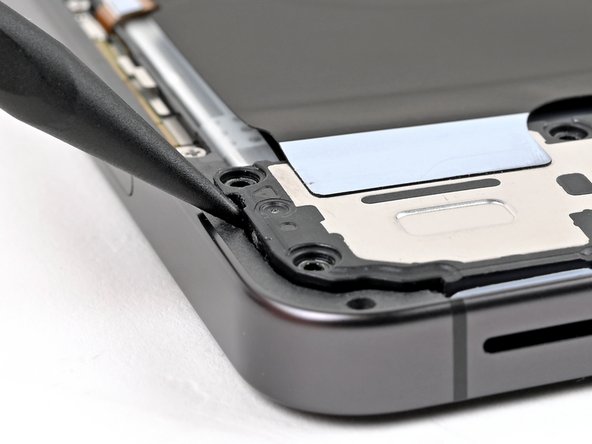
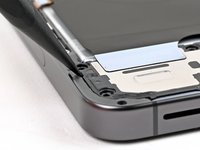
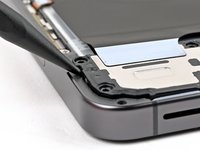
    • Insert the point of a spudger in the notch located on the left edge of the loudspeaker assembly.

    • Pry up the loudspeaker to release its clips.

  19. Samsung Galaxy S24 Battery Replacement: crwdns2935265:019crwdnd2935265:01crwdnd2935265:03crwdne2935265:0 Samsung Galaxy S24 Battery Replacement: crwdns2935265:019crwdnd2935265:02crwdnd2935265:03crwdne2935265:0 Samsung Galaxy S24 Battery Replacement: crwdns2935265:019crwdnd2935265:03crwdnd2935265:03crwdne2935265:0
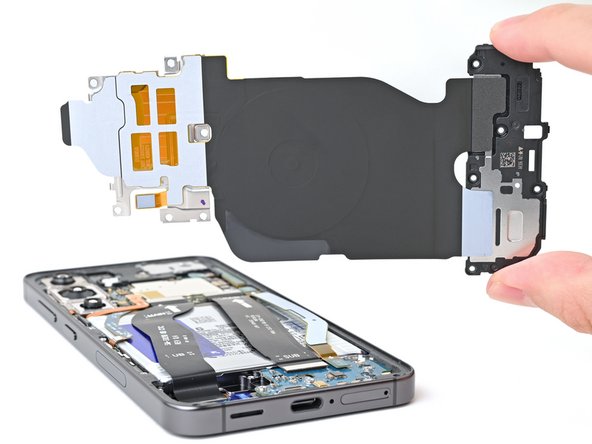
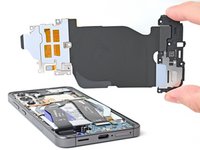
    • Use your fingernail or the flat end of a spudger to pry up the wireless charging coil and loudspeaker assembly away from the frame.

    • Remove the wireless charging coil and loudspeaker from your phone.

    • During reassembly, press around the edges of the loudspeaker to clip it to the frame before reinserting the screws.

  20. Samsung Galaxy S24 Battery Replacement, Disconnect the battery: crwdns2935265:020crwdnd2935265:01crwdnd2935265:02crwdne2935265:0 Samsung Galaxy S24 Battery Replacement, Disconnect the battery: crwdns2935265:020crwdnd2935265:02crwdnd2935265:02crwdne2935265:0
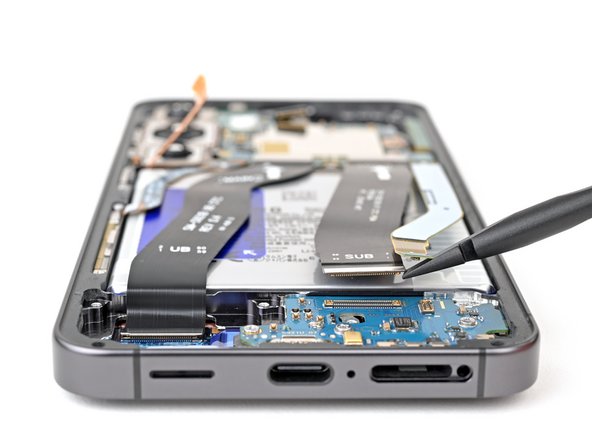
    • Insert the flat end of a spudger under the battery cable press connector (located on the motherboard) and pry up to disconnect it.

  21. Samsung Galaxy S24 Battery Replacement, Disconnect the interconnect cables: crwdns2935265:021crwdnd2935265:01crwdnd2935265:03crwdne2935265:0 Samsung Galaxy S24 Battery Replacement, Disconnect the interconnect cables: crwdns2935265:021crwdnd2935265:02crwdnd2935265:03crwdne2935265:0 Samsung Galaxy S24 Battery Replacement, Disconnect the interconnect cables: crwdns2935265:021crwdnd2935265:03crwdnd2935265:03crwdne2935265:0
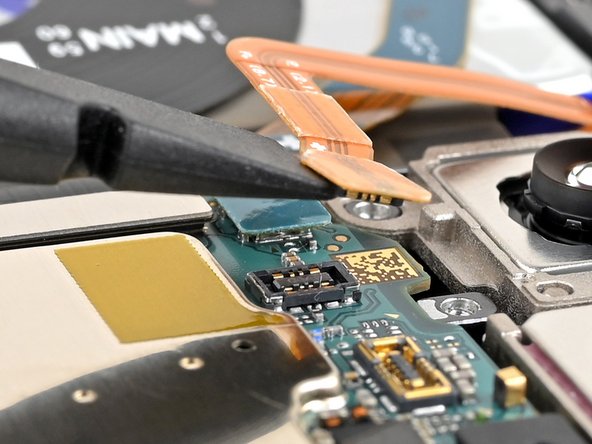
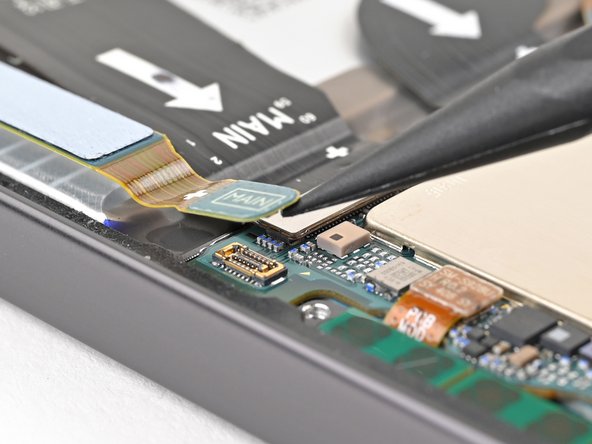
    • Insert the point of a spudger under the secondary interconnect cable press connector labeled "MAIN" (located on the bottom right corner of the motherboard) and pry up to disconnect it.

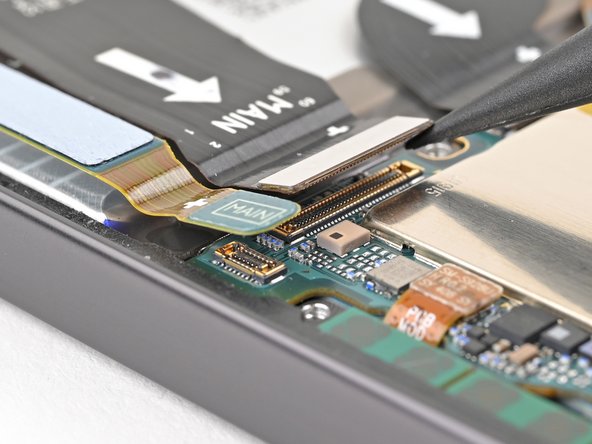
    • Repeat this process for the primary interconnect cable connector.

  22. Samsung Galaxy S24 Battery Replacement: crwdns2935265:022crwdnd2935265:01crwdnd2935265:02crwdne2935265:0 Samsung Galaxy S24 Battery Replacement: crwdns2935265:022crwdnd2935265:02crwdnd2935265:02crwdne2935265:0
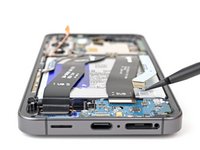
    • Repeat this process to disconnect the display and 5G mmWave cable press connectors located on the bottom left edge of the motherboard.

  23. Samsung Galaxy S24 Battery Replacement: crwdns2935265:023crwdnd2935265:01crwdnd2935265:03crwdne2935265:0 Samsung Galaxy S24 Battery Replacement: crwdns2935265:023crwdnd2935265:02crwdnd2935265:03crwdne2935265:0 Samsung Galaxy S24 Battery Replacement: crwdns2935265:023crwdnd2935265:03crwdnd2935265:03crwdne2935265:0
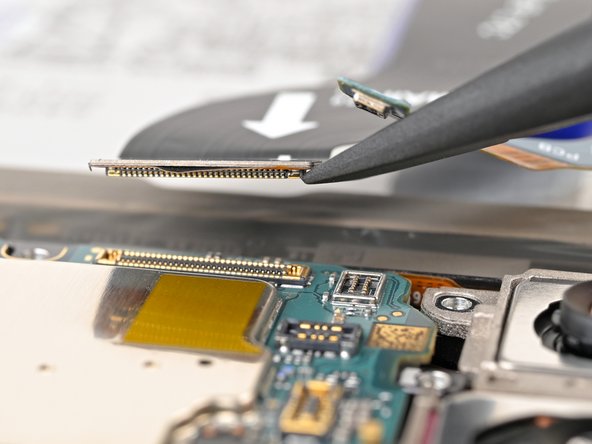
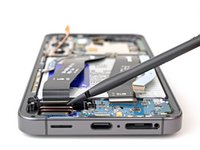
    • Repeat this process to disconnect the two interconnect cable press connectors located on the daughterboard, and the display cable connector to the left of the daughterboard.

  24. Samsung Galaxy S24 Battery Replacement, Remove the interconnect cables: crwdns2935265:024crwdnd2935265:01crwdnd2935265:03crwdne2935265:0 Samsung Galaxy S24 Battery Replacement, Remove the interconnect cables: crwdns2935265:024crwdnd2935265:02crwdnd2935265:03crwdne2935265:0 Samsung Galaxy S24 Battery Replacement, Remove the interconnect cables: crwdns2935265:024crwdnd2935265:03crwdnd2935265:03crwdne2935265:0
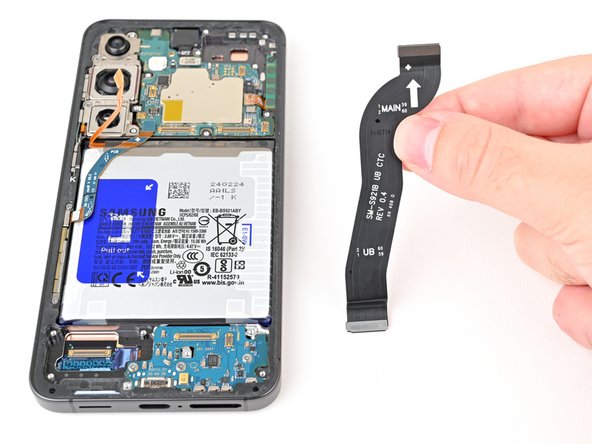
    • Remove the two interconnect cables and the display cable from your phone.

  25. Samsung Galaxy S24 Battery Replacement, Move the cables: crwdns2935265:025crwdnd2935265:01crwdnd2935265:02crwdne2935265:0 Samsung Galaxy S24 Battery Replacement, Move the cables: crwdns2935265:025crwdnd2935265:02crwdnd2935265:02crwdne2935265:0
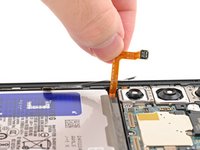
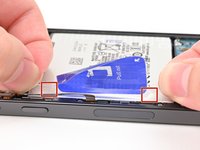
    • Gently bend the 5G mmWave antenna and battery cables so they are pointing straight up.

  26. Samsung Galaxy S24 Battery Replacement, Separate the battery pull tab: crwdns2935265:026crwdnd2935265:01crwdnd2935265:03crwdne2935265:0 Samsung Galaxy S24 Battery Replacement, Separate the battery pull tab: crwdns2935265:026crwdnd2935265:02crwdnd2935265:03crwdne2935265:0 Samsung Galaxy S24 Battery Replacement, Separate the battery pull tab: crwdns2935265:026crwdnd2935265:03crwdnd2935265:03crwdne2935265:0
    • Be very careful not to bend, crease, or puncture the battery during the next few steps. A damaged battery can leak dangerous chemicals and catch fire.

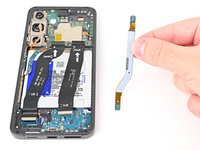
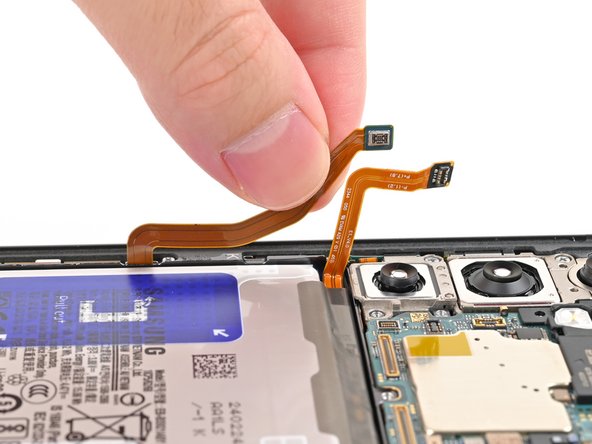
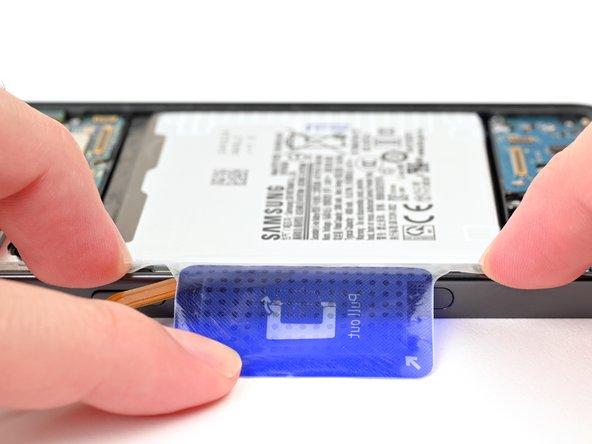
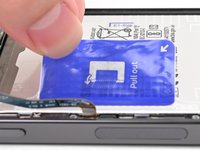
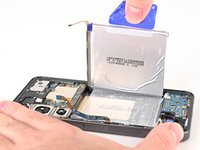
    • Peel the battery pull tab away from the battery, towards the left edge of the phone.

    • If you're having trouble getting the pull tab up, use an opening pick or other thin plastic tool at a low angle to peel up a corner before using your fingers. Never use a metal tool or press into the battery.

  27. Samsung Galaxy S24 Battery Replacement: crwdns2935265:027crwdnd2935265:01crwdnd2935265:03crwdne2935265:0 Samsung Galaxy S24 Battery Replacement: crwdns2935265:027crwdnd2935265:02crwdnd2935265:03crwdne2935265:0 Samsung Galaxy S24 Battery Replacement: crwdns2935265:027crwdnd2935265:03crwdnd2935265:03crwdne2935265:0
    • Separate the small, clear tabs above and below the blue part of the pull tab from the rest of the pull tab.

    • Your device may have two additional tabs on the bottom edge of the battery. These are designed to tear away during the next step, but if you have trouble removing the battery, you can carefully peel these tabs up as well.

    • Bend these small tabs away from the battery to make sure they stay clear of the battery.

    • If these tabs aren't separated, you won't be able to lift the battery in the next step. You can tape these tabs to the side of the phone or the screen to keep them out of the way.

  28. Samsung Galaxy S24 Battery Replacement, Remove the battery: crwdns2935265:028crwdnd2935265:01crwdnd2935265:02crwdne2935265:0 Samsung Galaxy S24 Battery Replacement, Remove the battery: crwdns2935265:028crwdnd2935265:02crwdnd2935265:02crwdne2935265:0
    • When you pull out the battery, its left edge will come up, but the right edge will not. You'll remove the remaining film and the battery in the next step.

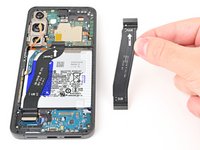
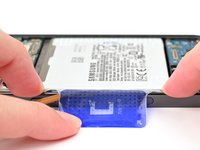
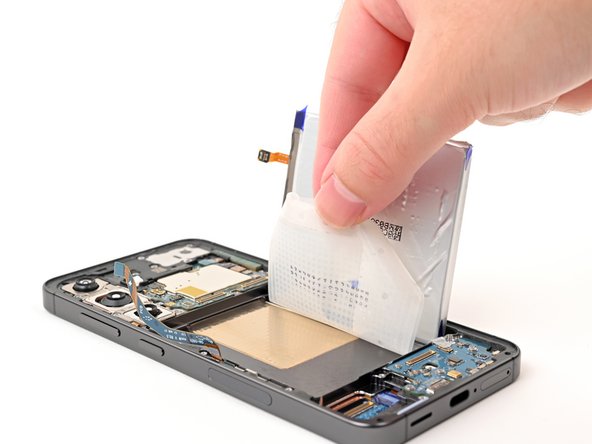
    • Firmly hold the phone in place and grip the blue center pull tab.

    • Pull straight up to separate the battery adhesive using firm, steady force.

    • If you're having trouble, apply 1-2 drops of high-concentration (more than 90%) isopropyl alcohol to the left edge of the battery. Lift the left edge of your phone and wait one minute for the alcohol to soften the adhesive.

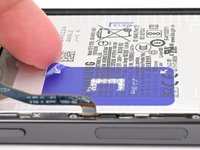
    • Lift the battery until it is perpendicular to the phone and hold/rest it in the right edge of the frame.

  29. Samsung Galaxy S24 Battery Replacement: crwdns2935265:029crwdnd2935265:01crwdnd2935265:03crwdne2935265:0 Samsung Galaxy S24 Battery Replacement: crwdns2935265:029crwdnd2935265:02crwdnd2935265:03crwdne2935265:0 Samsung Galaxy S24 Battery Replacement: crwdns2935265:029crwdnd2935265:03crwdnd2935265:03crwdne2935265:0
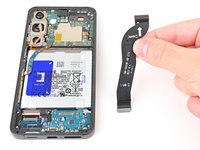
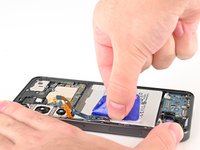
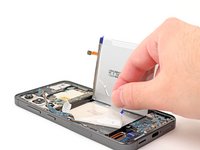
    • Use your fingers to peel the adhesive film from the frame.

    • Remove the battery and its film.

    • If you used isopropyl alcohol, wait ten minutes before installing the new battery to allow the alcohol to completely evaporate.

crwdns2915888:0crwdne2915888:0

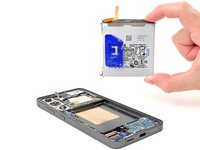
Compare your new replacement part to the original part—be sure to transfer remaining components and remove adhesive backings from the new part before installing.

To reassemble your device, follow these instructions in reverse order.

Calibrate your newly installed battery after completing this guide.

Take your e-waste to an R2 or e-Stewards certified recycler.

Repair didn’t go as planned? Try some basic troubleshooting, or ask our Samsung Galaxy S24 Answers Community for troubleshooting help.

Nick Schultz

crwdns2935283:003/24/24crwdne2935283:0

19.612 crwdns2915208:0crwdne2915208:0

crwdns2935297:0114crwdne2935297:0

crwdns2915084:0crwdne2915084:0

iFixit crwdns2935289:0iFixitcrwdne2935289:0

Staff

crwdns2931471:0120crwdne2931471:0

crwdns2935297:020.002crwdne2935297:0

crwdns2947412:00crwdne2947412:0

crwdns2917038:0crwdne2917038:0

crwdns2936625:0crwdne2936625:0:

crwdns2936751:024crwdne2936751:0 25

crwdns2936753:07crwdne2936753:0 225

crwdns2936753:030crwdne2936753:0 842

crwdns2942667:0crwdne2942667:0 3,821