crwdns2915892:0crwdne2915892:0
Use this guide to replace a cracked or broken screen on your Samsung Galaxy A32 5G.
If the frame is deformed, it's important to replace it to make sure the new screen will mount correctly and won’t suffer damage from uneven pressure.
If your battery is swollen, take appropriate precautions. Before disassembling your device, discharge the battery below 25%. The battery can catch fire and/or explode if accidentally punctured, but the chances of that happening are much lower if discharged.
Note: This guide instructs you to replace only the screen while leaving the original frame and motherboard in place. However, some replacement screens for this phone come pre-installed in a new frame (a.k.a. chassis), which requires a very different procedure. Make sure you have the correct part before starting this guide.
Before you begin this procedure, be sure to have a set of replacement adhesives for both the rear glass and the screen.
crwdns2942213:0crwdne2942213:0
-
-
Prepare an iOpener and apply it to the back cover for at least two minutes to loosen the adhesive underneath.
-
-
-
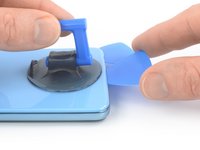
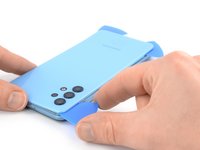
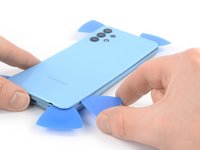
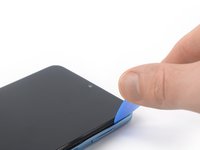
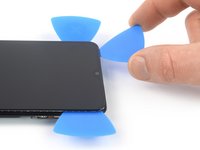
Secure a suction handle to the bottom edge of the back cover, as close to the edge as possible.
-
Lift the back cover with the suction handle to create a small gap between the back cover and the frame.
-
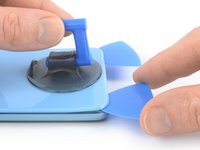
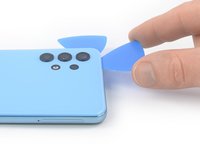
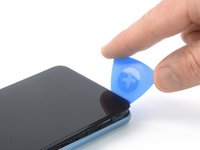
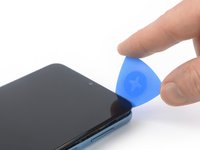
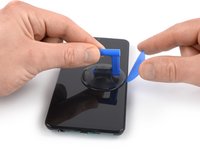
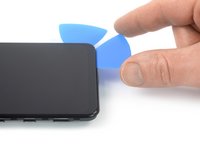
Insert an opening pick into the gap you created.
-
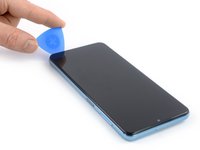
Slide the opening pick to the bottom right corner to slice the adhesive.
-
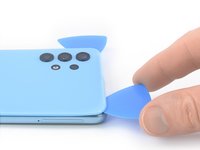
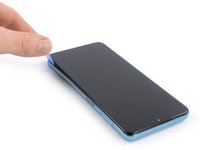
Leave the opening pick in place to prevent the adhesive from resealing.
-
-
-
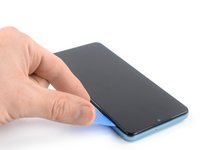
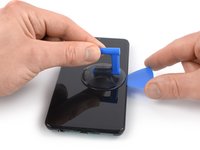
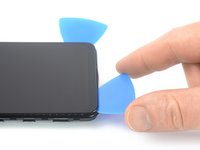
Insert a second opening pick at the bottom edge of your phone.
-
Slide the opening pick to the bottom left corner to slice the adhesive.
-
Leave the opening picks in place to prevent the adhesive from resealing.
-
-
-
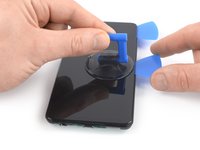
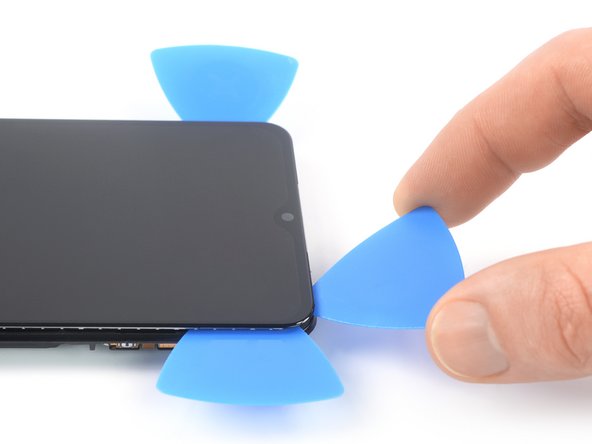
Insert a third opening pick at the bottom left corner of your phone.
-
Slide the opening pick along the left edge of your phone to slice the adhesive.
-
Leave the opening pick in the top left corner to prevent the adhesive from resealing.
-
-
-
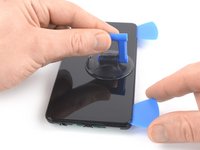
Insert a fourth opening pick underneath the top left corner of your phone.
-
Slide the opening pick along the top edge to slice the adhesive.
-
Leave the opening pick in the top right corner to prevent the adhesive from resealing.
-
-
-
Insert a fifth opening pick underneath the top right corner.
-
Slide the opening pick along the right edge of the back cover to slice the remaining adhesive.
-
-
-
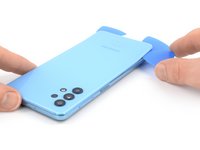
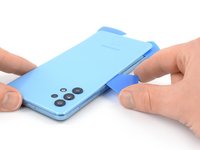
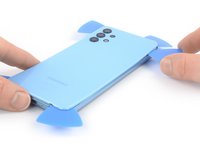
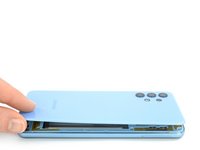
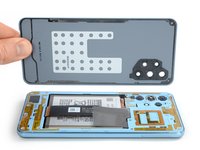
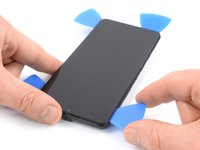
Remove the back cover.
-
-
-
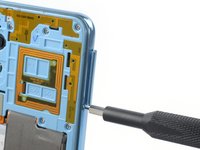
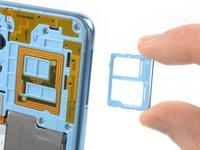
Insert a SIM card eject tool, a SIM eject bit, or a straightened paper clip into the hole on the SIM tray located at the left edge of the phone.
-
Press directly into the hole to eject the SIM card tray.
-
Remove the SIM card tray.
-
-
-
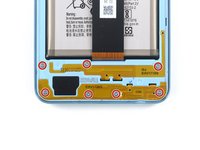
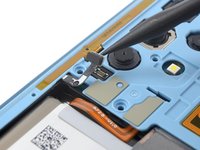
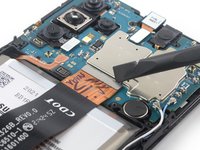
Use a Phillips screwdriver to remove the sixteen 4.1 mm-long screws securing the midframe.
It would be useful to show a picture,here, highlighting the 7 screws below the battery that also require removal.
-
-
-
-
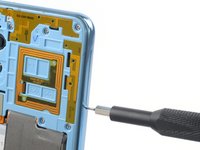
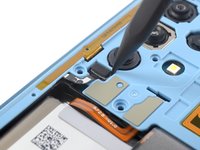
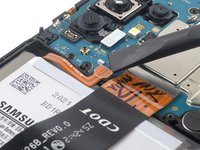
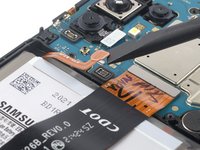
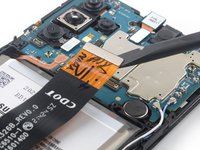
Use a spudger to disconnect the power and volume button flex cable by prying the connector straight up from its socket.
-
-
-
Insert an opening pick between the midframe and front panel assembly on the left edge of the phone where the SIM tray slot is located.
-
-
-
Slide the opening pick along the left edge of the phone to release the plastic clips.
-
-
-
Slide the opening pick around the bottom left corner.
-
Slide the opening pick along the bottom edge of the phone to release the plastic clips.
-
-
-
Slide the opening pick around the bottom right corner.
-
Slide the opening pick along the right edge of the phone to release the plastic clips.
-
-
-
Slide the opening pick around the top right corner.
-
Slide the opening pick along the top edge of the phone to release the remaining plastic clips.
-
-
-
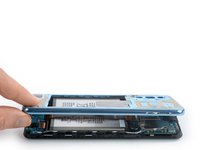
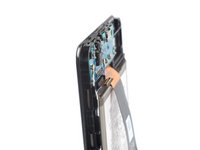
Place your phone with the display facing downwards on your working surface.
-
Remove the midframe.
-
-
-
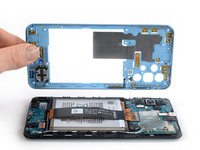
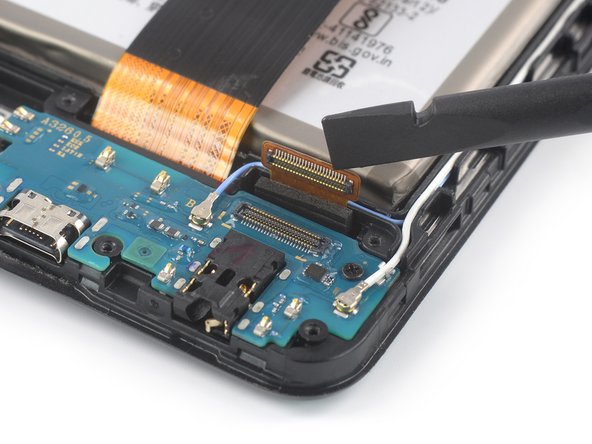
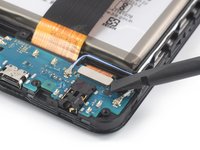
Use a spudger to disconnect the battery cable by prying the connector straight up from its socket.
-
-
-
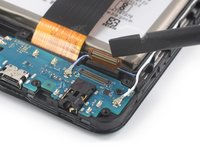
Use a spudger to disconnect the display cable by prying the connector straight up from its socket.
-
-
-
Use a spudger to disconnect the digitizer cable by prying the connector straight up from its socket.
-
-
-
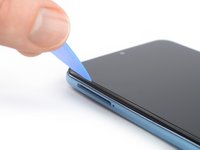
Apply a heated iOpener to the screen to loosen the adhesive underneath. Apply the iOpener for at least 5 minutes.
-
-
-
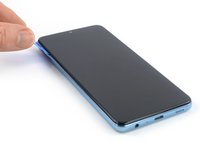
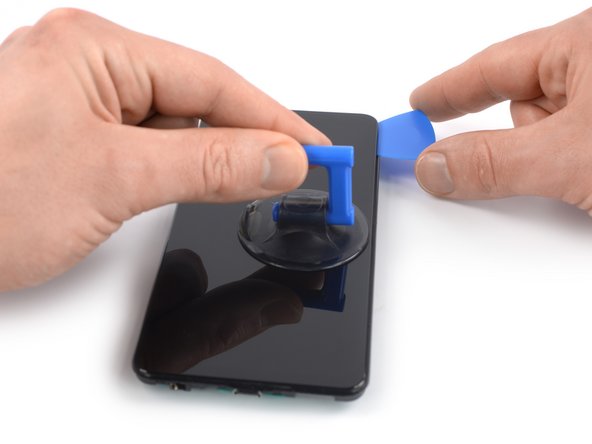
Once the screen is warm to touch, apply a suction cup to the right edge of the screen.
-
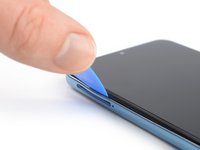
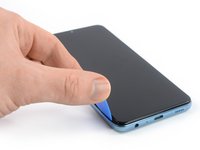
Lift the screen with the suction handle to create a small gap between the screen and the front panel assembly.
-
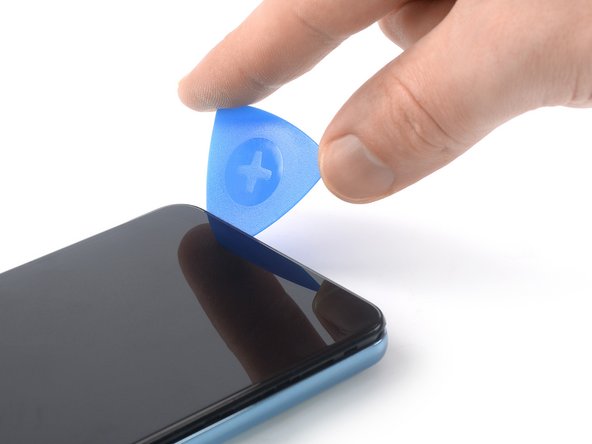
Insert an opening pick in the gap between the front panel assembly and the screen.
-
Slide the opening pick to the top right corner of the screen to slice its adhesive.
-
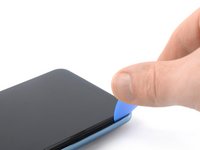
Leave the opening pick in place to prevent the adhesive from resealing.
-
-
-
Insert a second opening pick in the gap between the front panel assembly and the screen.
-
Slide the opening pick to the bottom right corner of the screen to slice its adhesive.
-
Leave the opening pick in place to prevent the adhesive from resealing.
-
-
-
Insert a third opening pick underneath the bottom right corner of the screen.
-
Slide the opening pick to the bottom left corner of the screen to slice its adhesive.
-
Leave the opening pick in its place to prevent the adhesive from resealing.
-
-
-
Insert a fourth opening pick underneath the bottom left corner and slide it along the left edge of the phone to slice the adhesive.
-
Leave the opening pick in its place to prevent the adhesive from resealing.
-
-
-
Insert a fifth opening pick at the top left corner of the screen.
-
Slide the opening pick along the top edge of the phone to slice the remaining adhesive.
-
-
-
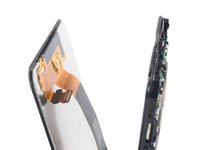
Thread the screen and the digitizer flex cables through the gap in the front panel assembly.
-
-
-
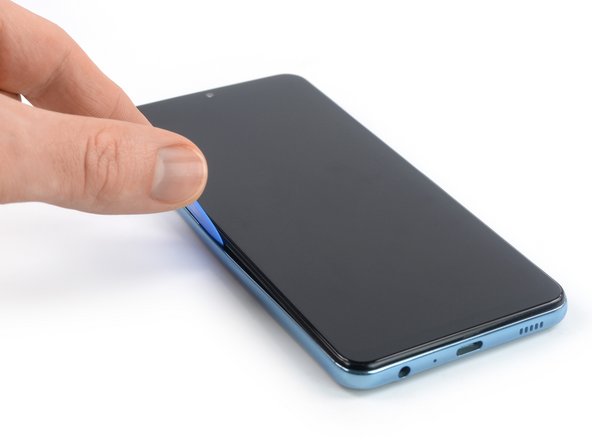
Remove the screen.
-


If possible, turn on your device and test your repair before installing new adhesive and resealing.
Compare your new replacement part to the original part—you may need to transfer remaining components or remove adhesive backings from the new part before installing.
To reassemble your device, follow these instructions in reverse order.
The best way to secure the new screen is to apply a sheet of custom-cut double-sided tape to the back of the screen.
Take your e-waste to an R2 or e-Stewards certified recycler.
Repair didn’t go as planned? Try some basic troubleshooting, or ask our Answers community for help.
crwdns2935221:0crwdne2935221:0
crwdns2935229:038crwdne2935229:0


crwdns2947412:012crwdne2947412:0
I am wondering why it would be necessary to detach more than just the screen and digi flex cables. It seems as though removing the extra cabling and screws is just an additional step that isn't needed. Please advise.
Hi Bryan,
in this guide you only disconnect the power and volume button flex cable which is mandatory to remove the midframe. Without removing the midframe it is impossible to disconnect the display cables. The only other cable you need to disconnect besides those three is the battery cable to prevent a short causing damage to other components during the display replacement.
What display did you use as the replacement? It doesn’t look like Ifixit has an option for the a32
Same question. Where is the display part and adhesive?
I’ve been repairing phones since 2009, so I am very careful, so I’m experienced and careful.
I’ve replaced the screen twice with new parts from a reputable dealer and both result in a black screen. I’ve tried the reset options to get out of the BSOD to no avail. If I put the old broken screen back on, I can at least see lines and a partial picture, as it is smashed, of course. Has anyone experienced this problem and/or figured out why it happened? The ribbon cables look slightly different and the numbers are A326U for the original screen and A326B for both replacement screens. Could this be an issue or nothing?
There is a known issue that has been happening since this post, but just now starting to be known more widespread, with aftermarket screens having issues after the 6.1 UI update. If you use Mobile Sentrix for parts, you can ask them to program the screen (if it's aftermarket) before they ship it. You need to call, because they are supposed to be, but aren't always done, so I call to be sure.
Where do you buy the screen?
I usually would advise against it - but I got mine off eBay and it's working great.
Darohan -
I can't remove the mid frame, also I don't see in your cell a chrome frame that surrounds the mid frame
The display is very fragile (much more than it seems), I made a crack immediately while trying to insert an opening pick in the gap, effectively ruining the efforts..
I wouldn't recommend to do it at home if you are inexperienced and really care about your display.
Hello, I have been repairing iPhones since about 2015, and have just recently started working on all phones, including Samsungs. I HIGHLY recommend these three things when doing ANY type of repair that has some sort of glass screen that is attached with a very strong adhesive......A magnet board for the screws, 90% isopropyl Alcohol, and heat (whether it be a hair dryer if you don't do this all the time, just be very careful not to overheat it and cause damage). I personally prefer a heating pad, and usually set it to around 179 degrees F or 81.67 degrees celsius. You put alcohol around the edges, let it sit for about 10 min, then add a little bit more alcohol, wait another 5 min, and then start to attempt to remove the screen, by either using a suction cup or for more advanced techs, a razor (I DO NOT RECOMMEND USING A RAZOR IF YOU ARE NOT EXPERIENCED!!!!!!). Hope this helps, and don't give up, anyone can do this, with the correct tools and practice :-)
I replaced the screen and it worked fine, however after I applied B-7000 (that came with the replacement) and put a notebook on top because I don’t have clams it wasn’t working anymore. After I opened again to verify there was glue everywhere on the inside but still vibrates. I think is the glue but not quite sure tho. Any ideas what might be?