crwdns2915892:0crwdne2915892:0
Follow this guide to replace the optical drive on your Sony Playstation 4.
On 1XXX series models of the PS4, the optical drive daughterboard and the motherboard are paired. If your daughterboard's broken, you'll have to replace the motherboard.
You can replace the the optical drive assembly by itself, but the replacement assembly must be compatible with the your optical drive daughterboard.
Unplug your PS4 before beginning any repairs.
crwdns2942213:0crwdne2942213:0
-
-
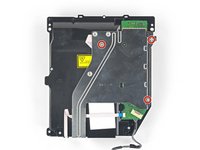
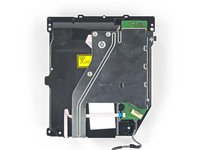
Flip the PS4 upside-down with the back side facing towards you.
 crwdns2952109:0crwdne2952109:0
-
-
crwdns2935267:0crwdne2935267:0Tweezers$4.99
-
Use tweezers to remove the two stickers in the center of the back of the PS4 exposing two case screws.
-
-
-
Use tweezers to carefully remove the plastic screw covers in each corner, exposing two more case screws.
-
-
-
Remove the four 7.2 mm T8 Torx security screws on the back of the PS4.
-
-
-
Use your thumbs to lift the lower case up and off the PS4.
-
-
-
Use a pair of tweezers to pull the power supply cable straight out and disconnect the power supply unit from the motherboard.
-
-
-
Remove three 9.7 mm-long TR8 Torx security screws.
-
Remove two 41 mm-long Phillips screws and brackets.
-
-
-
Lift the power supply straight up and out of the PS4.
-
-
-
Use the tip of a spudger to disconnect the antenna cable from the motherboard.
-
-
-
crwdns2935267:0crwdne2935267:0Tweezers$4.99
-
Use a pair of tweezers or your fingers to grab the antenna cable and move it out from the cable guides.
-
-
-
Use a pair of tweezers or your fingers to thread the antenna cable out from underneath the optical drive cable.
-
-
-
Remove the 9.7 mm Torx security screw securing the antenna.
-
-
-
Remove the Wi-Fi antenna.
-
-
crwdns2935267:0crwdne2935267:0Tweezers$4.99
-
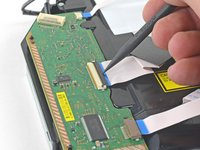
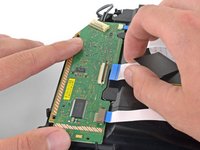
Use your fingernail to press down on the metal release lever of the ribbon cable on top of the optical drive.
-
Use your fingers or a pair of tweezers to disconnect the ribbon cable by pulling on the black tab.
-
-
-
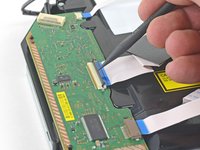
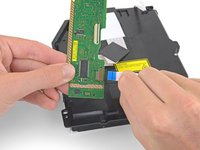
Use your fingernail to press down the metal release lever for the ribbon cable connected to the motherboard.
-
Use your fingers or a pair of tweezers to disconnect the ribbon cable by pulling on the black tab.
-
Set the ribbon cable aside for reassembly.
-
-
-
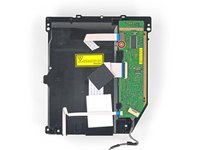
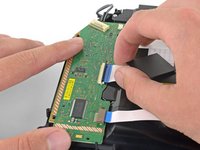
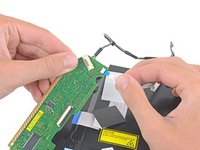
Use your fingers or a pair of tweezers to disconnect the optical drive cable from the motherboard.
-
-
-
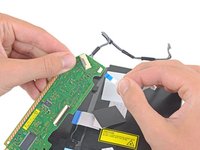
Use your fingers or a pair of tweezers to remove the optical drive cable from the cable guides that hold it in place.
-
-
-
Remove the four screws securing the optical drive.
-
Three 9.7 mm Torx screws
-
One 6.2 mm Phillips screw
-
-
-
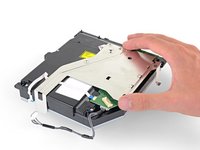
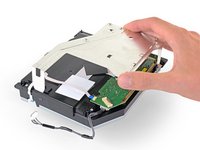
Lift the optical drive straight up and out of the PS4.
-
-
-
Remove the three 6.2 mm Phillips screws from the metal bracket.
-
-
-
Lift the metal bracket straight up to separate it from the optical drive.
-
-
-
Remove the 6.4 mm Phillips screw from the PCB board.
-
-
-
Use the tip of a spudger to flip open the ZIF connector locking bar.
-
-
-
Pull the ribbon cable straight out of the ZIF connector.
-
-
-
Hold the PCB in one hand and the lower ribbon cable in the other.
-
Gently pull the lower ribbon cable straight out of the socket.
-
-
-
Hold the PCB in one hand and the upper ribbon cable in the other.
-
Pull the upper ribbon cable straight out of the socket.
-


📌To reassemble your device, follow the above steps in reverse order.
Take your e-waste to an R2 or e-Stewards certified recycler.
Repair didn’t go as planned? Check out our Answers community for troubleshooting help.
Compare your new replacement part to the original part—you may need to transfer remaining components or remove adhesive backings from the new part before installing.
crwdns2935221:0crwdne2935221:0
crwdns2935229:0200crwdne2935229:0

crwdns2947412:074crwdne2947412:0
This was a great help after my 2 yr old put a coin in my PS4. However when following the steps backwards I got to step 7 which says 'Remove the 5 wire plug attached from the power supply to the motherboard' & couldn't see how to reattach it. I then noticed it looks like I've pulled the whole plastic white casing/plug holder (within the orange rectangle) off the mobo rather than just the plug from the casing. Although the pic looks like the plastic casing does come off the mobo as it's at an angle (maybe why I pulled the whole thing out or maybe I did it right).
I'm thinking I've made a mistake is because now I cant see anywhere that I can 'plug' the 5 L shaped wires on the bottom of the plastic casing back onto the mobo. Plus where they used to be attached there's now 5 tiny silver rectangles on the mobo (2 opposite 3), so I guess these 5 wires were some how adhered to those mobo rectangles by a conductive adhesive of some sort.
Any suggestion for the best repair method would be appreciated.
Thanks
doc browejnn - crwdns2934203:0crwdne2934203:0 crwdns2950251:0crwdne2950251:0
If you've pulled the female end from the motherboard the it need to be resoldered to the board, most likely gonna need to pull the motherboard. It's a very simple connector, sounds as if you yanked the whole thing off.
lynx2069 - crwdns2934203:0crwdne2934203:0 crwdns2950251:0crwdne2950251:0
Is anyone there who try to change the optical drive without change the Motherboard in the same time ? And does it run ?
Thanks for your help.
Frederic Morelli - crwdns2934203:0crwdne2934203:0 crwdns2950251:0crwdne2950251:0
How about a guide for replacing just the laser unit instead of the whole drive?
david.walker52 - crwdns2934203:0crwdne2934203:0 crwdns2950251:0crwdne2950251:0
I changed the drive with its motherboard, when I want to update the system, an error message appears:
CE-42116-8 .
rafat abulaeth - crwdns2934203:0crwdne2934203:0 crwdns2950251:0crwdne2950251:0