crwdns2915892:0crwdne2915892:0
Use this guide to remove and replace the screen assembly including the frame of the Motorola Moto E4 Plus.
Before you begin, download the Rescue and Smart Assistant app to backup your device and diagnose whether your problem is software or hardware related.
While this guide is written with the XT1771 model, you can also use this guide for other Moto E4 Plus variants, such as XT1772, and XT1773.
Before disassembling your phone, discharge the battery below 25%. If your battery is swollen, do not heat your phone. Swollen batteries can be very dangerous, so wear eye protection and exercise due caution, or take it to a professional if you're not sure how to proceed.
You’ll need replacement adhesive to reattach components when reassembling the device.
crwdns2942213:0crwdne2942213:0
-
-
Insert the edge of the spudger into the notch on the bottom right corner of the phone.
-
Twist the spudger to start releasing the back cover from the phone.
-
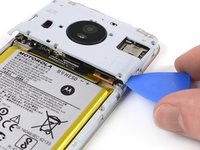
Slide the spudger along the bottom edge to separate the back cover from the phone.
-
-
-
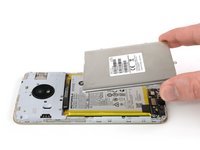
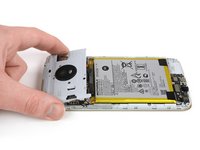
Lift the phone unit out of the back cover.
-
-
-
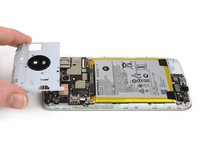
Remove the eighteen 3.3 mm Phillips screws securing the midframe assembly.
-
-
-
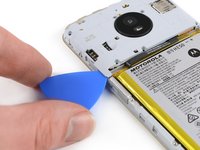
Insert an opening pick underneath the bottom left corner of the motherboard cover.
-
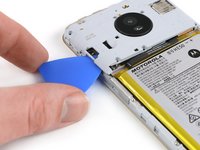
Slide the opening pick between the cover and the second SIM tray to release the plastic clip.
-
-
-
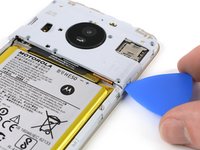
Insert an opening pick underneath the bottom right corner of the motherboard cover.
-
Use the opening pick to pry up the motherboard cover.
-
-
-
Use the edge of a spudger to pry up and disconnect the battery flex cable from the motherboard.
-
-
-
Remove the two 2.9 mm Phillips screws.
-
-
-
crwdns2935267:0crwdne2935267:0Tweezers$4.99
-
Use the edge of a spudger to pry up the flap of the ZIF connector located below the SIM slot on the left side of the motherboard.
-
Use a pair of tweezers to pull the power and volume button flex cable out of the ZIF connector.
-
-
-
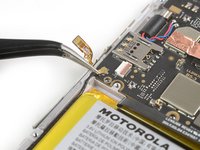
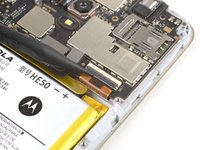
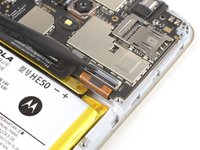
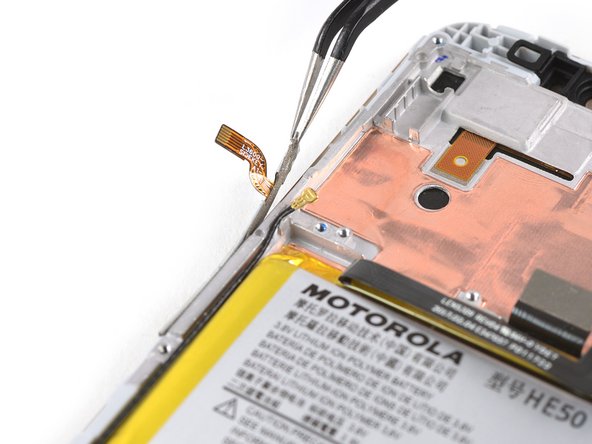
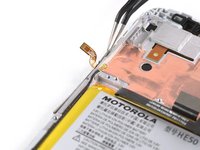
Use a pair of tweezers to pry up and disconnect the antenna cable.
-
-
-
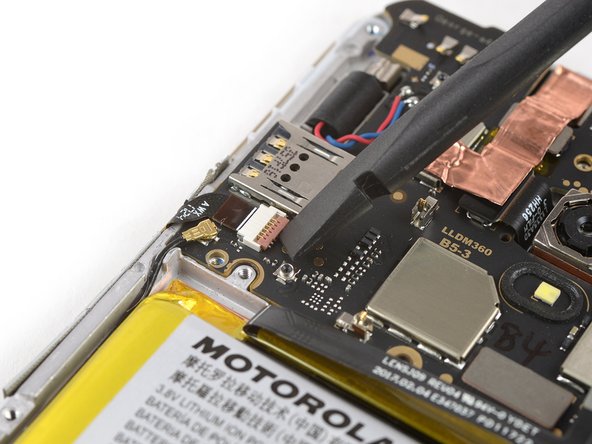
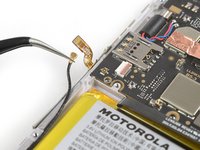
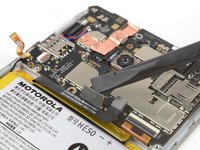
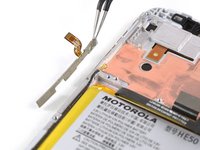
Use the flat end of a spudger to pry up and disconnect the interconnect flex cable.
-
-
-
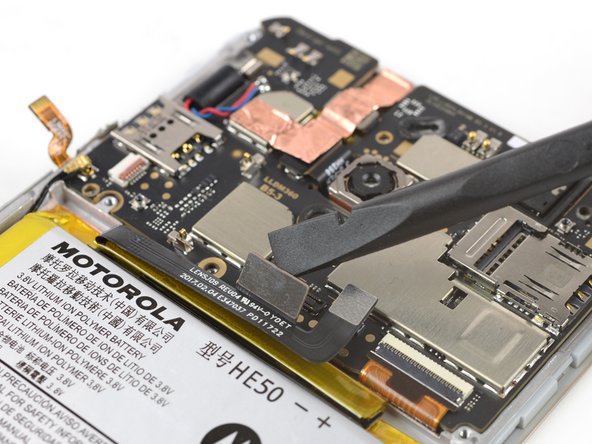
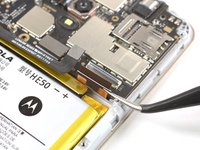
Use the tip of a spudger or an opening pick to pry up the flap of the ZIF connector, located in the bottom right corner of the motherboard.
-
Use a pair of tweezers to pull the display flex cable out of the ZIF connector.
-
-
-
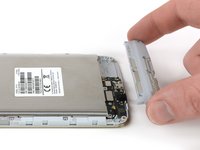
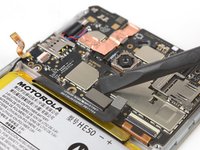
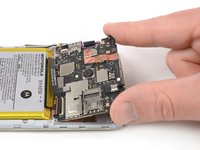
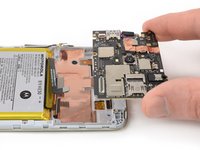
Grasp the motherboard by the top corners and remove it by lifting up and pulling it carefully out of its recess.
-
-
-
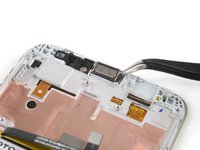
Apply a heated iOpener to the upper part of the phone for about 30 seconds to loosen the adhesive beneath the earpiece speaker.
-
-
crwdns2935267:0crwdne2935267:0Tweezers$4.99
-
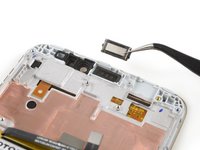
Use a pair of tweezers to lift the earpiece speaker out of its recess and remove it.
-
-
crwdns2935267:0crwdne2935267:0Tweezers$4.99
-
Use a pair of tweezers to gently peel the power and volume button unit out of its thin recess on the left side of the frame.
-
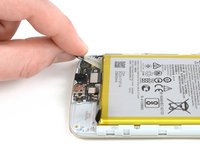
Remove the power and volume button unit.
-
-
-
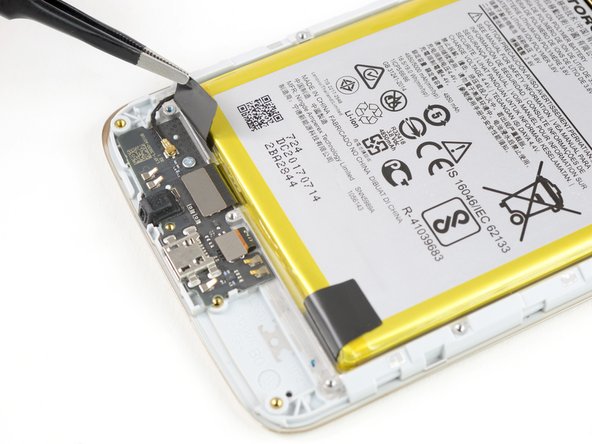
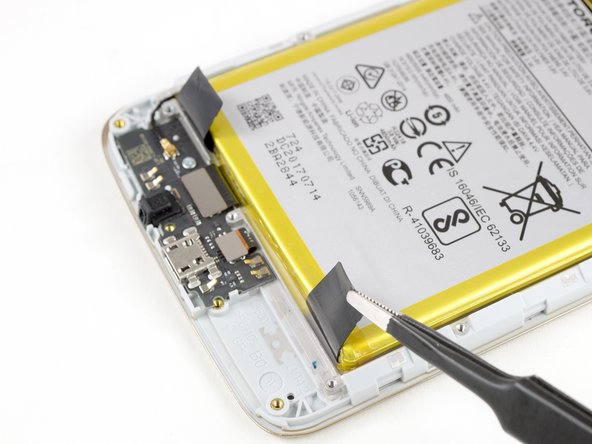
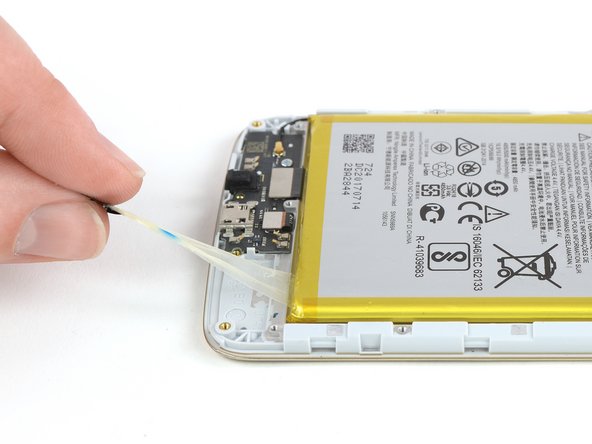
Use a pair of tweezers to peel the ends of the two pull tabs off of the bottom edge of the battery.
-
-
-
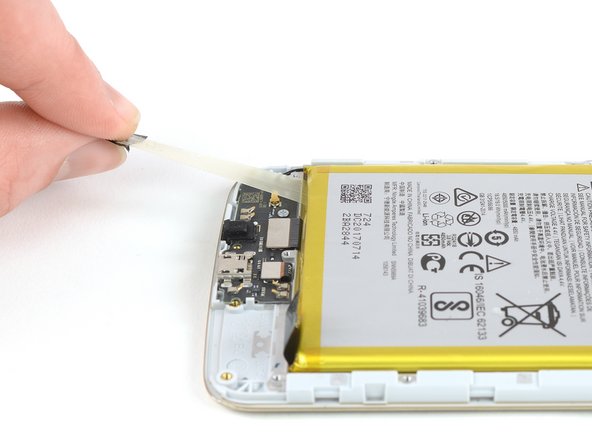
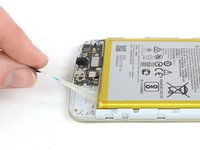
Pull out the left adhesive strip by steadily pulling the left tab at a flat angle.
-
Repeat the same process for the right adhesive strip.
-
-
-
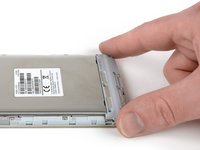
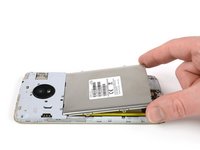
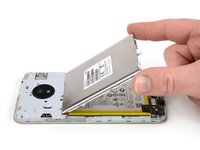
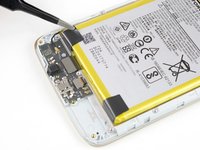
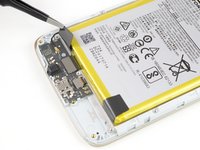
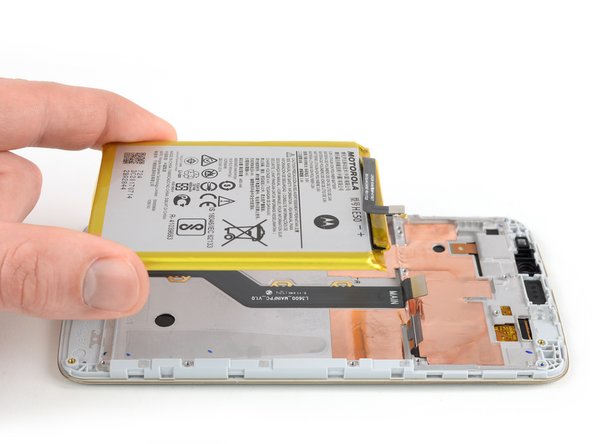
Get a good grip on the battery and remove it.
-
-
-
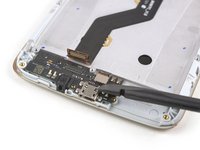
Remove the single 2.9 mm Phillips screw holding the charging board to the frame.
-
-
-
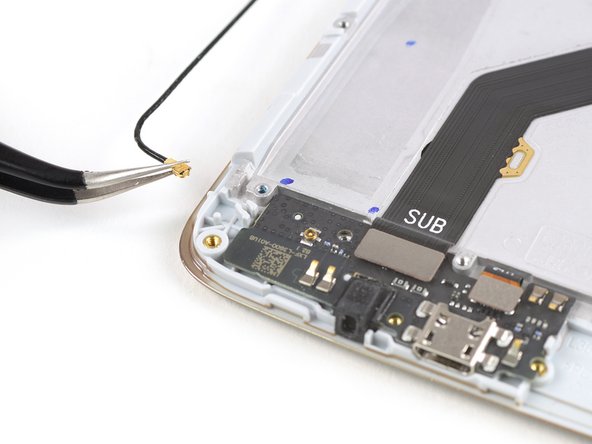
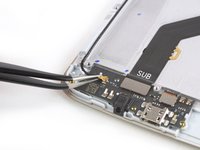
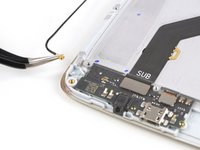
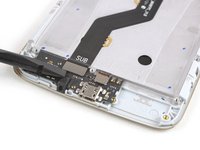
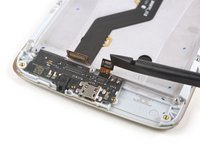
Use a pair of tweezers to pry up and disconnect the antenna cable and remove it.
-
-
-
Use the edge of a spudger to pry up and disconnect the interconnect flex cable.
-
-
-
Use the edge of a spudger to pry up and disconnect the fingerprint sensor flex cable.
-
-
-
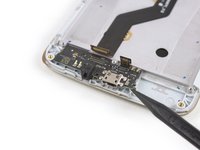
Insert the tip of a spudger underneath the bottom edge of the charging board and pry upwards.
-
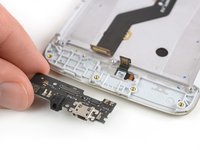
Remove the charging board.
-
-
-
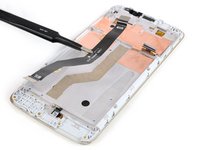
Use a pair of tweezers to gently peel the interconnect flex cable from the frame and remove it.
-


To reassemble your device, follow these instructions in reverse order.
Take your e-waste to an R2 or e-Stewards certified recycler.
To reassemble your device, follow these instructions in reverse order.
Take your e-waste to an R2 or e-Stewards certified recycler.
crwdns2935221:0crwdne2935221:0
crwdns2935229:03crwdne2935229:0


crwdns2947412:02crwdne2947412:0
Bonjour cher ami
Grace a vous je me suis lancé dans le remplacement de mon ecran explosé par le passage d’un véhicule. j’ai suivi vos explications a la lettre dans le démontage et pour le remontage aussi vous n’avez pas signalé de récupérer le revêtement de cuivre, j’ai réussi de le décoller en chauffant. Tout fonctionne comme avant.
Merci de ce tuto. Félicitations.
Thanks for your comment. Glad to hear you could get it back to working conditions. Welcome to the club of fixers.