crwdns2915892:0crwdne2915892:0
Follow this guide to replace the kickstand on your Microsoft Surface Pro 7.
Some photos in this guide are from a different model and may contain slight visual discrepancies, but they won't affect the guide procedure.
crwdns2942213:0crwdne2942213:0
-
-
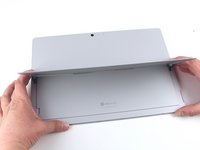
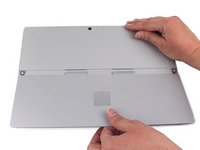
Lift the kickstand to expose the hinge screws.
-
-
-
Remove the four 2.7 mm T3 screws—two on each side of the kickstand.
-
-
-
-
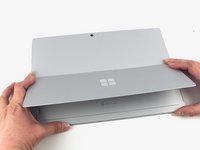
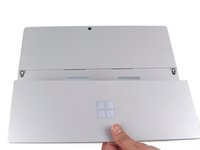
Move the kickstand back down to a flat position.
-
-
-
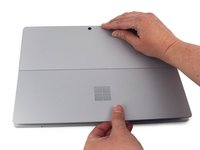
Remove the kickstand from the back cover.
Heute selbst durchgeführt. Hilfreich wäre, die Beschreibung um folgende Info zu ergänzen: wie man die Scharniere nach Schritt 4 wieder aus den Einbuchtungen im Gehäuse hochgestellt bekommt, um das neue Kickstand zu montieren. Nach eigenen Überlegungen konnte ich die Schaniere durch Einführen des benutzten Torx-Schraubenziehers in die äußere Schraubenbohrung des Scharniers und ganz behutsamen Hochdrücken des Scharniers mit Hilfe des Schraubenziehers lösen.
-


To reassemble your device, follow the above steps in reverse order.
Take your e-waste to an R2 or e-Stewards certified recycler.
Repair didn’t go as planned? Try some basic troubleshooting, or ask our Answers community for help.
To reassemble your device, follow the above steps in reverse order.
Take your e-waste to an R2 or e-Stewards certified recycler.
Repair didn’t go as planned? Try some basic troubleshooting, or ask our Answers community for help.
crwdns2935221:0crwdne2935221:0
crwdns2935227:0crwdne2935227:0

crwdns2947412:02crwdne2947412:0
One of the hinges broke on my Surface Pro 6.
1. I removed the broken hinge, closed the kickstand and duct taped the seam.
2. I opened the kickstand wide and duct taped the seam.
The single hinge and duct tape seem to be working!
"Spare the duct tape, spoil the job." - Red Green
What are the parts used for this fix?