crwdns2915892:0crwdne2915892:0
Use this guide to replace the stator in your LG front load washing machine.
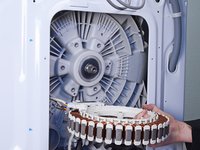
The stator is part of the direct drive motor. If the motor is broken, it's possible that one or more of the stator coils is burnt out.
This guide will work for most LG front load washing machines. This guide is written with a model WM3050CW washer. If you have a different model, you may encounter some minor disassembly differences, but the overall repair process will be the same.
crwdns2942213:0crwdne2942213:0
-
-
Turn off the main water supply
-
Unplug your washer
-
Disconnect all water connections at the rear of your washer
-
-
-
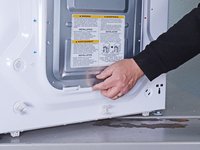
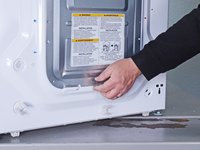
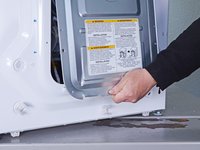
Remove the screw(s) securing the rear panel.
I undertook this repair with the wd14071sd6 model. Unlike this picture the entire back panel has to be removed to access the rotor. This is very very awkward, as multiple electrics are also connected to the panel via plastic clips.
Thank you for the additional information. This is especially helpful when manufacturers market different models in different areas worldwide. You would hope that a sensible design for the access, like what is shown in the guide, would be universal, but that's not always the case.
-
-
-
Unclip the rear panel from the chassis.
-
-
-
-
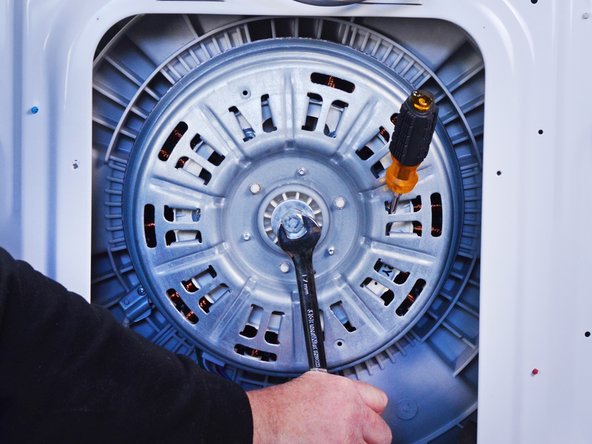
Use an impact driver to remove the 17 mm nut securing the rotor.
-
Alternatively, you can use a wrench and a hammer to loosen the nut.
-
-
-
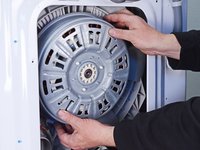
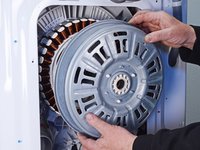
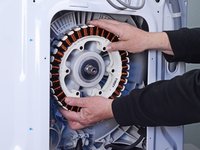
Pull the rotor straight off the stator and drive shaft splines to remove it.
The wd14071sd6 model includes a white plastic guard at the top of the rotor that appears to be a failsafe to keep the rotor inplace. Remove the two phillips head screws and this guard BEFORE you attempt to pull the rotor off.
Thank you for your contribution! Having information about machines that are similar but found in a different part of the world is a plus!
-
-
-
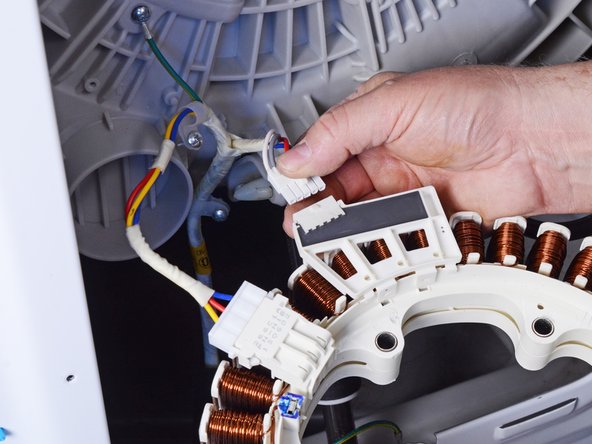
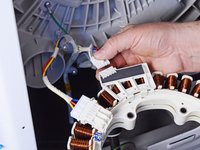
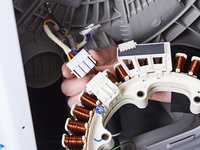
Remove the screw(s) securing the motor harness.
-
-
-
Remove the bolts securing the stator.
-
-
-
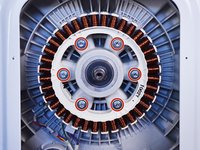
Pull the stator out of its slot on the drum, and flip it so its rear is facing upward.
-
-
-
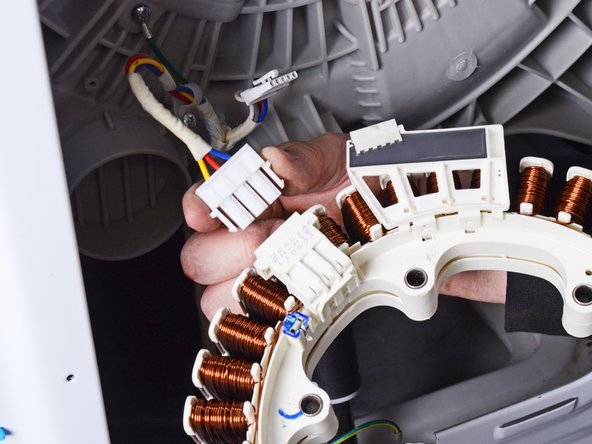
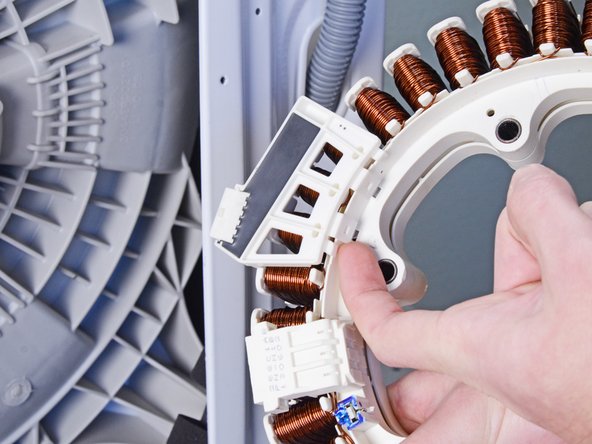
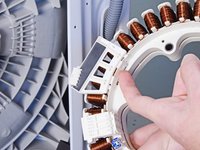
Disconnect the connectors attached to the stator.
-
-
-
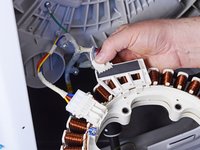
Use your fingers to unclip the rotor position sensor from the stator.
-
Pull the sensor away from the stator to completely unclip it.
-
Remove the rotor position sensor.
-
You're left with the stator.
-


To reassemble your device, follow these instructions in reverse order.
Take your e-waste to an R2 or e-Stewards certified recycler.
Repair didn’t go as planned? Ask our Answers community for help.
To reassemble your device, follow these instructions in reverse order.
Take your e-waste to an R2 or e-Stewards certified recycler.
Repair didn’t go as planned? Ask our Answers community for help.
crwdns2935221:0crwdne2935221:0
crwdns2935229:02crwdne2935229:0


crwdns2947412:03crwdne2947412:0
I don’t have comment just question. Does this particular model have a drive belt? Mine is not spinning properly
No it does not. It is a direct drive machine, meaning that the motor drives the wash basket directly. Take a look at this link for some help.
I undertook this repair with the wd14071sd6 model to replace the hall sensor as I was getting the LE error code. I have noted on step 2 that the entire back panel had to be removed to access the rotor. This is very very awkward, as multiple electrics are also connected to the panel via plastic clips.
Despite this, the repair can be achieved without any major electric disconnection work just a matter or having enough space to carefully remove things.
DO NOT USE THESE Instructions 🤦♂️. It will take you for ever. Go from the back, lie down on the ground take it I’ll put the new one in done. Or do it with someone you leave it a tad side ways and even easier
Mechanicbob - crwdns2934203:0crwdne2934203:0