crwdns2933423:0crwdne2933423:0
crwdns2947577:0crwdnd2947577:0crwdne2947577:0

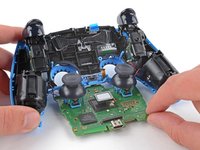
DualSense Controller v2 Adaptive Trigger Replacement

crwdns2942213:0crwdne2942213:0

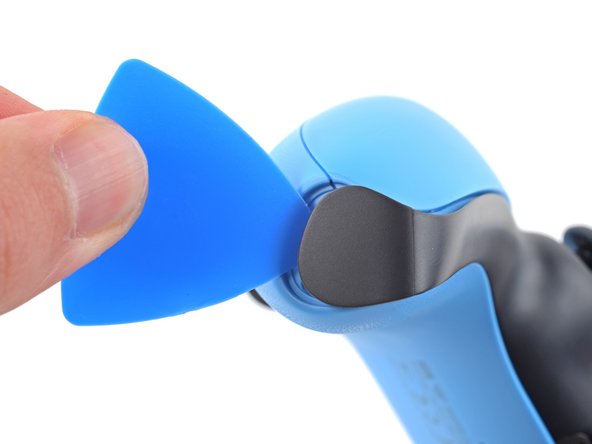
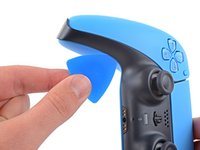
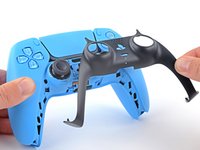
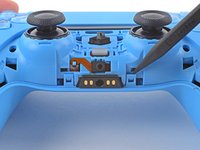
    1. DualSense Controller v2 Adaptive Trigger Replacement, Unclip the right end of the middle trim: crwdns2935265:01crwdnd2935265:01crwdnd2935265:02crwdne2935265:0 DualSense Controller v2 Adaptive Trigger Replacement, Unclip the right end of the middle trim: crwdns2935265:01crwdnd2935265:02crwdnd2935265:02crwdne2935265:0
      • Disconnect and power down the controller before you begin.

      • Insert an opening pick underneath the middle trim at the bottom-right corner of the controller to release the clips securing it to the case.

      crwdns2952109:0crwdne2952109:0

      crwdns2917038:0crwdne2917038:0

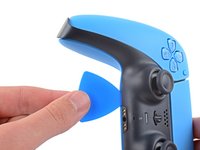
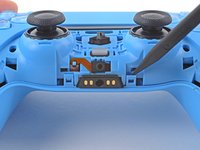
    2. DualSense Controller v2 Adaptive Trigger Replacement, Unclip the lower-right edge of the middle trim: crwdns2935265:02crwdnd2935265:01crwdnd2935265:03crwdne2935265:0 DualSense Controller v2 Adaptive Trigger Replacement, Unclip the lower-right edge of the middle trim: crwdns2935265:02crwdnd2935265:02crwdnd2935265:03crwdne2935265:0 DualSense Controller v2 Adaptive Trigger Replacement, Unclip the lower-right edge of the middle trim: crwdns2935265:02crwdnd2935265:03crwdnd2935265:03crwdne2935265:0
      • Slide the opening pick along the lower-right edge of the middle trim to release the clips securing it to the case.

      crwdns2952109:0crwdne2952109:0

      crwdns2917038:0crwdne2917038:0

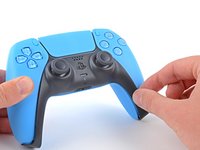
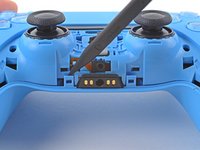
    3. DualSense Controller v2 Adaptive Trigger Replacement, Unclip the left end of the middle trim: crwdns2935265:03crwdnd2935265:01crwdnd2935265:02crwdne2935265:0 DualSense Controller v2 Adaptive Trigger Replacement, Unclip the left end of the middle trim: crwdns2935265:03crwdnd2935265:02crwdnd2935265:02crwdne2935265:0
      • Insert an opening pick underneath the middle trim at the bottom-left corner of the controller to release the clips securing it to the case.

      crwdns2952109:0crwdne2952109:0

      crwdns2917038:0crwdne2917038:0

    4. DualSense Controller v2 Adaptive Trigger Replacement, Unclip the lower-left edge of the middle trim: crwdns2935265:04crwdnd2935265:01crwdnd2935265:03crwdne2935265:0 DualSense Controller v2 Adaptive Trigger Replacement, Unclip the lower-left edge of the middle trim: crwdns2935265:04crwdnd2935265:02crwdnd2935265:03crwdne2935265:0 DualSense Controller v2 Adaptive Trigger Replacement, Unclip the lower-left edge of the middle trim: crwdns2935265:04crwdnd2935265:03crwdnd2935265:03crwdne2935265:0
      • Slide the opening pick along the lower-left edge of the middle trim to release the clips securing it to the case.

      crwdns2952109:0crwdne2952109:0

      crwdns2917038:0crwdne2917038:0

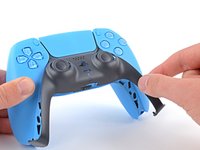
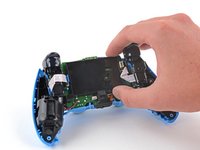
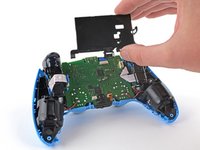
    5. DualSense Controller v2 Adaptive Trigger Replacement, Remove the middle trim: crwdns2935265:05crwdnd2935265:01crwdnd2935265:03crwdne2935265:0 DualSense Controller v2 Adaptive Trigger Replacement, Remove the middle trim: crwdns2935265:05crwdnd2935265:02crwdnd2935265:03crwdne2935265:0 DualSense Controller v2 Adaptive Trigger Replacement, Remove the middle trim: crwdns2935265:05crwdnd2935265:03crwdnd2935265:03crwdne2935265:0
      • Use your fingers to lift up the bottom edge of the middle trim to release the remaining clips.

      • Lift the middle trim over the joysticks to remove it.

      • During reassembly, position the middle trim into place and press along all edges to engage the clips securing it to the controller.

      crwdns2952109:0crwdne2952109:0

      crwdns2917038:0crwdne2917038:0

    1. DualSense Controller v2 Adaptive Trigger Replacement, Remove the L1 button: crwdns2935265:06crwdnd2935265:01crwdnd2935265:03crwdne2935265:0 DualSense Controller v2 Adaptive Trigger Replacement, Remove the L1 button: crwdns2935265:06crwdnd2935265:02crwdnd2935265:03crwdne2935265:0 DualSense Controller v2 Adaptive Trigger Replacement, Remove the L1 button: crwdns2935265:06crwdnd2935265:03crwdnd2935265:03crwdne2935265:0
      • Insert the flat end of a spudger into the gap above the L1 button.

      • Cover the button with your thumb to prevent it from ejecting across the room.

      • Pry the spudger upward to remove the L1 button.

      crwdns2952109:0crwdne2952109:0

      crwdns2917038:0crwdne2917038:0

    2. DualSense Controller v2 Adaptive Trigger Replacement, Remove the R1 button: crwdns2935265:07crwdnd2935265:01crwdnd2935265:03crwdne2935265:0 DualSense Controller v2 Adaptive Trigger Replacement, Remove the R1 button: crwdns2935265:07crwdnd2935265:02crwdnd2935265:03crwdne2935265:0 DualSense Controller v2 Adaptive Trigger Replacement, Remove the R1 button: crwdns2935265:07crwdnd2935265:03crwdnd2935265:03crwdne2935265:0
      • Insert the flat end of a spudger into the gap above the R1 button.

      • Cover the button with your thumb to prevent it from ejecting across the room.

      • Pry the spudger upward to remove the R1 button.

      crwdns2952109:0crwdne2952109:0

      crwdns2917038:0crwdne2917038:0

    1. DualSense Controller v2 Adaptive Trigger Replacement, Remove the case screws: crwdns2935265:08crwdnd2935265:01crwdnd2935265:01crwdne2935265:0
      • Use a Phillips screwdriver to remove the two 6.5 mm screws securing the bottom corners of the lower case.

      crwdns2952109:0crwdne2952109:0

      crwdns2917038:0crwdne2917038:0

    2. DualSense Controller v2 Adaptive Trigger Replacement: crwdns2935265:09crwdnd2935265:01crwdnd2935265:01crwdne2935265:0
      • Use a Phillips screwdriver to remove the two 6.5 mm screws behind the L1 and R1 buttons.

      crwdns2952109:0crwdne2952109:0

      crwdns2917038:0crwdne2917038:0

    3. DualSense Controller v2 Adaptive Trigger Replacement, Unclip the rear case: crwdns2935265:010crwdnd2935265:01crwdnd2935265:03crwdne2935265:0 DualSense Controller v2 Adaptive Trigger Replacement, Unclip the rear case: crwdns2935265:010crwdnd2935265:02crwdnd2935265:03crwdne2935265:0 DualSense Controller v2 Adaptive Trigger Replacement, Unclip the rear case: crwdns2935265:010crwdnd2935265:03crwdnd2935265:03crwdne2935265:0
      • Use the pointed edge of a spudger to unclip the two clips on either side of the headset jack.

      crwdns2952109:0crwdne2952109:0

      crwdns2917038:0crwdne2917038:0

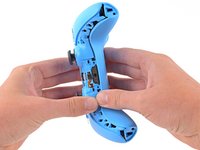
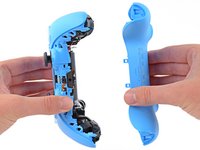
    4. DualSense Controller v2 Adaptive Trigger Replacement, Remove the rear case: crwdns2935265:011crwdnd2935265:01crwdnd2935265:02crwdne2935265:0 DualSense Controller v2 Adaptive Trigger Replacement, Remove the rear case: crwdns2935265:011crwdnd2935265:02crwdnd2935265:02crwdne2935265:0
      • Use your hands to carefully pull the rear case off of the controller.

      • During reassembly, make sure the red and black vibration motor wires are not pinched between the front and rear case.

      crwdns2952109:0crwdne2952109:0

      crwdns2917038:0crwdne2917038:0

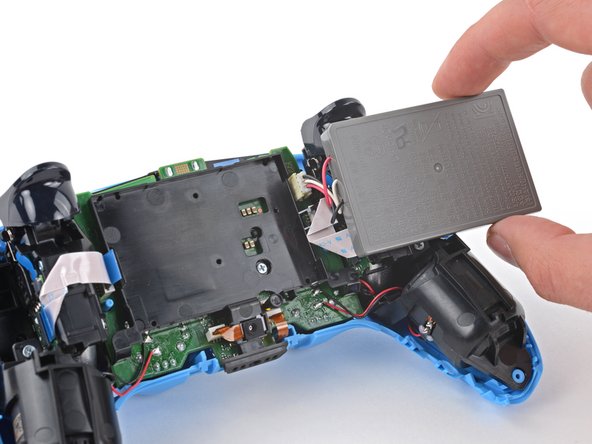
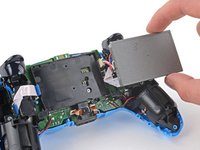
    1. DualSense Controller v2 Adaptive Trigger Replacement, Reposition the battery: crwdns2935265:012crwdnd2935265:01crwdnd2935265:02crwdne2935265:0 DualSense Controller v2 Adaptive Trigger Replacement, Reposition the battery: crwdns2935265:012crwdnd2935265:02crwdnd2935265:02crwdne2935265:0
      • Lift the battery out of its bracket and reposition it to the right for better access to the battery connector.

      • Don't strain the battery cables.

      crwdns2952109:0crwdne2952109:0

      crwdns2917038:0crwdne2917038:0

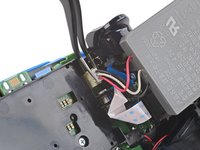
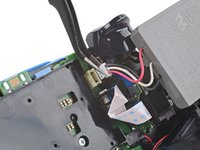
    2. DualSense Controller v2 Adaptive Trigger Replacement, Disconnect the battery: crwdns2935265:013crwdnd2935265:01crwdnd2935265:02crwdne2935265:0 DualSense Controller v2 Adaptive Trigger Replacement, Disconnect the battery: crwdns2935265:013crwdnd2935265:02crwdnd2935265:02crwdne2935265:0
      crwdns2935267:0crwdne2935267:0
      Tweezers
      $4.99
      • Use a pair of tweezers or your fingers to disconnect the battery from the motherboard.

      • Don't pull on the wires to disconnect the battery.

      crwdns2952109:0crwdne2952109:0

      crwdns2917038:0crwdne2917038:0

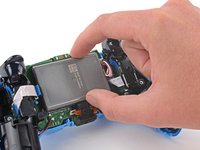
    3. DualSense Controller v2 Adaptive Trigger Replacement, Remove the battery: crwdns2935265:014crwdnd2935265:01crwdnd2935265:01crwdne2935265:0
      • Remove the battery.

      crwdns2952109:0crwdne2952109:0

      crwdns2917038:0crwdne2917038:0

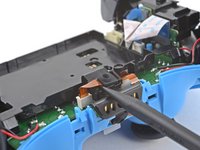
    1. DualSense Controller v2 Adaptive Trigger Replacement, Remove the lower microphone: crwdns2935265:015crwdnd2935265:01crwdnd2935265:02crwdne2935265:0 DualSense Controller v2 Adaptive Trigger Replacement, Remove the lower microphone: crwdns2935265:015crwdnd2935265:02crwdnd2935265:02crwdne2935265:0
      • Use the pointed end of a spudger to remove the lower microphone from its bracket next to the battery.

      • During reassembly, make sure the end of the microphone's ribbon cable is slotted into the bracket.

      crwdns2952109:0crwdne2952109:0

      crwdns2917038:0crwdne2917038:0

    2. DualSense Controller v2 Adaptive Trigger Replacement: crwdns2935265:016crwdnd2935265:01crwdnd2935265:02crwdne2935265:0 DualSense Controller v2 Adaptive Trigger Replacement: crwdns2935265:016crwdnd2935265:02crwdnd2935265:02crwdne2935265:0
      crwdns2935267:0crwdne2935267:0
      Tweezers
      $4.99
      • Grab the lower microphone ribbon cable pull tab with your fingers or a pair of tweezers and disconnect it from the motherboard.

      crwdns2952109:0crwdne2952109:0

      crwdns2917038:0crwdne2917038:0

    3. DualSense Controller v2 Adaptive Trigger Replacement, Remove the battery bracket: crwdns2935265:017crwdnd2935265:01crwdnd2935265:01crwdne2935265:0
      • Use a Phillips screwdriver to remove the 6.5 mm screw securing the battery bracket.

      crwdns2952109:0crwdne2952109:0

      crwdns2917038:0crwdne2917038:0

    4. DualSense Controller v2 Adaptive Trigger Replacement: crwdns2935265:018crwdnd2935265:01crwdnd2935265:02crwdne2935265:0 DualSense Controller v2 Adaptive Trigger Replacement: crwdns2935265:018crwdnd2935265:02crwdnd2935265:02crwdne2935265:0
      • Lift the battery bracket off of the motherboard.

      crwdns2952109:0crwdne2952109:0

      crwdns2917038:0crwdne2917038:0

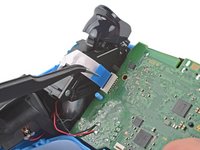
    5. DualSense Controller v2 Adaptive Trigger Replacement, Disconnect the right trigger assembly: crwdns2935265:019crwdnd2935265:01crwdnd2935265:02crwdne2935265:0 DualSense Controller v2 Adaptive Trigger Replacement, Disconnect the right trigger assembly: crwdns2935265:019crwdnd2935265:02crwdnd2935265:02crwdne2935265:0
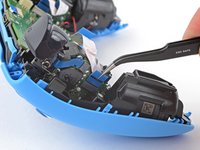
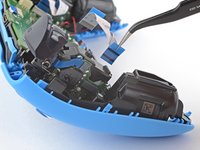
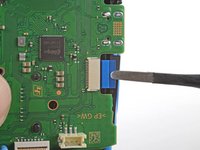
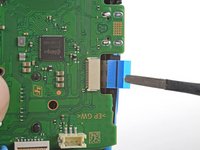
      • Grip the right trigger assembly cable with a pair of tweezers or your fingers and disconnect it from the motherboard.

      • Use the pull tab to disconnect the cable. Don't pull on the cable itself.

      • Don't completely remove the ribbon cable yet.

      crwdns2952109:0crwdne2952109:0

      crwdns2917038:0crwdne2917038:0

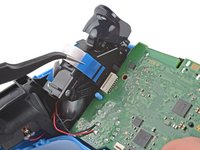
    6. DualSense Controller v2 Adaptive Trigger Replacement: crwdns2935265:020crwdnd2935265:01crwdnd2935265:02crwdne2935265:0 DualSense Controller v2 Adaptive Trigger Replacement: crwdns2935265:020crwdnd2935265:02crwdnd2935265:02crwdne2935265:0
      • Grip the right trigger assembly cable with a pair of tweezers or your fingers, and disconnect it from the trigger assembly.

      • Use the pull tab to disconnect the cable. Don't pull on the cable itself.

      • Depending on the controller's model, the ribbon cable may block the motherboard from coming loose. If so, remove the cable from the trigger assembly.

      crwdns2952109:0crwdne2952109:0

      crwdns2917038:0crwdne2917038:0

    7. DualSense Controller v2 Adaptive Trigger Replacement, Disconnect the left trigger assembly: crwdns2935265:021crwdnd2935265:01crwdnd2935265:02crwdne2935265:0 DualSense Controller v2 Adaptive Trigger Replacement, Disconnect the left trigger assembly: crwdns2935265:021crwdnd2935265:02crwdnd2935265:02crwdne2935265:0
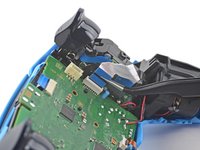
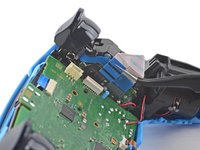
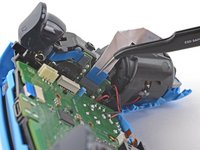
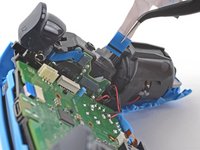
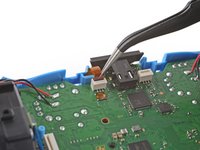
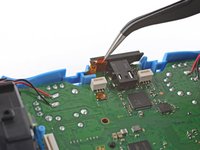
      • Grip the left trigger assembly cable with a pair of tweezers or your fingers to disconnect it from the motherboard.

      • Use the pull tab to disconnect the cable. Don't pull on the cable itself.

      • Don't completely remove the ribbon cable yet.

      crwdns2952109:0crwdne2952109:0

      crwdns2917038:0crwdne2917038:0

    8. DualSense Controller v2 Adaptive Trigger Replacement: crwdns2935265:022crwdnd2935265:01crwdnd2935265:02crwdne2935265:0 DualSense Controller v2 Adaptive Trigger Replacement: crwdns2935265:022crwdnd2935265:02crwdnd2935265:02crwdne2935265:0
      • Grip the left trigger assembly cable with a pair of tweezers or your fingers to disconnect it from the trigger assembly.

      • Use the pull tab to disconnect the cable. Don't pull on the cable itself.

      • Depending on the controller's model, the ribbon cable may block the motherboard from coming loose. If so, remove the cable from the trigger assembly.

      crwdns2952109:0crwdne2952109:0

      crwdns2917038:0crwdne2917038:0

    9. DualSense Controller v2 Adaptive Trigger Replacement, Disconnect the upper microphone: crwdns2935265:023crwdnd2935265:01crwdnd2935265:02crwdne2935265:0 DualSense Controller v2 Adaptive Trigger Replacement, Disconnect the upper microphone: crwdns2935265:023crwdnd2935265:02crwdnd2935265:02crwdne2935265:0
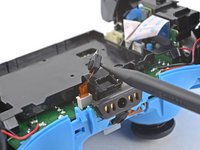
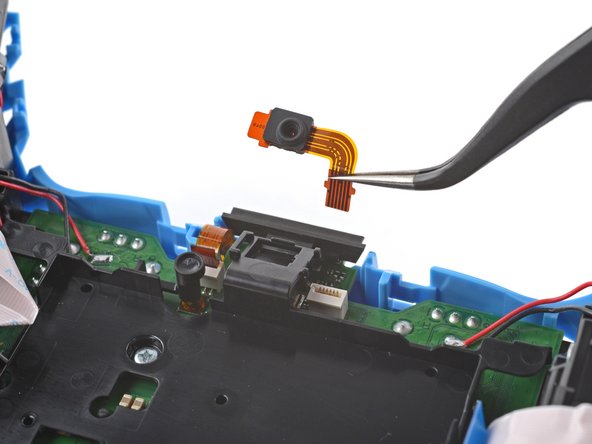
      • Use a pair of tweezers or your fingers to disconnect the upper microphone from the motherboard.

      • Use the pull tab to disconnect the cable. Don't pull on the cable itself.

      • If you're not replacing this microphone, don't remove it from the frame.

      crwdns2952109:0crwdne2952109:0

      crwdns2917038:0crwdne2917038:0

    10. DualSense Controller v2 Adaptive Trigger Replacement, Disconnect the touchpad: crwdns2935265:024crwdnd2935265:01crwdnd2935265:02crwdne2935265:0 DualSense Controller v2 Adaptive Trigger Replacement, Disconnect the touchpad: crwdns2935265:024crwdnd2935265:02crwdnd2935265:02crwdne2935265:0
      • Use a pair of tweezers or your fingers to disconnect the touchpad cable from the motherboard.

      • Use the pull tab to disconnect the cable. Don't pull on the cable itself.

      crwdns2952109:0crwdne2952109:0

      crwdns2917038:0crwdne2917038:0

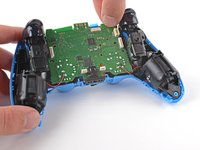
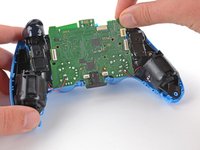
    11. DualSense Controller v2 Adaptive Trigger Replacement, Lift out the motherboard: crwdns2935265:025crwdnd2935265:01crwdnd2935265:03crwdne2935265:0 DualSense Controller v2 Adaptive Trigger Replacement, Lift out the motherboard: crwdns2935265:025crwdnd2935265:02crwdnd2935265:03crwdne2935265:0 DualSense Controller v2 Adaptive Trigger Replacement, Lift out the motherboard: crwdns2935265:025crwdnd2935265:03crwdnd2935265:03crwdne2935265:0
      • Carefully guide the joysticks through the front case and lift the motherboard out.

      • Don't strain the four soldered wires tethering the motherboard to the vibration motors.

      crwdns2952109:0crwdne2952109:0

      crwdns2917038:0crwdne2917038:0

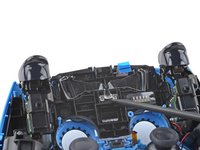
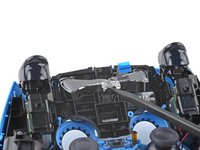
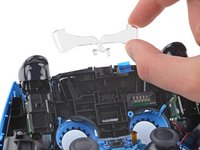
    1. DualSense Controller v2 Adaptive Trigger Replacement, Remove the light guide: crwdns2935265:026crwdnd2935265:01crwdnd2935265:03crwdne2935265:0 DualSense Controller v2 Adaptive Trigger Replacement, Remove the light guide: crwdns2935265:026crwdnd2935265:02crwdnd2935265:03crwdne2935265:0 DualSense Controller v2 Adaptive Trigger Replacement, Remove the light guide: crwdns2935265:026crwdnd2935265:03crwdnd2935265:03crwdne2935265:0
      • Use the pointed end of your spudger to lift the center of the light guide out of the controller.

      • Remove the light guide.

      crwdns2952109:0crwdne2952109:0

      crwdns2917038:0crwdne2917038:0

    1. DualSense Controller v2 Adaptive Trigger Replacement, Remove the midframe: crwdns2935265:027crwdnd2935265:01crwdnd2935265:01crwdne2935265:0
      • Use your Phillips driver to remove the two 6.5 mm screws securing the midframe to the front case.

      crwdns2952109:0crwdne2952109:0

      crwdns2917038:0crwdne2917038:0

    2. DualSense Controller v2 Adaptive Trigger Replacement: crwdns2935265:028crwdnd2935265:01crwdnd2935265:03crwdne2935265:0 DualSense Controller v2 Adaptive Trigger Replacement: crwdns2935265:028crwdnd2935265:02crwdnd2935265:03crwdne2935265:0 DualSense Controller v2 Adaptive Trigger Replacement: crwdns2935265:028crwdnd2935265:03crwdnd2935265:03crwdne2935265:0
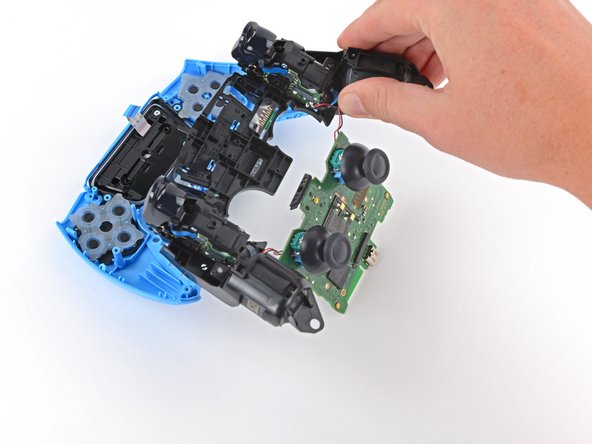
      • Carefully lift the midframe and motherboard up and out of the front case.

      • Be careful not to strain the vibrator motor wires.

      • During reassembly, feed the touchpad's ribbon cable back through its rectangular opening in the midframe.

      crwdns2952109:0crwdne2952109:0

      crwdns2917038:0crwdne2917038:0

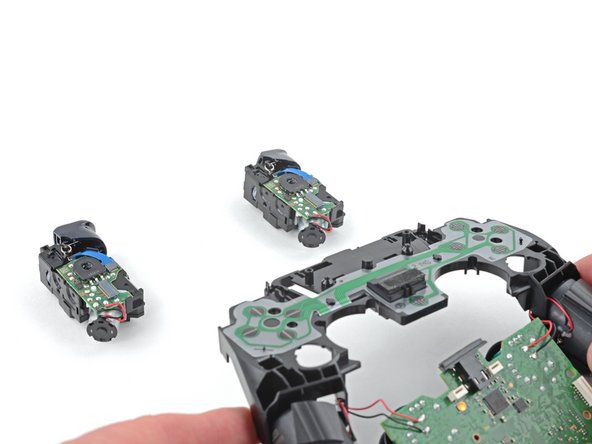
    1. DualSense Controller v2 Adaptive Trigger Replacement, Remove the adaptive triggers: crwdns2935265:029crwdnd2935265:01crwdnd2935265:01crwdne2935265:0
      • Use your Phillips screwdriver to remove the four 6.5 mm screws securing the adaptive triggers to the midframe.

      • The adaptive triggers are loose and will fall out of the midframe.

      • During reassembly, verify the conductive membrane is properly aligned by checking the screw holes and alignment posts.

      • Proper alignment of the conductive membrane is essential for button functionality.

      crwdns2952109:0crwdne2952109:0

      crwdns2917038:0crwdne2917038:0

    2. DualSense Controller v2 Adaptive Trigger Replacement: crwdns2935265:030crwdnd2935265:01crwdnd2935265:02crwdne2935265:0 DualSense Controller v2 Adaptive Trigger Replacement: crwdns2935265:030crwdnd2935265:02crwdnd2935265:02crwdne2935265:0
      • Lift the midframe off of the adaptive triggers.

      • Be careful not to pull the vibration motor wires out of the motherboard.

      crwdns2952109:0crwdne2952109:0

      crwdns2917038:0crwdne2917038:0

crwdns2915888:0crwdne2915888:0

To reassemble your device, follow these instructions in reverse order.

Take your e-waste to an R2 or e-Stewards certified recycler.

Repair didn’t go as planned? Try some basic troubleshooting, or ask our Answers community for help.

crwdns2935221:0crwdne2935221:0

crwdns2935229:02crwdne2935229:0

Sam Omiotek

crwdns2935283:002/25/19crwdne2935283:0

100,931 crwdns2915208:0crwdne2915208:0

crwdns2935297:0289crwdne2935297:0

crwdns2947412:04crwdne2947412:0

Anyone knows where to buy the Adaptive Triggers for this controller model, CFI-ZCT1W? Thanks in advance.

Obel Ortiz - crwdns2934203:0crwdne2934203:0 crwdns2950251:0crwdne2950251:0

This is wrong. Not the instructions for V2 as V2 removed the screws that hold the adaptive triggers so now it's impossible to remove them.

Glen Senecal - crwdns2934203:0crwdne2934203:0 crwdns2950251:0crwdne2950251:0

Does anyone know how to replace the l2 and r2 bumpers? I need to remove for a controller mod

MalicePalace - crwdns2934203:0crwdne2934203:0 crwdns2950251:0crwdne2950251:0

For a BDM-020 controller, extremerate has a video about installing a clicky kit that requires you to take off the trigger caps. They also have mods for other controller versions, so I assume they have videos for those controller variations too.

https://youtu.be/JSpm7piCqgQ?si=SyotXDne...

Lone - crwdns2934203:0crwdne2934203:0 crwdns2950251:0crwdne2950251:0

crwdns2917038:0crwdne2917038:0

crwdns2936625:0crwdne2936625:0:

crwdns2936751:024crwdne2936751:0 30

crwdns2936753:07crwdne2936753:0 224

crwdns2936753:030crwdne2936753:0 894

crwdns2942667:0crwdne2942667:0 29,784