crwdns2915892:0crwdne2915892:0
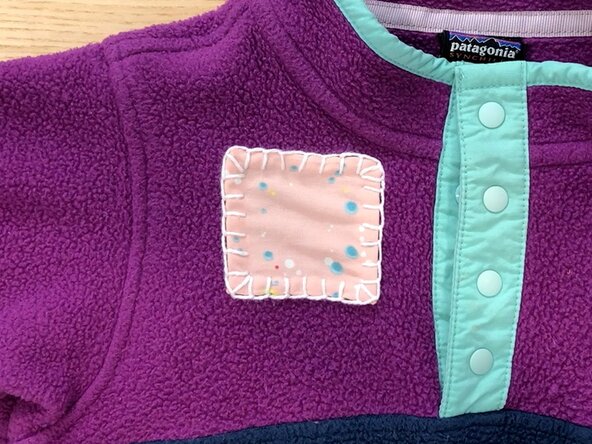
This guide demonstrates how to do a hand sewn blanket stitch to apply a patch over a hole in a Patagonia Snap-T®. The blanket stitch is known for its durability and decorative appeal, and is commonly used to secure raw fabric edges or attach patches.
Hand sewn repairs are a fun and effective way to extend the life of gear at home. DIY repairs won't void the Patagonia warranty—they're actually encouraged!
Patagonia items can also be taken in to a local retail store for repair evaluation or sent in to Patagonia through their mail-in repair service.
Let's get fixing!
Related Tutorials
Related Articles
crwdns2942213:0crwdne2942213:0
-
-
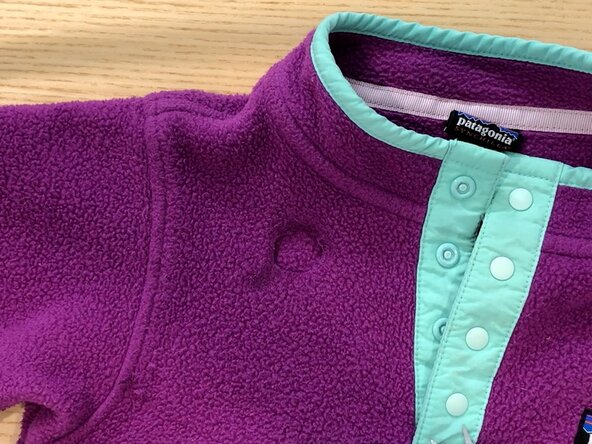
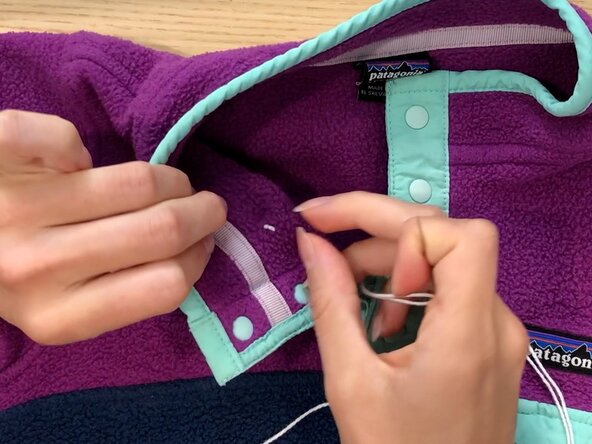
Locate the hole or tear that requires patching.
-
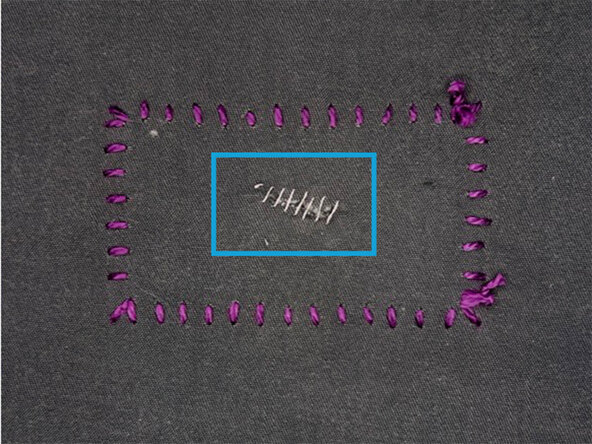
If possible, stitch the tear closed before attaching the patch.
-
If the tear is too large to be stitched closed, see the last step in this guide for details on creating an underpatch.
-
-
-
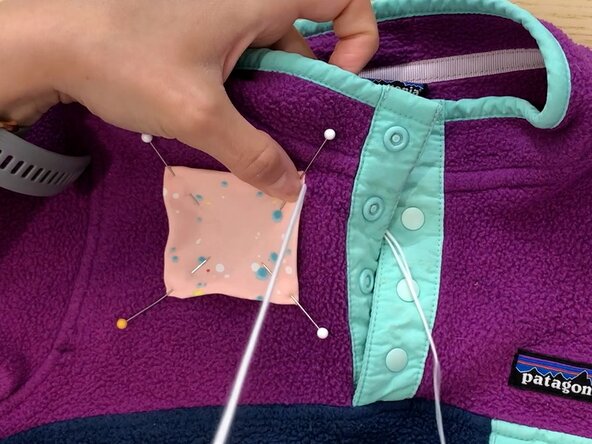
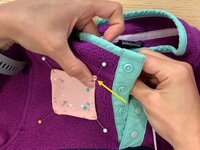
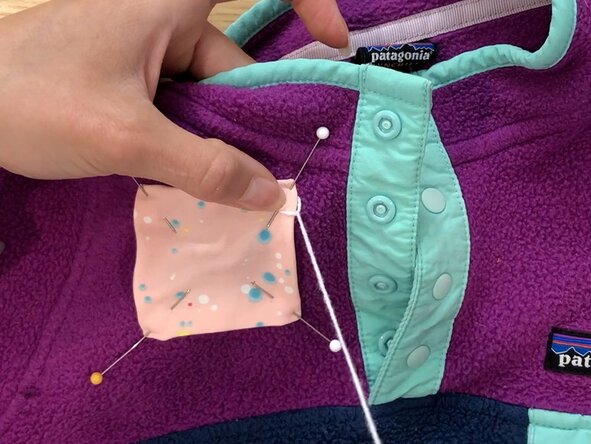
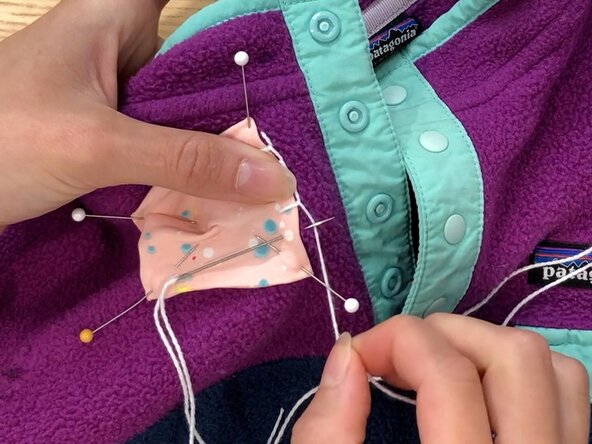
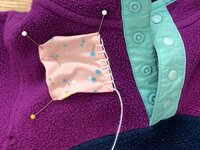
Position the fabric patch over the hole and pin it in place, ensuring the hole is centered.
-
-
-
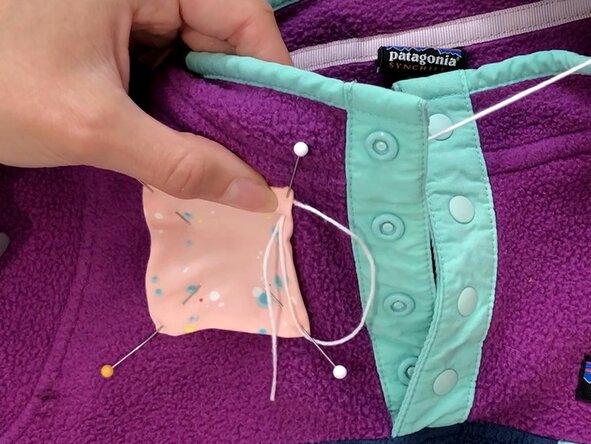
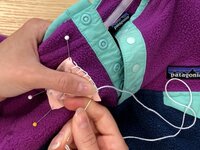
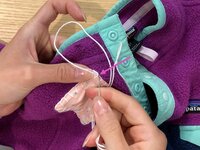
Thread the needle with a length of thread approximately 24 inches (~61 cm) long and tie a knot at one end of the thread. For more details see Needles and Thread.
-
Insert the needle up from the backside so it emerges just beside the edge of the patch without piercing through it.
-
Pull tight so the thread knot is flush against the back of the fabric.
-
-
-
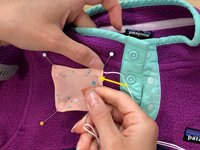
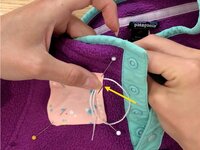
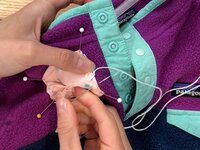
Insert the needle into the patch diagonally, 1/4 inch (~6 mm) inward from the edge and 1/4 inch (~6 mm) forward in the direction of the stitch path.
-
Pull the needle and thread through to the back. Don't pull the thread tight, leaving a small loop.
-
-
-
-
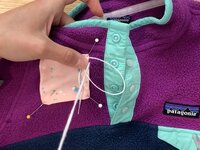
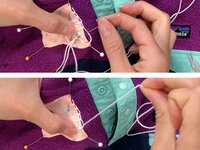
Pierce the needle from the backside, coming up just beside the edge of the patch, 1/4 inch (~6 mm) down from the first edge stitch made in Step 4.
-
Pass the needle through the small loop created in the last step.
-
Pull the thread tight to secure it.
-
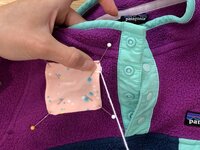
This completes the first blanket stitch!
-
-
-
To create the blanket stitch without flipping between the front and backside, complete the previous two steps in one motion:
-
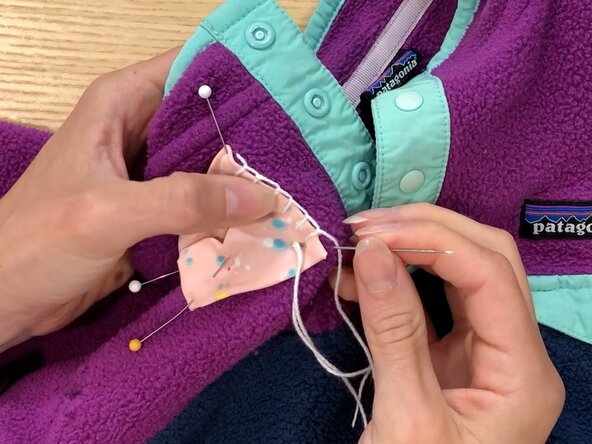
Start with the thread emerging along the edge of the patch.
-
Insert the needle into the patch 1/4 inch (~6 mm) in from the edge and bring it out at the edge of the patch directly adjacent. The needle will be perpendicular to the patch edge.
-
Pull the needle and thread through, ensuring the needle passes through the loop formed by the stitch.
-
-
-
This video shows how to complete the blanket stitch in one movement by following the instructions in the previous step.
-
-
-
Once within 1/2 inch (~13 mm) of a patch corner, create a corner stitch:
-
Insert the needle into the patch at the corner, 1/4 inch (~6 mm) in from both edges.
-
Then bring the needle out at the corner edge, passing through the thread loop.
-
Then continue stitching down the next side of the patch.
-
-
-
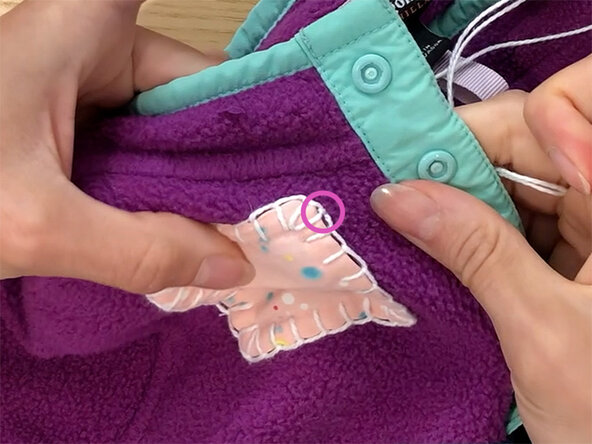
After stitching around the entire patch and coming within 1/4 inch (~6 mm) of the starting stitch, create a final blanket stitch with the needle emerging at the initial stitch point from Step 4.
-
Pass the needle through the thread loop and pull the thread tight.
-
Insert the needle back down into fabric in the same spot, ensuring the loop is secured with the stitch. Pull the thread tight.
-
-
-
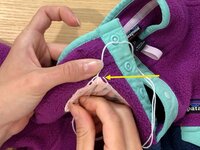
Make a secure knot on the backside of the fabric using one of the techniques from Knot Thread to the Fabric (2 Ways).
-
Trim any excess thread.
-
-
-
Ensure that the patch is securely attached and that the stitches hold firmly without any gaps or looseness.
-
-
-
UNDERPATCH: If the tear is too large to be stitched closed in Step 2 and there's concern the exposed tear will get caught while the garment is being worn, create an underpatch first. An underpatch is a smaller patch that is sewn over the hole on the backside before the main patch is sewn on the front.
-