crwdns2933423:0crwdne2933423:0

Apple Watch Series 9 (45mm) Battery Replacement

crwdns2942213:0crwdne2942213:0

  1. Apple Watch Series 9 (45mm) Battery Replacement, Prepare your watch for disassembly: crwdns2935265:01crwdnd2935265:01crwdnd2935265:02crwdne2935265:0 Apple Watch Series 9 (45mm) Battery Replacement, Prepare your watch for disassembly: crwdns2935265:01crwdnd2935265:02crwdnd2935265:02crwdne2935265:0
    • Before starting this repair, remove your watch from the charger and let its battery drain completely—the watch should shut down from low battery. A charged lithium‑ion battery may catch fire if damaged.

    • Letting the battery drain completely also prevents accidentally turning your watch back on when gripping it during repair.

  2. Apple Watch Series 9 (45mm) Battery Replacement, Disassembly information: crwdns2935265:02crwdnd2935265:01crwdnd2935265:03crwdne2935265:0 Apple Watch Series 9 (45mm) Battery Replacement, Disassembly information: crwdns2935265:02crwdnd2935265:02crwdnd2935265:03crwdne2935265:0 Apple Watch Series 9 (45mm) Battery Replacement, Disassembly information: crwdns2935265:02crwdnd2935265:03crwdnd2935265:03crwdne2935265:0
    • Throughout the rest of your repair:

    • Attach and remove the watch bands as needed to get a better grip or stabilize your watch.

    • To remove a band, firmly press in the small, oval button on the underside of the watch and slide the band out of its groove.

    • Consider placing your watch on something soft like a clean cloth to help stabilize it and prevent damage.

  3. Apple Watch Series 9 (45mm) Battery Replacement, Mark your opening picks: crwdns2935265:03crwdnd2935265:01crwdnd2935265:03crwdne2935265:0 Apple Watch Series 9 (45mm) Battery Replacement, Mark your opening picks: crwdns2935265:03crwdnd2935265:02crwdnd2935265:03crwdne2935265:0 Apple Watch Series 9 (45mm) Battery Replacement, Mark your opening picks: crwdns2935265:03crwdnd2935265:03crwdnd2935265:03crwdne2935265:0
    • If inserted too far, an opening pick can damage your watch. Follow this step to mark your pick and prevent damage.

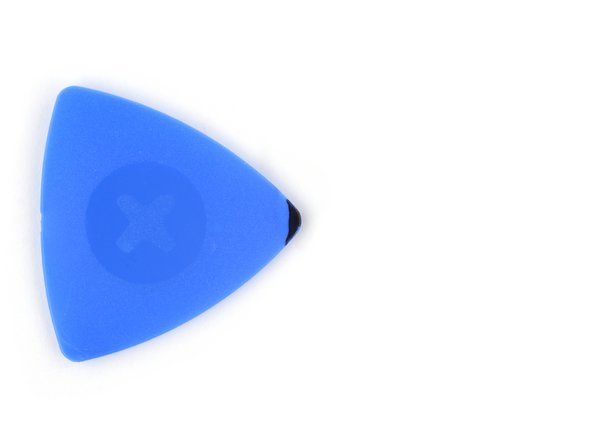
    • Measure 3 mm from the tip and mark the opening pick with a permanent marker.

    • Alternatively, tape a coin to a pick 3 mm from the tip.

  4. Apple Watch Series 9 (45mm) Battery Replacement, Heat the screen: crwdns2935265:04crwdnd2935265:01crwdnd2935265:01crwdne2935265:0
    • Strong adhesive secures the perimeter of the screen to the frame. Heating the screen softens the adhesive, making it easier to separate.

    • Heat an iOpener and lay it on the screen for two minutes to soften its adhesive.

    • Alternatively, you can use a hair dryer or heat gun—but be careful as extreme heat can damage the screen and/or battery.

  5. Apple Watch Series 9 (45mm) Battery Replacement, Insert an iFlex: crwdns2935265:05crwdnd2935265:01crwdnd2935265:03crwdne2935265:0 Apple Watch Series 9 (45mm) Battery Replacement, Insert an iFlex: crwdns2935265:05crwdnd2935265:02crwdnd2935265:03crwdne2935265:0 Apple Watch Series 9 (45mm) Battery Replacement, Insert an iFlex: crwdns2935265:05crwdnd2935265:03crwdnd2935265:03crwdne2935265:0
    crwdns2935267:0crwdne2935267:0
    iFlex Opening Tool
    $11.99
    crwdns2942207:0crwdne2942207:0
    • The gap between the screen and frame is extremely small. You'll need a thin tool such as an iFlex to create an initial gap.

    • Don't grip the iFlex or similar metal tools by the edges—they're very sharp. Consider wearing gloves to protect your hands.

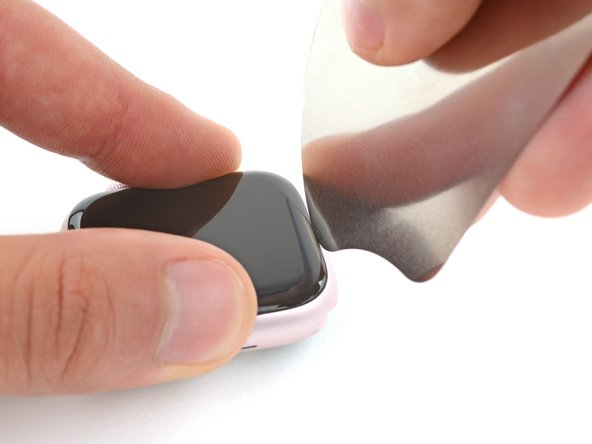
    • Insert the iFlex at a downward angle between the bottom edge of the screen and frame.

  6. Apple Watch Series 9 (45mm) Battery Replacement, Pry up the screen: crwdns2935265:06crwdnd2935265:01crwdnd2935265:02crwdne2935265:0 Apple Watch Series 9 (45mm) Battery Replacement, Pry up the screen: crwdns2935265:06crwdnd2935265:02crwdnd2935265:02crwdne2935265:0
    • Prying up the screen may take multiple attempts. If you're having trouble, apply more heat and try again.

    • With one hand, push down firmly on the watch's frame to secure it in place.

    • With your free hand, hold the iFlex and push the edges up to make it more rigid.

    • The iFlex should be slightly "U" shaped.

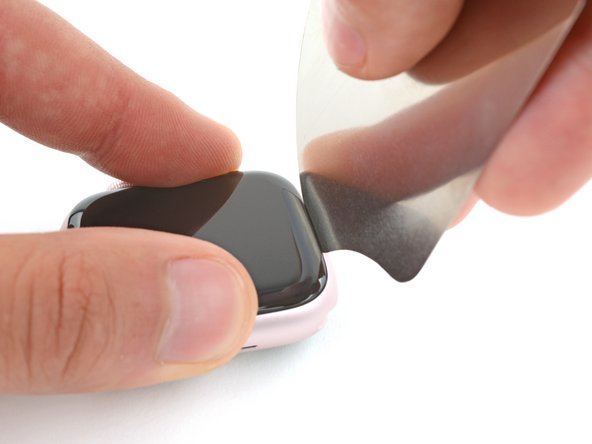
    • Pry up the screen enough for the iFlex to lay flat on its own.

    • The iFlex doesn't need to be inserted far, as it can easily damage the screen cables near the bottom right corner of the watch.

    • Leave the iFlex inserted under the screen.

  7. Apple Watch Series 9 (45mm) Battery Replacement, Insert an opening pick: crwdns2935265:07crwdnd2935265:01crwdnd2935265:03crwdne2935265:0 Apple Watch Series 9 (45mm) Battery Replacement, Insert an opening pick: crwdns2935265:07crwdnd2935265:02crwdnd2935265:03crwdne2935265:0 Apple Watch Series 9 (45mm) Battery Replacement, Insert an opening pick: crwdns2935265:07crwdnd2935265:03crwdnd2935265:03crwdne2935265:0
    • Do not insert your opening pick more than 3 mm under the screen when separating the adhesive, as you risk damaging your watches internals.

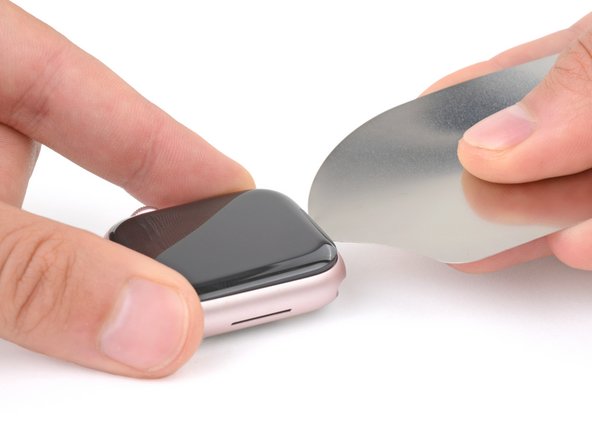
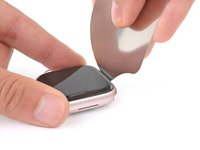
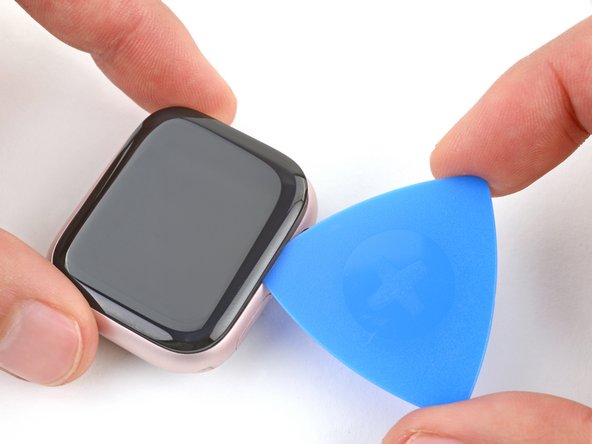
    • Keep the iFlex flat to maintain a gap between the screen and frame while inserting an opening pick.

    • Insert an opening pick between the screen and iFlex.

    • Remove the iFlex.

  8. Apple Watch Series 9 (45mm) Battery Replacement, Separate the bottom edge adhesive: crwdns2935265:08crwdnd2935265:01crwdnd2935265:02crwdne2935265:0 Apple Watch Series 9 (45mm) Battery Replacement, Separate the bottom edge adhesive: crwdns2935265:08crwdnd2935265:02crwdnd2935265:02crwdne2935265:0
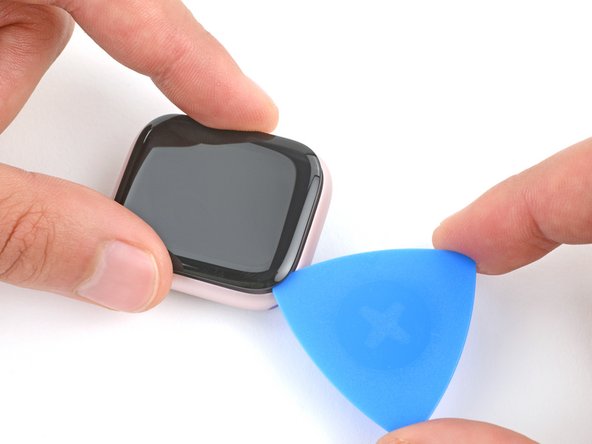
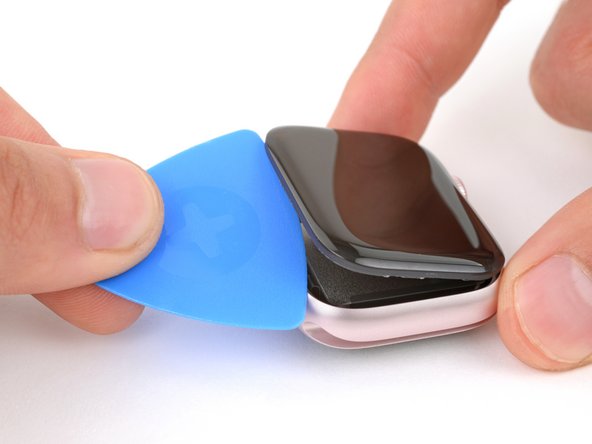
    • Slide the opening pick along the bottom edge to separate the adhesive securing it.

  9. Apple Watch Series 9 (45mm) Battery Replacement, Separate the left edge adhesive: crwdns2935265:09crwdnd2935265:01crwdnd2935265:02crwdne2935265:0 Apple Watch Series 9 (45mm) Battery Replacement, Separate the left edge adhesive: crwdns2935265:09crwdnd2935265:02crwdnd2935265:02crwdne2935265:0
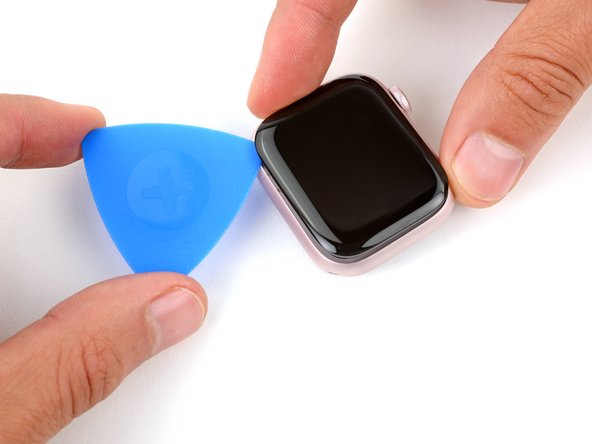
    • Slide the opening pick around the bottom left corner and up the left edge to separate the adhesive.

  10. Apple Watch Series 9 (45mm) Battery Replacement, Separate the top edge adhesive: crwdns2935265:010crwdnd2935265:01crwdnd2935265:02crwdne2935265:0 Apple Watch Series 9 (45mm) Battery Replacement, Separate the top edge adhesive: crwdns2935265:010crwdnd2935265:02crwdnd2935265:02crwdne2935265:0
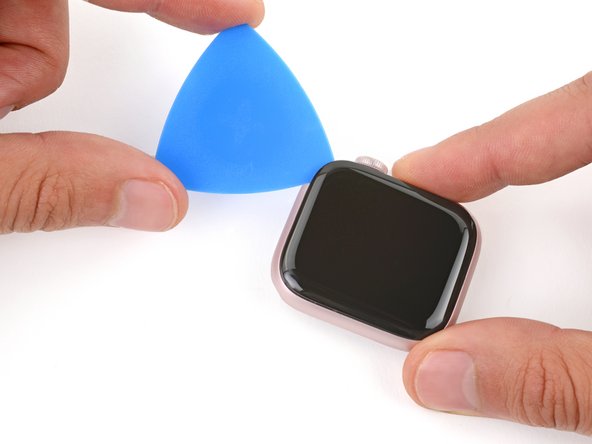
    • Slide the opening pick around the top left corner and along the top edge to separate the adhesive.

  11. Apple Watch Series 9 (45mm) Battery Replacement, Separate the right edge adhesive: crwdns2935265:011crwdnd2935265:01crwdnd2935265:02crwdne2935265:0 Apple Watch Series 9 (45mm) Battery Replacement, Separate the right edge adhesive: crwdns2935265:011crwdnd2935265:02crwdnd2935265:02crwdne2935265:0
    • Slide the opening pick around the top right corner and stop at the top of the side button.

    • Don't slide your pick past the side button—you risk damage to the screen cables.

  12. Apple Watch Series 9 (45mm) Battery Replacement, Separate the remaining adhesive: crwdns2935265:012crwdnd2935265:01crwdnd2935265:02crwdne2935265:0 Apple Watch Series 9 (45mm) Battery Replacement, Separate the remaining adhesive: crwdns2935265:012crwdnd2935265:02crwdnd2935265:02crwdne2935265:0
    • Insert the long edge of an opening pick between the left edge of the screen and frame.

    • Twist the pick to lift the screen and separate any remaining adhesive.

  13. Apple Watch Series 9 (45mm) Battery Replacement, Swing open the screen: crwdns2935265:013crwdnd2935265:01crwdnd2935265:03crwdne2935265:0 Apple Watch Series 9 (45mm) Battery Replacement, Swing open the screen: crwdns2935265:013crwdnd2935265:02crwdnd2935265:03crwdne2935265:0 Apple Watch Series 9 (45mm) Battery Replacement, Swing open the screen: crwdns2935265:013crwdnd2935265:03crwdnd2935265:03crwdne2935265:0
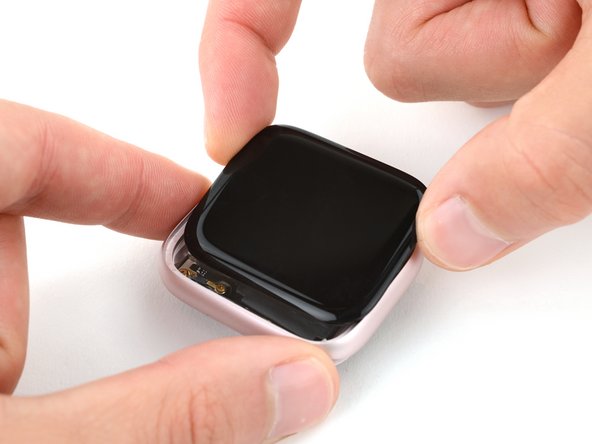
    • Pull the right edge of the screen over the digital crown.

    • If the screen feels stuck, go back around it with an opening pick to separate any adhesive.

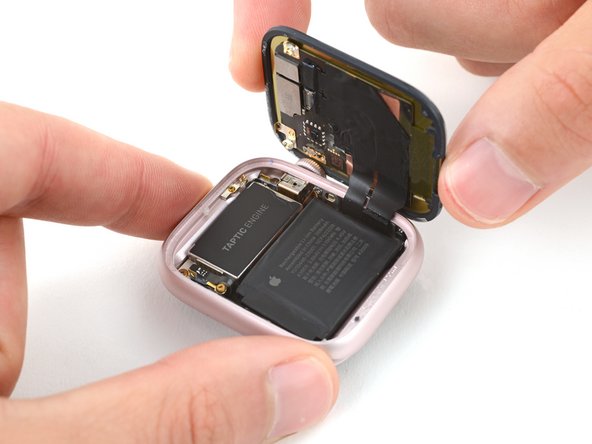
    • Swing up the left edge of the screen so it's upright. The screen should be to the right of the digital crown.

    • During reassembly:

    • This is a good point to plug in your watch and test all functions before sealing it up. Be sure to power it back down completely before you continue working.

    • Follow this guide to apply new screen adhesive and reseal your watch.

  14. Apple Watch Series 9 (45mm) Battery Replacement, Heat the battery adhesive: crwdns2935265:014crwdnd2935265:01crwdnd2935265:01crwdne2935265:0
    • Heating the battery will soften the strong adhesive securing it, making the battery easier to remove.

    • Heat an iOpener and lay it on the battery for two minutes to soften the adhesive.

    • Alternatively, you can use a hair dryer or heat gun—but be careful as extreme heat can damage the battery.

  15. Apple Watch Series 9 (45mm) Battery Replacement, Pry up the battery: crwdns2935265:015crwdnd2935265:01crwdnd2935265:03crwdne2935265:0 Apple Watch Series 9 (45mm) Battery Replacement, Pry up the battery: crwdns2935265:015crwdnd2935265:02crwdnd2935265:03crwdne2935265:0 Apple Watch Series 9 (45mm) Battery Replacement, Pry up the battery: crwdns2935265:015crwdnd2935265:03crwdnd2935265:03crwdne2935265:0
    • Be careful not to puncture or bend the battery—it can leak dangerous chemicals and catch fire.

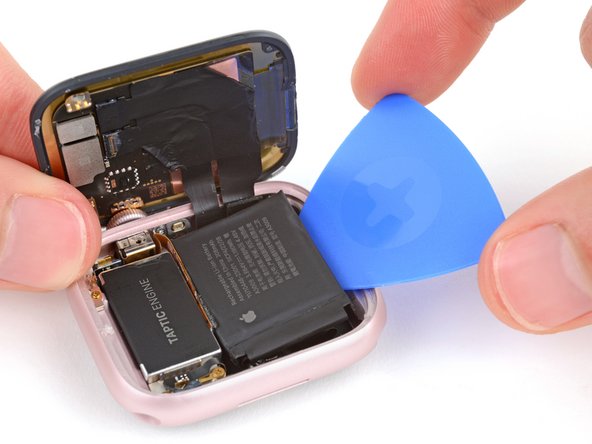
    • Insert an opening pick between the bottom edge of the battery and frame.

    • Pry up the battery with the opening pick until it starts to separate from the frame.

    • This requires time and constant pressure. If you're having trouble, apply more heat and try again.

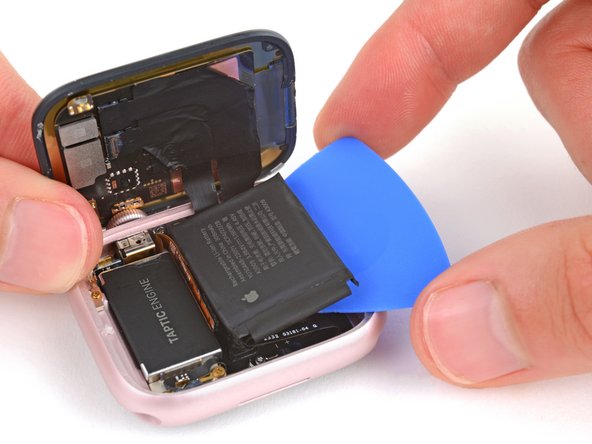
    • Slide the pick farther under the battery and lift until all the adhesive is separated.

  16. Apple Watch Series 9 (45mm) Battery Replacement, Reposition the battery: crwdns2935265:016crwdnd2935265:01crwdnd2935265:02crwdne2935265:0 Apple Watch Series 9 (45mm) Battery Replacement, Reposition the battery: crwdns2935265:016crwdnd2935265:02crwdnd2935265:02crwdne2935265:0
    • Be careful not to strain or tear the battery cable during the rest of your repair.

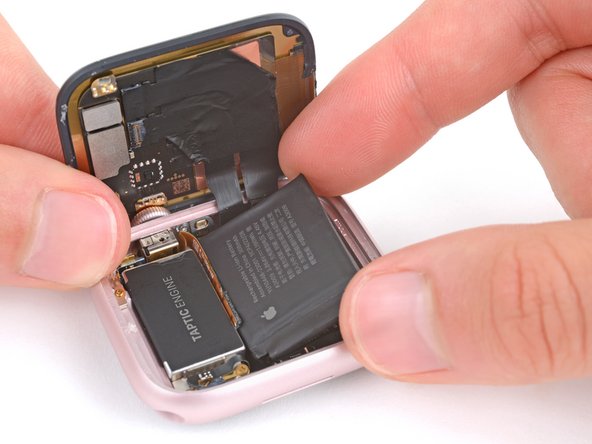
    • Gently lift the battery out of its recess and set it next to your watch so you can access the battery cable.

  17. Apple Watch Series 9 (45mm) Battery Replacement, Remove the battery connector screw: crwdns2935265:017crwdnd2935265:01crwdnd2935265:02crwdne2935265:0 Apple Watch Series 9 (45mm) Battery Replacement, Remove the battery connector screw: crwdns2935265:017crwdnd2935265:02crwdnd2935265:02crwdne2935265:0
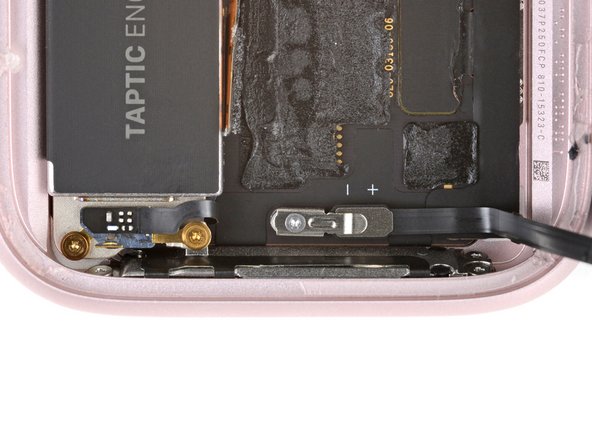
    • Use a tri‑point Y000 screwdriver to remove the 1.1 mm‑long screw securing the battery connector bracket.

  18. Apple Watch Series 9 (45mm) Battery Replacement, Remove the bracket: crwdns2935265:018crwdnd2935265:01crwdnd2935265:01crwdne2935265:0
    • Use a pair of tweezers to remove the battery connector bracket.

  19. Apple Watch Series 9 (45mm) Battery Replacement, Disconnect the battery: crwdns2935265:019crwdnd2935265:01crwdnd2935265:02crwdne2935265:0 Apple Watch Series 9 (45mm) Battery Replacement, Disconnect the battery: crwdns2935265:019crwdnd2935265:02crwdnd2935265:02crwdne2935265:0
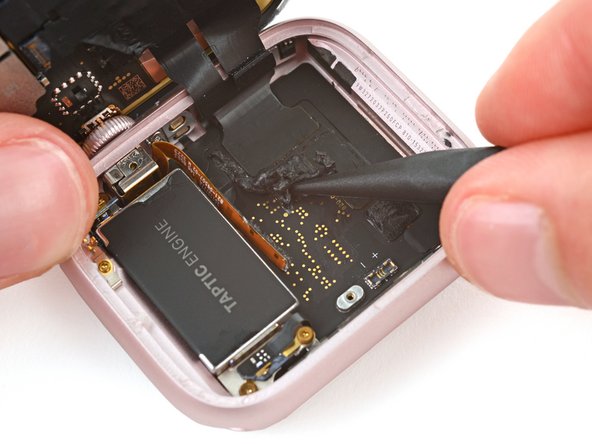
    • Insert the point of a spudger under the short end of the battery connector (opposite the cable) and pry it up.

  20. Apple Watch Series 9 (45mm) Battery Replacement, Remove the battery: crwdns2935265:020crwdnd2935265:01crwdnd2935265:02crwdne2935265:0 Apple Watch Series 9 (45mm) Battery Replacement, Remove the battery: crwdns2935265:020crwdnd2935265:02crwdnd2935265:02crwdne2935265:0
    crwdns2935267:0crwdne2935267:0
    Tesa 61395 Tape
    $2.99
    crwdns2942207:0crwdne2942207:0
    • Remove the battery.

    • To install a new battery:

    • Use a spudger and tweezers to remove all the old adhesive from the battery recess.

    • If your replacement battery doesn't have adhesive pre-installed, put strips of thin, double-sided tape on the logic board (not directly on the battery) where the old adhesive was.

    • Reconnect the battery cable press connector to its socket on the motherboard.

    • Put the battery connector bracket into place and install its screw. Make sure the metal arm goes over the battery press connector.

    • Remove any liners from the battery adhesive or double-sided tape.

    • Firmly press the battery into place to secure it with the adhesive.

crwdns2915888:0crwdne2915888:0

To reassemble your device, follow these instructions in reverse order.

For optimal performance, calibrate your newly installed battery after completing your repair.

Take your e-waste to an R2 or e-Stewards certified recycler.

Repair didn’t go as planned? Try some basic troubleshooting, or ask our Answers community for help.

Spencer Day

crwdns2935283:009/14/22crwdne2935283:0

53,712 crwdns2915208:0crwdne2915208:0

crwdns2935297:0394crwdne2935297:0

crwdns2915084:0crwdne2915084:0

iFixit crwdns2935289:0iFixitcrwdne2935289:0

Staff

crwdns2931471:0135crwdne2931471:0

crwdns2935297:017,180crwdne2935297:0

crwdns2944067:00crwdne2944067:0

crwdns2917038:0crwdne2917038:0

crwdns2936625:0crwdne2936625:0:

crwdns2936751:024crwdne2936751:0 6

crwdns2936753:07crwdne2936753:0 25

crwdns2936753:030crwdne2936753:0 81

crwdns2942667:0crwdne2942667:0 88