
Apple Watch Series 7 Screen Replacement

crwdns2944107:0crwdnd2944107:0Dominik Schnabelrauchcrwdnd2944107:0crwdnd2944107:0crwdnd2944107:03crwdnd2944107:0crwdne2944107:0
crwdns2944111:0Ndz 3, 2025crwdne2944111:0
crwdns2915892:0crwdne2915892:0
crwdns2942287:0crwdne2942287:0Use this guide to replace a broken, cracked, or defective screen on your Apple Watch Series 7.
It is possible to replace the screen of the Apple Watch Series 7 without removing or disconnecting the battery first. However, this can lead to a malfunction of the NFC antenna under certain circumstances. If you are unsure about your repair, we recommend that you first follow the battery guide and then continue with Step 23 of this guide.
Replacing the display can cause issues with Apple Pay. If possible, to reduce the likelihood of problems, delete all your Apple Pay account info before the replacement, and then re-enter it with the new display installed.
This guide shows the procedure on the cellular/LTE version of the watch, but the standard GPS-only version is similar.
You’ll need replacement adhesive to reattach components when reassembling the device.
crwdns2942213:0crwdne2942213:0
crwdns2943213:0crwdne2943213:0


crwdns2943215:0crwdne2943215:0


crwdns2944105:0crwdne2944105:0

-
-
Before starting repairs, take your watch off the charger and power it down.
-
-
-
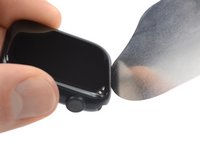
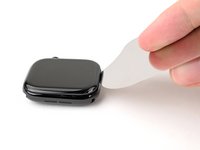
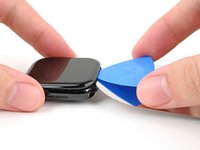
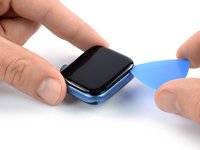
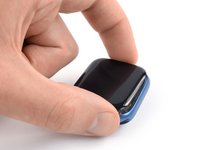
Because the gap between the screen and watch body is so thin, an iFlex is needed to separate the two.
Destroyed my watch screen using this method. See other comments in step 4. Do not recommend using a knife right where the data cable is.
-
-
-
Prepare an iOpener and apply it to the screen for at least two minutes to loosen the adhesive underneath.
Can confirm that if you want this to work, pop the iopener in for around 45seconds and then let it sit on the watch for 6 minutes, 2 minutes is just not enough.
-
-
crwdns2935267:0crwdne2935267:0Cut-Resistant ESD Gloves$19.99
-
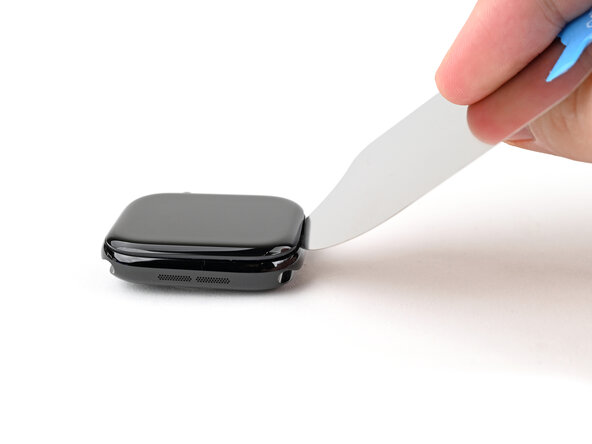
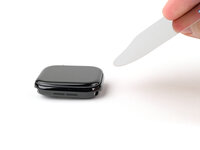
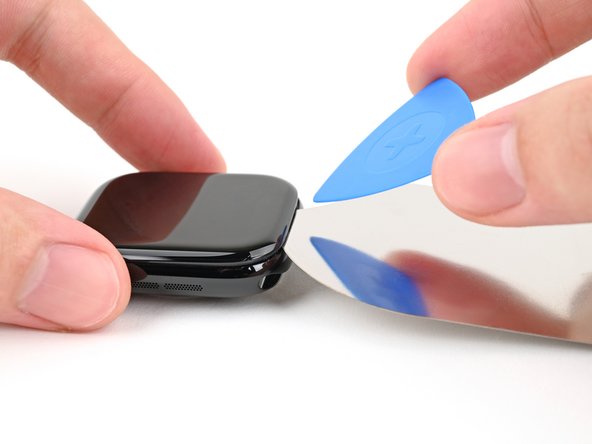
Insert the iFlex at a downward angle between the bottom edge of the screen and frame.
Tried this for almost an hour, and I could not lift the display off at all. Broke the screen and chipped pieces of the screen as well.
me too, I broke the screen
Yeah prolly gonna suggest an actual spudger for this step, or to be more detailed. Kept reheating the IOpener every 10mins keeping the watch under it for 5mins etc and it never budged after 3 hours of fiddling. Eventually broke the fine edge of the blade and scratched the casing, now the blade can't catch the groove and $8 down the drain.
As experienced with the user above I tried heating it up with the IOpener 6x every 10 mins and it’s still tough to open. At first I left it a full 10 minutes to try and soften the adhesive. Then the advised 1 min and 30. it still won’t lift up. A spudger will definitely help but will prolly break it if pulled too much.
Four rounds with the iOpener I got it open... but then.... a cascade of errors...
At some point while opening I saw a flash of lines across the screen. Significant?
Cleaned adhesive off the case and screen for an hour with Q tips and alcohol... perfect...
The replacement adhesive was not like in the photo, the tab to peel it was on a different corner, not a good start, it was very hard to position maybe easier for a lefty. Since it was so difficult to position, the blue protective cover was gone by the time It was well positioned with a spudger so once it was ready to test, it was sealed and the question will always be, is a cable unseated or was the display damaged opening it as it failed, it's awake, display is dark, it vibrates and makes noises with find my, but...
So I tried to reopen it and check the cables and the glass popped off the OLED, the new adhesive which I worked so hard to ensure integrity for unfortunately gripped way too well. I'll have to destroy it to pull off the display. :(
No dice. Used the iOpener three times, then cut my finger open because there was no good place to hold the watch when the blade slipped. I give up.
I tried it exactly this way of opening the display with the exact same tools as given here. starting with peeling on the short screen side with the fine blade. But then white lines appeared on my screen... Why? because exactly at that spot are the flat cables connecting the screen with the watch. Such a stupid recommendation from iFixit. It seems like they just copied the text over from another repair without validating it. now I broke not one but two watch displays because of that. I am very diappointed. I dont recommend doing this repair by yourself....
I got it to work with a single heating of the iOpener. Heat the iOpener and set it on the watch as described for 90 seconds. Using the edge of the knife (I used an exacto knife), gently press the edge into seam between the glass and case, you'll see it sink in very slightly. Pull the edge out, move it down along the seam a couple millimeters, and then press it into the seam again. Keep working it down along the seem, slowly pressing the edge of the knife in and pulling back. After about a minute of this the edge of the glass started separating from the case, and I was able to negotiate the corner with the knife. I stuck a spudger underneath the raised edge and continued working around the screen edge until it was completely separated.
Same issue as others. Using an exact at the position described cut the data cable to the screen and destroyed my watch. Will be requesting a refund.
Just destroyed my watch. Followed the instructions exactly as described. The place where they tell you to put the knife is where the data cable is, now my watch just shows random lines. The screen was not even lifting off yet, I had just pushed the knife at that spot and pried up.
Same here. I just destroyed my 45mm stainless steel Watch series 7 by following this guide. As soon as i inserted the blade not even a millimeter in the position shown in the pictures (bottom end of the display) is seem to have seperated important display data lines. There is not even a warning for this in the instructions. I could have used the watch perfectly fine for several more months, the battery was just at 75% capacity. Now i have to decide between trying to fix it with an expensive replacement display or buy a new watch! Not happy, will be contacting customer service asap.
Same from me, this instruction destroyed my 45 mm watch as well. The display is broken and the new Akku doesn't work, because the connector is broken.
-
-
-
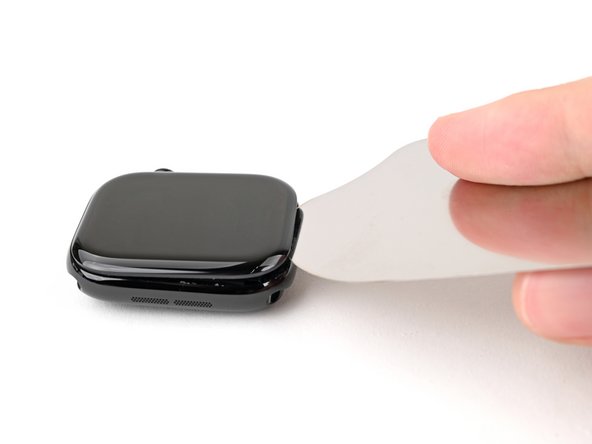
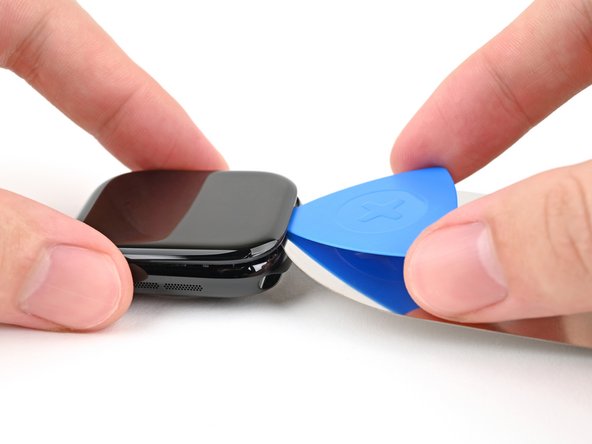
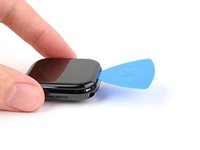
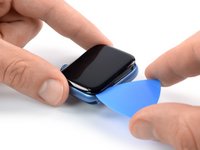
With one hand, push down firmly on the watch's frame to secure it in place.
-
With your free hand, hold the iFlex and push the edges up to make it more rigid.
-
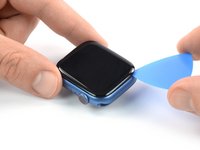
Pry up the screen enough for the iFlex to lay flat on its own.
-
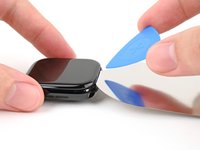
Leave the iFlex inserted under the screen.
-
-
-
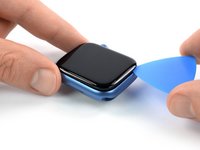
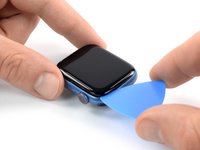
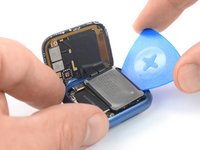
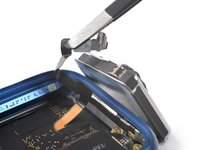
Keep the iFlex flat to maintain a gap between the screen and frame while inserting an opening pick.
-
Insert an opening pick between the screen and iFlex.
-
Remove the iFlex.
-
-
-
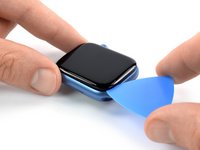
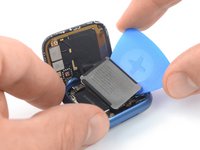
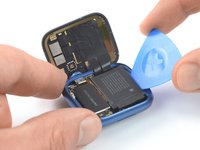
Slide the opening pick around the bottom left corner and up the left edge.
-
-
-
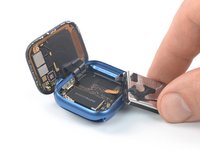
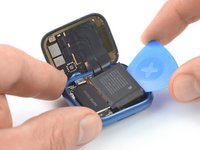
Slide the opening pick around the corner and along the long edge on the opposite side of the watch crown to slice the display adhesive.
-
-
-
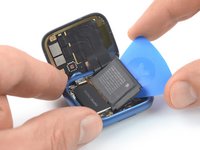
Slide the opening pick around the corner to slice the remaining adhesive on the short edge of the watch next to the watch crown.
-
-
-
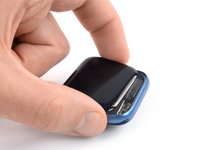
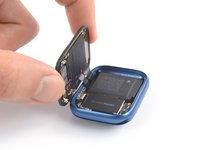
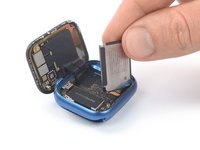
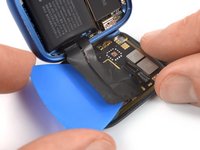
Lift the display and carefully pull it towards the watch crown.
-
Swing the display open to an upward position.
Hallo, ich habe leider beim Ausbau des Displays das Flexkabel beschädigt was zum Akku führt. Wie lässt sich dieses Kabel denn bitte tauschen? LG Thomas
-
-
-
-
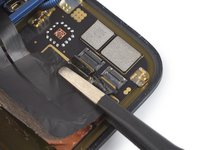
Prepare an iOpener and apply it to the rear side of your Apple Watch for at least two minutes to loosen the adhesive underneath the battery.
-
-
-
-
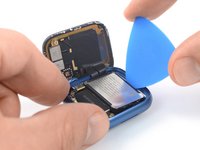
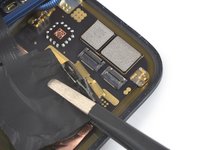
Insert an opening pick between watch body and the long edge of the battery.
-
Use constant, steady pressure to slowly pry up the battery.
-
-
-
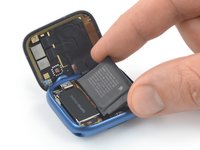
Carefully lift and swing the battery out of its recess and place it next to the watch body.
-
-
crwdns2935267:0crwdne2935267:0Tweezers$4.99
-
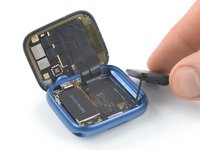
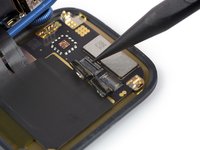
Use a pair of tweezers to peel the black protective tape off the ZIF connector.
-
-
-
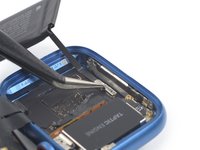
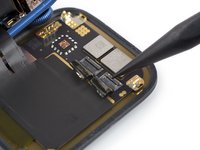
Use one arm of your tweezers or the pointed end of a spudger to pry up the lock bar on the ZIF connector securing the battery cable.
-
-
-
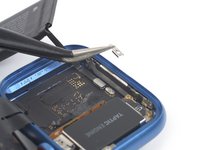
Use a pair of tweezers to pull the battery cable out of the battery ZIF connector.
A ZIF connector is "Zero Insertion Force". Do not make the mistake on the new battery that I did. Do not dbl-check and push on it again to make sure it's in. It's not like a USB plug where you can try and push it again.This ZIF connector will break off quite easily! And then you'll have to source the ZIF connector replacement, buy + learn the equipment for soldering it onto the motherboard. Too late, we bought a new one. Missed it by one little extra push. Remember what ZIF means.
-
-
-
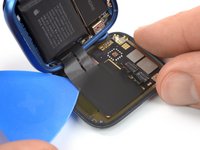
Remove the battery.
-
-
-
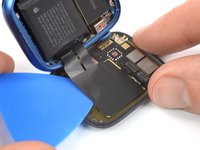
Insert an opening pick between watch body and the long edge of the battery.
-
Use constant, steady pressure to slowly pry up the battery.
Not a very good approach. Damaged back cover flex cable using triangular opening pick.
Battery is well glued to motherboard and opening pick has just too little contact point.Better to start with metal prying tool from taptic engine side adding some drops of isopropyl alcohol from time to time.
And of course take your time.
-
-
-
Carefully lift and swing the battery out of its recess and place it next to the watch body.
-
-
-
Use a Tri-Point Y000 screwdriver to remove the 1.1 mm-long screw securing the battery connector bracket.
-
-
-
Use a pair of tweezers to remove the battery connector bracket.
-
-
-
Use a spudger to disconnect the battery cable by prying the connector straight up from its socket.
-
-
-
Remove the battery.
-
-
crwdns2935267:0crwdne2935267:0Tweezers$4.99
-
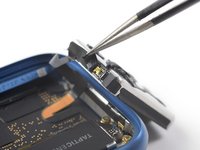
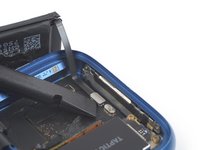
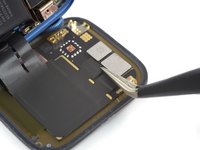
Use a pair of tweezers to carefully peel the black protective tape off both display connectors.
-
-
-
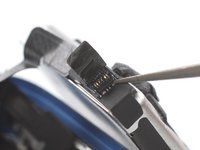
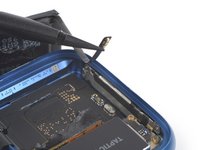
Use a spudger or one arm of your tweezers to pry up the lock bar on the ZIF connectors securing the display cables.
-
-
-
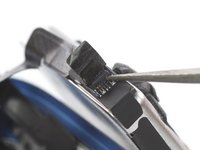
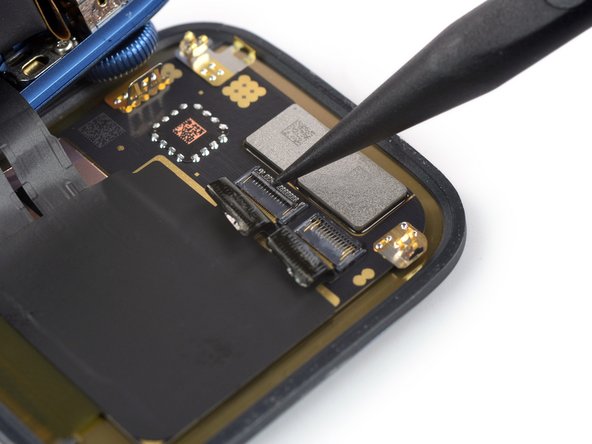
Prepare an iOpener and apply it to the screen for at least two minutes to loosen the protective tape on its rear side.
-
-
-
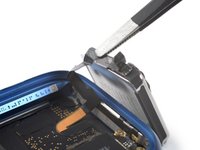
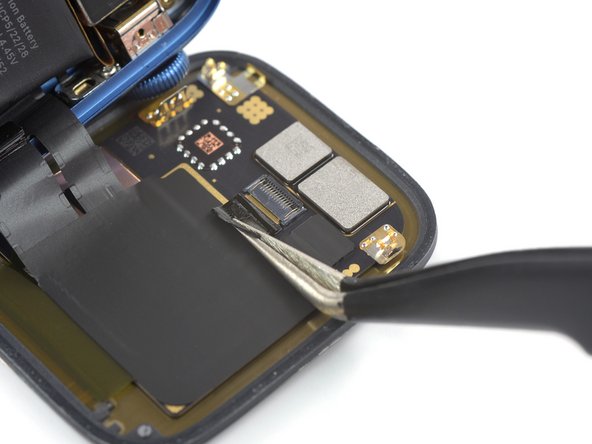
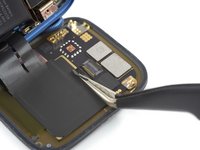
Carefully slide an opening pick underneath the display cables to separate them from the screen.
-
-
-
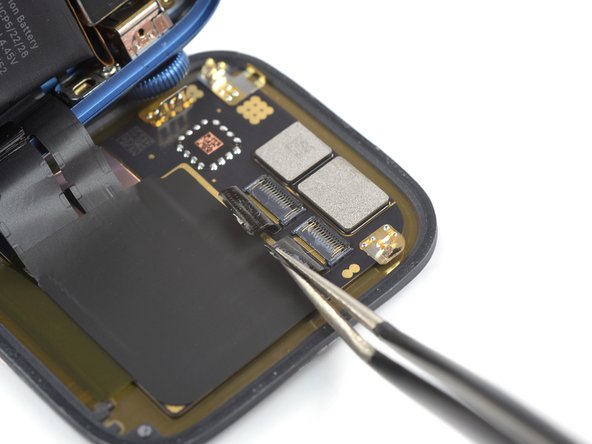
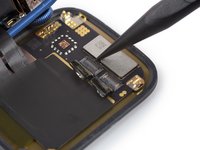
Use a pair of tweezers to pull both display cables out of the ZIF connectors.
-
-
-
Remove the screen.
Hello,
does the display also contain an NFC chip, and how can it be transferred to the new display? I couldn't find any instructions anywhere. Thank you.
-


If possible, turn on your device and test your repair before installing new adhesive and resealing.
To reassemble your device, follow these instructions in reverse order.
Take your e-waste to an R2 or e-Stewards certified recycler.
Repair didn’t go as planned? Check out our Answers community for troubleshooting help.
crwdns2935221:0crwdne2935221:0
crwdns2935229:06crwdne2935229:0


crwdns2947412:05crwdne2947412:0
Hat alles funktioniert, habe einen 2 Komponenten Kleber verwendet.
does apple add any warnings or tries to sabotage the devices like it does with iphones by removing true tone, etc or it is like new if screen is replaced
No they don‘t, it is also possible to upgrade the aluminum watch to the sapphire glass display. The watch will take a few minutes to update the display after turning it on for the first time. Afterwards the NFC chip (which is part of the display unit) will also function normally.
Slimbo -
So on the newer iWatches we do not swap the NFC chip from the old screen to the new one like we did with the 4s? You had mentioned that the NFC chip is still in the display in an earlier comment.
So, I replaced the screen with one I bought from ifixit and it is still black. It buzzes when I charge it and I can hear dialogue from the watch. Is this a lost cause? Is there something else I should do?