crwdns2915892:0crwdne2915892:0
Use this guide to replace a broken, cracked, or defective display on your Apple Watch Series 6.
Replacing the display can cause issues with Apple Pay. If possible, to reduce the likelihood of problems, delete all your Apple Pay account info before the replacement, and then re-enter it with the new display installed.
This guide shows the procedure on the cellular/LTE version of the watch, but the standard GPS-only version is similar.
You’ll need replacement adhesive to reattach components when reassembling the device.
crwdns2942213:0crwdne2942213:0
-
-
Before starting repairs, take your watch off the charger and power it down.
-
-
crwdns2935267:0crwdne2935267:0Safety Glasses$3.19
-
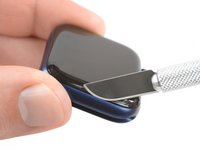
Because the gap between the screen and watch body is so thin, a sharp blade is needed to separate the two. Read the following warnings carefully before proceeding.
I found the supplied razor blade too thick to get in the gap between the screen and the case. I used half a Dorco razor blade to do the job, and some isopropyl alcohol once it started to lift.
-
-
-
Prepare an iOpener (or use a hair dryer or heat gun) and heat the face of the watch to loosen the display adhesive.
-
Leave the iOpener on the watch for at least two minutes to fully heat the screen and soften the adhesive holding it to the case.
-
-
-
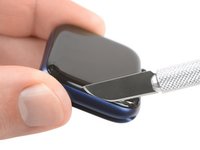
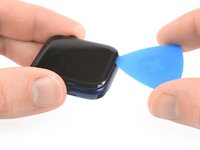
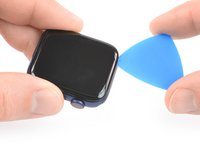
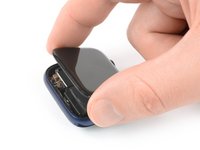
Place the edge of a curved blade into the thin gap between the display and the outer case. Start at the short side of the display, most distant to the digital crown.
-
Press firmly straight down into the gap.
-
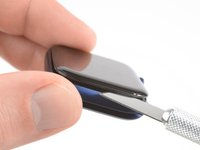
Once inserted, tilt the blade to pry the display open slightly.
I was unable to do this. and I ended up breaking the glass in the process. So this was not a great experience
-
-
-
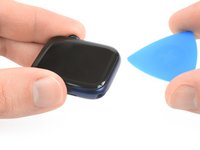
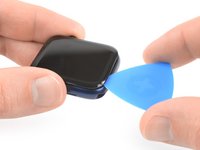
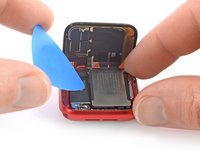
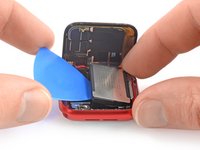
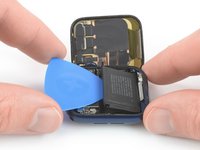
Insert an opening pick in the gap your created.
-
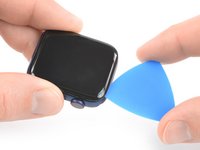
Slide the opening pick along the short edge of the watch to cut the adhesive.
-
-
-
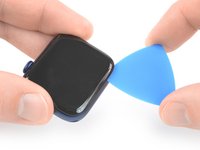
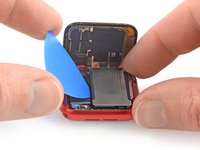
Slide the opening pick around the corner and along the long edge on the opposite side of the watch crown to cut the display adhesive.
-
-
-
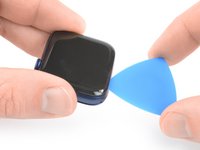
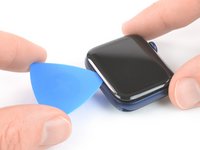
Slide the opening pick around the corner to cut the remaining adhesive on the short edge of the watch next to the watch crown.
-
-
-
Place the watch on a flat surface and use an opening pick to slice through any remaining adhesive.
-
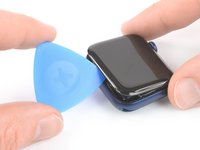
Slide an opening pick under the opposite display edge of the watch crown.
-
Twist the opening pick to loosen the display off the watch case.
-
-
-
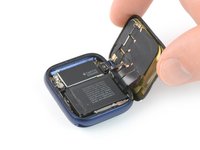
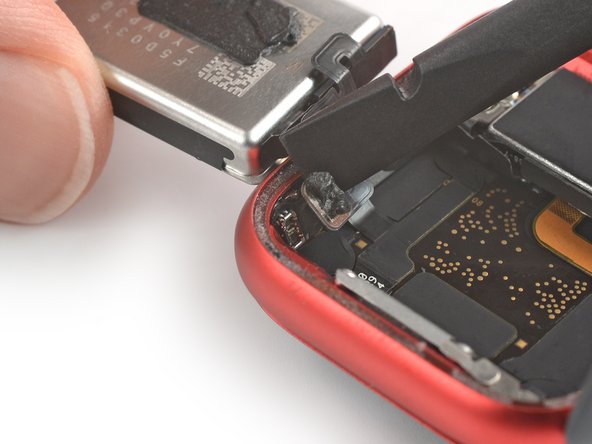
Lift the display and carefully pull it towards the watch crown.
-
Swing the display open to an upward position.
When I opened my watch I saw two layers of adhesive or are they gaskets? I broke one accidentally but not sure if I should keep the undamaged one in there? Or should both side be totally bare and the adhesive itself is also the seal?
Also I think I damaged my battery when prying it up since it won’t hold a charge now. I bought a replacement battery and will try that but is there anything else it could be?
Be very careful here... My display cable broke before achieving the angle they show in the last pick above. You may well want to order new cables along with the battery and gaskets. The are only $19.95
-
-
-
-
Prepare an iOpener (or use a hair dryer or heat gun) and heat the rear side of the watch to loosen the battery adhesive. Leave the iOpener on the watch for at least two minutes.
-
-
These links for replacing the battery for the 40mm and 44mm are going to the battery section of the screen replacement instructions page. They should go to the battery replacement instructions below instead. (This is likely a copy-paste error from that other page)
Yeah, bad links in step 11
I have edited the links to stay on the correct guide so they should work right once the edit is approved by the admins.
-
-
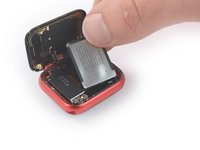
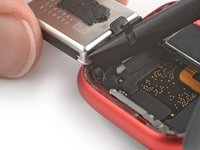
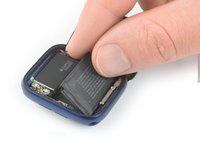
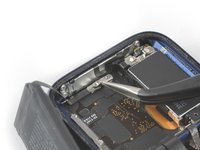
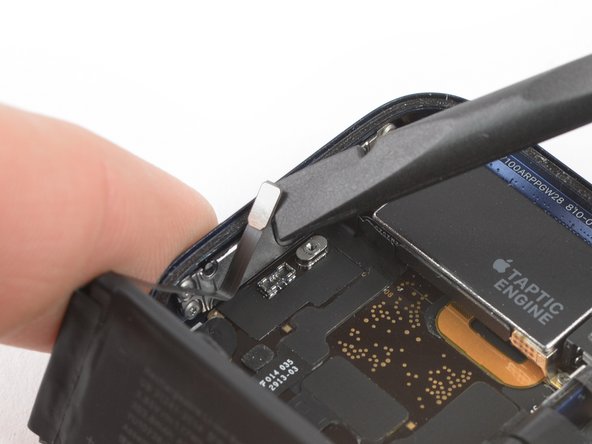
Insert an opening pick between the battery and the Taptic Engine.
-
Use constant, steady pressure to slowly pry the battery up, separating it from the adhesive securing it to the mainboard.
-
-
-
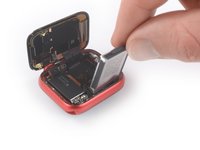
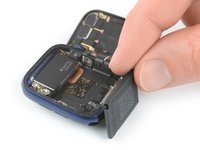
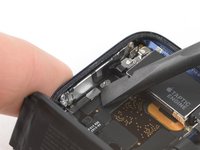
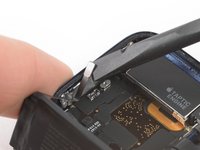
Carefully lift and swing the battery out of its recess.
-
-
-
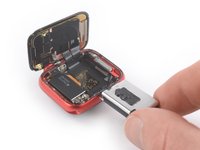
Use the flat end of a spudger to pry up and disconnect the battery connector.
-
-
crwdns2935267:0crwdne2935267:0Tesa 61395 Tape$5.99
-
Remove the battery.
-
-
-
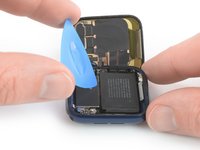
Insert an opening pick between the battery and the Taptic Engine.
-
Use constant, steady pressure to slowly pry the battery up, separating it from the adhesive securing it to the mainboard.
My watch has a metal shield in between the battery and screen?
Hi Eric,
I assume you own the 40mm version of the Apple Watch series 6 which has a slightly different build. The one you see here is the 44mm version.
Is removing the battery really necessary if you are only replacing the display? I can't see in the following steps where the battery would get in the way of detaching the old screen.
I’ve already taken off the screen , had a bad scratch I couldn’t get out then totally messed it up so for $50 bucks and some increased knowledge of Apple Watches I have the 6 44mm and the whole screen is off took 2days, I’m a little afraid I may have taken off the lcd part as well and I just bought a digitizer and new battery i didn’t get anything called an lcd they were more expensive but I’ve looked for hours and I didn’t tear anything, any thoughts?
Hi Jeremy,
Unfortunately what the sites that sell just the digitizer (AKA the front glass) aren't telling you is that it's extremely difficult to separate the LCD and the digitizer, as they're bonded together with glue called OCA (Optically Clear Adhesive). It takes specialized skills and equipment to successfully separate them without damaging the delicate LCD, then even more equipment to rebond the display with a new digitizer. I consider myself a very experienced DIY guy and this isn't something I'd try on an Apple Watch. I have done one on a couple of iPhone 6's that turned out with barely acceptable results, and one on a Samsung phone that failed miserably.
Sorry to say, you'll need to bite the bullet and just buy a new screen assembly, one that includes both the LCD and the digitizer. Presumably you haven't done anything with the replacement part you already bought, so hopefully you can return it.
-
-
-
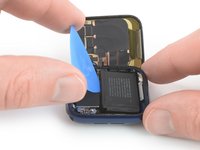
Carefully lift the battery out of its recess and place it outside the watch case opposite to the Taptic Engine.
-
-
-
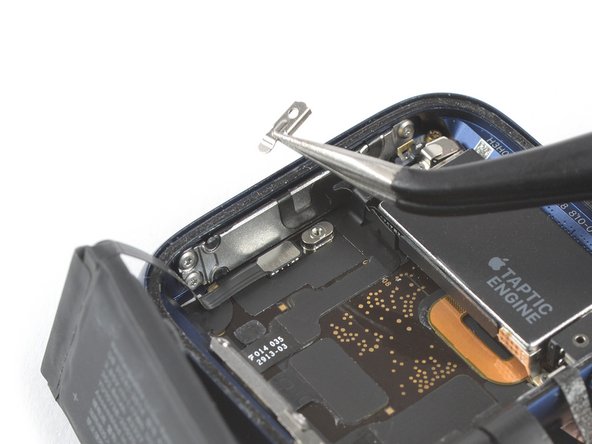
Remove the single 1.2 mm-long tri point Y000 screw.
-
-
crwdns2935267:0crwdne2935267:0Tweezers$4.99
-
Use a pair of tweezers to remove the metal shield covering the battery connector.
-
-
-
Use the flat end of a spudger to pry up and disconnect the battery connector.
Be careful that you don't push the spudger into the battery reciptical port and pop that off the motherboard like I did. Pry straight up. Do not press the spudger into the side of the battery connection port. I think I'm out of luck now.
-
-
crwdns2935267:0crwdne2935267:0Tesa 61395 Tape$5.99
-
Remove the battery.
-
-
crwdns2935267:0crwdne2935267:0Tweezers$4.99
-
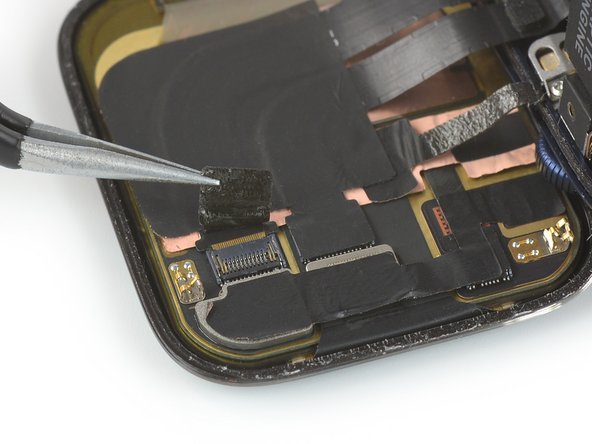
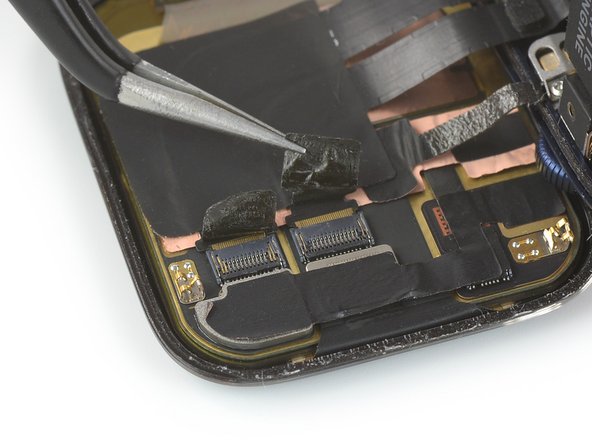
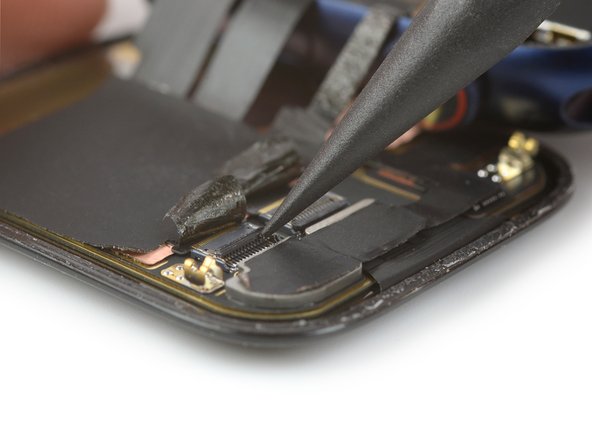
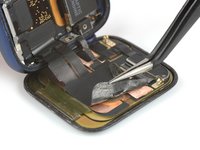
Use a pair of tweezers to carefully peel the black protective tape off both display connectors.
why do you have to remove the watch back from Face. You're going.to repace it. Isn;t there enough room to get the display positioned right upon re- assembly?
-
-
-
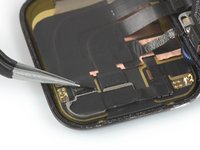
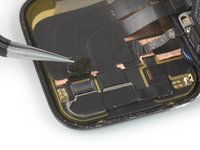
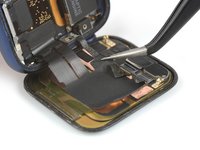
Use the pointed end of a spudger to pry up the lock bars on both ZIF connectors securing the display cables.
-
-
-
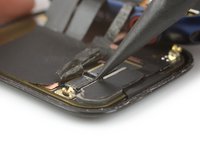
Use a pair of tweezers to carefully peel off the edges of the sticker which adheres the display and the grounding cable to the rear side of the screen.
An dieser Stelle muss ich aufgeben. Die Elemente sind sehr stark miteinander verklebt und das Erdungsband reisst sehr leicht.
-
-
-
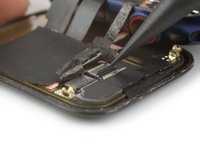
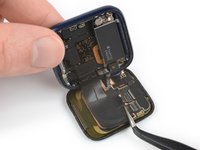
Use a pair of tweezers to pull both display cables out of the ZIF connectors.
This says nothing about the grounding cable..
Oh. Is that was that was. 👀 I knew I wasn't supposed to break this but the device turned on and functions properly. I'll keep an eye on things and see if my wrists sets on fire at some point. Thank you for pointing this out!
Paul B. -
I also have managed to break 👏
Nick -
I damaged the grounding foil/sticker when opening. It’s like tissue paper thin 😱 I was able to reconnect it in a hacky way but is there a replacement part for that available? That part didn’t come up with the rest of the display cable sticky assembly.
@paul is your watch still functioning properly?
-
-
-
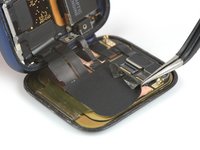
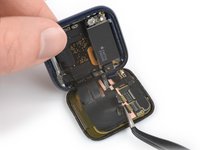
Separate the watch assembly and the screen.
Can we get the application process of the replacement adhesive added to this guide? I ended up messing up my adhesive (completely my fault) and have to buy another set. I thinking adding the guide into this one would be beneficial to the community. Thanks!
The bonding of the tesa tape seems poor. I think I did everything right, but the watch face rises up slightly off the case every day. This is with a new battery and new screen unit. Any tips?
Using standard off the roll Tesa tape won't do, you need the special die-cut tape which is a thinner version Apple Watch (40 mm Series 6) Screen Adhesive or Apple Watch (44 mm Series 6) Screen Adhesive
Dan -
-


To reassemble your Apple Watch Series 6 follow these instructions in reverse order to reattach the screen and the battery.
Apply a little bit of high isopropyl alcohol (>90%) to a Q-tip or use a cleaning pad to gently remove the leftover adhesive on the edges of the watch case and the screen before installing new adhesive.
Take your e-waste to an R2 or e-Stewards certified recycler.
Repair didn’t go as planned? Check out our Answers community for troubleshooting help.
crwdns2935221:0crwdne2935221:0
crwdns2935229:040crwdne2935229:0


crwdns2947412:020crwdne2947412:0
Can anyone tell me what that 3rd cable is (circled red in the pic linked below)? It’s linked to the metal back in the phone?
I think it is just a grounding wire.
Did you ever find out what that third wire is?
I want to know too, I break it while pulling the battery yesterday, but the watch seems working fine
Coco -
It’s a shield (grounding) line to control EMI noise
Dan -
Siete magnifici
Dommage qu’il n’y ai pas de lien d’une batterie à acheter ainsi qu’un lien pour trouver le joint d’étanchéité.
Hello, do we lose the Apple Pay functionality if we replace the screen?
No, i dont think so.
Burak -
Where to buy the replacement glass for series 6 Watch?
Hallo, bei öffnen habe ich versehentlich das Erdungskabel abgerissen. Läuft die Uhr auch ohne dieses Kabel?
Why would you leave out the steps for replacing or reattaching the screen? It’s not the same in reverse as you have to replace adhesive what’s the process or best practice? Do you reheat the adhesive before replacing screen?
Ich finde nirgendwo einen Ersatz Akku für die Apple Watch Series 6, 44mm, steht dieser zur Zeit nicht zur Verfügung oder passt der von der Series 5 ebenfalls, so das dieser nicht separat angeboten wird ?
Mil gracias por Tu generosidad al compartir Tu conocimiento con los demás.
Can just the top touch glass if lcd is fine?
Which Tesa 61395 Tape width should I buy for a 44mm watch?
Is there a way to just replace the glass, or do you have to replace the whole screen?
Not really, the crystal is glued to the panel with a special optical glue
Someone with the needed heater and vacuum chamber could but one has to have the skills as well. Remember we all can’t be brain surgeons!
Dan -
how separate the digitizer from the crack screen?
This is an assembly where the crystal and LED screen are glued together. If you damaged the crystal the you will need to replace the full assembly which has the panel attached.
Dan -