crwdns2915892:0crwdne2915892:0
Use this guide to replace a worn-out or dead battery in your Apple Watch Series 4.
This guide shows the procedure on the standard, GPS-only version of the watch, but the cellular/LTE version is similar.
For your safety, discharge your battery below 25% before disassembling your Apple Watch. This reduces the risk of a dangerous thermal event if the battery is accidentally damaged during the repair.
Note: If your battery is swollen, take appropriate precautions.
During the display opening procedure of the Apple Watch it is likely to damage the force touch gasket. If you separate the gasket layers or cut the cable, you'll also need to replace the Force Touch gasket itself.
You’ll need replacement adhesive to reattach components when reassembling the device.
crwdns2942213:0crwdne2942213:0
-
-
Before starting repairs, take your watch off the charger and power it down.
-
If your touchscreen is broken and prevents powering off the watch, use this alternate method to power it down.
-
-
crwdns2935267:0crwdne2935267:0Safety Glasses$3.19
-
Because the gap between the screen and watch body is so thin, a sharp blade is needed to separate the two. Read the following warnings carefully before proceeding.
-
-
-
Prepare an iOpener (or use a hair dryer or heat gun) and heat the face of the watch to loosen the display adhesive.
-
Leave the iOpener on the watch for at least two minutes to fully heat the screen and soften the adhesive holding it to the case.
-
-
-
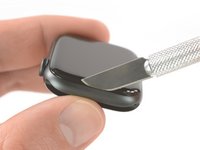
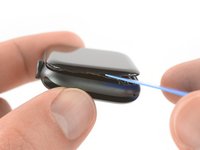
Place the edge of a curved blade into the thin gap between the display and the outer case. Start at the short side of the display, closest to the digital crown.
-
Press firmly straight down into the gap.
-
Once inserted, tilt the blade to pry the display open slightly.
This part is REALLY hard! Even after using the iOpener to warm the watch I had to use A LOT of force to get the blade in between the glass and the case. Be very careful when prying the display. I applied way too much force and my blade shot into the case under the display. I don’t think I damaged anything, but I did replace the force touch gasket to be sure.
I have a stainless steel case, not sure if that makes a difference, and was unable to do this without breaking the screen. Be very careful. Followed instructions but could not get the screen to release no matter how hot I got the watch.
I am moderately experienced at opening Apple devices having replaced batteries in several iPhones, iPods, and an iPad. I could not get the watch open with the x-acto knife blade as shown. I found other sites showed using a 0.1mm thick tool. I bought one and found it relatively easy to open the watch. It has the advantage of going in horizontal rather than vertical so it went between the glass and the force sense gasket. Force sense gasket wasn't disturbed at all. iFixit should add this type of tool to their offering.
-
-
-
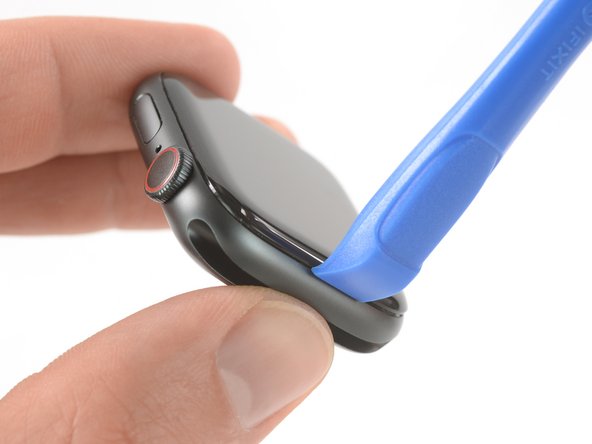
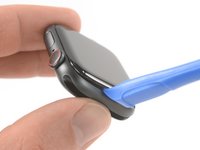
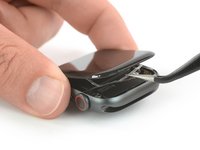
Once you've opened a small gap with the curved blade, remove the blade and insert the thinner edge of an opening tool into the gap.
-
Push the opening tool into the gap, using your thumb as a pivot to lift the display open a bit farther.
-
-
-
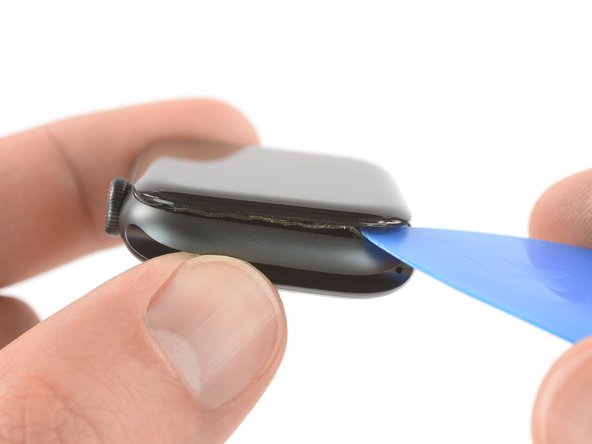
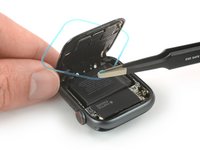
It's likely that the Force Touch sensor will stick to the display frame instead to the watch's body. In this case, insert an opening pick under the display and carefully separate the Force Touch gasket from the display.
-
Slide the pick around the display to separate the adhesive between the Force Touch gasket and the display.
This impossible for me. I just left the force touch gasket attached to the display side. I was able to bend the display back with the gasket still in place.
See first the instructions for replacing the force touch gasket to familiarize yourself with parts that need separating. These instructions will seem unclear if you don't know what the force touch gasket looks like.
Be very careful with this step. I accidentally tore the Force Touch gasket, and while trying to replace it, then tore the display flex cable, thereby ruining the watch.
-
-
crwdns2935267:0crwdne2935267:0Tweezers$4.99
-
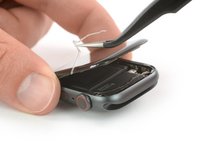
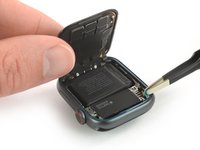
Open the display at max. to an 45° angle, and use tweezers to peel off the adhesive between the display and the Force Touch gasket.
-
Thread the adhesive around and behind the display cables to get it off completely. Since the adhesive needs to be replaced anyway, you can cut it if that makes removal easier for you.
Be careful to remove just the adhesive and not the force touch gasket itself!
-
-
-
-
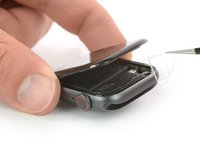
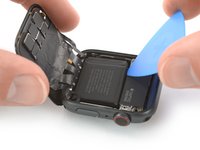
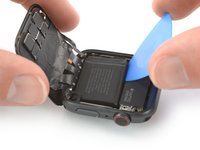
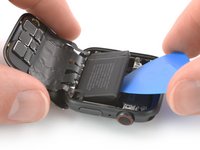
Carefully fold the screen to the back until you get enough space to pry out the battery.
-
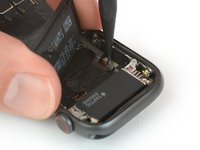
Insert an opening pick between the battery and the Taptic Engine.
If you are just replacing the screen then there is no need to remove battery.
When removing the screen I tore the two outer cables attached to the lcd screen. What are their purpose? I read somewhere they are just some sort of shield. Will my watch function normally without them?
thanks
-
-
-
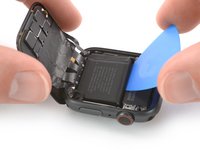
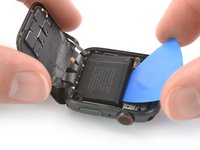
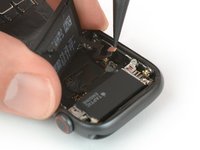
Slide the opening pick along the edge of the battery to loosen the adhesive.
-
Use constant, steady pressure to slowly pry the battery up, separating it from the adhesive securing it to the system board.
-
-
crwdns2935267:0crwdne2935267:0Tweezers$4.99
-
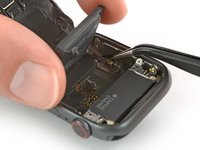
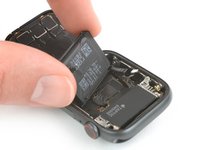
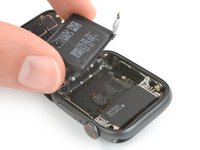
Carefully lift the battery and bring it in a 75° angle.
-
Use a pair of tweezers to peel the black sticker off the metal plate which covers the battery connector.
Nothing is said about replacing the black sticker over the connector. I set it aside and found its adhesive was good enough to stay in place and put it back on during reassembly.
-
-
-
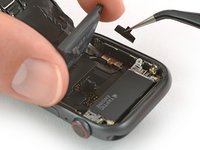
Remove the Y000 screw (1.2 mm length).
-
-
-
Use a pair of tweezers to remove the metal plate which covers the battery connector.
-
-
-
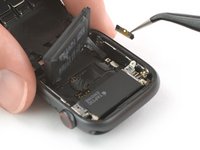
Use the pointed end of a spudger to pry up and disconnect the battery flex cable.
-
-
crwdns2935267:0crwdne2935267:0Tesa 61395 Tape$5.99
-
Remove the battery.
When installing the new battery be aware that the sidewall of the watch directly above the contacts and cover screw hole is magnetized. This was shock to me and a little frustrating. Every time I attempted to place the cover with a tweezers it was pulled toward the sidewall. I pushed the plate in place with a spudger, then attached the screw to the tip of the screwdriver. I was then able to insert the screw with minimal disturbance to cover plate.
-
-
crwdns2935267:0crwdne2935267:0Adhesive Cleanup Kit (Set of 12)$7.99
-
The following steps describe how to apply replacement adhesive in preparation for the resealing procedure.
-
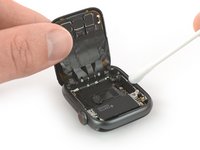
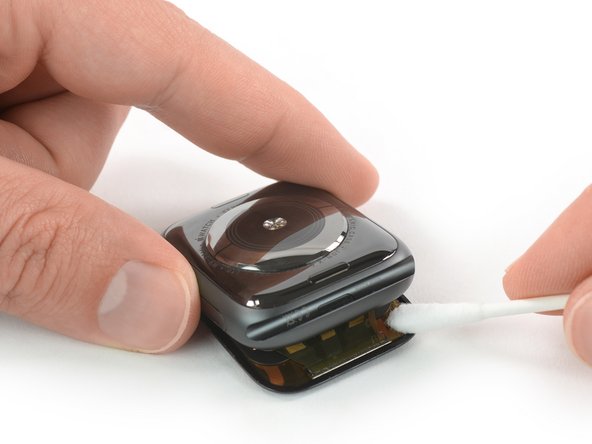
Apply a little bit of high isopropyl alcohol (>99%) to a Q-tip or use a cleaning pad to gently remove the leftover adhesive on top of the Force Touch gasket.
I also found a lot of gunt built up on the sidewall between where the glass and case connect. I used the tip of a spudger to scrape the dirt free, then followed with an 90% IPA (isopropyl alcohol) wetted cotton swab.
-
-
-
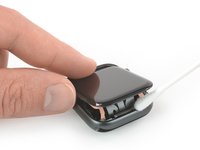
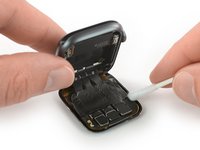
Flip the Apple Watch upside down so the display lays flat while lifting up the case.
-
Remove the leftover adhesive from the back of the display.
Und warum soll ich dann bei Amazon 70% Tigern kaufen?
Was genau meinst du?
-
-
crwdns2935267:0crwdne2935267:0Tweezers$4.99
-
Use a pair of tweezers to carefully remove the replacement adhesive with the blue protective film from the backing paper.
The step showing the new battery being installed is missing.
As stated 3 layers. Trick is to separate them correctly and at the right time. The greatest adhesion is to the blue top layer. If done as shown the most difficult task of separating the blue film will be done at the worst time, on the watch. It is better to do the hard part first, separate the blue from the adhesive. So leave the adhesive on the paper backing in the picture above. Then remove the inner part as 3 layers together leaving you with the paper backed adhesive.
This step should state that if you are replacing the force touch gasket, then you can skip steps 17, 18, and 19. The force touch gasket comes with adhesive already applied.
The gasket is black and won't look translucent blue as shown in the picture. The die cut is poor and I destroyed the first gasket I tried and bought a 2nd one. Carefully complete the die cut with an x-acto knife or equivalent before separating the gasket from the sheet. I don't think it is more difficult to remove the blue film than the paper film backing as suggested by another comment. You definitely need to leave one protective layer on until the gasket is positioned. The exposed adhesive grabs everything and it takes patients to get it positioned.
-
-
-
Hold the replacement adhesive diagonally to thread it over the display.
-
Slightly tilt the display forward so you can align the adhesive with the frame.
-
Position the replacement adhesive on top of the Force Touch gasket.
You're missing the step that says "INSERT THE NEW BATTERY."
See my comments previous step. Instead of blue it should look like the brown paper side with the adhesive down. Now press into the cavity in the watch frame. The paper and cavity will make location easy. You shouldn't have to adjust much. Press the face down on top to squish the adhesive into place. It won't stick because the paper is still on. Open and check placement. Now remove the paper
See my comments previous step. Instead of blue it should look like the brown paper side with the adhesive down. Now press into the cavity in the watch frame. The paper and cavity will make location easy. You shouldn't have to adjust much. Press the face down on top to squish the adhesive into place. It won't stick because the paper is still on. Open and check placement. Now remove the paper
-
-
-
Use the pointed end of a spudger to make final position adjustments and press the adhesive into place.
-


To reassemble your Apple Watch Series 4 follow these instructions in reverse order to reattach the battery.
For optimal performance, calibrate your newly installed battery: Charge it to 100% and keep charging it for at least 2 more hours. Then use your device until it shuts off due to low battery. Finally, charge it uninterrupted to 100%.
Take your e-waste to an R2 or e-Stewards certified recycler.
Repair didn’t go as planned? Check out our Answers community for troubleshooting help.
crwdns2935221:0crwdne2935221:0
crwdns2935229:042crwdne2935229:0


crwdns2947412:05crwdne2947412:0
Is the adhesive waterproof?
Hi laws,
iFixit makes no claims to the continued splash-resistance of the Apple Watch after applying this adhesive strip. It's probably going to be just fine, but we can't confirm that the Apple Watch will maintain its IPX7 waterproof rating after being repaired.
Ich habe jetzt 2 Uhren durch - besten Dank für die Hilfestellung. Ich habe mir die “Dichtungs-Klebestreifen” besorgt, waren für mich aber nicht praktikabel. Bei beiden Uhren hat sich die Force-Touch-Dichtung teilweise gelöst und der Klebestreifen hat zwar auf der FT-Dichtung gehalten, aber das Display kam wieder hoch, da der die FT-Dichtung eben nicht mehr am Gehäuse geklebt hat.
Ich habe mir eine Tube Smartphone-Dichtmasse besorgt, damit konnte ich die FT-Dichtung wieder befestigen und habe damit auch das Glas wieder optimal einkleben können. Da sich sich die Masse (wie die Klebestreifen auch) bei Hitze wieder entfernen lässt: für mich die praktikablere Lösung. Auch nicht ganz so frickelig…
Wie heißt der Kleber? T-7000?
Why is the replacement battery slightly larger than the original? 10 hours of pressure applied after reattaching the display and heating it, but as soon as it's put on a charger, the replacement battery swells up a bit and pushes the display up
Hi. I changed the screen on an apple watch series 4, now the screen works, whcih is great, but when I charge it, the green snake comes on but never charges. It heats up the bottom, gets very warm. Could it be the battery itself? Maybe needs a new one? Is rthere anything else that woudl be causing the battery to not charge and or heat up on the bottom when chaging the screen?
Derrick Brewer - crwdns2934203:0crwdne2934203:0