crwdns2933423:0crwdne2933423:0

Anker Soundcore Space One Microphone Replacement

crwdns2942213:0crwdne2942213:0

  1. Anker Soundcore Space One Microphone Replacement, Ear Pads: crwdns2935265:01crwdnd2935265:01crwdnd2935265:01crwdne2935265:0
    • Flip over the device so the ear pads face up.

    • This replacement guide will only cover one of the ear pads. The same exact steps apply to both.

  2. Anker Soundcore Space One Microphone Replacement: crwdns2935265:02crwdnd2935265:01crwdnd2935265:02crwdne2935265:0 Anker Soundcore Space One Microphone Replacement: crwdns2935265:02crwdnd2935265:02crwdnd2935265:02crwdne2935265:0
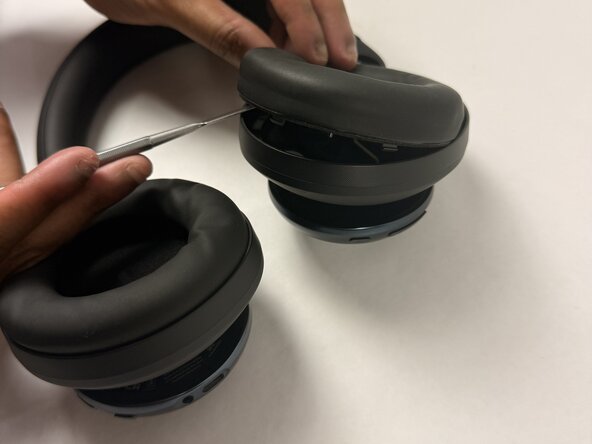
    • Insert a spudger (plastic or metal) between the ear pad and the driver housing (the driver housing is the outside plastic part of ear cup).

    • Using a metal spudger (like the one pictured) can cut you if not used correctly. Please be mindful of where you insert it if you choose to use one.

    • Pry around the ear pad in a circular path until it fully releases.

  3. Anker Soundcore Space One Microphone Replacement: crwdns2935265:03crwdnd2935265:01crwdnd2935265:01crwdne2935265:0
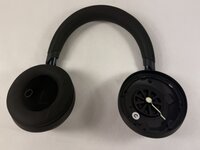
    • Remove the ear pad from the driver housing.

    • The gray foam component shown is an additional protective component of the ear pad. You can remove it with your hands if needed, without any tools.

  4. Anker Soundcore Space One Microphone Replacement, Driver: crwdns2935265:04crwdnd2935265:01crwdnd2935265:02crwdne2935265:0 Anker Soundcore Space One Microphone Replacement, Driver: crwdns2935265:04crwdnd2935265:02crwdnd2935265:02crwdne2935265:0
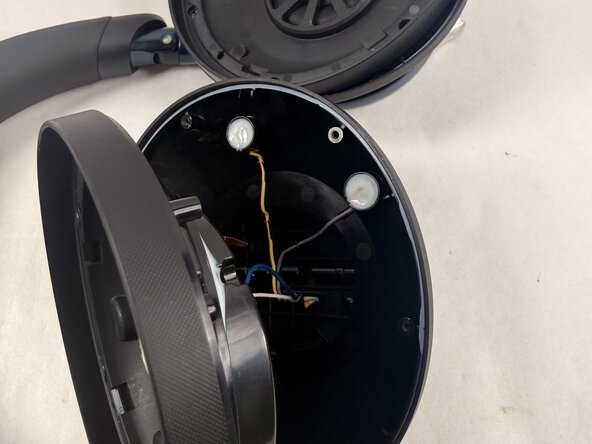
    • Position the inside of the driver housing facing up (without the ear pad).

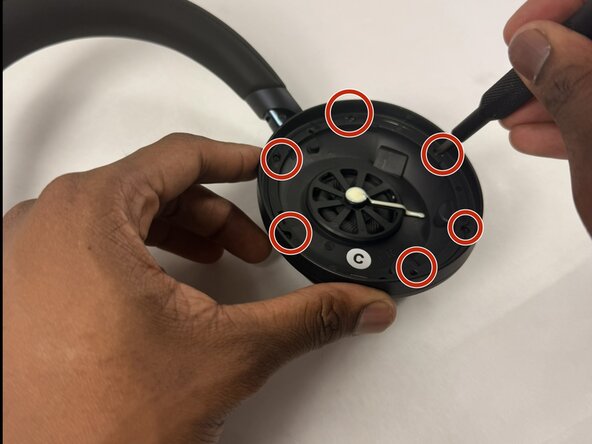
    • Find the six 6.1 mm Philips #00 screws inside the ear cup's driver housing.

    • These six 6.1 mm Philips #00 screws are circled in red in the image of the ear cup's driver housing.

    • Unscrew the six 6.1 mm Phillips #00 screws from the driver housing.

  5. Anker Soundcore Space One Microphone Replacement: crwdns2935265:05crwdnd2935265:01crwdnd2935265:02crwdne2935265:0 Anker Soundcore Space One Microphone Replacement: crwdns2935265:05crwdnd2935265:02crwdnd2935265:02crwdne2935265:0
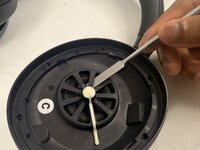
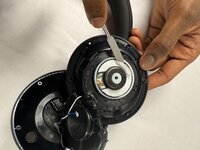
    • Pry around the interior plate of driver housing with a spudger.

    • Lift out the interior plate of the driver housing with a spudger carefully to fully remove.

    • This component has wires still connected to it, so don't be too aggressive when popping this component off.

  6. Anker Soundcore Space One Microphone Replacement: crwdns2935265:06crwdnd2935265:01crwdnd2935265:02crwdne2935265:0 Anker Soundcore Space One Microphone Replacement: crwdns2935265:06crwdnd2935265:02crwdnd2935265:02crwdne2935265:0
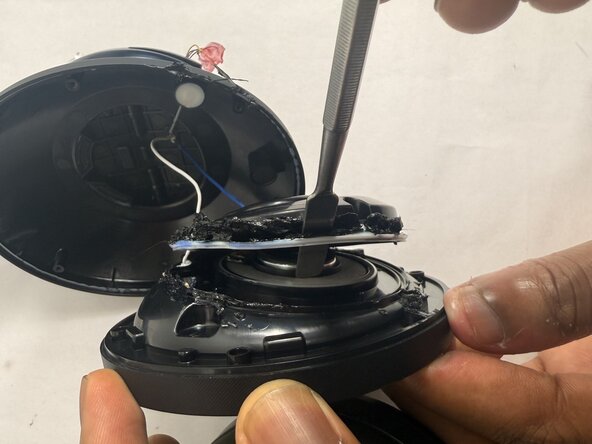
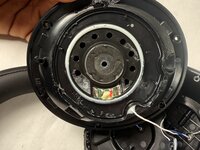
    • Flip the popped-off plate component away from the ear cup.

    • Use soldering iron in a circular path along with the seam of the glue (white lining) to separate the two components that are glued together.

    • The soldering iron is extremely hot and could burn the user in used incorrectly. Please proceed with caution.

    • Pop of this component once it has detached from the glue (a spudger may be needed for this).

  7. Anker Soundcore Space One Microphone Replacement: crwdns2935265:07crwdnd2935265:01crwdnd2935265:02crwdne2935265:0 Anker Soundcore Space One Microphone Replacement: crwdns2935265:07crwdnd2935265:02crwdnd2935265:02crwdne2935265:0
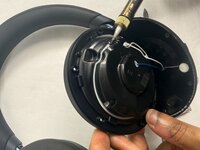
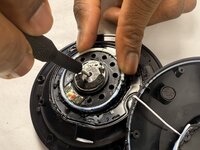
    • Pry the white adhesive layer around the driver component off with a spudger.

    • The actual driver is the metal disc in the center. The entire driver component includes everything inside the white lining (pictured in the second image).

  8. Anker Soundcore Space One Microphone Replacement: crwdns2935265:08crwdnd2935265:01crwdnd2935265:02crwdne2935265:0 Anker Soundcore Space One Microphone Replacement: crwdns2935265:08crwdnd2935265:02crwdnd2935265:02crwdne2935265:0
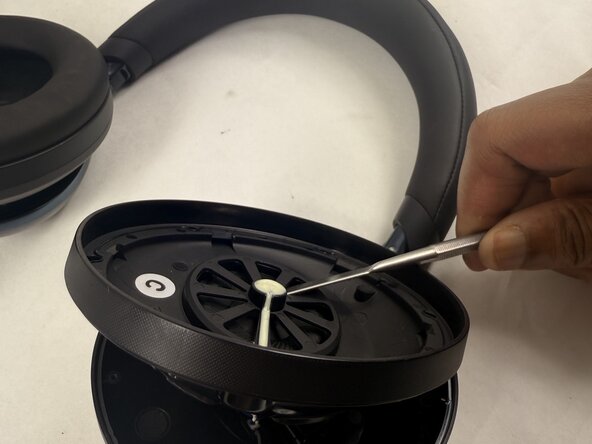
    • Insert a Phillips #00 screwdriver into the hole in the metal center of the actual driver.

    • Pop off the driver component.

    • You will have to replace the entire driver component pictured, since there's no given way to retrieve the actual driver. If you attempted to replace just the actual driver, it could risk damaging interior components.

  9. Anker Soundcore Space One Microphone Replacement, Microphone: crwdns2935265:09crwdnd2935265:01crwdnd2935265:01crwdne2935265:0
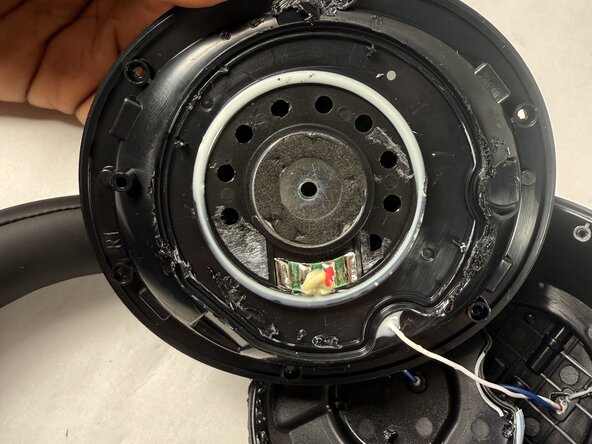
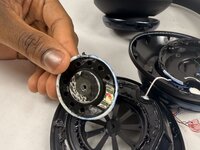
    • Locate the microphones by looking in the outside bowl area fit with wires and white spots.

    • This guide covers the microphones in the left ear cup. There's one other microphone in the right ear cup.

  10. Anker Soundcore Space One Microphone Replacement: crwdns2935265:010crwdnd2935265:01crwdnd2935265:01crwdne2935265:0
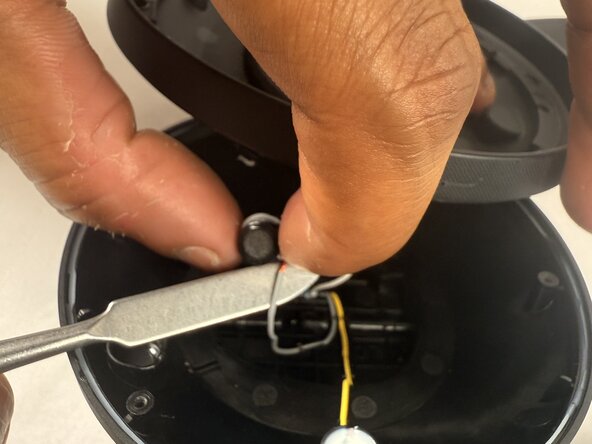
    • Remove the microphones from underneath the white coverings with a spudger.

  11. Anker Soundcore Space One Microphone Replacement: crwdns2935265:011crwdnd2935265:01crwdnd2935265:01crwdne2935265:0
    • Pop out the microphones from underneath their white coverings.

    • The same process is done to the other two microphones

crwdns2915888:0crwdne2915888:0

To reassemble your device, follow the above steps in reverse order.
Take your e-waste to an R2 or e-Stewards certified recycler.
Repair didn’t go as planned? Try some basic troubleshooting or ask our Answers community for help.

Malcolm Hewlett

crwdns2935283:003/21/25crwdne2935283:0

433 crwdns2915208:0crwdne2915208:0

crwdns2935297:04crwdne2935297:0

crwdns2915084:0crwdne2915084:0

UMass Dartmouth, Team 2-3, Botvin Spring 2025 crwdns2935289:0UMass Dartmouth, Team 2-3, Botvin Spring 2025crwdne2935289:0

UMASSD-BOTVIN-S25S2G3

crwdns2931471:03crwdne2931471:0

crwdns2935297:04crwdne2935297:0

crwdns2947412:00crwdne2947412:0

crwdns2917038:0crwdne2917038:0

crwdns2936625:0crwdne2936625:0:

crwdns2936751:024crwdne2936751:0 0

crwdns2936753:07crwdne2936753:0 10

crwdns2936753:030crwdne2936753:0 64

crwdns2942667:0crwdne2942667:0 254