crwdns2933423:0crwdne2933423:0

2.2 GHz (Turbo Boost up to 3.4 GHz), 2.5 GHz (Turbo Boost up to 3.7 GHz), or 2.8 GHz (Turbo Boost up to 4.0 GHz) quad-core Intel Core i7 processor with 6 MB shared L3 cache.

crwdns2934591:0773crwdne2934591:0 crwdns2934593:0crwdne2934593:0

Is there a guide for replacing keyboard backlight?

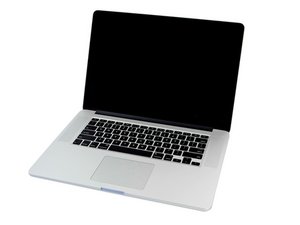
In my battery replacement I severed the backlight cable. I’ve purchased a new backlight but want to know if replacing it requires even further tearing up of my laptop like I’ve already done ? The MacBook currently sits at the stage where I’ve just removed the dead battery - ie, in pieces - and want to know if it’s worth putting it back together now or if I’ll have to tear the whole thing to it’s skeleton later?

Block Image

crwdns2934081:0crwdne2934081:0 crwdns2934083:0crwdne2934083:0 crwdns2934093:0crwdne2934093:0

crwdns2934109:0crwdne2934109:0

crwdns2889612:0crwdne2889612:0 0
crwdns2934285:0crwdne2934285:0

crwdns2933315:02crwdne2933315:0

crwdns2934051:0crwdne2934051:0

While we don't have a discreet guide to replace the backlight assembly the needed steps to replace the keyboard is the same. But before you dig into your system are you sure you need to replace it? I would make sure the power is present on the logic board.

I find liquid damage also takes out the keyboard besides the backlight, it just takes a bit longer.

You'll need to follow this guide to get to the keyboard MacBook Pro 15" Retina Display Mid 2015 Upper Case Assembly Replacement

Now it's just a question on just replacing the backlight or also replacing the keyboard as well. The backlight is glued to the uppercase so once you get things out of the way you can carefully lift it off. If you only have one section out you might only need to replace the tiny LED and put it back. Apple never offered the back light as a replaceable part so all you'll find is used ones which is getting hard for this series as even today people are holding onto this great system! I have two and I'm not likely to part with either for a few more years!

If you think you also need to replace the keyboard its a bit a chore! You'll find a massive collection of screws and plastic rivets holding the keyboard assembly into the upper case. You'll need to replace the rivets with screws as well as removing any stuck within the holes. It takes a fair amount of labor and patience MacBook Pro 15" Retina (Mid 2012-Mid 2015) Keyboard. The other options is just replace the uppercase unit which I find is much faster but more costly MacBook Pro 15" Retina (Mid 2015) Upper Case Assembly

crwdns2886500:0MacBook Pro 15" Retina (Mid 2015) Upper Case Assemblycrwdne2886500:0

crwdns2934075:0crwdne2934075:0

MacBook Pro 15" Retina (Mid 2015) Upper Case Assembly

$299.99

crwdns2886500:0MacBook Pro 15" Retina (Mid 2012-Mid 2015) Keyboardcrwdne2886500:0

crwdns2934075:0crwdne2934075:0

MacBook Pro 15" Retina (Mid 2012-Mid 2015) Keyboard

$19.99

crwdns2934105:0crwdne2934105:0

crwdns2889612:0crwdne2889612:0 2

crwdns2944067:03crwdne2944067:0:

Ended up ordering in a backlight and following the guide and a few youtube videos. Now I just have to figure out what to do with a broken connector on the Airport/Antenna cable.

crwdns2934271:0crwdnd2934271:0crwdne2934271:0

@stujumpsrope - Post a few pics so we can see what you're dealing with. Adding images to an existing question

crwdns2934271:0crwdnd2934271:0crwdne2934271:0

@danj - I've added an image to the question so you can see how far I've got. Very carefully got a new piece of tinned wire into the tiny connector and soldered it to the smallest Airport/Antenna end . I'm not expecting it to work so Im' thinking about buying a new cable before I break the card itself.

crwdns2934271:0crwdnd2934271:0crwdne2934271:0

crwdns2934285:0crwdne2934285:0
crwdns2934057:0crwdne2934057:0

Hi

As far as I can see there isn’t a guide sadly;(

But YouTube has lots (if there aren’t any for your device specifically it’s quite easily to follow along with another one as it’s a similar process across a lot of them)

All you really have to do is get a thin plastic pry tool and pry up around the edge of the keyboard backlight(the thing black paper like film) and then remove and then put your new one in

It’s quite easy but if you need any help with it just ask

Hopefully this helps

Thanks:-)

crwdns2934105:0crwdne2934105:0

crwdns2889612:0crwdne2889612:0 2
crwdns2934285:0crwdne2934285:0

crwdns2934229:0crwdne2934229:0

Stuart Liddell crwdns2934231:0crwdne2934231:0
crwdns2936625:0crwdne2936625:0:

crwdns2936751:024crwdne2936751:0 0

crwdns2936753:07crwdne2936753:0 6

crwdns2936753:030crwdne2936753:0 37

crwdns2942667:0crwdne2942667:0 241