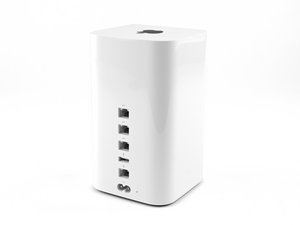
This is a summary describing an attempt at upgrading the HDD in a Time Capsule A1470 from 2TB to 6TB - just in case it proves useful to someone else attempting the same task, or contemplating it. There may well be better approaches - but here goes:
The base is held in place by twelve plastic retention lugs evenly spaced around the inside perimeter.
I slide a thin strong spudger between the base and the body (not too far in) to gently prise the edge of the base up, while trying not to mark or dent the soft plastic. There are cables in "too close for comfort" proximity to the lugs at the front and back of the unit - so starting at the left or right side seems a safer bet. The white plastic casing flexes alarmingly, causing cowardly postponement until the following day…
With one spudger in, I introduce a second into the gap to reduce 'single-point' stress and help things along. Once one side is unclipped, things get a touch easier - working gradually around the perimeter gently levering with the spudger until the base eventually pops off with a sound like a warranty vaporising.
The last clip doesn't want to let go, and you can see I've damaged one black plastic loop slightly.
We're in. Mop sweat from brow and take a short break.
A top metal plate, power cable, and three delicate looking cables guard the entrance to the cave hard drive bay. The power cable with socket attached lifts away easily. Removing four T8 Torx screws releases the plate. I initially try a T8 L-key, which fits, but is unable gain a good purchase on the screws. Repeated attempts result in rounding both the L-key and one of the screws - so off to B&Q to find a proper T8 screwdriver. The smallest B&Q offers is a T15, no good, but Maplins on the same site comes to the rescue with a 5 year guarantee precision set for £6.99. (There's a more budget conscious set too, but minus the security dimple, which I wasn't sure whether I needed or not).
The T8 screwdriver makes short work of extracting the screws - yay! Now to disconnect the thin delicate cables from the PCB. I've made it this far, how hard can it be? The largest cable comes away without too much trouble, by sliding it gently in a same plane as the PCB - but the really small fragile connectors are a different story. After scrabbling around with a plastic spudger, torch and camera for half an hour or so getting nowhere, I head online in search of advice. A helpful forum comment indicates that the two smaller connectors do not disconnect like the first - despite appearances, they move "almost perpendicular" to the PCB (Thank You Feanor! | Detailed Removal 2TB HD Plus Install 4TB HD + Formating). Armed with this vital clue and refreshed by a night with a howling 7-week old baby daughter, I prop my eyes open with matchsticks for another attempt.
Placing a small plastic spudger at the top of the two connectors, behind the wires and, cringing slightly, I pull gently forwards - click, off pops each connector, all wires still attached. Phew! I also pull off the remaining LED connector in the same way, which is not necessary at all - but that's sleep deprivation for you.
A rubber pad lifts grudgingly to reveal the hard drive beneath. Still can't extract it though - there's the drive SATA and power connector to ease off first. The SATA connector has a couple of lugs at either end - ease each up gently with the corner of a plastic spudger and move the connector clear of the drive.
Pull the drive out - fairly tight fit. At the bottom of the hole are two rubber segments where the drive is usually seated. Unfortunately these are custom shaped to match the original hard drive shape exactly - and won't seat the new replacement drive going in which has a chunkier profile. So these have to come out for trimming, and then placed back inside which is all quite fiddly but doable using a long thin wooden implement of some sort swiped from the kitchen drawer while my better half is distracted and isn't looking.
Sliding the new drive into place I then reattach the drive SATA/Power connector. The top rubber pad also requires trimming bits off to accommodate the 6TB replacement drive.
The delicate cable connectors are reconnected to the PCB by offering them into place then gently pressing them back onto their respective connections with the aforementioned wooden thing from the kitchen. The larger of the three connectors slides back into its socket without trouble.
Finally the power cable and socket is offered back into its holder on the inside of the case - and it's time to test...
Detailed Removal 2TB HD Plus Install 4TB HD + Formating
AirPort Time Capsule A1470 (Mini!) Teardown
AirPort Extreme A1521 Teardown


crwdns2944067:02crwdne2944067:0
You might find these IFIXIT guides helpful: AirPort Extreme A1521
crwdns2934271:0crwdnd2934271:0 Dan crwdne2934271:0
Thanks Dan - Yes, those guides are helpful. I've now successfully replaced the HDD with a 6TB drive. I took some photos at the time, so will try to post a summary here in case it proves useful to someone else.
crwdns2934271:0crwdnd2934271:0 Cascade crwdne2934271:0