crwdns2862678:0crwdne2862678:0
crwdns2895503:0crwdne2895503:0
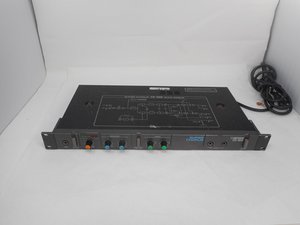
Is your Boss CE-300 Super Chorus powering on and is properly connected to input and output signals, but no audio is produced? Use this troubleshooting guide to help diagnose why.
Power Switch Not Responding
Ensure the device is getting power. The power button makes a distinct sound when switching on and has a detent – the switch should remain closer to the face of the device when in the ON position. The LED above the power button should light up. If it does not, try moving to a different outlet. If the device is moved to a new outlet that has confirmed power running to it, there may be an issue with the power supply.
Sound Settings Wrong on Device
Once the power is on, there are multiple settings you can adjust to output sound. Ensure that the LEDs above the “Input Level” are on; adjust the levels as needed. If this does not help, double check that the “Direct Mute” is not on. This button is used when running in-line with a mixer and input signal is not desired.
If the previous does not resolve the issue, check the input on both the front and back of the device. If two devices are plugged in, the input on the front of the device takes priority. Try removing the second device and test input for both terminals. If one works, and the other does not, you may need to replace it. You may use the guide here for instructions.
Input or Output Cables Not Supplying Proper Signal
Test your cables and ensure that they are in good condition. If they are damaged or kinked, it can impact the signal coming in or out of the device. Try replacing damaged cables to see if there is any improvement. Check the input device as well – trying a different input device can ensure the error is within the CE-300, and not the input device.
There may also be damage to the input and output terminals. Visually check the condition. Using cotton swabs and isopropyl alcohol, clean the terminals of any debris or corrosion. If the terminals are rusted and or cannot be cleaned, they may need to be replaced. You can follow the replacement guide here.
crwdns2935287:0crwdne2935287:0

University of Memphis, Team 1-2, Sneed Fall 2024 crwdns2935289:0University of Memphis, Team 1-2, Sneed Fall 2024crwdne2935289:0
UM-SNEED-F24S1G2
crwdns2931471:04crwdne2931471:0
crwdns2935297:017crwdne2935297:0
crwdns2944067:00crwdne2944067:0