crwdns2933423:0crwdne2933423:0

Remplacement du nouveau câble ruban Microtek ScanMaker 5900

crwdns2935425:01crwdne2935425:0

crwdns2936315:0crwdne2936315:0
crwdns2936317:0crwdne2936317:0
crwdns2931653:01crwdne2931653:0
Microtek ScanMaker 5900 New Ribbon Cable Replacement, Remove outer plastic housing: crwdns2935265:00crwdnd2935265:01crwdnd2935265:03crwdne2935265:0 Microtek ScanMaker 5900 New Ribbon Cable Replacement, Remove outer plastic housing: crwdns2935265:00crwdnd2935265:02crwdnd2935265:03crwdne2935265:0 Microtek ScanMaker 5900 New Ribbon Cable Replacement, Remove outer plastic housing: crwdns2935265:00crwdnd2935265:03crwdnd2935265:03crwdne2935265:0
Remove outer plastic housing
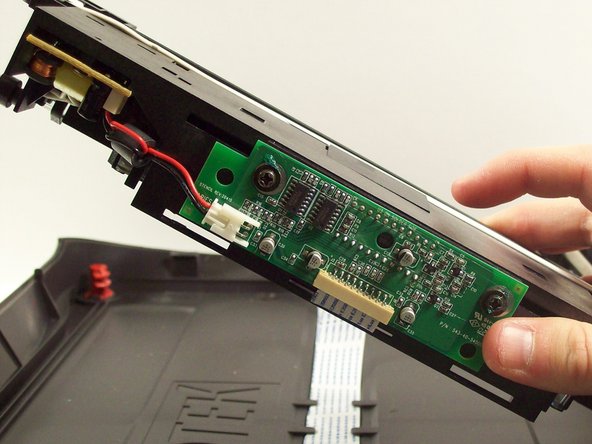
  • Lift up the central plastic housing inside the scanner.

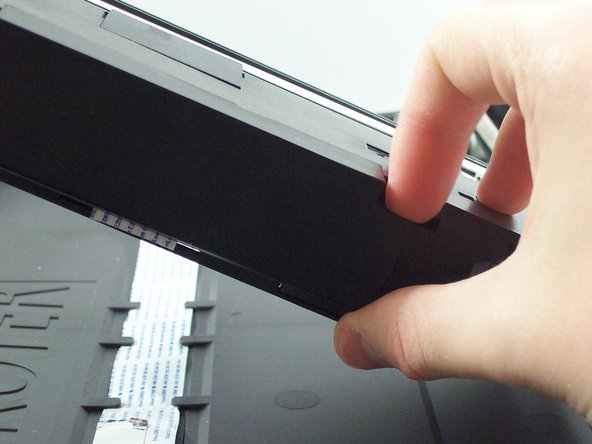
  • There are four plastic tabs located on the outer plastic housing. Push on each of these and pull to remove it.

  • Underneath you will see that the ribbon cable is attached to the circuit board.

Soulevez le boîtier central en plastique à l'intérieur du scanner.

Il y a quatre languettes en plastique situées sur le boîtier en plastique extérieur. Appuyez sur chacun d'eux et tirez pour le retirer.

En dessous, vous verrez que le câble ruban est attaché à la carte de circuit imprimé.

crwdns2944171:0crwdnd2944171:0crwdnd2944171:0crwdnd2944171:0crwdne2944171:0