crwdns2933423:0crwdne2933423:0

Remplacement de la carte mère Linksys WAP 11

crwdns2931527:0crwdnd2931527:0crwdnd2931527:0crwdnd2931527:0crwdne2931527:0

crwdns2935425:01crwdne2935425:0

crwdns2936315:0crwdne2936315:0
crwdns2936317:0crwdne2936317:0
crwdns2931653:01crwdne2931653:0
Linksys WAP 11 Motherboard Replacement: crwdns2935265:00crwdnd2935265:01crwdnd2935265:02crwdne2935265:0 Linksys WAP 11 Motherboard Replacement: crwdns2935265:00crwdnd2935265:02crwdnd2935265:02crwdne2935265:0
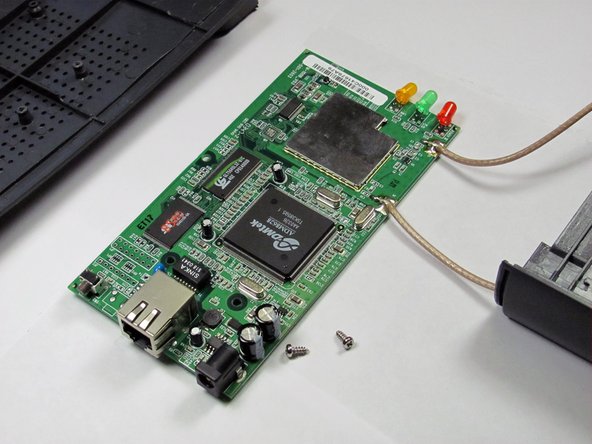
  • At this point, you may want to remove the antenna leads as well.

  • Once the antennas have been removed, proceed to remove the remaining three phillips screws fastening the motherboard to the case.

  • Once the screws are removed, your motherboard will separate from the housing.

  • Keep these three screws together and separate from the outer case screws.

À ce stade, vous voudrez peut-être également retirer les fils d'antenne.

Une fois les antennes retirées, retirez les trois vis cruciformes restantes fixant la carte mère au boîtier.

Une fois les vis retirées, votre carte mère se séparera du boîtier.

Gardez ces trois vis ensemble et séparées des vis du boîtier extérieur.

crwdns2944171:0crwdnd2944171:0crwdnd2944171:0crwdnd2944171:0crwdne2944171:0