crwdns2933423:0crwdne2933423:0

Remplacement de l'écran du Gateway LT4004u

crwdns2936315:0crwdne2936315:0
crwdns2936317:0crwdne2936317:0
crwdns2931653:04crwdne2931653:0
Gateway LT4004u Screen Replacement: crwdns2935265:00crwdnd2935265:01crwdnd2935265:03crwdne2935265:0 Gateway LT4004u Screen Replacement: crwdns2935265:00crwdnd2935265:02crwdnd2935265:03crwdne2935265:0 Gateway LT4004u Screen Replacement: crwdns2935265:00crwdnd2935265:03crwdnd2935265:03crwdne2935265:0
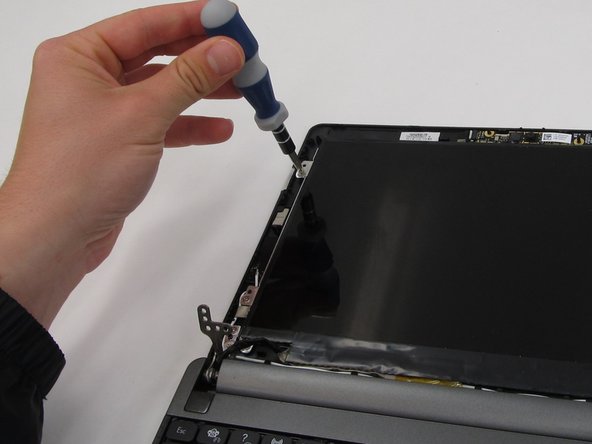
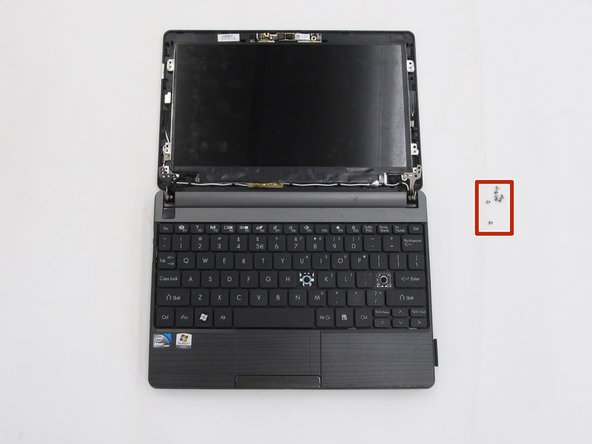
  • Once the screen casing is removed, unscrew the 8 screws surrounding the screen and remove them from the laptop. All 8 screws should measure 4.0mm long.

  • There is a single screw in each red indicator and two screws in each orange indicator, totaling to the eight screws.

Une fois le cadre de l’écran retiré, dévissez les 8 vis tout autour de l’écran et retirez-les de l’ordinateur portable. Les 8 vis doivent mesurer 4,0 mm de long.

Il y a une unique vis dans chaque cercle indiqué en rouge et deux vis pour chaque cercle en orange, ce qui fait un total de 8 vis.

crwdns2944171:0crwdnd2944171:0crwdnd2944171:0crwdnd2944171:0crwdne2944171:0