crwdns2933423:0crwdne2933423:0

Remplacement du panneau Lcd du Panasonic PV-GS9

crwdns2931529:0crwdnd2931529:0crwdnd2931529:0crwdnd2931529:04crwdnd2931529:0crwdne2931529:0

crwdns2935425:03crwdne2935425:0

crwdns2936315:0crwdne2936315:0
crwdns2936317:0crwdne2936317:0
crwdns2931653:03crwdne2931653:0
Panasonic PV-GS9 LCD panel replacement: crwdns2935265:00crwdnd2935265:01crwdnd2935265:03crwdne2935265:0 Panasonic PV-GS9 LCD panel replacement: crwdns2935265:00crwdnd2935265:02crwdnd2935265:03crwdne2935265:0 Panasonic PV-GS9 LCD panel replacement: crwdns2935265:00crwdnd2935265:03crwdnd2935265:03crwdne2935265:0
  • Before removing the LCD panel from the camcorder, disconnect all the ribbon cables joining the LCD panel to the logic board.

  • There may be multiple ribbon cables attached to the same point on the logic board.

Avant de retirer le panneau LCD du caméscope, déconnectez les câbles plats reliant le panneau LCD à la carte mère.

Il se peut que plusieurs câbles plats soient connectés au même point sur la carte mère.

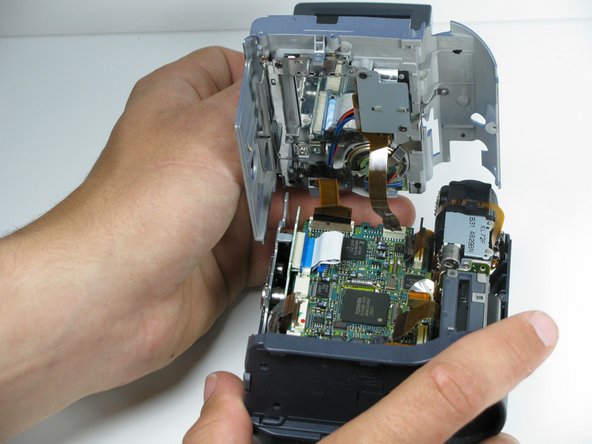
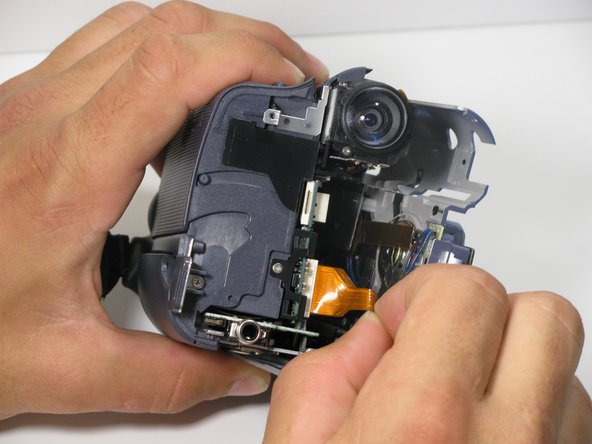
-[* icon_caution] Before removing the LCD panel from the camcorder, disconnect the ribbon cables joining the LCD panel to the logic board.
- [* black] There may be multiple ribbon cables attached to the same point on the logic board.
+[* icon_caution] Before removing the LCD panel from the camcorder, disconnect all the ribbon cables joining the LCD panel to the logic board.
+ [* icon_note] There may be multiple ribbon cables attached to the same point on the logic board.

crwdns2944171:0crwdnd2944171:0crwdnd2944171:0crwdnd2944171:0crwdne2944171:0