crwdns2933423:0crwdne2933423:0

Mercedes W123 Türfüllung ausbauen

crwdns2931527:0crwdnd2931527:0crwdnd2931527:0crwdnd2931527:0crwdne2931527:0

crwdns2936315:0crwdne2936315:0
crwdns2936319:0crwdne2936319:0
crwdns2931653:012crwdne2931653:0
Disassembling Mercedes W123 Door Panel: crwdns2935265:00crwdnd2935265:01crwdnd2935265:03crwdne2935265:0 Disassembling Mercedes W123 Door Panel: crwdns2935265:00crwdnd2935265:02crwdnd2935265:03crwdne2935265:0 Disassembling Mercedes W123 Door Panel: crwdns2935265:00crwdnd2935265:03crwdnd2935265:03crwdne2935265:0
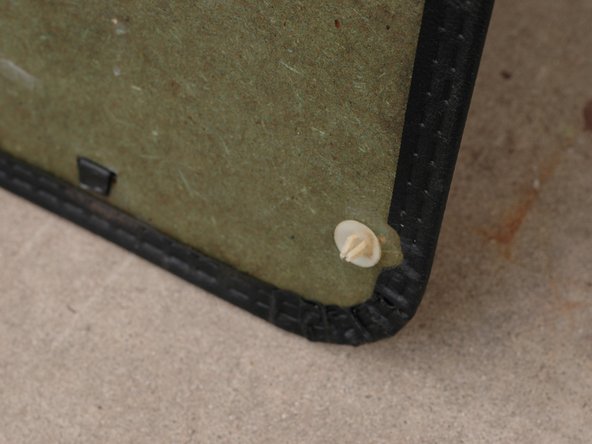
  • Pictured is the back of your door panel once removed. Notice the white plastic clips around the edge. Notice that many are missing. There should be several more on this door. Also, notice that some are broken.

  • Once the panel is removed, there should be a plastic vapor barrier between the panel and the door shell. This will need to be removed. If removed gently, it may be able to be reused. Otherwise, replace it with any thick plastic and 3M Spray Adhesive or contact cement. (Not pictured)

Im Bild ist eine ausgebaute hintere Türfüllung gezeigt. Beachte die weißen Plastikklammern am Rand. Es fehlen einige, es sollten mehr sein. Beachte auch, dass einige kaputt sind.

Wenn die Türfüllung entfernt ist, sollte eine Dampfsperre aus Plastik zwischen Tür und Füllung zum Vorschein kommen. Diese muss entfernt werden. Wenn du sie vorsichtig ausbaust, kannst du sie wieder verwenden. Anderenfalls ersetze sie durch eine dicke Plastikfolie und klebe diese mit Sprüh- oder Kontaktkleber fest (nicht gezeigt).

crwdns2944171:0crwdnd2944171:0crwdnd2944171:0crwdnd2944171:0crwdne2944171:0