crwdns2933423:0crwdne2933423:0

Whip Stitch on a Patch

crwdns2936315:0crwdne2936315:0
crwdns2936311:0crwdne2936311:0
crwdns2931653:06crwdne2931653:0
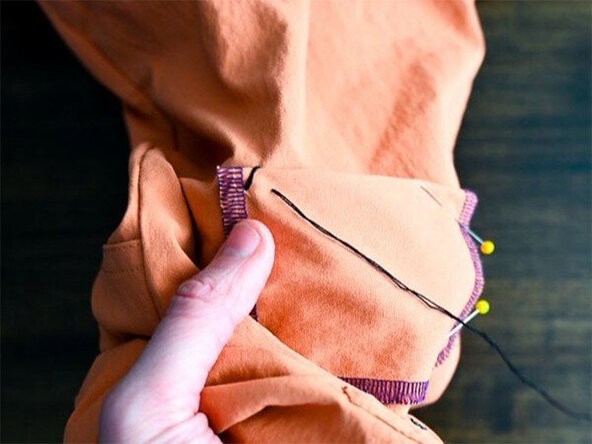
Whip Stitch on a Patch, Start the stitch: crwdns2935265:00crwdnd2935265:01crwdnd2935265:03crwdne2935265:0 Whip Stitch on a Patch, Start the stitch: crwdns2935265:00crwdnd2935265:02crwdnd2935265:03crwdne2935265:0 Whip Stitch on a Patch, Start the stitch: crwdns2935265:00crwdnd2935265:03crwdnd2935265:03crwdne2935265:0
Start the stitch
  • Insert the needle into the back of the patch, about 1/4 inch (~6 mm) in from the edge. Pull through so the thread knot is flush against the back of the patch.

  • Starting behind the patch will trap the starting knot between the patch and the garment, and reduce the number of knots the wearer will be able to see or feel.

  • Pierce the needle down at the edge of the patch, into the garment fabric adjacent to the first stitch.

  • Bring the back needle up approximately 1/4 inch (~6 mm) in from the edge of the patch and 1/4 inch (~6 mm) away from the first stitch. Pull the stitch tight.

  • Make sure that this stitch grabs all layers.

  • This technique creates a spiral of thread that adheres the edge of the patch to the garment.

crwdns2935429:0crwdne2935429:0

crwdns2935429:0crwdne2935429:0

crwdns2935429:0crwdne2935429:0

crwdns2935429:0crwdne2935429:0

crwdns2935429:0crwdne2935429:0

crwdns2935429:0crwdne2935429:0

crwdns2944171:0crwdnd2944171:0crwdnd2944171:0crwdnd2944171:0crwdne2944171:0