crwdns2933423:0crwdne2933423:0

Google Pixel 9aのインナーハウジング用接着剤の取り付け(全作業共通)

crwdns2931529:0crwdnd2931529:0crwdnd2931529:0crwdnd2931529:09crwdnd2931529:0crwdne2931529:0

crwdns2936315:0crwdne2936315:0
crwdns2936323:0crwdne2936323:0
crwdns2931653:02crwdne2931653:0
Google Pixel 9a Inner Housing Adhesive Application (All Repairs), Apply the adhesive: crwdns2935265:00crwdnd2935265:01crwdnd2935265:03crwdne2935265:0 Google Pixel 9a Inner Housing Adhesive Application (All Repairs), Apply the adhesive: crwdns2935265:00crwdnd2935265:02crwdnd2935265:03crwdne2935265:0 Google Pixel 9a Inner Housing Adhesive Application (All Repairs), Apply the adhesive: crwdns2935265:00crwdnd2935265:03crwdnd2935265:03crwdne2935265:0
Apply the adhesive
  • Remove the larger, clear liner from the inner housing adhesive and lay it in place around the camera holes.

  • Use the cutouts for the small silver pads to help align the adhesive.

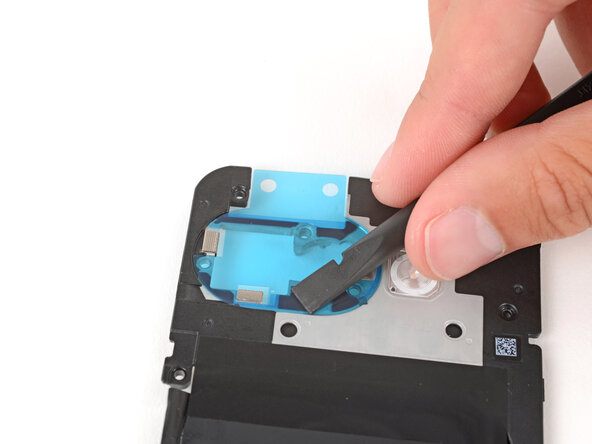
  • Use the flat end of a spudger to firmly push down on each piece of adhesive, securing them in place.

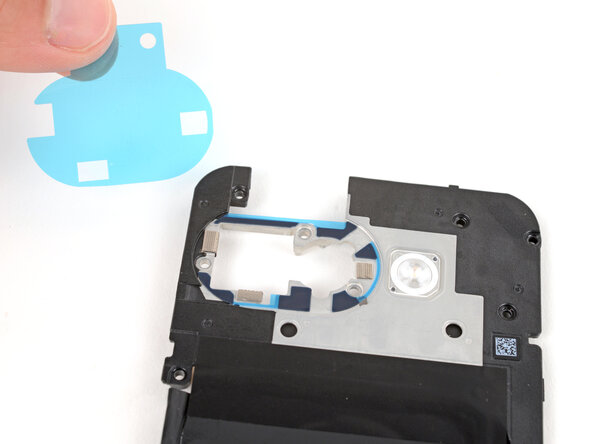
  • Remove the colored liner using the pull tab on the top edge.

  • If the adhesive starts to pull up with the liner, lay it back in place and use your spudger to secure it again.

インナーハウジング用接着剤から大きい方の透明な裏紙を剥がして、カメラ用の穴を囲む所定の位置に置いて下さい。

小さな銀色のパッドのための切り欠きを、接着剤の位置合わせの際に参考にして下さい。

スパッジャーの平らな方の先を使って、接着剤の各片をしっかり押し付けて、所定の位置に貼り付けて下さい。

上の端にあるプルタブを使って、色のついている方の裏紙を剥がして下さい。

接着剤が裏紙と一緒に持ち上がってしまう場合は、一度所定の位置に置き直してからスパッジャーを使ってもう一度貼り付け直して下さい。

crwdns2944171:0crwdnd2944171:0crwdnd2944171:0crwdnd2944171:0crwdne2944171:0