crwdns2933423:0crwdne2933423:0

Google Pixel 9a Inner Housing Adhesive Application (All Repairs)

crwdns2862623:0crwdne2862623:0
crwdns2942641:0crwdne2942641:0

crwdns2942213:0crwdne2942213:0

  1. Google Pixel 9a Inner Housing Adhesive Application (All Repairs), Remove the old adhesive: crwdns2935265:01crwdnd2935265:01crwdnd2935265:02crwdne2935265:0 Google Pixel 9a Inner Housing Adhesive Application (All Repairs), Remove the old adhesive: crwdns2935265:01crwdnd2935265:02crwdnd2935265:02crwdne2935265:0
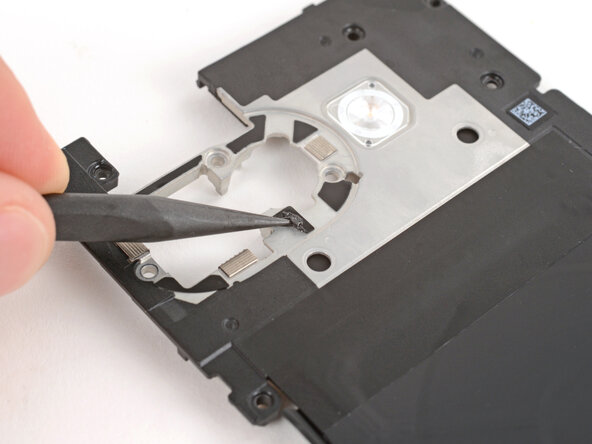
    • Use a spudger to scrape up and remove the six small pieces of adhesive around the rear cameras.

    • Use high‑concentration (>90%) isopropyl alcohol and a lint‑free cloth (or coffee filter) to clean up and remove any residue from the adhesives that were removed.

  2. Google Pixel 9a Inner Housing Adhesive Application (All Repairs), Apply the adhesive: crwdns2935265:02crwdnd2935265:01crwdnd2935265:03crwdne2935265:0 Google Pixel 9a Inner Housing Adhesive Application (All Repairs), Apply the adhesive: crwdns2935265:02crwdnd2935265:02crwdnd2935265:03crwdne2935265:0 Google Pixel 9a Inner Housing Adhesive Application (All Repairs), Apply the adhesive: crwdns2935265:02crwdnd2935265:03crwdnd2935265:03crwdne2935265:0
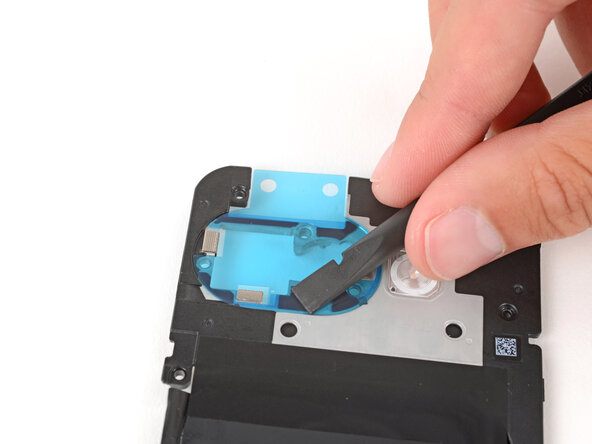
    • Remove the larger, clear liner from the inner housing adhesive and lay it in place around the camera holes.

    • Use the cutouts for the small silver pads to help align the adhesive.

    • Use the flat end of a spudger to firmly push down on each piece of adhesive, securing them in place.

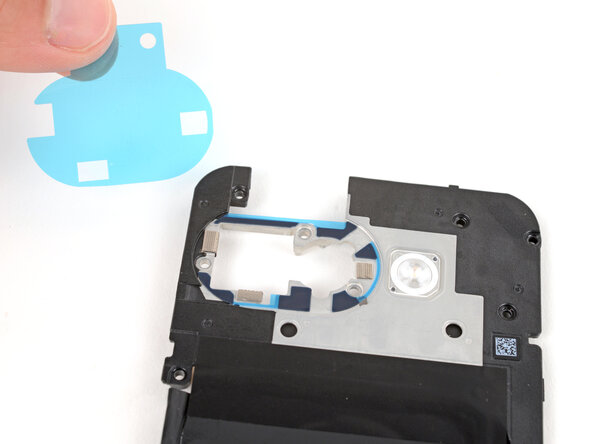
    • Remove the colored liner using the pull tab on the top edge.

    • If the adhesive starts to pull up with the liner, lay it back in place and use your spudger to secure it again.

  3. Google Pixel 9a Inner Housing Adhesive Application (All Repairs), Secure the adhesive: crwdns2935265:03crwdnd2935265:01crwdnd2935265:03crwdne2935265:0 Google Pixel 9a Inner Housing Adhesive Application (All Repairs), Secure the adhesive: crwdns2935265:03crwdnd2935265:02crwdnd2935265:03crwdne2935265:0 Google Pixel 9a Inner Housing Adhesive Application (All Repairs), Secure the adhesive: crwdns2935265:03crwdnd2935265:03crwdnd2935265:03crwdne2935265:0
    • Use a spudger to firmly press down on each of the six pieces of inner housing adhesive to secure them.

    • These pieces of adhesive can easily be pulled up when removing the final liners, so make sure they're firmly in place.

crwdns2935217:0crwdne2935217:0

Spencer Day

crwdns2935283:009/14/22crwdne2935283:0

111,815 crwdns2915208:0crwdne2915208:0

crwdns2935297:0811crwdne2935297:0

crwdns2915084:0crwdne2915084:0

iFixit crwdns2935289:0iFixitcrwdne2935289:0

Staff

crwdns2931471:0120crwdne2931471:0

crwdns2935297:020,002crwdne2935297:0

crwdns2947412:00crwdne2947412:0

crwdns2917038:0crwdne2917038:0

crwdns2936625:0crwdne2936625:0:

crwdns2936751:024crwdne2936751:0 2

crwdns2936753:07crwdne2936753:0 6

crwdns2936753:030crwdne2936753:0 25

crwdns2942667:0crwdne2942667:0 27